Jordan's S13 Silvia ♠️♠️

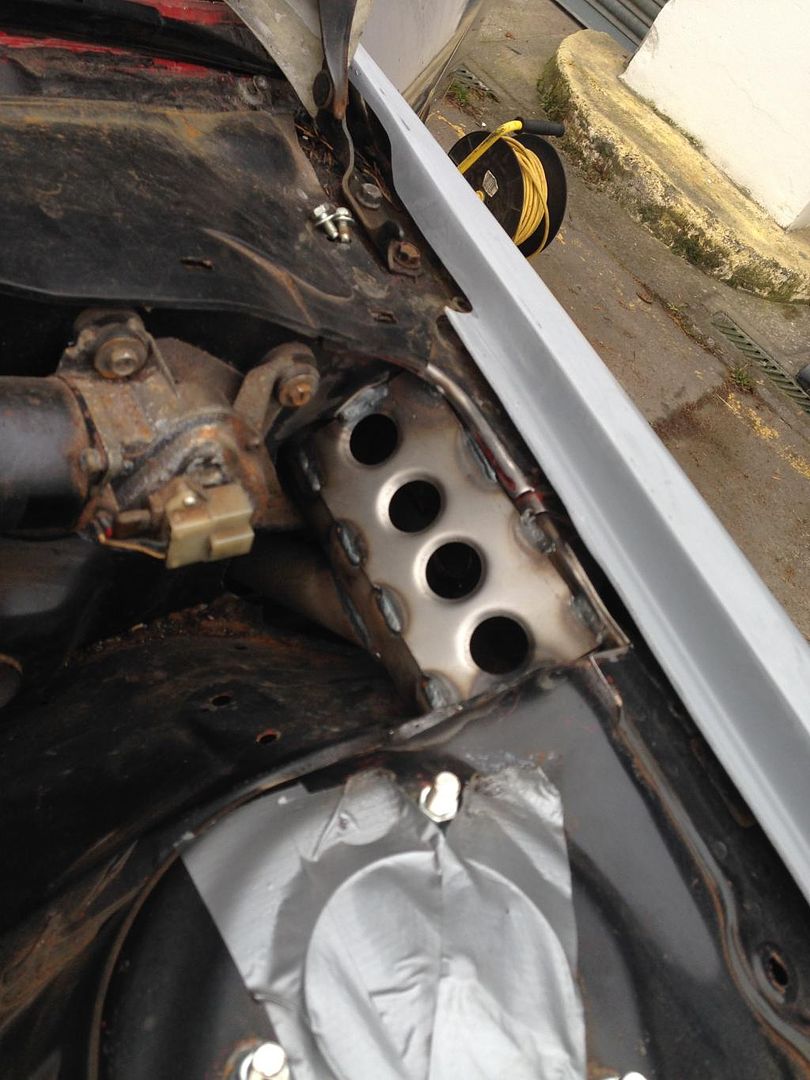
So now Huxley had finished doing this work of art, it was time for his next task, the exhaust work! A Mid-Mount isn’t the nicest of manifolds in regards to space for the turbo elbow and downpipe, then there’s the issue of how the runners sit etc, you get the picture its nowhere near as spacious as the traditional top mount setup. There’s also the complication of trying to get the exhaust to 3” as soon as possible for performance reasons. Huxley told me he had a few ideas so left him to do what he does best.
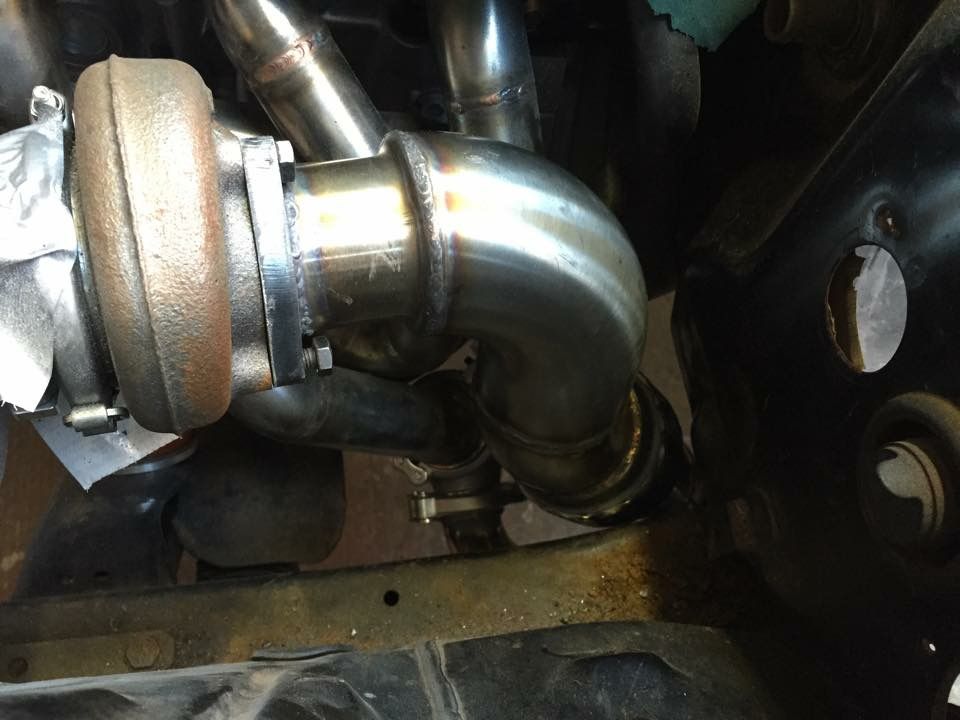
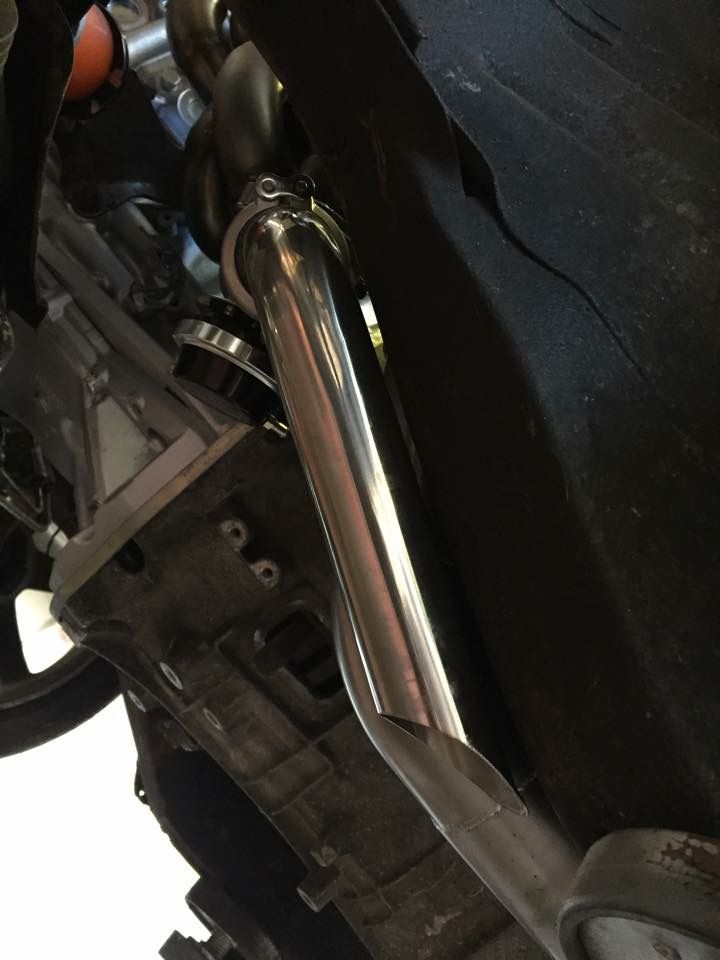
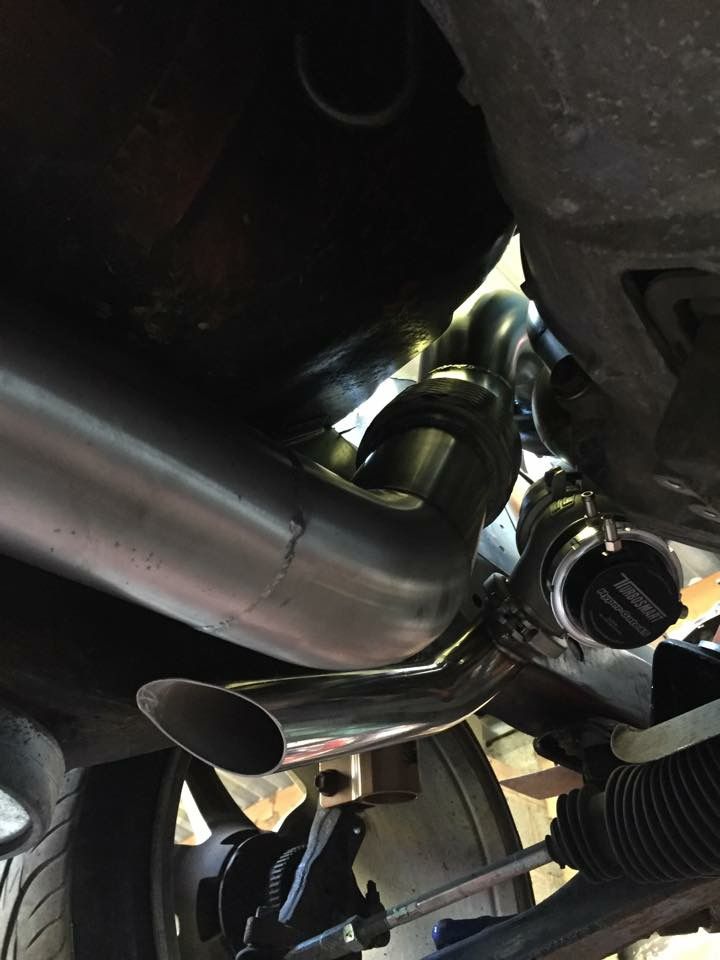


I also asked him to do the screamer pipe while he was there, and he just so happened to make it as I thought of. Great minds think alike ;)

But I have to say, Huxley has done an amazing job on the cage and exhaust work, and I would without a shadow of doubt recommend his work to anyone! So much so, the car may be booked back in around March sometime ;)

- - - Updated - - -

So today I actually managed to go and have a look at the car for the first time since it came back. I cant get over the quality of his work!
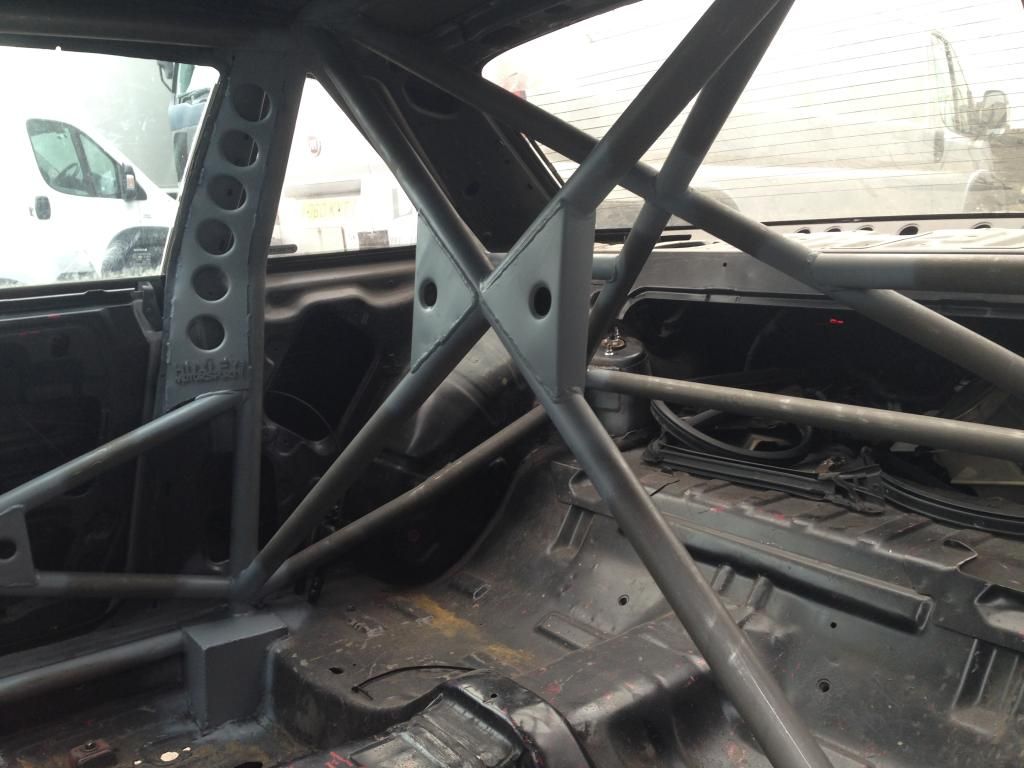


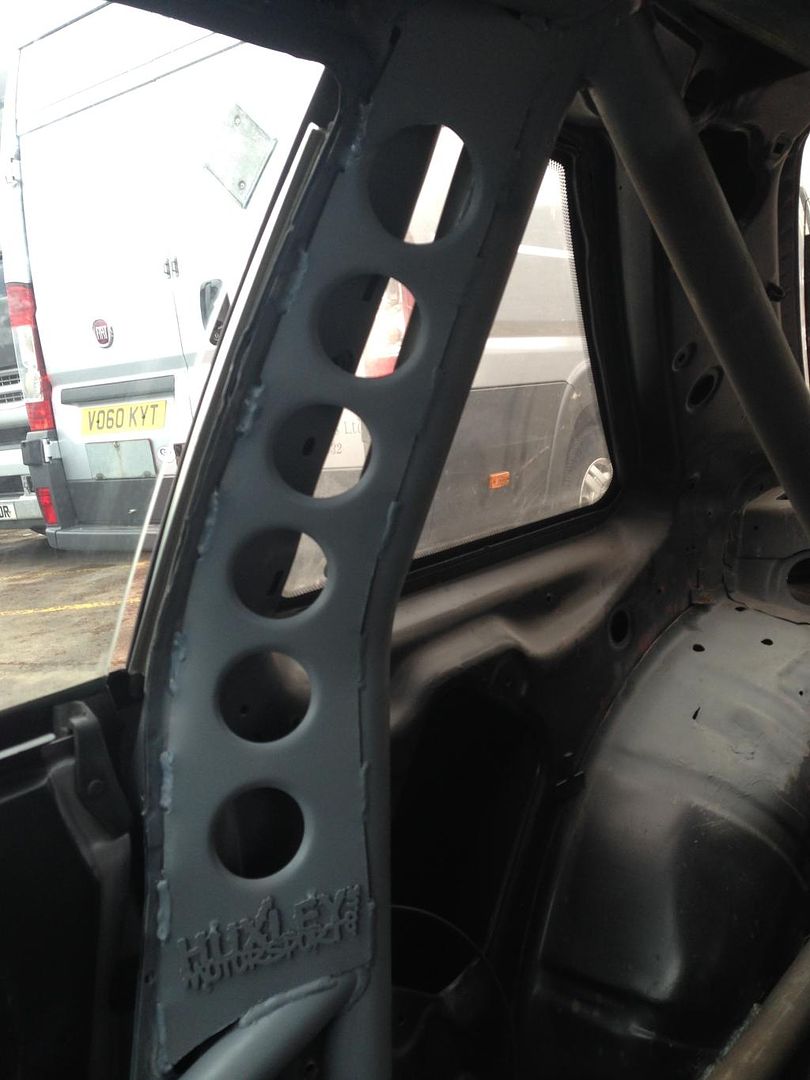
I love the Huxley Motorsport tag on the B pillar gussets! Such a small, simple but effective token. In fact, I’m pretty happy to be representing his name on the car somewhere!


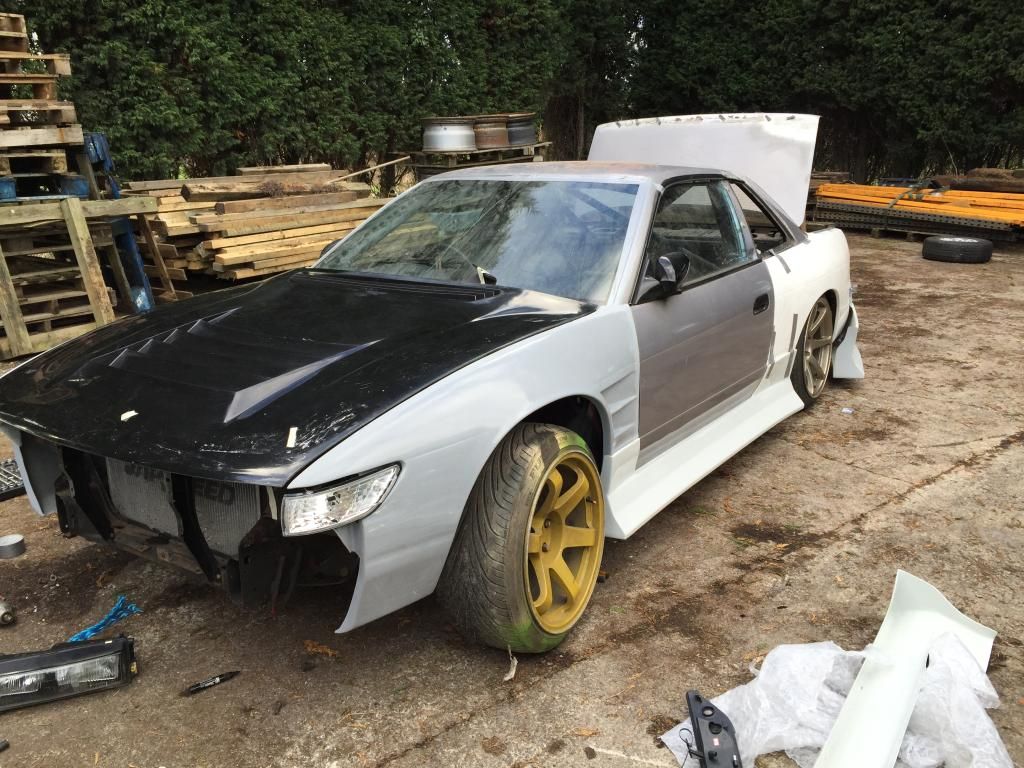
Next up to try and get some motivation was to slap on the fiberglass and see how it all fits. I had a friend who recently got the same Origin wings but had some fitment issues, but thankfully mine don’t seem so bad, they’ll need some fettling but they are definitely along the right lines
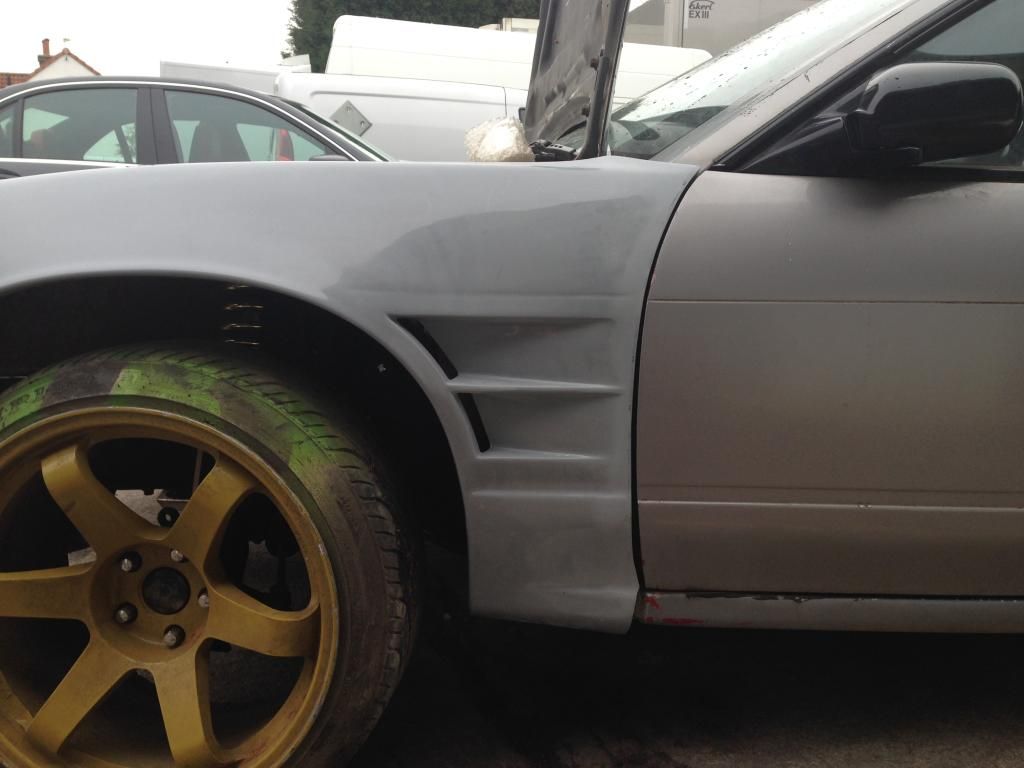
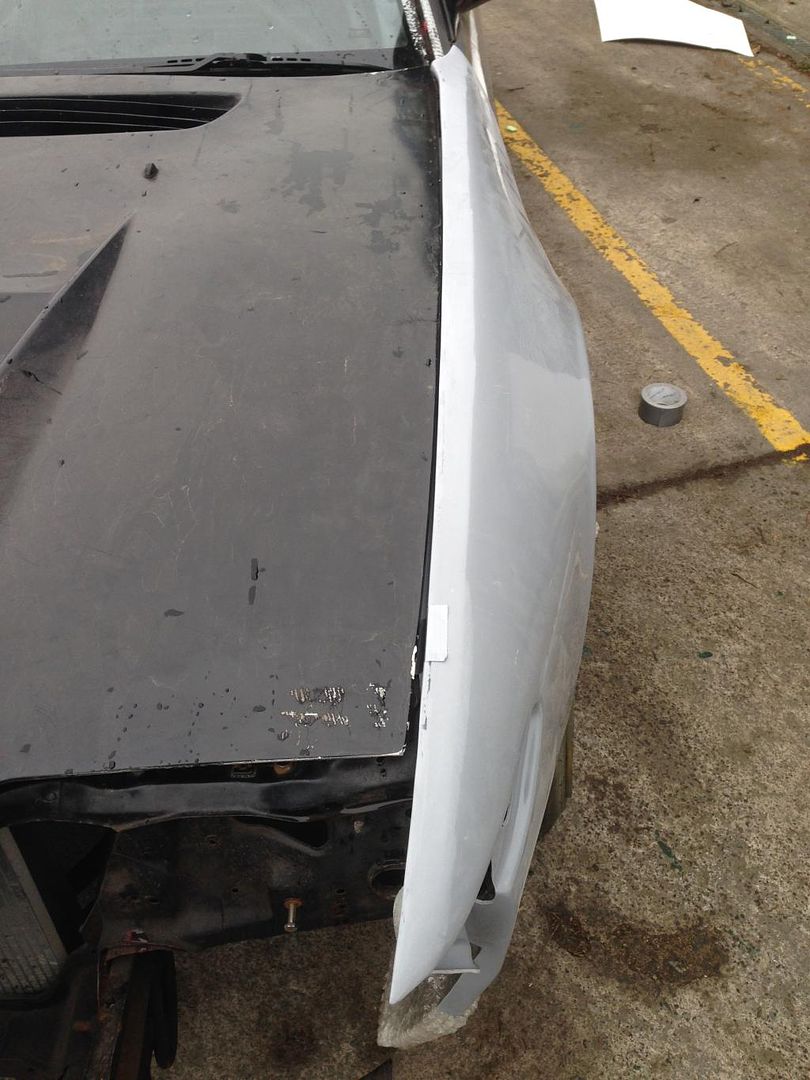


#weldporn :p
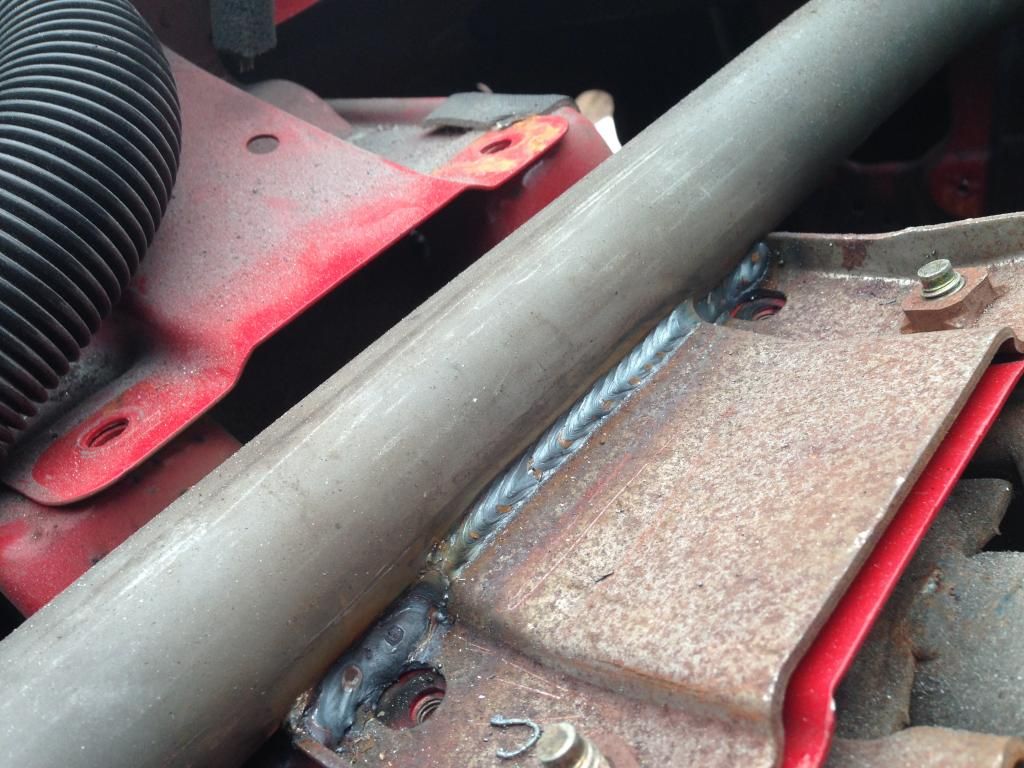


More of the cage! Started to throw some Zinc primer over the welds to give it and extra bit of protection until I can get the interior sprayed. Not entirely sure on the interior colour, I have some sort of gun metal grey in my head though?
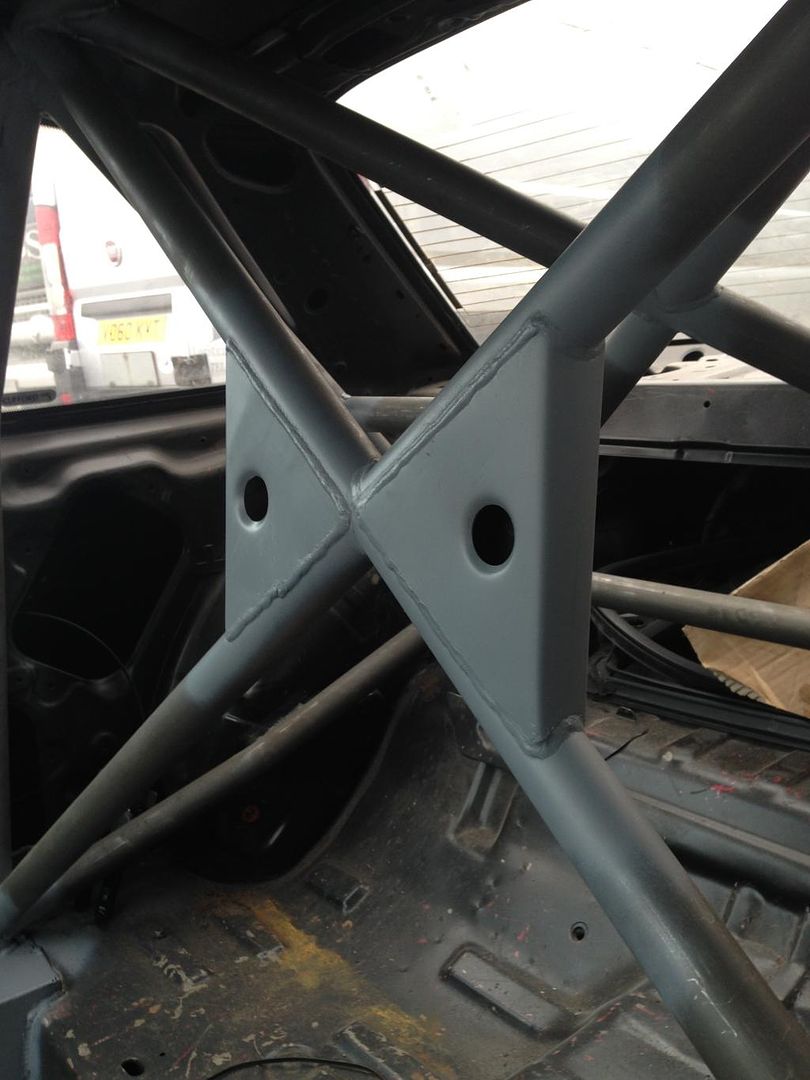


Gussets!


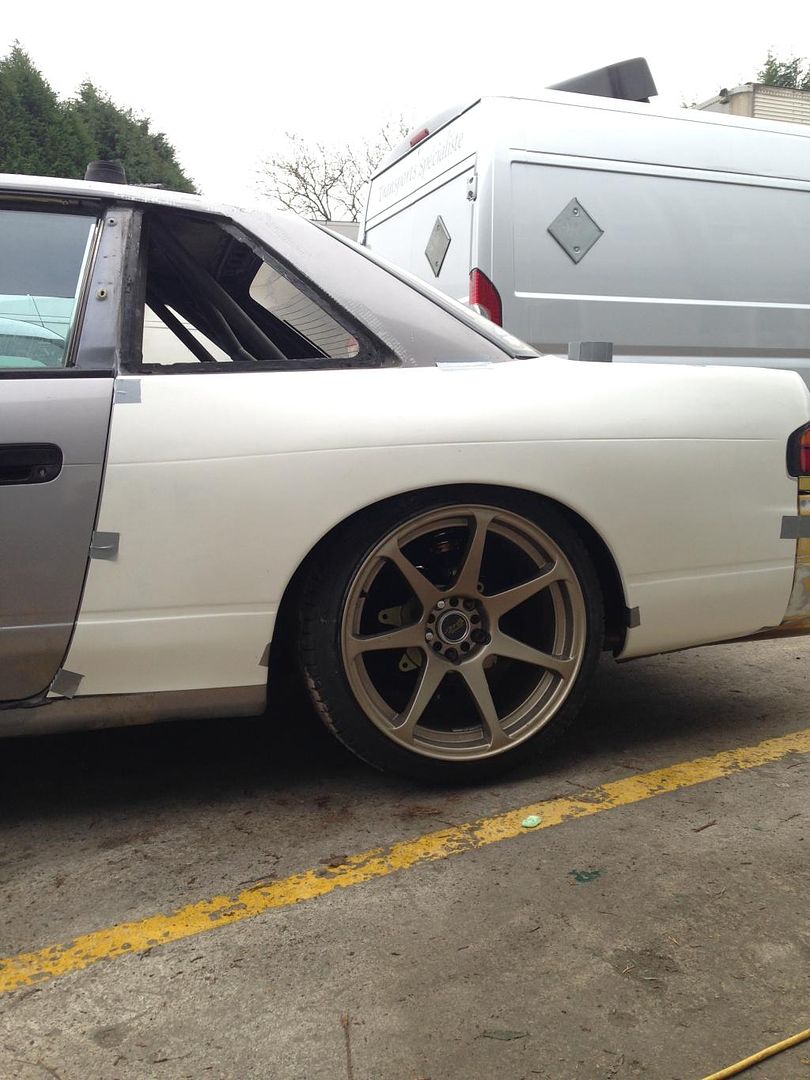
I slapped on the rear overfenders just to check how they’ll fit. Seems pretty decent to me, so wont be long until I can annoy a good friend to tub my rear arches ;)


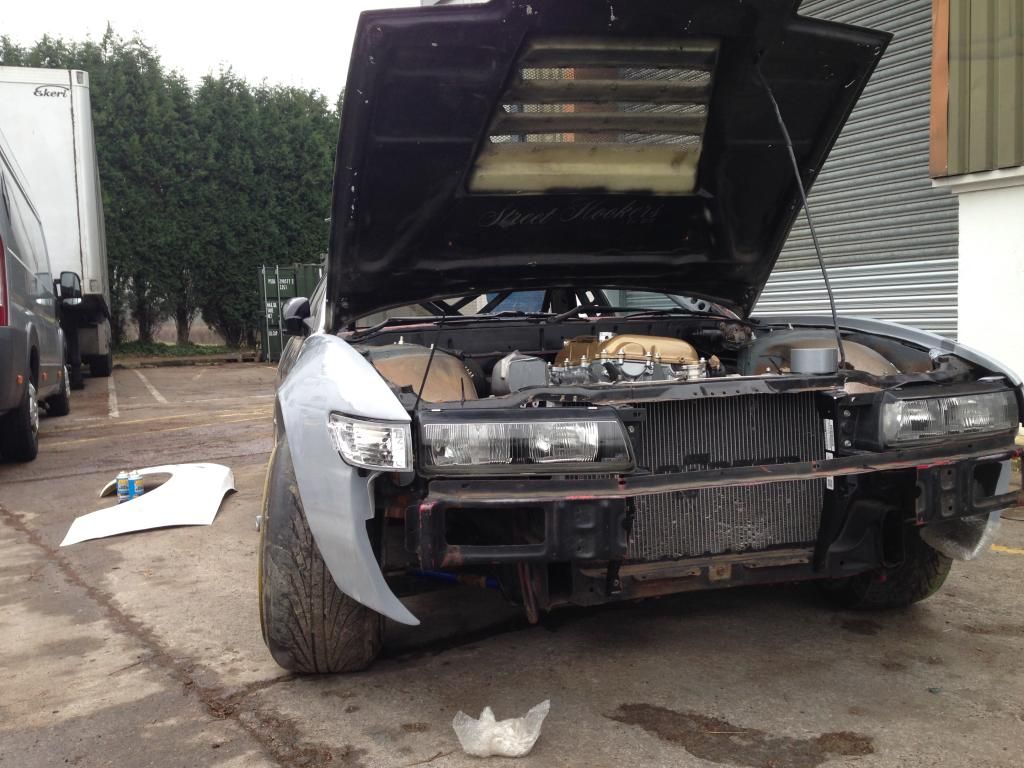
Whilst I was there, it’d be rude not to throw the PS13 Brick headlights on ;)


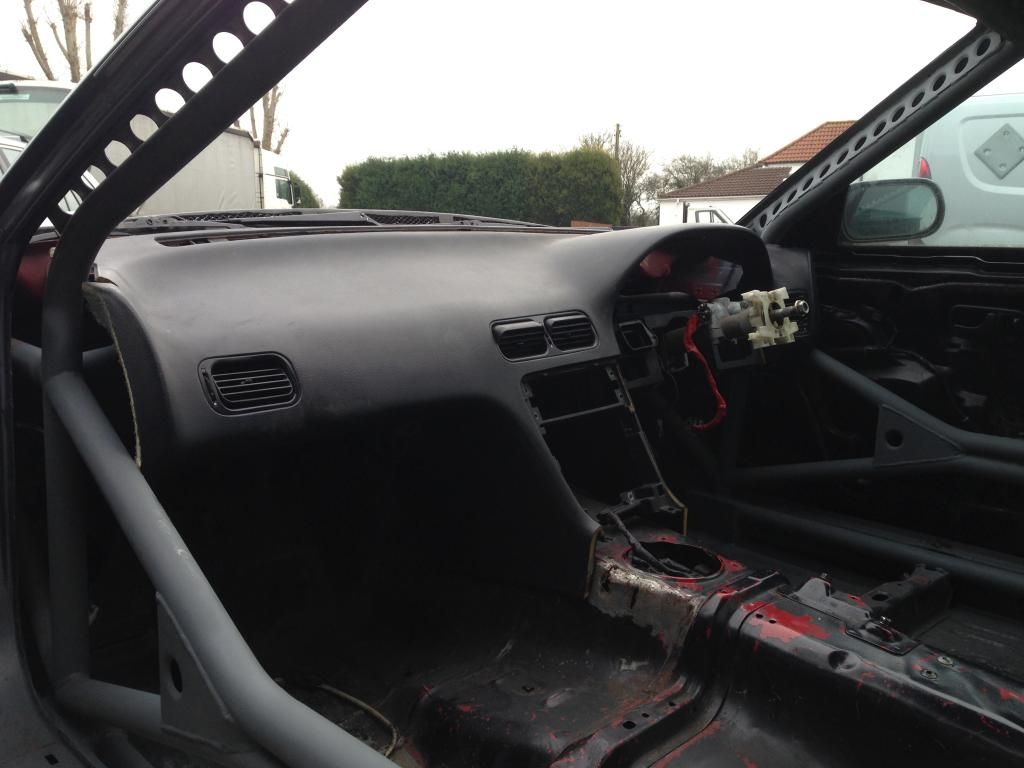
Next task for the afternoon was trying to make the dash fit. It took quite a bit of cutting, but that’s to be expected with quite an intense cage. Plan is to mock up some small plates that’ll bolt onto the dash and sit around the front legs to tide the cuts up a tad.


Then, I threw my Bride in to see how it feels with the cage, and it sounds stupid but I’m already excite to improve my driving and try more riskier things, knowing there’s a proper cage surrounding me.
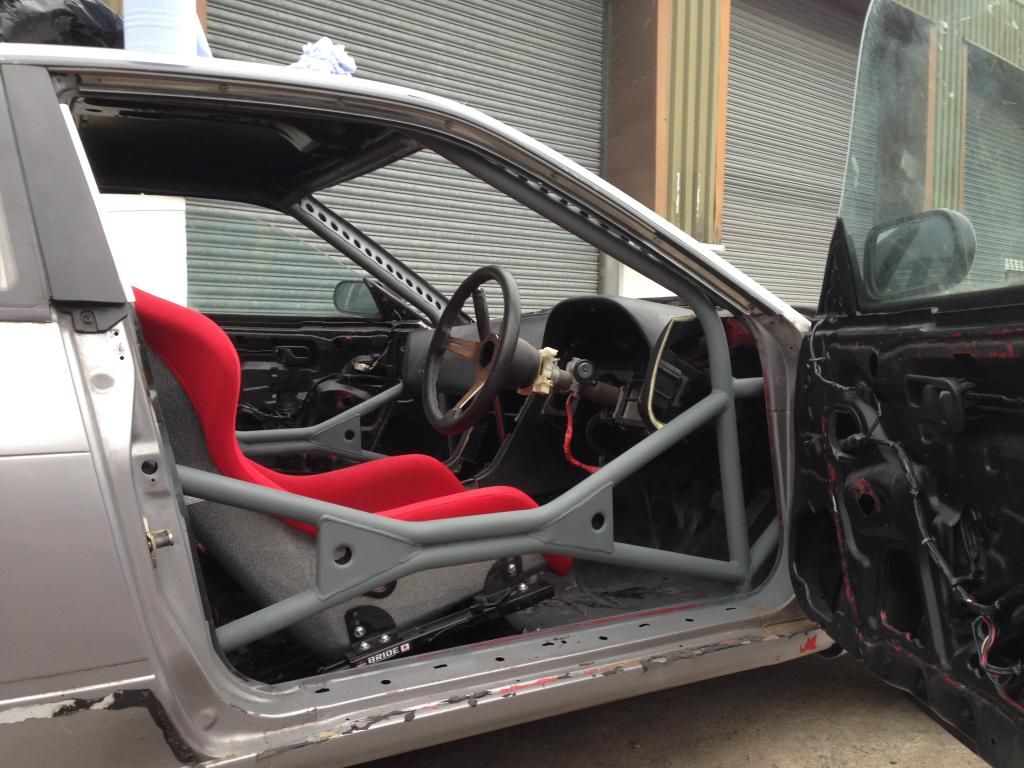
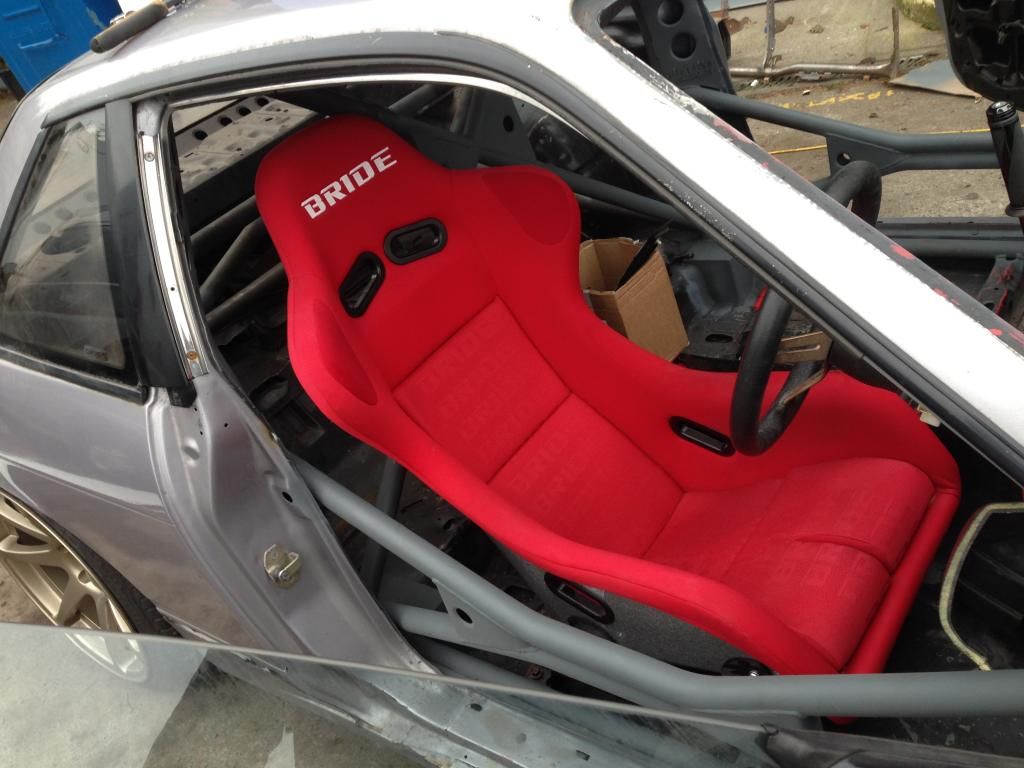
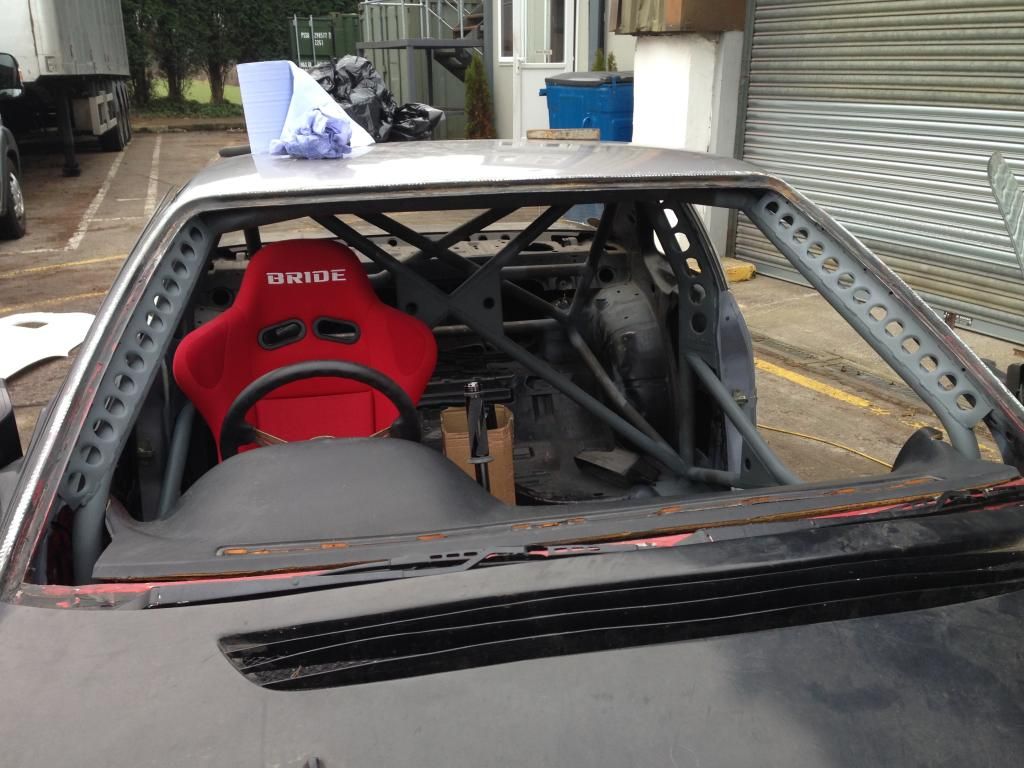


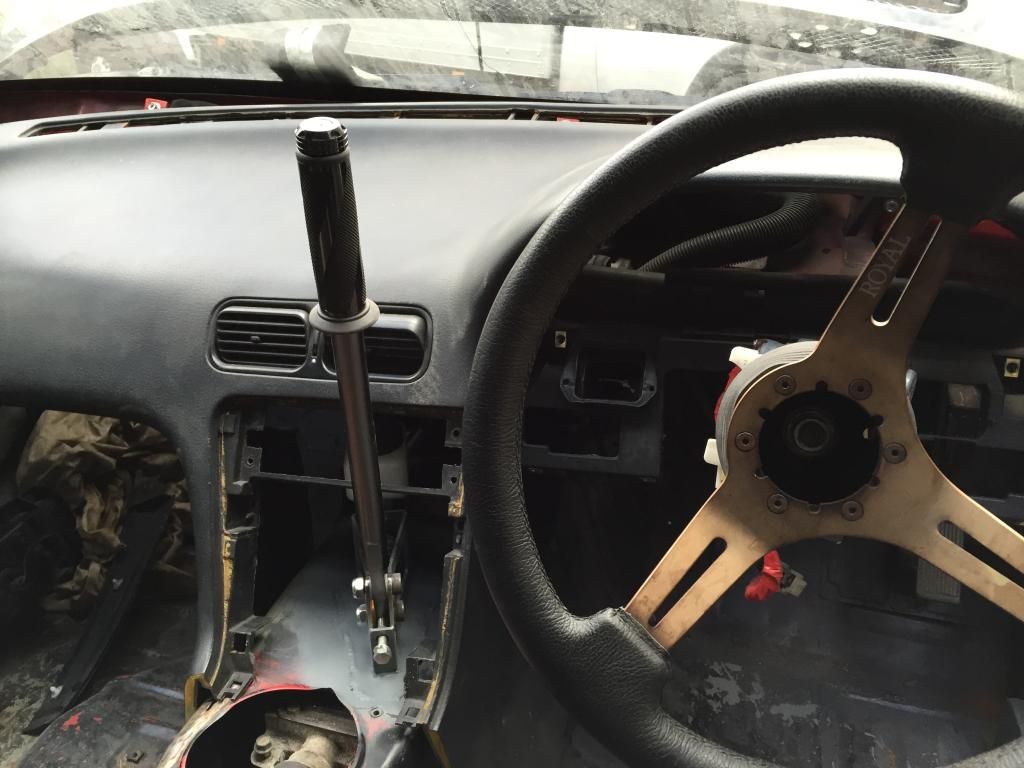
Started playing around with my Powered by Max handbrake to see how I’d want it sit. I’ve got a vague idea of the positioning but ill confirm that once I can get a friend to weld it in.
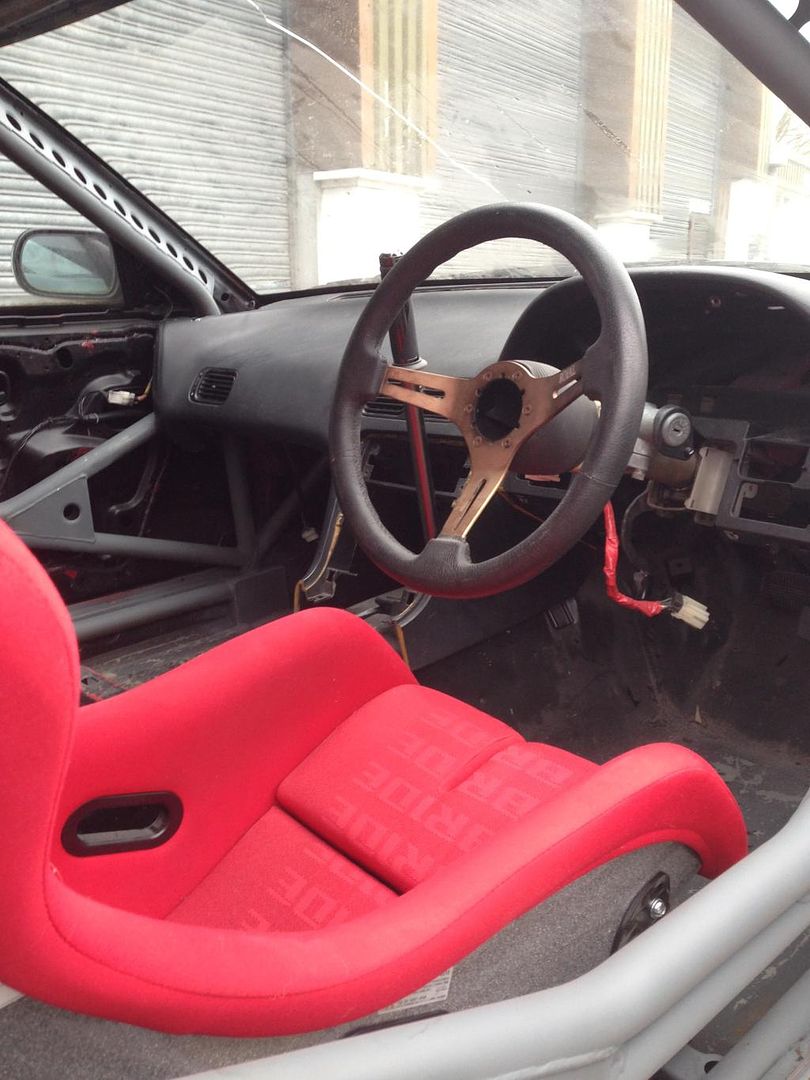


That lost shot reminds me hugely of my old S13. I suppose if you know what’s right, you can build and improve on that! :)
 
Last edited:
Looking good man , definitely some sort of grey on the inside :)

Yeah I think it's along the right lines dude.

In my heads it's;

Exterior = Black
Engine Bay = Gold
Interior = Gun Metal/Metallic Grey(?)

My thinking is thatll it'll still look good but also simple and classy? :)
 
So this is my first post on any forum so I officially renounce my lurkership! I just want to say I have subscribed to this thread with email because your threads are a huge inspiration. I may only be (almost) 15 and live in Canada but the quality of products you put into your car is amazing, I just read this thread and it inspired me to keep saving every dollar I earn for when I can buy my first s-chassis. The fact you do this through school and just commit over the summer is also amazing so I just want to tell you how much I appreciate your work. Ok fanboy reply over.
 
Bloody students, spending all their loan money on beer & baked beans :D

Sweet build dude. That manifold is a work of art. I had to do the down pipe for Daze's. He's running a different wastegate to you & there's even less room, no way I could've got a 3" flexi downpipe in there, only just gor a 2.5" one in.
 
So this is my first post on any forum so I officially renounce my lurkership! I just want to say I have subscribed to this thread with email because your threads are a huge inspiration. I may only be (almost) 15 and live in Canada but the quality of products you put into your car is amazing, I just read this thread and it inspired me to keep saving every dollar I earn for when I can buy my first s-chassis. The fact you do this through school and just commit over the summer is also amazing so I just want to tell you how much I appreciate your work. Ok fanboy reply over.

Haha thanks man! Only advice I can give you is save like a mad man :p

Bloody students, spending all their loan money on beer & baked beans :D

Sweet build dude. That manifold is a work of art. I had to do the down pipe for Daze's. He's running a different wastegate to you & there's even less room, no way I could've got a 3" flexi downpipe in there, only just gor a 2.5" one in.

Yeah Daze showed me the downpipe, and we also mentioned our Wastegate differences as the Greddy unit is pretty big :(
 
Do a metallic black on the outside,
Black_Base_Metallic_Custom_Paint.jpg
 
Do a metallic black on the outside

I'd love to go to all the effort to do a nice metallic colour, but truth is I can see the front and rear bumpers coming off quite a bit so a cheap, easy to match paint seems the logical way to go.

Getting better and better dude! Where'd you get the Bride from? ;)

From Japan dude, only way to guarantee a Genuine Bride these days. So many fakes rocking around, all of which I think should be burned :)
 
Nice effort, Huxley's fab work is very impressive. Colour mix sounds spot on too.

One thing about the hydro after fitting mine: ensure you have the seat in the final position and have it so the handbrake doesn't fall at the very end of your reach with your shoulders flat on the seat. Ideal would be 1-2" inside full extension. That will give you good leverage but not require you to lean forward to reach it.

Yeah I threw the seat back in on the same setting as I ran in my old 13, and forgot how low I sat as I could barely see over the steering wheel :cool:

But once it gets closer to the time, i'll definitely get a bit more serious with the positioning. From what I felt, it can fit nicely under the centre of the dash and be within reach :thumbs:
 
Epic stuff mate! Always dig popping into this thread, seeing all the epic work and forcing myself to save cash for more parts haha!

On the colour front I'd say spot on dude, run 2k black , easy enough to buy off the shelf and quick to repair/ respray panels :)

P.S. I wish I could fly Huxley out to SA to build my turbo elbow and downpipe , weld porn for daaaays!

Haha thanks man! Its worth it, its so nice recieving parts and then fitting them :)

Thats my thinking with a regular black, plus I think a deep, standard black adds a bit of aggression to the car.

Haha never say never! It wouldn't be cheap flying him out though :wack:
 
So, I think its time for a small update now I have finished a uni project.

Not a lot has happened since the last update, but a good friend of mine accepted to help complete the horrible task of tubbing the rear arches.

(Apologies for the terrible photo’s haha)

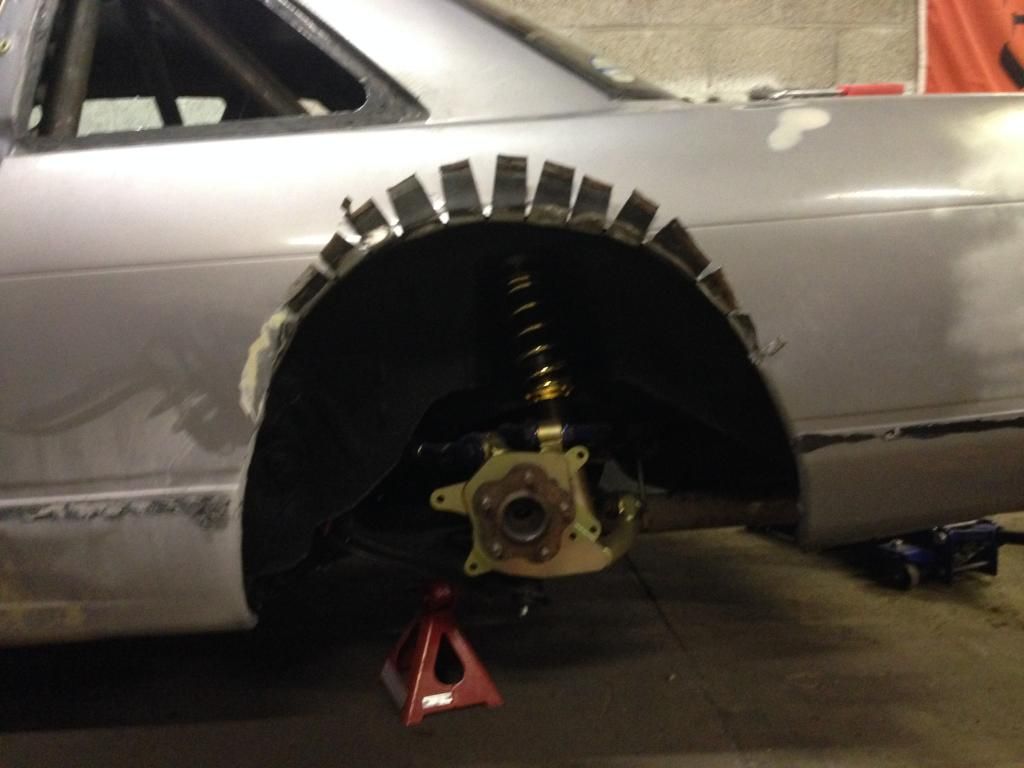
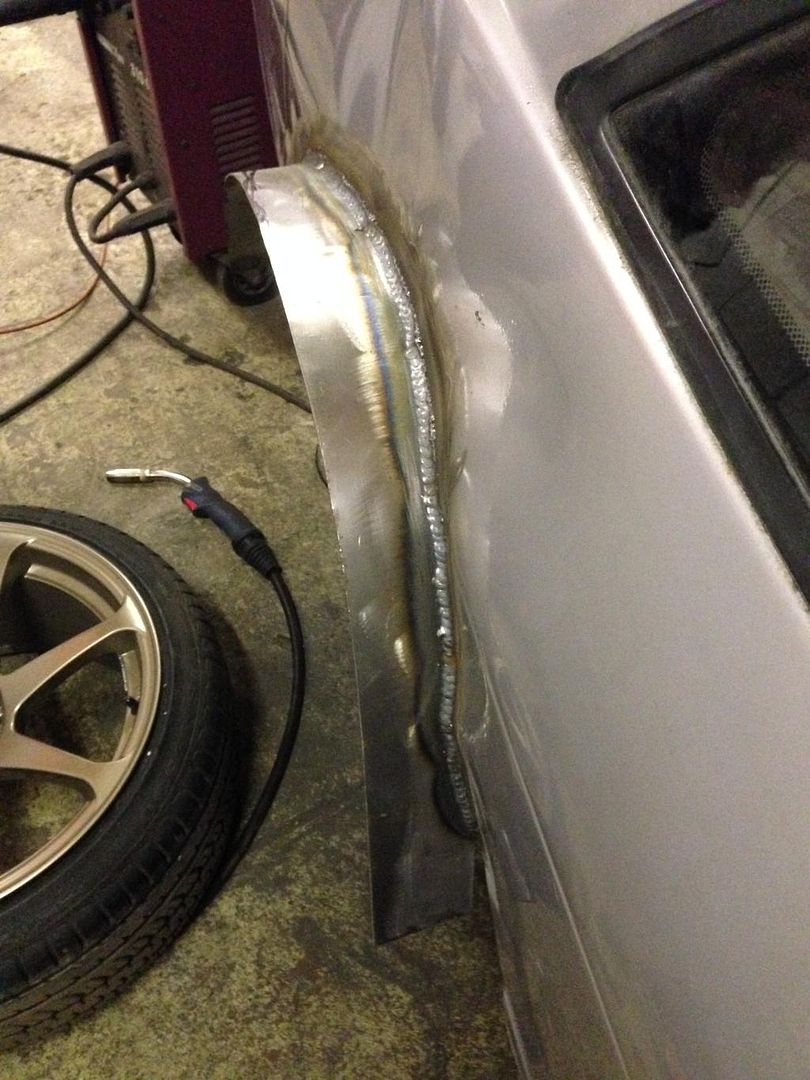
First things first was to cut and slit the inner skin


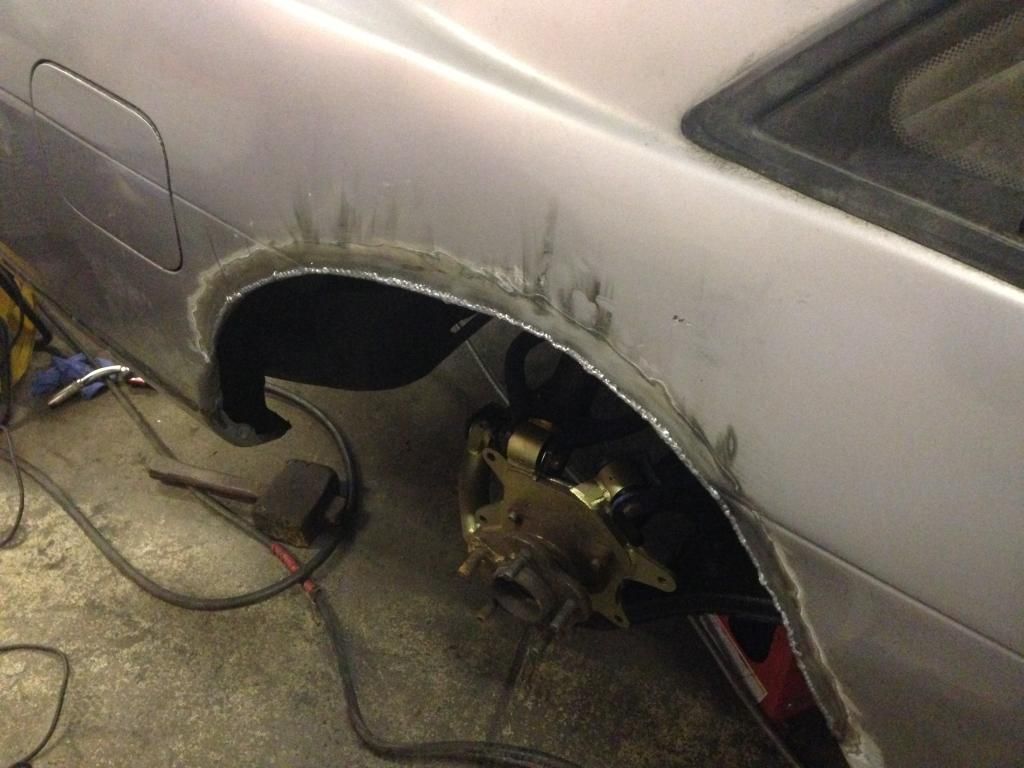
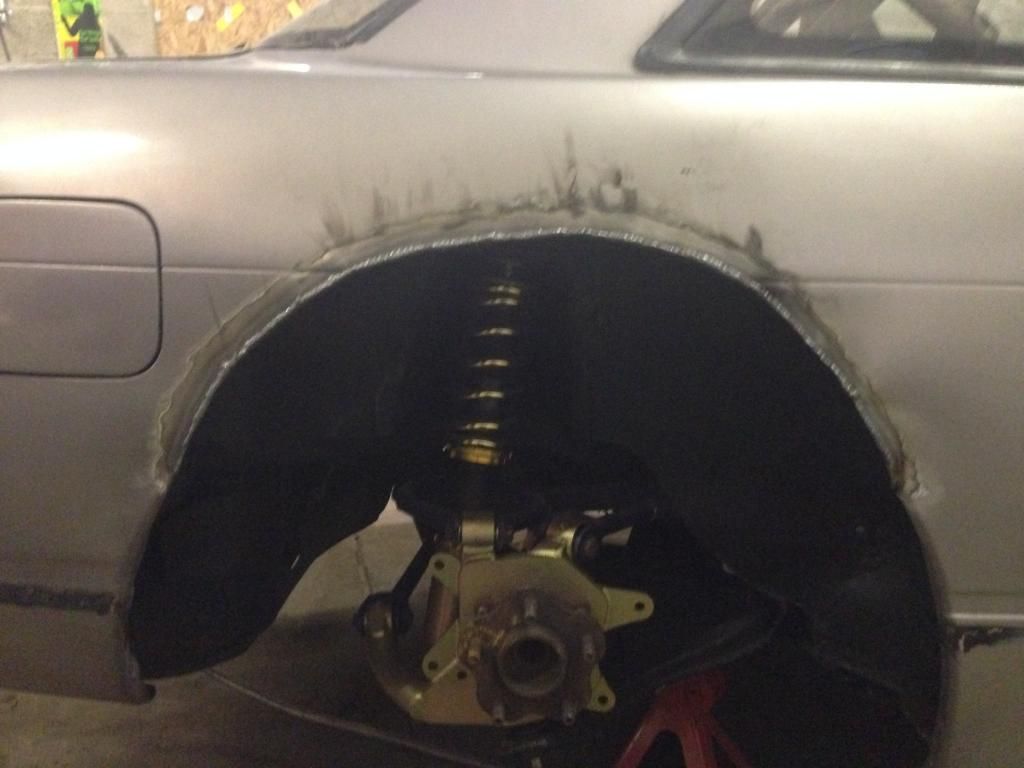
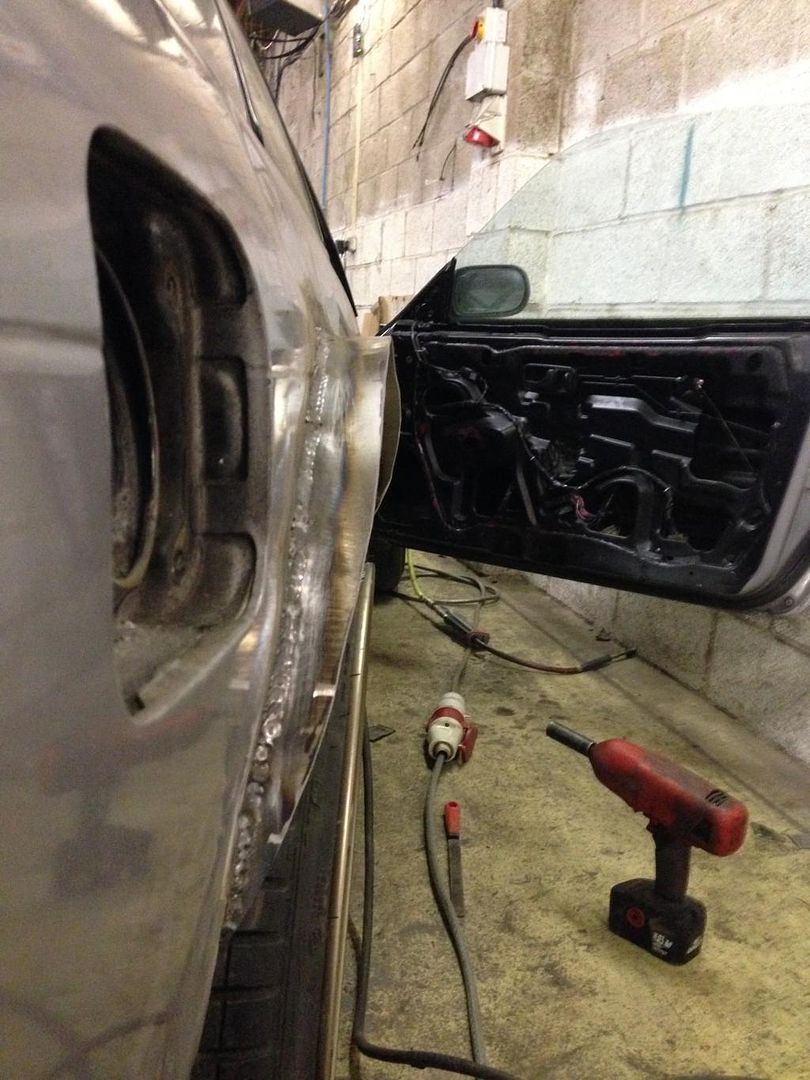
My friend then proceeds to weld up the rear arches, and make sure they are fully sealed, hopefully so that no smoke is able to get in.


Originally I was worried about whether we didn’t cut high enough, but after some measuring I think there should be quite some room to tuck rim :thumbs:

BUT. We couldn’t leave it there no could we. The next step was to build a lip, where some people usually cut out the original Nissan metal inside the arch, we decided to just build an “add-on”, reason being who wants to weld upside on the terrible Nissan metal!


Once that was done, we took some meausrements, placed the fender on and off a few times and before we knew it, we shaped it perfectly to meet the fender but so that it pushes the fender out. Winner! Hopefully this means any delam will face the metal lip, rather than smashing the overfender.


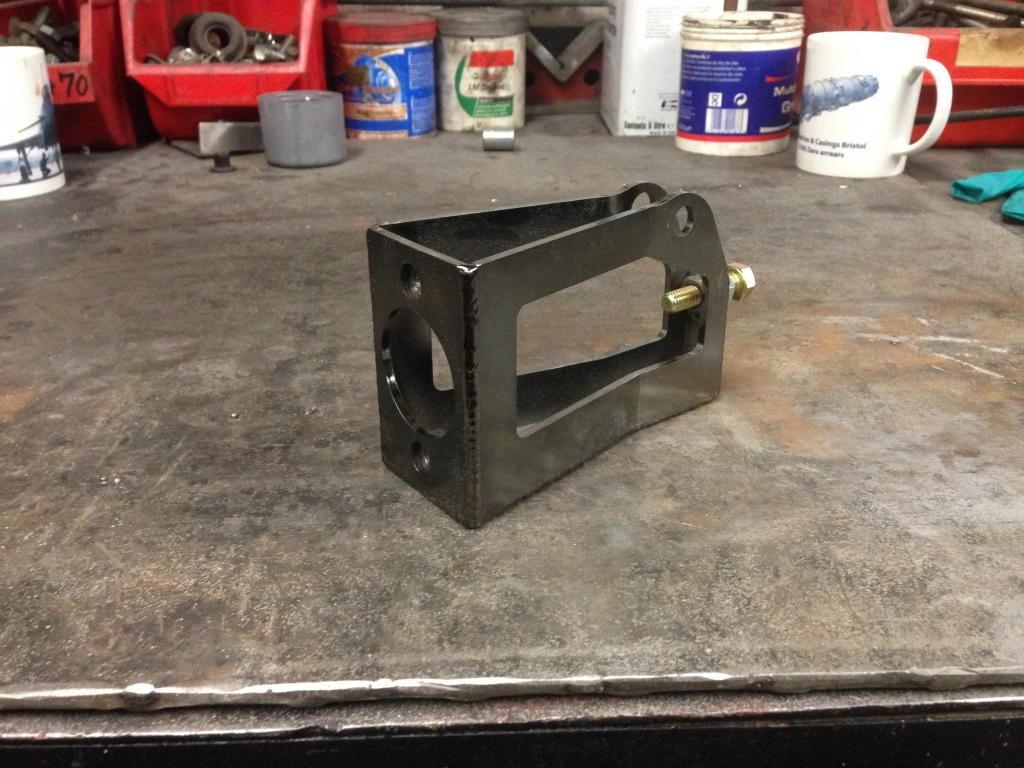
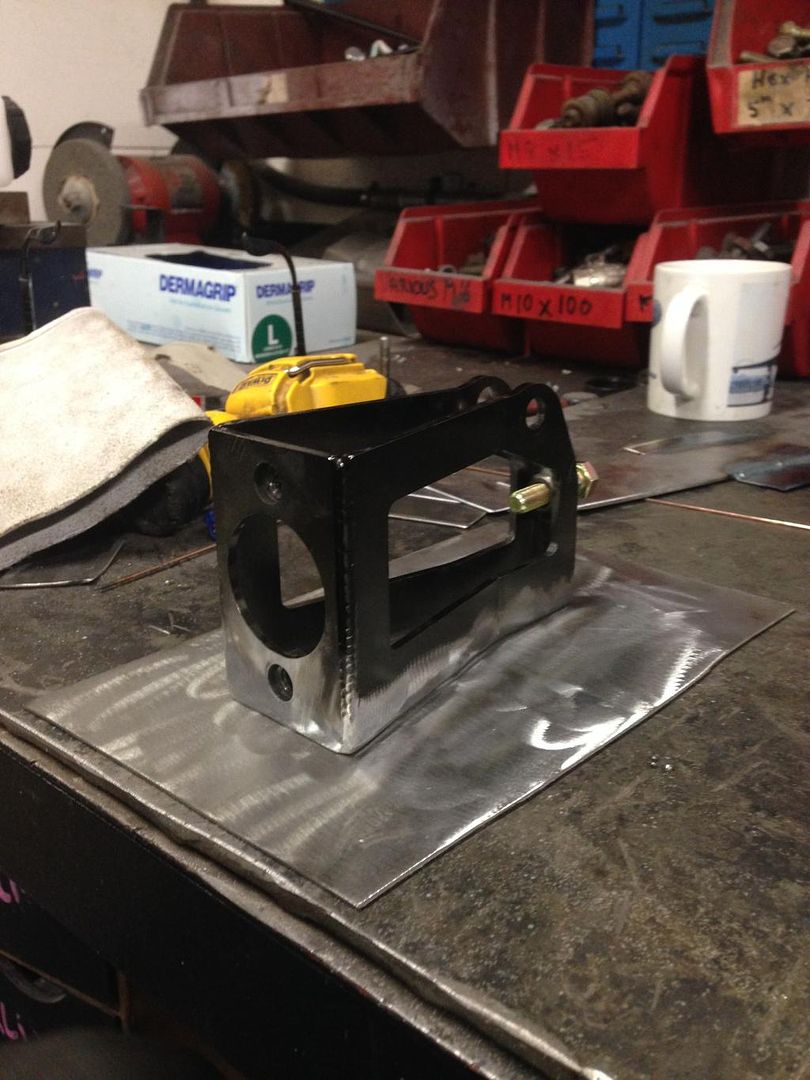
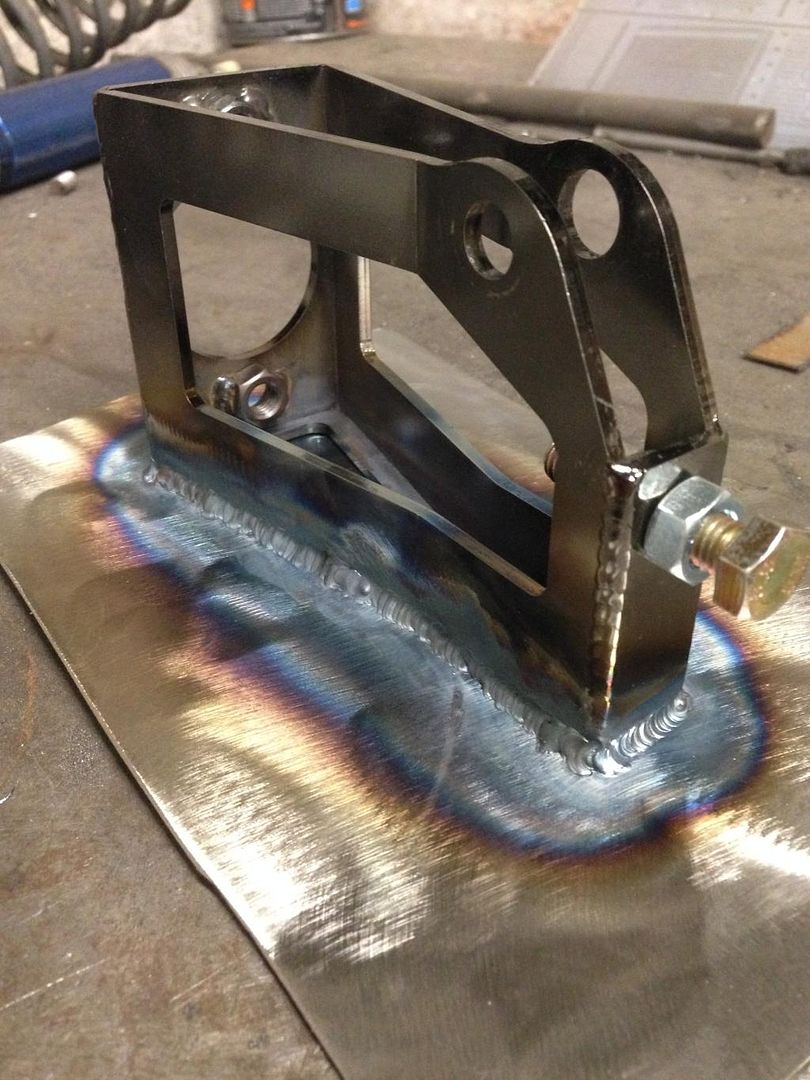
Next job was mounting the Powered by Max hydraulic handbrake. Unlike the convention hydro’s, these style don’t offer the regular “bolt-in” style. So we had to get creative, I say we, but my good friend Rich had a little play on the TIG welder and see what shapes he could throw.

1) Place the hydro bracket for a fancy photo


2) Acquire a base plate to weld the bracket too, and remove the plated finish


3) Lay down some funky shapes with the TIG welder!


Rich wasn’t too happy with it, but I was stoked with the result. Looks pretty, with some pretty colours! :)

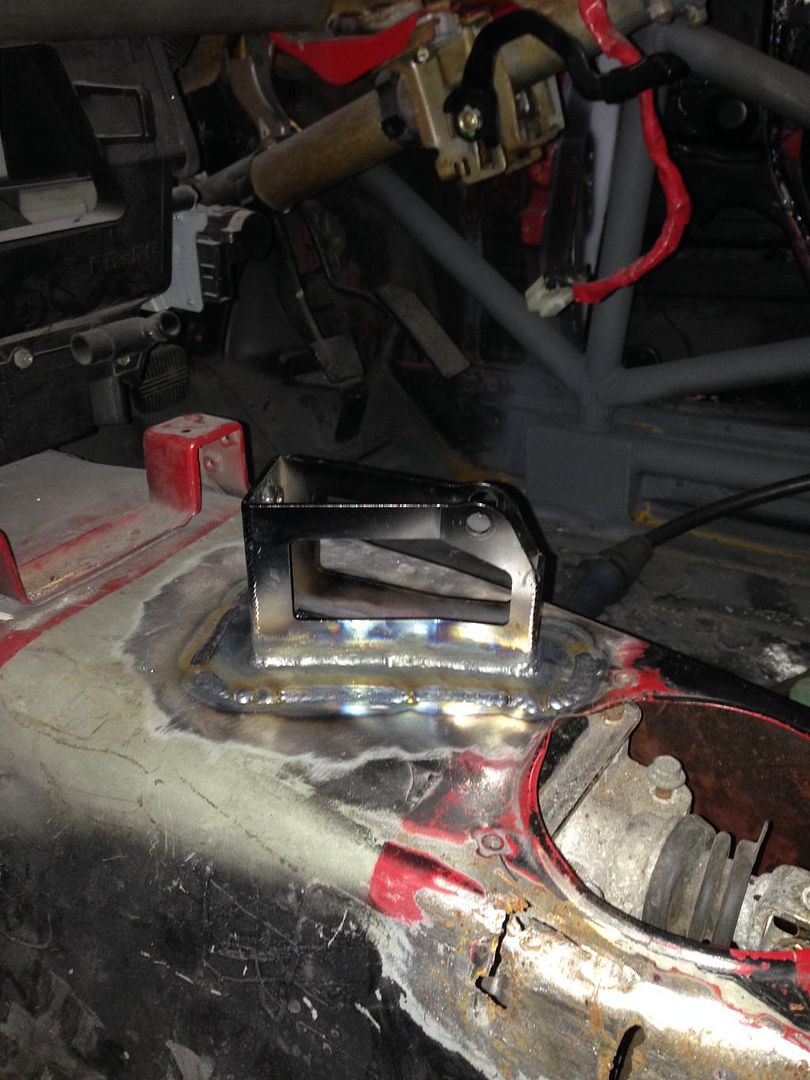
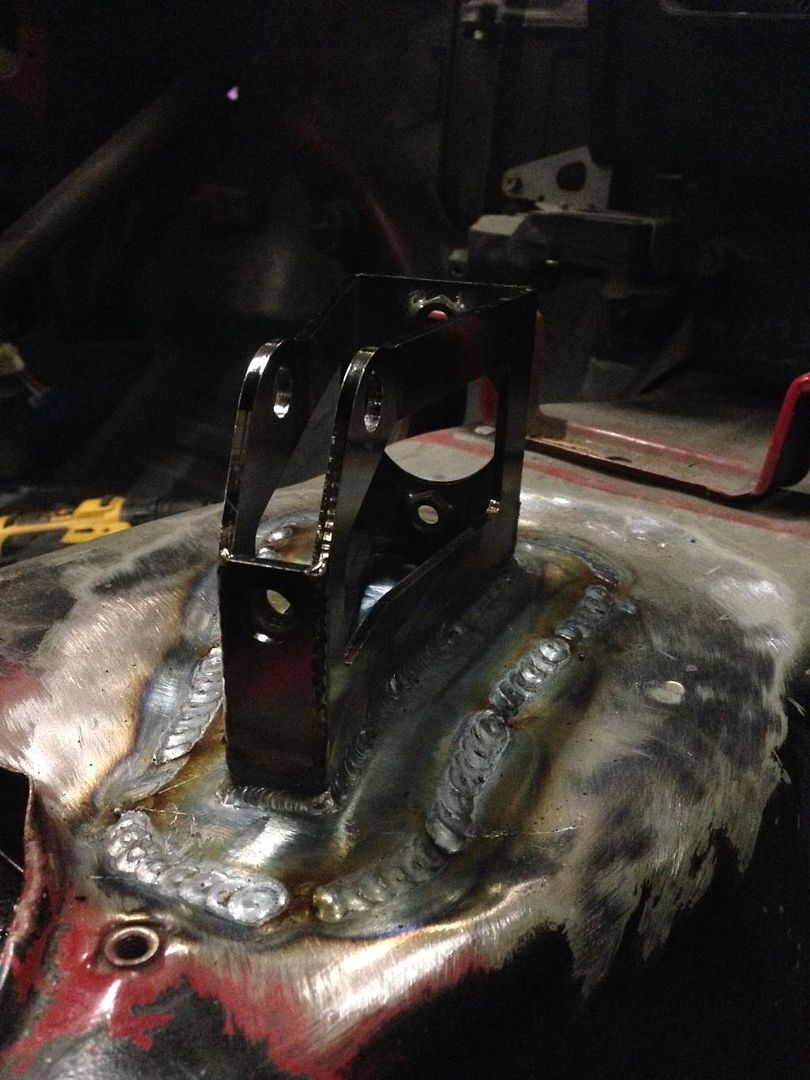
4) Trimmed down the base plate, and found the best position to mount it. Rich proceeded to MIG with base plate to the transmission tunnel. The odd thing was how easy the tunnel warped under heat, but that’s thin Nissan metal for you!


Whilst the car was at Rich’s, we proceeded to plug the holes left by the old cage, anything to stop smoke coming in!

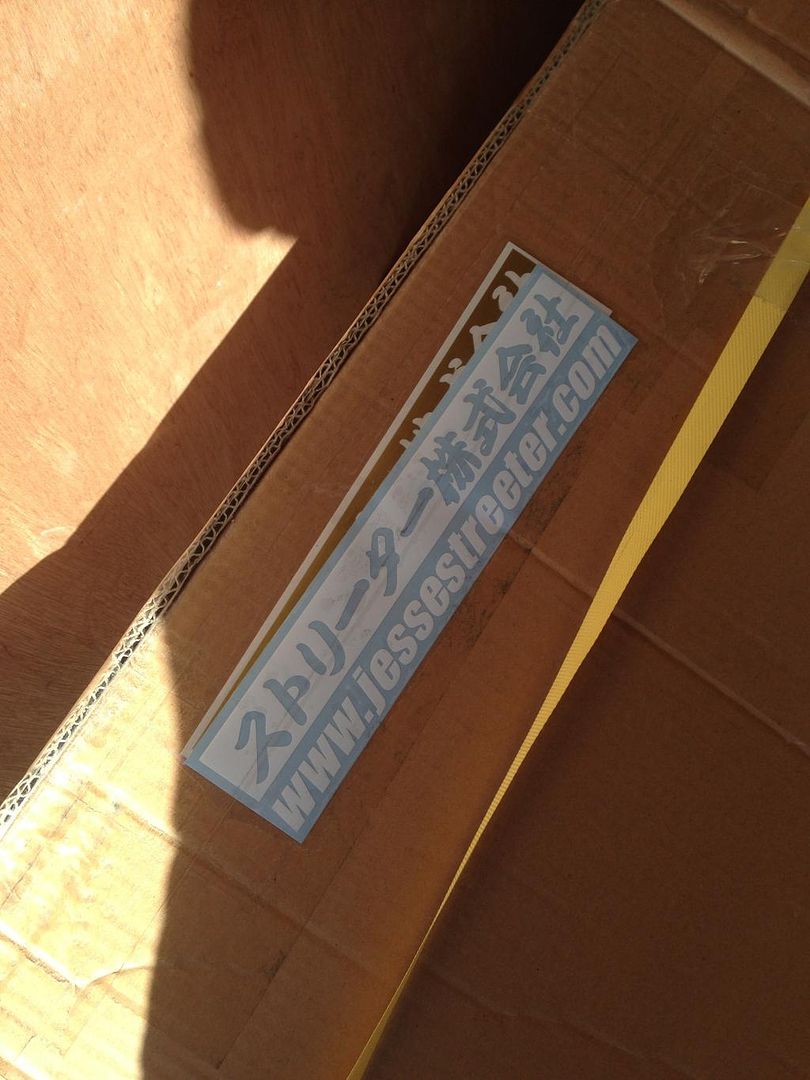
Anyhow, whilst this was happening I thought I’d treat myself. Once again, great thanks to this guy;


Those who don’t know, Jesse is a top guy! Anything you want from Japan, he can get it, and send it. Plus he drives a badd ass PS13 with a Mid-Mount TD06 ;)

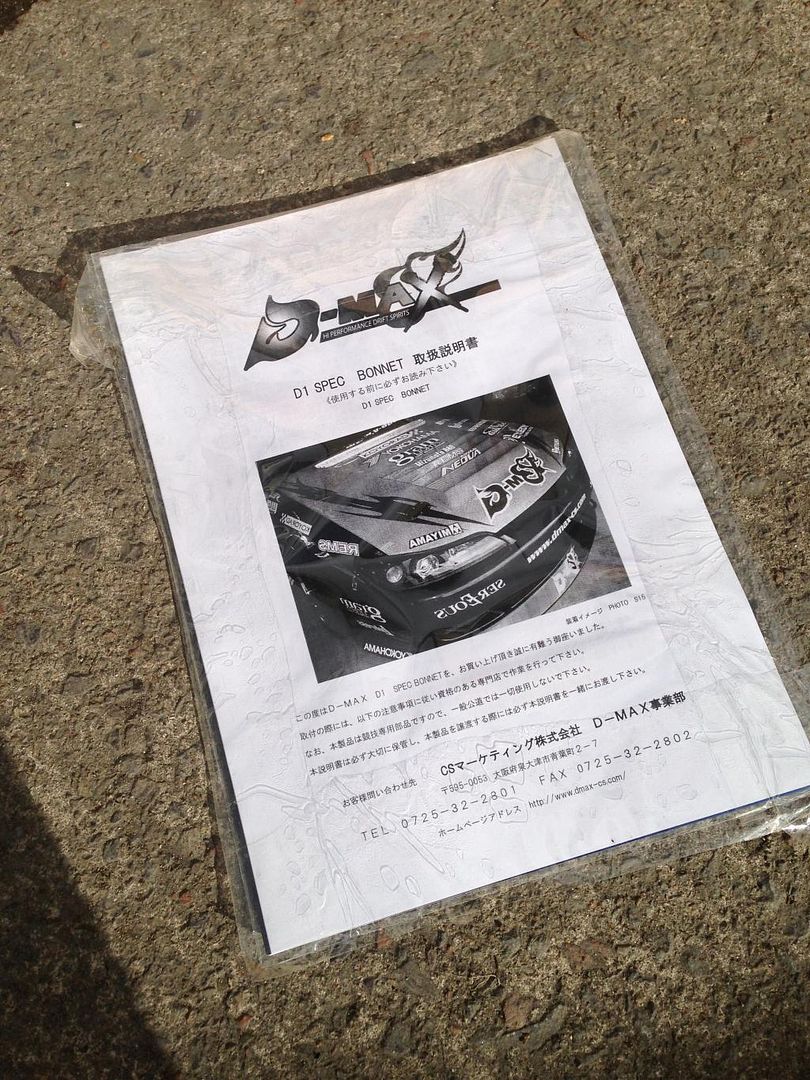
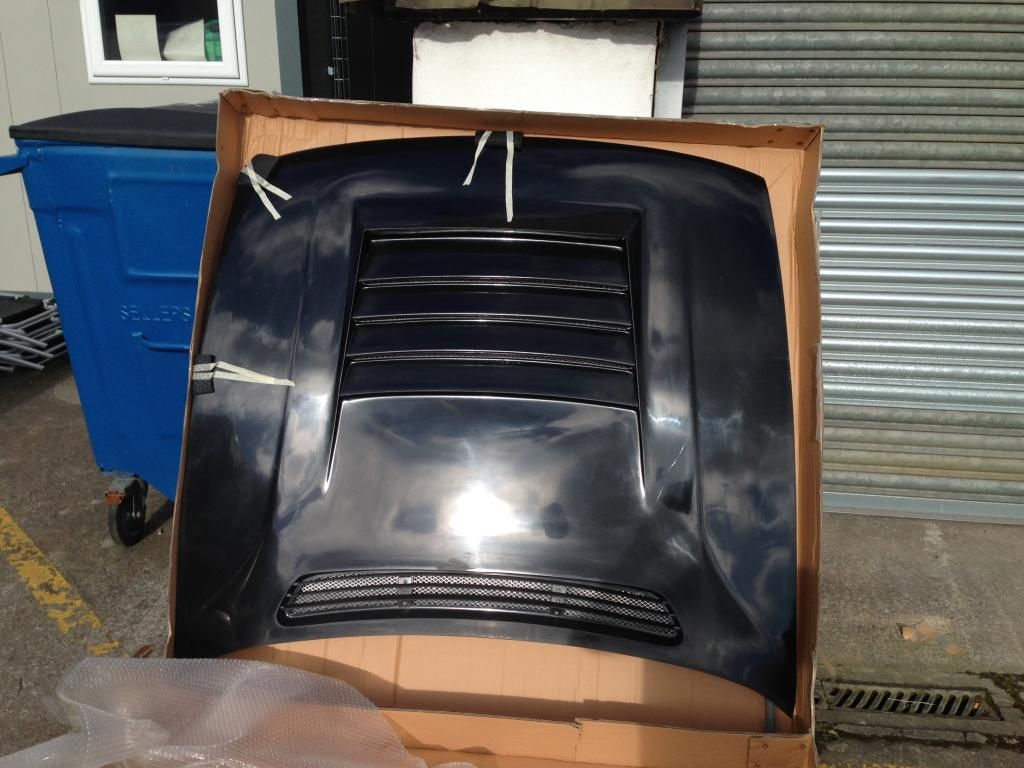
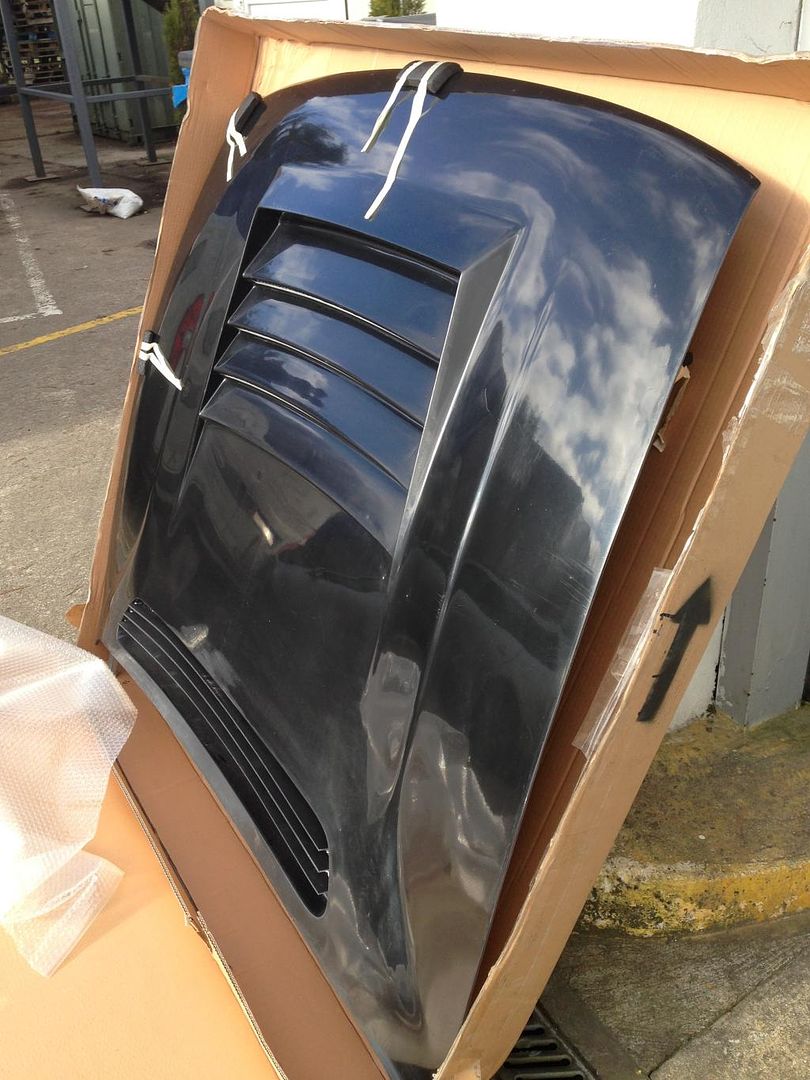
This may have arrived;


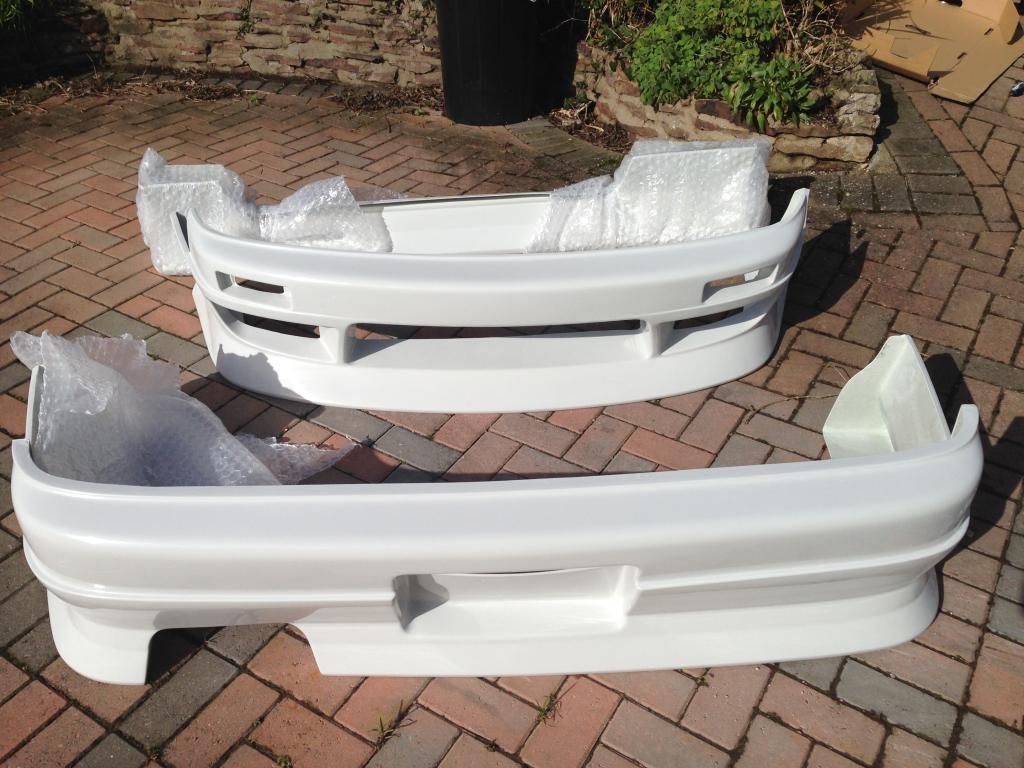
A genuine FRP D-Max PS13 bonnet of course!


The quality is unreal! Cant wait to see the aero start coming together, I have taken an inspiration from a couple cars and hopefully able to do my own twist on it. Plus, I need motivation to finish the car!

EPRacing proceeded to hook me up with D-Max Type 3 kit. A few guys I know are running the same kit, each of us will have our own small twists on it which will be cool. Just imagine 4 PS13’s running the same kit, whilst in a mini-train. That’ll be a cool sight! Some may even say Japan ;)


Final pictures from today, I rebuilt the Hydro back up again. Cant wait to throw the seat back in again, I may have to make brum brum noises and pretend the cars finished haha


Threw the bonnet, wings and kit on today. Front and rear bumpers need some work though. Hopefully it wont take much with a heat gun, but ideally needs to be done ASAP before the car gets a new front end next Saturday by Huxley. :(


Trying to sort the bonnet, wings and headlights without no previous panels is an absolute a**! Kinda gave up today so I’ll have another go on the weekend,. Seriously cant wait after Huxley has done his magic again, THEN its time for those coilovers to finally be wound down!

Exciting news is that I may finally have a unit, so I can go down at nights, during the rain, whenever which will be nice. A few years working outside on cars gets a very tedious, very fast!

Sold my PBM intercooler on the weekend, so I have a new Intercooler, Radiator and Oil Cooler setup courtesy of Mishimoto! So stoked on the new setup im planning to run, should stay super cool at all time, plus the bigger intercooler should mean I can run some big boost ;)
 
Back
Top