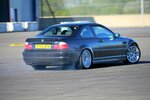
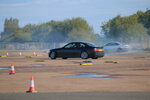
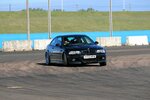
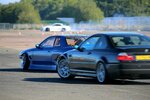
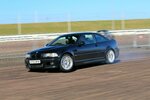
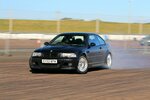
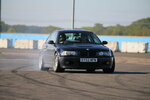
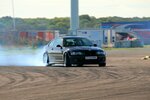
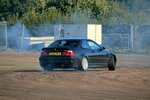
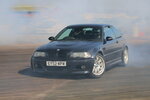
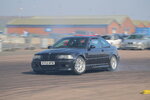
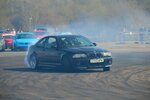
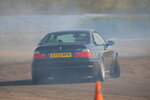
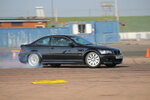
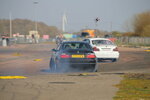
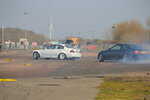
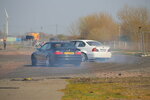
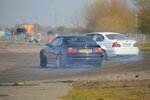
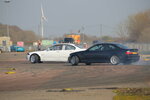
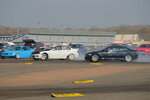
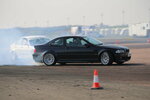
Just your average BMW Fanboy’s Build Thread (PIC HEAVY)

So the Hack Engineering Billet brackets arrived, they are beautiful, make me really want to replace some interior parts with billet now...
20201111_142811.jpg


Fitted those to the car which I actually decided a spacer needed to be added to the outside as the weight of the stock silencer looked like it was overstressing the polybush.

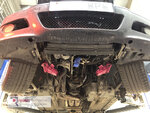
Whilst under the car I noticed a downside of powdercoating your OEM parts. As soon as they get dirty they look terrible, I now really regret not getting some nice photos of the underside when it was fresh... Even all the new BMW nuts and bolts already look old and its only been about a month.
20201112_143253.jpg


If anyone reading this wants any E46 M3 parts, my current list of parts that I have to sell are:
Passenger side front knuckle with brand new bearing installed
Passenger side front knuckle no bearing
Brand new BMW Trailing arm bushes (and bolt/nut)
Rear subframe
Front subframe
Rear Upper arm (both sides)
Rear anti roll bar
Rear trailing arms (both sides)
Stock M3 radiator (nothing wrong with it, just installed the Mishi one)
3x OEM front wheels (8j), two silver one black
2x brand new Kenda KR20 224/45/18 (still stickered)

Will be throwing all this stuff on ebay soon so message if you want something :)

The good news is there isn't much left that needs to be done to the car now. Just need to get the handbrake bracket fitted, have someone make up the AN lines and then the car is ready to be used at as many drift and track days as I can get to...

Current list of jobs to do:
1. Fit Dual Caliper System
2. Figure out why my boot and battery tray are constantly filling up with water...
 
Yet another broken part needing replacing :(.

The car developed a fairly savage nocking noise last week and I started seriously considering just burning the car and claiming insurance money.

Jacked the car up again and did a full nut and bolt check which feels like at least the 6th time now, everything was tight but noticed that there was a puddle of oil under the car, then noticed that it was coming from one of the HSD's...
20201122_142702.jpg

These coilovers are 2 years old now but if you follow this thread you will see that they have caused me a fair amount of hassle so far. Currently saving up to treat the car to some very spendy coilovers but will leave that till the new year probrably.

Anyway, this damper needed replacing so hopped on Driftworks and ordered a replacement for £135 which came the next day (thanks DPD)
received_2829213287401257.jpeg


Put the old top hat and coilover base onto the new damper (with all the copper grease in the world), set to the correct height and softness and the nocking is now gone, result! I was getting worried that it may be more serious...
20201124_155528.jpg


At this point I am getting pretty tired of working on this car, the whole point of refreshing the whole rear end and underside of the car is to minimise the amount of time I spend working on this thing, but no matter what I replace the car always seems to find a new way to surprise me, thanks BMW.

Oh, I also drilled yet another hole in the boot (the battery tray this time) because that is still filling up with water.

Current list of jobs to do:
1. Fit Dual Caliper System
2. Figure out why my boot and battery tray are constantly filling up with water...
 
ts been a while, bought a place in December so been focusing on that really, but got a Lydden day booked on the 4th September and a Pod day booked on 6th October so realised the car needed a bit of love.

I have been putting off putting the IRP Dual Caliper bracket as it meant I would need to make AN Lines, sort a hydro mount etc... I didn't realise that the dual caliper bracket itself would be the hardest part of the process.
Before I go on a full blown rant, the IRP E46 M3 dual caliper bracket is sold by Individual Racing Parts, described on their website as "Rear second caliper adapter (M3, calipers rear E39), Second caliper housing OE numbers: 34211163649, 34211163650 *To install this kit standard handbrake has to be eliminated".
Nothing in the above implies that this should not simply bolt on to the car and function as intended...

If you buy this product, and go to fit it, you will realise this is impossible. You cannot fit the adapter bracket without removing the rear wheel speed sensors (permanently as the bracket blocks the hole that these plug into), which might be fine on a car running a standalone or something else, but on a road car is obviously not an option. Even if you have a race car with no need for a speedo, the bracket will not fit your car anyway as the other side of the bracket contacts with the Upper Inner Arm bolt which means the bracket simply does not fit the car.
The amount of material that I have had to grind away from this machined piece is unbelievable, considering I paid over £200 for this adapter bracket. It also took me two days to modify the brackets on both side to a point where they fit. Very unhappy customer.

I don't think I have explained It well so enjoy the following Photo Dump that might explain the issue better...
The photos below show the difference between an un modified bracket and the first one I did (the second one I cut up was much cleaner but in fairness this is the first time I have had to do something like this, and I only had a Dremel...).

322940-4cfed4314db24e4e5fd296d02b0f5015.jpg
322941-1ad6e8a16fcfde830575b5d58d2e4fa5.jpg


The photos below also show that the bracket itself leaves the OEM E39 caliper bracket too close to the disk for my liking, so also had to clearance that.

322942-7030804dba486386ed0d7eff67df9bfd.jpg
322943-15abf32a1852a36687acac24d05a4702.jpg


Below is just a few pictures of the bracket after I modified them both and made them work with the OEM speed sensor.
322947-39213a936b22cc9a02a4dd3af8ce309d.jpg
322946-341fa5f0d8b103389ea039d184d53711.jpg
322945-bb8a19c6d766c6bb9fca1fc490bb1eb7.jpg
322944-65b0662a2fbe0ef4fa8bad8e59ddd5e1.jpg


Finally a picture of it all finished, minus brake lines which I need to make and fit AN ends to, handbrake still needs a bracket made up then it all needs testing...
20210814_180859-jpg.jpg


I am on holiday next week so will be trying to get the lines and bracket sorted by the end of next week. Hopefully that goes smoother than fitting the IRP bracket has.

Current list of jobs to do:
1. Make lines from E39 calipers to T piece
2. Make line from T piece to hydro
3. Make line from Hydro to remote master cylinder
4. Make a bracket so the handbrake is useable
5. Do an oil change
6. Get an alignment
7. Don't crash at Lydden or Pod
 

Attachments

  • Screenshot_20210814-213913_Gallery.jpg
    Screenshot_20210814-213913_Gallery.jpg
    237.1 KB · Views: 1
  • Screenshot_20210814-213913_Gallery.jpg
    Screenshot_20210814-213913_Gallery.jpg
    237.1 KB · Views: 0
  • Screenshot_20210814-213913_Gallery.jpg
    Screenshot_20210814-213913_Gallery.jpg
    237.1 KB · Views: 1
  • Screenshot_20210814-220209_Gallery.jpg
    Screenshot_20210814-220209_Gallery.jpg
    261.7 KB · Views: 0
  • Screenshot_20210814-213245_Gallery.jpg
    Screenshot_20210814-213245_Gallery.jpg
    237.5 KB · Views: 0
  • Screenshot_20210814-213315_Gallery.jpg
    Screenshot_20210814-213315_Gallery.jpg
    190.5 KB · Views: 1
  • 20210814_154019.jpg
    20210814_154019.jpg
    310.8 KB · Views: 0
  • 20210814_163924.jpg
    20210814_163924.jpg
    244.5 KB · Views: 0
  • 20210814_163946.jpg
    20210814_163946.jpg
    293.6 KB · Views: 0
  • 20210814_154010.jpg
    20210814_154010.jpg
    360.3 KB · Views: 1
  • 20210814_180859.jpg
    20210814_180859.jpg
    300.7 KB · Views: 1
Last edited:
Its been a productive week.
I have never made AN lines before and amazingly did it all without a single one leaking, shows how easy it is to do yourself really.
Also cut up the OEM handbrake bracket to make a mount and Sam very kindly quickly welded the bracket to the base of the handbrake.
I now have a working hydraulic handbrake that is fly off, and when you press the button, locks as a normal handbrake would. It might need either a 0.7 master cylinder or some better rear pads to make it a bit easier to lock the wheels, but other than that its great!
Progress pictures below:
20210822_160649.jpg 20210822_163951.jpg 20210823_135905.jpg20210823_135836.jpg

Current list of jobs to do:
1. Do an oil change
2. Get an alignment
3. Look at getting either a 0.7 master or some more aggressive pads.
4. Don't crash at Lydden or Pod
 
Sorry for the poor pictures, but I found a 0.7 master from Willwood that has a built in reservoir that looked like it might fit where I wanted it to, so bought it.
20210826_234825.jpg


Removed the old Girling Master and OBP Fluid Resevoir and replaced with this .7 Willwood and it looks much better.
Still doesn't fit under the OEM cover so I will need to either raise the centre console or lower the handbrake mount further, but it looks good enough for now!
20210831_190351.jpg
20210831_191507.jpg


Lydden (wet day :no:) is on Saturday...
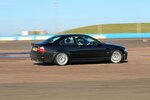
Current to do list:
1. Do an oil change.
2. Get an eyelignment before going out on track.
3. Don't Crash...
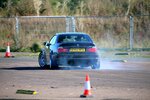
 
Good news! We survived Lydden, did pretty badly but survived.

Will trickle feed Pictures and Videos as people send me them but here is the onboard from Lydden:
(Skip to 11:00 mins ish if you want to see some not awful runs)

Exterior clip (thanks Sam!)

Todd was absolutely nailing it from pretty much his second lap :cool:

I started the day pretty badly, I think in general this was some of the worse drifting I have ever done but kind of got the hang of it by the last few laps...
Struggled at the start with wearing gloves (which are incredibly comfy by the way, will start driving normally with them to get used to them), then what gear to be in, then I couldn't figure the handbrake entry out, span a bunch of times, then burnt the clutch so gave up on trying 3rd as it was just slipping, all in all not my best performance. Watching the footage back I can see so many things that I was doing wrong but in the moment its just not as easy to step back and think about what your doing.
Need to look at the handbrake as I really struggled to get it to lock up, even though when I was testing it I had no issues at all locking up... Will leave the clutch and see how it is at Pod next month. Changed the oil the night before so that will be good for a while. Could do with an alignment because after running over one of the kerbs my steering wheel is now straight again which it hasn't been for months, so maybe the tie rod bent itself back to normal?

Anyway, that car ran great, didn't overheat or give any signs at all of trouble of any kind again just reinforcing that E46 M3's are the best daily that can skid (in my biased opinion).
As anyone following this thread can see, it is an out the factory, 19year old stock car with cheap coilovers, polybushes (which was unnecessary but avoids future maintenance), rack spacers, an uprated rad and a hydro, that's it and its brilliant. Proof that you don't need a stupidly overbuilt car to drift, just something reliable and a whole bunch of seat time.

Current to do list:
1. Test the hydro some more and figure out what I was doing wrong.
2. Try get an eyelignment before going out on track.
3. Don't Crash...
 
Last edited:
Huge shout out to Vince (@vincent_miele) for the Photos. He just has a way of making us idiots look good.

20210904-lydden-hill_drift-day-20.jpg
20210904-lydden-hill_drift-day-495.jpg
20210904-lydden-hill_drift-day-483.jpg
20210904-lydden-hill_drift-day-14.jpg
20210904-lydden-hill_drift-day-539.jpg
20210904-lydden-hill_drift-day-3.jpg 20210904-lydden-hill_drift-day-19.jpg 20210904-lydden-hill_drift-day-21.jpg 20210904-lydden-hill_drift-day-26.jpg 20210904-lydden-hill_drift-day-38.jpg 20210904-lydden-hill_drift-day-228.jpg 20210904-lydden-hill_drift-day-21-2.jpg 20210904-lydden-hill_drift-day-453.jpg 20210904-lydden-hill_drift-day-465.jpg 20210904-untitled shoot.jpg 20210904-lydden-hill_drift-day-336.jpg 20210904-lydden-hill_drift-day-534.jpg 20210904-lydden-hill_drift-day-542.jpg


Current to do list:
1. Test the hydro some more and figure out what I was doing wrong.
2. Try get an eyelignment before going out on track.
3. Don't Crash...
 
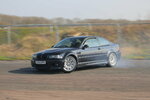
Santa Pod was a success (mostly).
The M3 (as always) ran flawlessly, temps got a bit hot but would cool down within a minute of sitting in the que to go out again.
Only issue on the day was the POS Individual Racing Parts dual calliper bracket. around 3:00 I came in to change my tyres, changed them and dropped the car back down to head out. As I tried to leave the pits the handbrake was stuck on. Jacked the car up again and one of the two bracket retaining bolts had loosened, come out completely and allowed the caliper to swing on the remaining bolt into the wheel, this had then punctured the OEM wheel which is now being welded up by Sam (thanks!!!). Applied all the locktight to the bolt, refitted it and called it a day for drifting, but it seems to have held for now.
I honestly cannot criticise these IRP Dual Caliper Brackets enough. They cant be fitted to the car at all without significant modification, you cannot run speed sensors without removing a scary amount of material from the bracket, and now this.

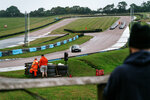
Anyway, enough ranting about wasted time and money, here is a quick video of the day and some nice pictures courtesy of Ian Blackett (Resident Pod Photographer and all around nice guy).

OOO_0090.JPG OOO_0538_remastered.jpg OOO_0567_remastered.jpg OOO_0578_remastered.jpg OOO_0579.JPG OOO_0831_remastered.jpg OOO_0859_remastered.jpg OOO_0870_remastered.jpg OOO_1047_remastered.jpg OOO_1056_remastered.jpg OOO_1262.JPG OOO_1510_remastered.jpg OOO_1524_remastered.jpg OOO_2145_remastered.jpg OOO_2177_remastered.jpg OOO_2180.JPG OOO_2200_remastered.jpg OOO_2529_remastered.jpg OOO_2535_remastered.jpg OOO_2615.JPG OOO_2618_remastered.jpg OOO_2626_remastered.jpg OOO_2644_remastered.jpg OOO_2652_remastered.jpg OOO_2923_remastered.jpg OOO_2931_remastered.jpg OOO_2933_remastered.jpg OOO_2950_remastered.jpg OOO_2969_remastered.jpg OOO_2994.JPG OOO_2995.JPG OOO_3007_remastered.jpg

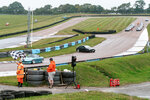
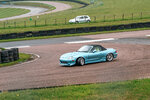
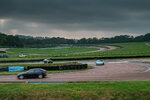
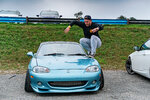
And finally a beautiful pic of Sam's Soarer, Todd's MX5 and the M3 courtesy of Vince Miele (amazing photographer and great drift instructor)!
IMG-20211010-WA0001 (1).jpg


Current to do list:
1. Have Sam weld my wheel.
2. Figure out what to do with these POS caliper brackets.
3. Mount new tyres.
4. Get a propper alignment at Abbey.
5. Book some more skid days!!!
 
Getting those post drift day blues now.
Was at Santa Pod DWYB again yesterday (26th March 2022) and had a pretty great day.
M3 ran brilliantly all day, got a bit hot as usual but as long as you run a few corners just driving or don't drift the back corner its never a real problem.
Right at the end of the day the car developed a pretty nasty noise from possibly the rear left, sounds like it might be the driveshaft or a prop donut or something like that but will figure it out another time. Car is still driveable, just makes a nasty noise and vibration under heavy load in 1st or 2nd.

Huge shout out to Sam, Todd and Vince for all their help on the day, was also great meeting some internet friends in person and making new friends :).

Video below is all the onboard footage from the day:

And here are all Ian Blacket's photos. As always, if you are ever at Pod, go say hi, buy his photos, the man is an amazing photographer and just generally a really nice, happy, friendly guy:
OOO_1435.JPG OOO_1467.JPG OOO_1482.JPG OOO_1873.JPG OOO_2276.JPG OOO_2278.JPG OOO_2279.JPG OOO_2304.JPG OOO_2305.JPG OOO_2306.JPG OOO_2307.JPG OOO_2308.JPG OOO_2326.JPG OOO_2327.JPG OOO_2328.JPG OOO_2344.JPG OOO_2826.JPG OOO_2829.JPG OOO_2831.JPG OOO_2833.JPG OOO_3736.JPG OOO_4803.JPG

Current to do list:
1. Find and fix the new mysterious noise/vibration
2. Figure out what to do with these POS caliper brackets.
3. Get a propper alignment at Abbey.
4. Book some more skid days!!!
 
So I found the source of the mysterious knocking noise, it was the propshaft centre bearing, yay.

In typical BMW fashion, it is impossible to get to and will take infinitely longer than you expect to fix. But here is a quick walkthrough in case you need to replace one yourself.
Step 1: Get the car really high on axle stands.
IMG-20220402-WA0003.jpeg
Step 2: Remove the front undertray that covers the Cat (8mm and 10mm).
Step 3: Remove the Y Brace (3x 16mm).
Step 4: Remove the Exhaust support bracket (14mm)
Step 5: Remove the Heatshielding (10mm)
Step 6: Remove the exhaust centre section (T12 and a 14mm wrench for the Manifold to Centre Section), it may be easier for you to remove the whole exhaust from manifold back, but then you also need to remove your rear bumper too.
Step 7: Remove the Prop (T12 socket for the diff flange, 18mm socket and wrench for the gearbox flange).
20220402_154831.jpg
Step 8: Paint mark the centre of the prop to ensure you can line it back up again then separate the Prop.
20220403_112041.jpg
Step 9: Remove the destroyed propshaft centre bearing (hammer and chisel).
IMG-20220403-WA0002.jpeg
Step 10: Fit the new one (grease).
Step 11: Put the car back together and hope it all still works (hopes and dreams).

The good news is the noise has gone away, and the Guibo looks in a great condition so didn't replace that in the end. Unfortunately I am now noticing a speed related vibration, feels like its coming from the front left but gets pretty noticeable around 70mph+. I hit a kerb pretty hard at pod so hoping it just a bent rim or something, but will figure it out when I get some time next.

In the meantime, here is some drone footage from the Pod Day:

Things to do:
1. Find and fix the new mysterious noise/vibration (hopefully bent rim or warped disk or something simple like that...)
2. Figure out what to do with these POS caliper brackets.
3. Get a propper alignment at Abbey.
4. Book some more skid days!!!

20220403_114650.jpg
 
Had a bit of a mare... but on the plus side the mysterious wobble has been cured!

Bought a spare hub on Ebay with a new bearing already fitted, with the intention of spending an hour or so swapping my old one out with a new one.
It arrived and all looked good, got the car jacked up and started taking everything off the car, most stuff was pretty easy to remove as we copper greased anything we could when reassembling last year.
Unfortunately discovered that the front wishbone balljoint was bent:
Bent BallJoint.jpg

No idea how that happened or why but oh well, got on to ECP and ordered a new one.
In that time also realised that the front wheel bearing on the new hub looked slightly different to the ones I had on the other 3 corners of the car that I replaced previously. Luckily I had a spare in the shed so decided to use my cars hub and the new bearing rather then the one I had just bought. (If anyone is after an M3 Drivers Side Front hub and new bearing then let me know).

New Arm arrived, got it all back together and the wobble is gone! I now have an intermittent issue where the ABS warning light comes on and I have no ABS, but that's a future me problem because it doesn't affect how I drive the car anyway :)
Wishbone.jpgEmpty Arch.jpg Hub and Bearing.jpgAll Done.jpg

Also went and got the Aircon Re Gassed so I have ice cold AC again! Perfect timing for our heatwave.

Fixed my sagging window trim with a bit of gorilla glue...
Headlining.jpg

Also finally hit 100k miles in the car. Had it for 6 years, done 41k miles, countless drift days, road trips, commuting, green laning, everything really. What a good car.
100k.jpg


Current to do list:
1. Resolve the intermittent ABS error.
2. Fix the drivers seat as it no longer slides forward or back, all other directions work.
3. Replace the cracked front fog light.
4. Replace the cracked rear tail light.
5. Figure out what to do with these POS caliper brackets.
6. Get a propper alignment at Abbey.
7. Book some more skid days!!!
 
One for the S54 people:

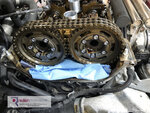
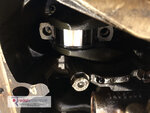
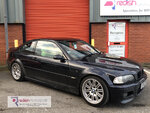
Decided that it had been just about long enough putting off getting the Rod Bearings and Vanos done, so seeing as the car needed an Inspection 2 Service (well overdue), I had a chat with Redish Motorsport who were absolutley amazing. If anyone needs any work done to their BMW's then call Redish. Yes you can probrably do it yourself for cheaper, but why bother. You will probrably muck something up and have to do it again anyway so dont, just get them to sort it and be stress free.

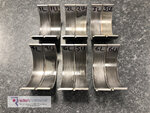
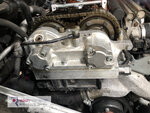
Dropped the car off to them on a Tuesday and the car was ready for Collection by Friday after having the full Inspection 2 Service, Vanos System replaced and Rod Bearings also replaced. Not much to say other than again, they were amazing, see update pictures below that James sent me of their work and some other things they found wrong with the car (they sent significantly more but here are just a few):
2YoeMfriAJgKHG3JmiTs.jpg5BoVGUpNz1g9XLoMxXGs.jpg DFxiErTbCjVQ42mJs131.jpg ePtlcZha546k1V8YlP7e.jpg FFf8ubJQJzMhMgKaMgQh (1).jpg ItnlOGNGWHljC9IFt3WN.jpg KAWmvTPeiXtS0sRZ8aCR.jpg pR4gSNQzflmukzugRsYa.jpg S2q02nlsQQnglumkxH7l.jpg siwKVkWbtUdHIojFCfbp.jpg Tfe2vKFxKohmcswMzjPp.jpg vhpsEBXd2c7QZvbe23g4.jpg xwrJTH0M2MhK0z2tkf0k.jpg ybh5OY7MmtObNFGEcJRO.jpg YizN9PBQ47EAFt1RqTnq.jpg zmDOv0aXaRd12Fuisjsj.jpg

Interestingly, they noticed that the Vanos unit had some non BMW sealent in it, which means at some point before I got the car it had already had the Vanos done. Interestingly the bearings they pulled out of the car were also BMW Recall bearings, so they had also been done some point before my ownership. So all of thi was actually a bit premature, but worth it for the peace of mind anyway.

Unfortunately the list of other items they found wrong with the car was huge:
  1. Coolant Leak from Radiator Vent Hose
  2. Main Drive Belt Idler Cover Missing (Replaced)
  3. Oil Leaking from Cam Cover Bolt Holes (Recommend new Valve Cover Gasket)
  4. Bonnet Catches are partially siezed and require tapping to get sliders to lock bonnet down (I have been dealing with this for a year and just whack them when needed)
  5. Rear View Mirror Leaking Internally
  6. Drivers Seat Inoperative Fore/Aft
  7. Sat Nav Unit Pixels Failing
  8. PDC Inoperative (Diagnosed and replaced the reversing light switch)
  9. Reverse Light Inoperative (see above)
  10. Non Genuine Battery Fitted
  11. Brake Fluid Requires Changing
  12. Near Side Fog Light Cracked
  13. Door Mirror Glass Failing on both sides
  14. N/S/R light cluster damp inside
  15. Front Indicators Starting to show White
  16. Washer Fluid Jets inoperable (Frozen, bit of hot water resolved this)
  17. Disk Brake Backing Plates not Fixed (I removed them because... well, just because)
  18. Anti Roll Bar not Fitted (Please see post earlier in this thread)
  19. Xenon Drop Link not Fitted Properly.
  20. Xenon Potentiometer siezed and plug tabs broken.
  21. Outer Steering Gaiters missing clips, secured by Cable Ties (my bad again).
  22. Oil Cooler Loose in Housing (Mishimoto Mounting Points seem to have broken...)
  23. Oil Cooler Pipes Split at cooler end (assume caused by the above...)
  24. Main Drivebelt Cracked (asked them to replace which they did)
  25. Slight Leak around Power Steering Pump / Resevoir (will deal with this whenever I get round to doing the Purple Tag Rack Swap)
  26. Constant Pressure Valve Leaking (they resolved)
  27. N/A Front Arm Dust Cover Insecure
  28. Front Control Arm Rear Polybushes not Aligned Correctly (I didnt align the Offset Polybushes Correctly, oops)
  29. Exhaust Centre Hardware virtually corroded away (have been waiting for them to fully become dust before I replace them)
  30. Propshaft Worn (this happened when the centre bearing died)
  31. Aquaplane Guards Insecure (Ironically happened when I aquaplaned a few years ago)
  32. V Brace not fitted (I removed this because i need to re tap one of the mounting points)
  33. N/S Driveshaft Outer CV joint casing leaking grease
  34. O/S Driveshaft Inner CV worn
  35. Xenon Droplink Siezed
  36. Driveshaft Heatshield Insecure (I cable tied this up years ago after a bolt snapped and never got round to fixing it)
  37. Roll bar droplinks fitted to the wrong side of the arm (Another thing caused by my own stupidity)
  38. Rear Brake Pipe showing signs of corrosion (I replaced one about 2 years ago but not both... preventative maintenance is key!)
  39. Corrosion beginning to form around jacking points & V Brace Mounts (I know, need to get Sam or Dan on this in the Summer)
  40. Spot Weld failed in the N/S Spring Perch Area. (This scares me, i have Redish V1 subframe reinforcement plates in the car which were installed 6 years ago, but looks like the problem has migrated to a new area... this will need some serious work).
I don't even know where to begin with this anymore, but will keep posting here as I get around to fixing things...

Current to do list:
1. Cry.
2. Get a beer.
3. Start finding a buyer for my kidneys to finance the above.
 
So, its been a long time since the last update and a lot has happened. Wish I had written this along the journey but here we are and I will try recap everything that has happened in the last few months…

After getting the car back from Redish the list of issues was so huge that I didn’t really know where to start or how to figure out what to do, so I started with what I thought would be the easiest fix and replaced the Alternator.

I wont do a post on installing this because if you go back a page, you can see the last time I did this back in September 2019. But what I will say is this time, instead of buying a cheaper Valeo unit, I instead went for a genuine BMW one, so lets see if this one lasts longer than 3 and a half years.
20230410_123418.jpg 20230410_130316.jpg 20230410_130321.jpg 20230410_143719.jpg
 
Next easiest thing I could think of was the driveline issues, so I bought new Driveshafts from BMW Douglas Park. When they arrived went to install them on the car. Whilst looking at removing the old Driveshafts I noticed there was a lot of play in the right hand cup of the M3 Diff, which upon further research is a common issue. The rabbit hole opened and I ended up ordering a RacingDiffs Clutch Pack and Free Play Delete Kit including all new Bearings and Seals.
20230610_111755.jpg 20230610_111838.jpg20230509_133852.jpg

Whilst that arrived I decided to take the Propshaft out and get it Balanced as I believed this was also an issue since it had been rattling around the tunnel when the center bearing died last year. After dropping this off at Bailey Morris they informed me that both the CV and Diff end Flange were out of spec so they pretty much fully refurbished the Propshaft and balanced it, so fingers crossed the gearbox back now should not need serious work again for another 100k miles!
20230527_150540.jpg 20230610_111845.jpg 20230610_111857.jpg

Whilst removing the Diff to get that over to Sam at Parr Motorsport, one of the differential Torx bolts rounded whilst trying to undo it, which sent me down the decision to buy replacement Driveshaft and Propshaft bolts with Internal Hex drive heads rather than Torx as these have always been a nightmare when doing rear end work to an E46.
IMG-20230513-WA0003.jpeg 20230513_161235.jpg 20230513_152246.jpg

Oh I almost forgot, back in March I had also booked myself onto a Brands Hatch GP day in June thinking that setting a date would help me get the car sorted in time. However the RacingDiff’s upgrade kit was delayed over and over and over again, in the end coming 4 weeks after being ordered which meant that by the time the Brands Hatch GP day came round, the pack had not got to Parr Motorsports yet to be rebuilt into my diff. Luckily Sam once again came to the rescue and managed to borrow a spare E46 M3 diff from a friend that I could use.

We then spent the Saturday before the Monday trackday getting the car back together again but with someone elses Differential…
20230507_173420.jpg

20230507_171523.jpg


20230625_130923.jpg
 
The Week before this all happened I realized whilst at work that I had not ordered any brake pads and that the OEM ones would probably not hold up well on Brands GP, so after many calls I managed to source a set of Ferodo DS1.11’s for the front and Sam (again coming in clutch) happened to have some spare race brake fluid that I could use.

We also diagnosed the issue to the drivers seat no longer moving fore/aft. The cables to the motor were loose so we simply pushed them back in and it works again, next time it stops working I will take the seat out and solder them in properly, but this seems to work for now.
20230520_121035.jpg

We installed everything on the car and after a very long, very hot day, the car was ready for Brands Hatch GP with literally no testing…
 
What can I say other than what an amazing day. Brands Hatch GP is an incredible track and I would recommend it to anyone, coming away from this, I think I will be doing more track than drift days going forward, at least in the short term.

There were a few hiccups during the day, firstly the car would not stop overheating which it has never done before, at least not like this. Most drift days I can do a full session before needing a cool down, however I could only make it one full lap of the GP track before getting into the red, and unfortunately for Sam, he couldn’t even make a full lap without it getting into the red (he is a far better and more aggressive driver than I am).

There were a lot of “Steady”, “No Drifting!” and “Caution” flags but luckily no Black flags for us throughout the day :D.

Huge thanks to Sam for being an absolute legend in every way and to Dan and all the guys at CMR (Cogswell Motor Racing) for being awesome Pit Neighbors and driving instructors! If you ever need road or race cars worked on, set up or anything else, give CMR a call :D

6.JPG

20230612_111850.jpg 1.JPG 2.JPG 3.JPG 4.JPG 5.JPG 7.JPG 8.JPG 9.JPG 10.JPG 11.JPG 12.JPG 13.JPG
 
On Brands other than the overheating, we noticed under breaking there was some serious vibrations which could only have been warped disks (suspected warped disks pre Brands Hatch, but clearly that and the DS!.11’s killed them off), so ordered a new set of MTEC disks.

Whilst rebuilding the Diff, sam also noticed that one of the Powerflex Rear Diff Bushings had cracked, so ordered a new pair of those to be delivered to him and he installed onto the Diff Backing Plate.

The weekend after Brands Hatch, Sam had finished rebuilding my Diff so I took the borrowed one out, returned it to him, picked up my refurbished and upgraded diff and installed that back in my car.
IMG-20230515-WA0006.jpg IMG-20230515-WA0005.jpg IMG-20230515-WA0007.jpg

Popped out for a walk that evening to some local countryside roads and noticed that someone had clearly been testing a diff to see how it locked up, hopefully mine locks up as well as that did. Shoutout to RacingDiffs for making a great product that feels great!
20230625_130901.jpg
 
Finally, after we had finished everything and got the car back to a roadworthy state, the car started throwing TC, ABS, and Tyre Pressure warning Lights. I couldn’t read the OBD on the car due to an electrical issue on the car. I wont go into chapter and verse on it, but turns out that when the Steering Angle Sensor dies on an E46 M3, some electrical issue causes the OBD to stop picking up signals from Pin 8 (Every Module except for ECU) and you can only read Pin 7 (ECU). So after taking the glovebox apart and one by one unplugging modules to find the culprit, the OBD now works again after leaving the steering angle sensor module unplugged. There seem to have been no negative side affects to this “Temporary” fix, however I have ordered a new steering angle sensor anyway to resolve this.
20230520_114423.jpg 20230520_114429.jpg

Once the OBD Reader worked again, we could read the codes and see that the car was throwing front right wheel speed sensor codes, but the OBD could read the wheel speed at all times which was confusing, but ordered a new sensor anyway just in case.

Went to put the new disks on and replace the wheel speed sensor and noticed that the sensor was covered in grease. After inspecting the wheel bearing we noticed that the bearing was very dead and had leaked grease all over the kingpin, back of the disk and the wheel speed sensor. Luckily I had a spare in the shed, so swapped that over at the same time (forgot to take a picture of it after I installed it, but just imagine a shiny new bearing :)) as replacing the disks and pads (back to road pads). We also replaced the front bleed nipples and re bled the brakes again.
20230627_153804.jpg 20230627_153822.jpg 20230710_175311.jpg 20230710_175317.jpg 20230710_182838.jpg 20230710_185158.jpg
 
Back
Top