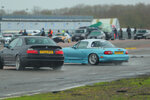
Just your average BMW Fanboy’s Build Thread (PIC HEAVY)

Things went downhill again after this.

It all started with a misfire and engine warning light at 04:30 as I was leaving to drive 4 hours to Leeds for work. Drove the 10 mins back home parked the car and got in the backup.
That evening I got home, plugged in the OBD, and received some misfire codes. I have dealt with this before so dug into it, swapped coil 3 to cylinder 4 and the code followed so was obviously a dead coil.
20230719_195244.jpg
Luckily because I am a hoarder, I happened to have a bag of spares so threw a spare Bosch one in (rather than the OEM BMW) and problem solved, easy win.
20230719_205155.jpg 20230719_201612.jpg 20230719_201421.jpg
 
Next issue was the week after, again went to a site in Watford and on the way back heard a noise from the rear (diff). Drove home and parked the car up till the weekend.

Got it in the air on the weekend and checked the bolts for tightness and both the rear bolts were loose (again). Tightened the left, then the right. But rather than going righty tighty (just a single 19mm spanner and I am not built like Thor) it went snap.
20230729_172144.jpg

Went inside, had a bit of a breakdown, once again contemplated just scrapping the car and giving up on all motorsports of any kind. Got myself back together and started resolving the issue.

Realised that I would have to drop the entire diff and subframe to get the remaining bolt out so sucked up my feelings and got to work. Dropped the diff out which at least gave me a nice excuse to take another picture of Sam’s amazing work!
20230729_162759.jpg
Unfortunately that also made me realise the issue that had caused this. We had put the Powerflex Diff Bushes in back to front which had caused the bolt to fatigue under and off throttle… So ordered some new diff bushes and carried on.

Dropped the subframe but realized I would not be able to get it down fully as I had routed the braided hydraulic lines through the OEM handbrake cable holes which run through the subframe. Got it low enough to access the bolt, used an extractor kit I had and managed to get the leftover bolt out.
Also torqued everything again whilst I was down there and noticed that almost every bolt had come loose in the last few years so this was worth doing anyway.
20230729_170834.jpg

Once the bushes arrived we put everything all back together again and the rear diff bolts went in smoothly and torqued up great. So happy that the car was all back together again we went to tighten the front diff bolt. A bit of a precursor to the next point is that in the 7/8 years I have had this car, we have had the differential in and out of the car at least 5 times for various reasons. As I torqued the front Diff Bolt which BMW recommend doing to 200NM, I got to 70nm before righty tighty became righty loosey. Honestly, a pretty much full breakdown then happened for the rest of the evening and I left the car for the rest of the weekend.
 
During the next week I did some research and established that a helicoil would be enough to fix this issue so ordered a kit and decided to try fix it that weekend.
20230813_175740.jpg

Got the diff back out (got hit in the face by the propshaft at the same time which gave me a nice black eye for the next week). Drilled the bolt hole out to 14.3mm which went smoothly (after hunting down and ordering a 16mm drill chuck because the 14.3mm drill bit did not have a tapered end).
20230813_175732.jpg20230813_175727.jpg20230813_182247.jpg
Got to tapping the hole and although this looked dead straight, once I got about 3cm down the hole I realized it was not as the tap started getting very stiff and looked like it was trying to cut into the diff rather than the hole. Fitted the helicoil anyway as a local “specialist” said it would be fine.
20230813_205159.jpg

Tested on the floor and I got to 120NM before we could no longer hold the diff steady so assumed all would be ok. Fitted the differential back into the car and managed to get to 140NM before the bolt went righty tighty again. For now the 3rd weekend in a row I was lying under the car with a snapped / stripped differential bolt stopping me from re fitting the diff.

Luckily I was past the point of caring any more and we found the situation funny rather than crushing, so just decided to pull the differential back out and figure out how to deal with it again during the week. During pulling the diff out again, a wasp flew up my jean leg and stung me twice before I managed to take my rage out on it and beat it to death with a 19mm wrench (full fast & furious style). But we still got the diff back out, put it in the car and spent the rest of the day getting drunk.
 
During the week I called 8 different machine shops and 3 “thread repair” specialists who all said they could do nothing to help my situation. I called a couple E46 M3 differential rebuild shops to see if they had dealt with this before of if I could buy an empty casing from them, no one had spare casings they were willing to sell however one recommended a machine shop who had fixed this issue for them before, but when I called the machine shop, they said it was a nightmare and I could not pay them any amount to do it again.

Spirits fully crushed I called James at Redish who has been an amazing help throughout the years and always seems to have a solution to my problems, but this time it was the first time they had dealt with this and they did not know how to resolve it either. My other go to is Ben at Hack Engineering, who have recently opened up their own machine shop next to their standard workshop, they specialize in BMW’s (especially M cars) and they had literally the week before repaired their first E46 M3 Differential Front Bolt strip that another customer had asked them to take a look at.

Left home as soon as I finished talking to Ben and dropped it off straight away and within two days they had solved it with a larger external diameter (stronger) helicoil! I cannot recommend them enough and will be using them for the rest of my machine shop needs for as long as I can.
20230815_092538.jpg

At this point me and my dad have gotten an E46 M3 diff removal and refit down to a fine art, so had the diff back in the car within 30 mins of it getting home, and the rest of the underside of the car back together within the next hour. Torqued the diff bolt up to 150NM as recommended by Ben (because 200NM is an insane level of torque, even for an M14) and all of the locktight red the bolt would take.

As of two weeks ago, the M3 is now back together again, driving and as I type this causing me no more emotional trauma.
 
This final one for todays catch up session is just a post to help me stay on track of everything again / the order of jobs to do:

Spare Parts I have that need fitting:
1. Front Fog Lights
2. New Headlight Lenses (need to PPF these)
3. Valve Cover Gasket
4. Steering Angle Sensor and Purple Tag Rack (Buy a solid steering coupler to install at the same time)
5. Aluminium Washer Pump Pulley and new Water Pump (Ordered a metal finned Water Pump last night)

Parts to buy:
1. Radiator Vent Hose
2. Interior Mirror
3. Wing Mirror Glass (both sides)
4. Front Indicator Lenses

Other things to do / work out:
1. Have Sam rebuild a full set of e46 m3 calipers I found cheap on ebay.
2. Replace headlights with Non M Bulb system rather than Xenon/Halogen/Self Levelling stuff (constantly goes wrong and is more expensive!)
3. Re Align the front Control Arm Offset Polybushes
4. Re Tap / Re Fit V Brace
5. Replace rusty hardware under the car
6. Have a welder (maybe Sam) look at the Failing Spot Welds and Jacking Points.
7. Deal with the rusty boot area
8. Deal with the front arches starting to rust
9. Bonnet latches are getting very difficult to re latch

Parts I have that need selling:
1. Old Driveshafts
2. Old Disks, possibly could have these unwarped and keep as spare
3. Old Alternator, possibly have this rebuilt as a spare
4. Welded (by DSI if anyone remembers when that was a garage) 318ci small case E46 differential
5. E46 M3 front right hub with brand new wheel bearing fitted
6. E36 M3 Brake Caliper
7. Front and Rear OEM Powdercoated Anti Roll Bars
8. Powerflex Front Lower Control Arm Bush Kit (SPF2558K)
9. Genuine BMW Aux Retrofit Kit (65 12 0 153 503)
 
Yet another bulk update incoming. Since the last post, I got married and the M3 had Christmas!

So in an attempt to get the M3 looking good for the Wedding Day, I got new headlight lenses for it. However in typical me fashion, I left this till literally the night before the Wedding...
This meant that I was rushing and ended up rushing to get this done and decided that I could cut corners and not remove the seized indicator lenses... Unfortunately this meant I ended up snapping one of the headlight tabs that hold the indicators in, and on the other side the indicator side of the tab. Which meant that the Indicators were (and have been for 2 months now) held in with clear gorilla tape :D.
20231119_100751.jpg 20231122_155404.jpg 20231111_162427.jpg

So now I get to add to the List new indicator lenses and new adjustment / retaining bolts for these!
 
Post wedding, Black Friday came about and the sweet sweet deals sucked me in... Leading to the impulse buy of Ohlins R/T Coilovers, Millway Motorsport top mounts and a CSF Triple Pass Radiator...

Sam being the hero that he is came round and we got the Radiator, Water Pump and Aluminium pulley fitted within a few hours. Things worth noting for anyone looking at either Mishimoto Radiators for an E46 M3, or for an ECS Aluminium Water Pump Pulley, dont use the Mishimoto bolts that come with the kit, the heads are so thin that getting a bite on with a socket is a nightmare. Re the Aluminium Water Pump Pulley, it did not feel any lighter at all against the OEM S54 pulley, dont bother, its purely an aesthetic upgrade!
20231223_094905.jpg 20231223_105703.jpg 20231223_105706.jpg 20231223_105709.jpg 20231223_113259.jpg 20231223_113310.jpg 20231223_113326.jpg

This all went worryingly well so we went on to trying to fit the Ohlins and Ground Control Top Mounts. Unfortunatley we could only get the rear dampers on as I did not realise that when you buy Ohlins, you are supposed to use the OEM Top Mounts on the front. Or if you get Millway Top Mounts then you need to cut apart the OEM Rubbers to make them fit. So I now have these on order from BMW.
On the Rears, I didnt have the tools required to remove the HSD Spring Perches so have also ordered some large Alan Keys to get those off... Will post again once I get the Ohlins on all round, but here are pictures of the rear dampers fitted :D.
IMG-20231223-WA0001.jpg 20231223_144634.jpg 20231223_131002.jpg

On the 1st, the M3 also got a puncture to start the new year right... So its currently running the AR1's all round :cool:.

To Do list:
Spare Parts I have that need fitting:
1. Ohlins Front and Rear
2. New Indicators
3. Valve Cover Gasket
4. Steering Angle Sensor and Purple Tag Rack (Buy a solid steering coupler to install at the same time)

Parts to buy:
1. Radiator Vent Hose
2. Interior Mirror
3. Wing Mirror Glass (both sides)

Other things to do / work out:
1. Have Sam rebuild a full set of e46 m3 calipers I found cheap on ebay.
2. Re Align the front Control Arm Offset Polybushes
3. Re Tap / Re Fit V Brace
4. Replace rusty hardware under the car
5. Have a welder (maybe Sam) look at the Failing Spot Welds and Jacking Points.
6. Deal with the rusty boot area
7. Deal with the front arches starting to rust
8. Bonnet latches are getting very difficult to re latch
 
Bit of an update for anyone wanting to install these yourself here is what you will need to buy and how to put them together:
Ohlins R/T E46 Coilovers
Millway Motorsport Adjustable Camber / Caster Plates
2 x Upper spring pocket w/axial cage bearing (31331090612)
2 x Spring pad upper (31331091233)

You want to install the Shocks/Springs as per the Ohlins Instructions, then the Upper spring pad and cage bearing, then the spring pad, then the Millway top mounts as instructed with the thicker metal shim under the spherical bearing and the thinner one on top, then ugga dugga the top mount on and your good to install the fronts.

I set front and rear to recommended height on the coilovers which looked great on the left hand side, but the right hand side was 9mm lower on the front and 8mm on the rear so something must be up with the chassis. Raised the front right by 5mm (maxed out) and lowered the front left 4mm to even it out. Raised the rear right by 6mm and rear left by 2mm to level it all out.
Wish I could raise the front a bit more so might have to look at making / buying a spacer for the top mounts to get it 1cm higher but will figure that out in the future.

Fit the calipers and brackets that Sam had plated and rebuilt for me (thanks again you Legend!)

Here is a spam upload of a bunch of pictures of the above work.
Will updated again when I have the alignment sorted and get some nice pics of the car before Pod on the 21st :D.
20240125_123906.jpg 20240125_123923.jpg 20240122_163437.jpg 20240122_163432.jpg 20240120_125556 (1).jpg 20240120_145555.jpg 20240210_151846.jpg 20240210_144138.jpg


To Do list:
Have the Car Aligned and Tyres Fitted ready for Pod!

Spare Parts I have that need fitting:
1. New Indicators
2. Valve Cover Gasket
3. Steering Angle Sensor and Purple Tag Rack (Buy a solid steering coupler to install at the same time)

Parts to buy:
1. Radiator Vent Hose
2. Interior Mirror
3. Wing Mirror Glass (both sides)

Other things to do / work out:
1. Re Align the front Control Arm Offset Polybushes
2. Re Tap / Re Fit V Brace
3. Replace rusty hardware under the car
4. Have a welder (maybe Sam) look at the Failing Spot Welds and Jacking Points.
5. Deal with the rusty boot area
6. Deal with the front arches starting to rust
7. Bonnet latches are getting very difficult to re latch
 
Last edited:
Got the M3 aligned by Twiggs on the Sunday before Wednesday's Pod Day, went for Front Camber 2.5, Toe +0.2 and as much caster as possible without rubbing the arch liners (still rubbing a bit), Rear Camber 1.5, Toe -0.1.
Car drives great, good self steer, could do with a bit more but without cutting or raising the front that's not possible, but may be if I get some stiffer springs or have some strut top spacers made, who knows.

Packed the car up on Tuesday night ready for a wet day at pod. I have never run Semi Slicks in the wet, but I know from running them at dry days that they only lasted one session (roughly 5 mins on the Pod Big Track) before being shredded so I loaded the car up with as many as possible (spoiler alert, this was a waste of time, a full day in the wet on 265 AR1's and I could still have driven home on them, but better safe that sorry I guess...)
20240220_202236.jpg

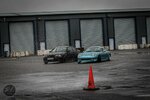
Got to pod in the pouring rain, miserable weather. Unpacked the cars, did briefing and headed out on track. I didn't grid up with Todd or Faisal (both the other drivers I knew on the day) all morning so was just driving on my own / with randoms and to be honest, by Lunch was talking to Sam and Todd and was pretty set on not doing another skid day. The track day at Brands Hatch GP was so much fun despite the car cooking itself constantly, there was less stress on both myself or the car, as much fun and unbelievably cheaper. The morning at pod in the wet was frankly boring. I was driving fine, but it just didn't even feel exciting.

After lunch however this all changed. I lined up with Todd for the first session and chased him. The Turbo MX5 is fast, really fast. But on a wet skid day it is really held back by the 195 road tyres he was running. This however gave me the perfect chance to try my first attempt at really chasing someone and this is when the love for drifting kicked back in. I had the best afternoon of drifting I have had so far, with Sam teaching me how to Left foot break and attempt chasing.

I have not been through all the footage yet from my car or Todd's, but here are some pictures of my first attempt at chasing someone (funny how it feels in car like you are inches from someone, when really you are more like meters...):
IMG-20240222-WA0036.jpg IMG-20240225-WA0003.jpg IMG-20240225-WA0004.jpg TOD_3330.jpg TOD_3331.jpg TOD_3332.jpg TOD_3341.jpg

Once I go through the footage properly I will do a video and link it on here but expect more from the M3 this year. I was kind of falling out of love with the sporty side of the car but this has really put me back in with it :D.

To Do list:
Parts to be fitted that I have:
1. New Indicators
2. Valve Cover Gasket
3. Steering Angle Sensor and Purple Tag Rack (Buy a solid steering coupler to install at the same time)

Parts to buy:
1. Radiator Vent Hose
2. Interior Mirror Glass
3. Wing Mirror Glass (both sides)

Other things to do / work out:
1. Fix the windscreen washer jets which have now decided to just dribble on the windscreen if even anything at all.
2. Re Tap / Re Fit V Brace.
3. Replace rusty hardware under the car.
4. Have a welder (maybe Sam) look at the Failing Spot Welds and Jacking Points.
5. Deal with the rusty boot area.
6. Deal with the front arches starting to rust.
7. Bonnet latches are getting very difficult to re latch.
8. Check and clean all the earths as the Dash and Indicators died after hitting a bump at Pod.
 
Back
Top