You are using an out of date browser. It may not display this or other websites correctly.
You should upgrade or use an alternative browser.
You should upgrade or use an alternative browser.
200sx_
PS13 x TD Power
Thanks for all the positive comments guys! 
As for updates, I'll do one soon. Just delayed parts have hampered progress, combined with the fact my release bearing combination may be too short just delays getting the engine and gearbox into the car.
Ive just gotten my front subframe and lower arms back from Zinc coating, so I can start bolting the front end together and grab some pics for you guys

Andrex
Member
Man this looks like everything I've ever wanted out of a ps!! Jealousy doesn't even come close 
I always thought your s13 looked nuts but this is even better.
I know people may not want to spend the money on their cars but if drift cars looked more like this instead of just your average smashed up bmw, then we may get taken more seriously.

I always thought your s13 looked nuts but this is even better.
I know people may not want to spend the money on their cars but if drift cars looked more like this instead of just your average smashed up bmw, then we may get taken more seriously.
200sx_
PS13 x TD Power
Man this looks like everything I've ever wanted out of a ps!! Jealousy doesn't even come close
I always thought your s13 looked nuts but this is even better.
I know people may not want to spend the money on their cars but if drift cars looked more like this instead of just your average smashed up bmw, then we may get taken more seriously.
Read through from start to finish slowly while on my 8hr shift at work, such a good read and awesome ride. Nice job on doing it proper too in every way. Keep updates coming and plenty of pictures.
Woah thanks guys, really appreciate the comments! I totally agree Andrex, for me and quite a few others ‘im sure we all share the same opinion that a drift car can be presentable and yet still driven hard!

So firstly I apologise for the lack of updates, quick a bit has happened I suppose but not without its fair share of problems

So after the last update, a few of us were speaking about the rear traction rod length, where common practice leads to people replacing them, but keeping them at stock length. A friend explained how the length determines the dynamic movement of the alignment throughout the compression stages of the rear hub (I think I have that right haha). I was supposed to sit down and have a look for myself, but I kinda got lazy and my friend told me the length he extends his to, and considering he’s driven a fair bit, I trust him!
The interesting thing that caught my attention was how the rear wheels suddenly sat;
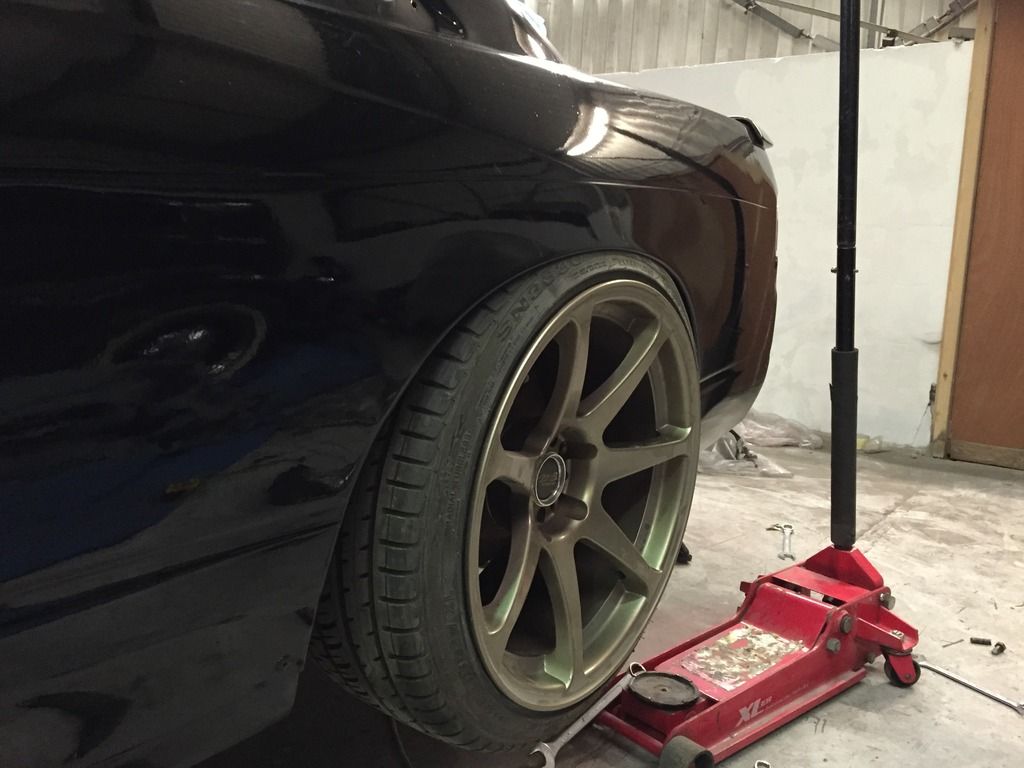
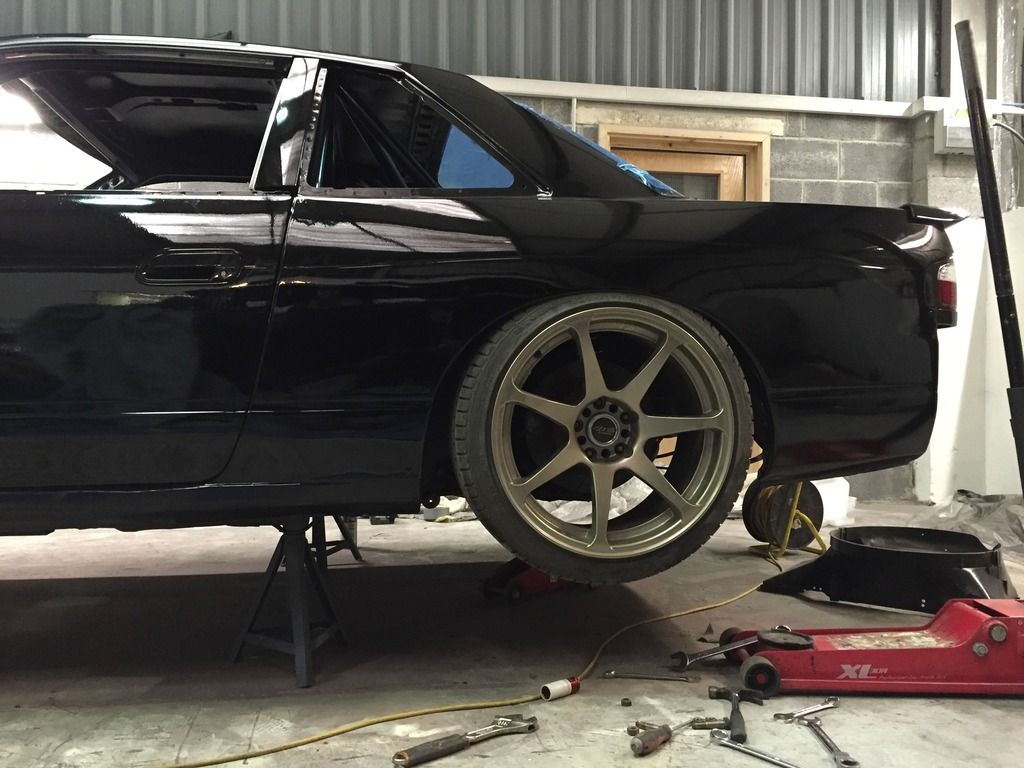
Time will tell what difference this will make to improving the rear end, but considering the extensive changes between my old 13 and this car, I may not be able to give a direct comparison as so much has changed, it’s literally a whole different car!

As im running a swirl pot and fuel pump in the boot, something I always want to make up was a firewall of somekind, so after quickly knocking up a few idea’s, I just went and made a dead simple one.
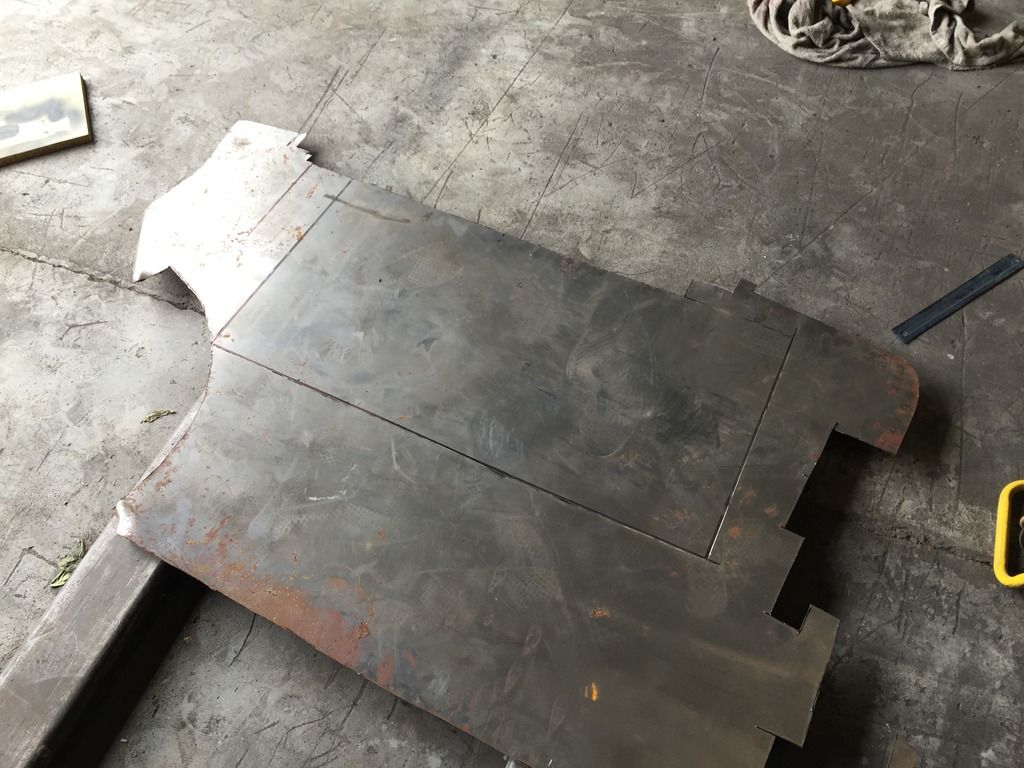
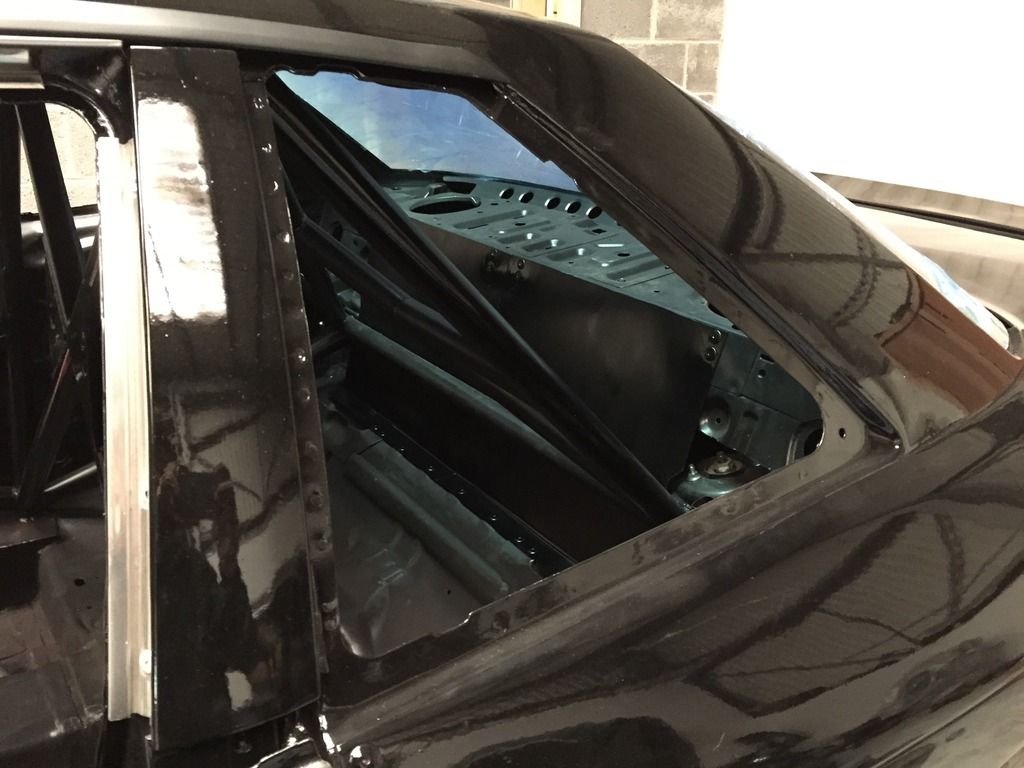
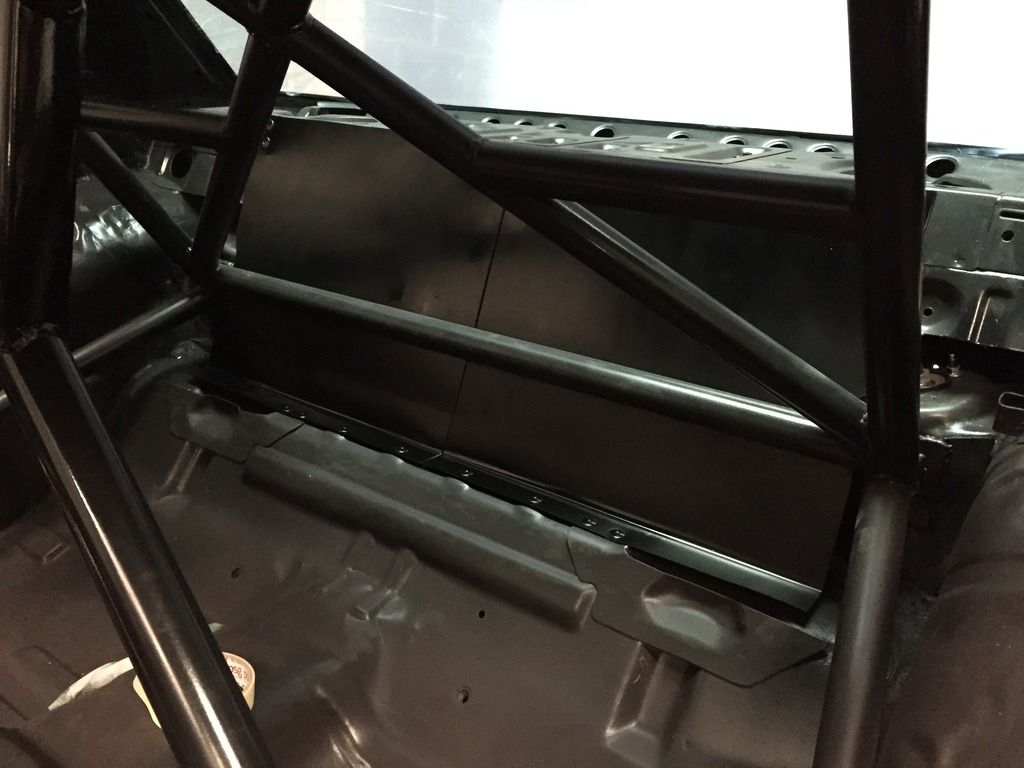
It wont be up to BDC and other motorsport regs as the rear isn’t completely sealed off, but IF that time ever comes, im sure I could make another firewall that would be compliant. But for now, if something comes loose in the rear, there’s something inbewteen us
 Plus, it should help dampen the noise the 044 may create too.
After following Daze’s car closely and looking at his power steering setup, it made me want to run a power steering cooler to prevent the fluid from boiling over. After looking at his setup, a -6 cooler was needed. So after trying to avoid buying an unnecessarily large core, I managed to find this;
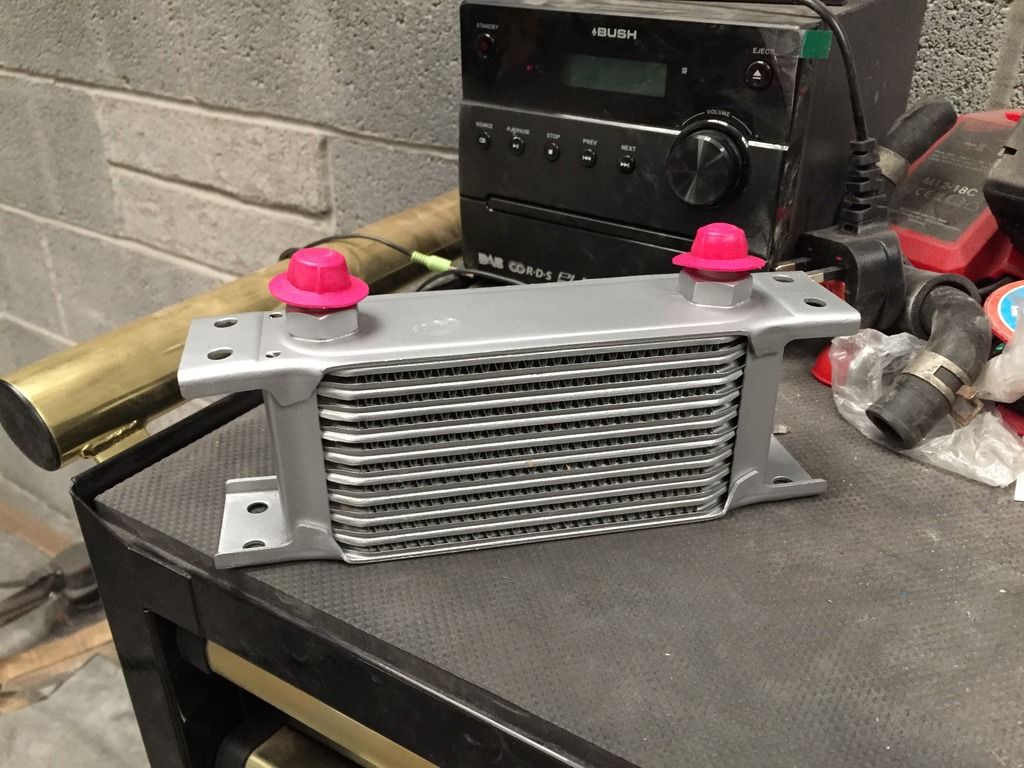
Perfect!
200sx_
PS13 x TD Power
Since the cage went in, everything was painted it was now time to start the assembly phase. So first things first, the heater matrix. Huxley said to me I’d never get the end heater matrix/core in due to the triangulation of the cage to the front struts, challenge accepted!
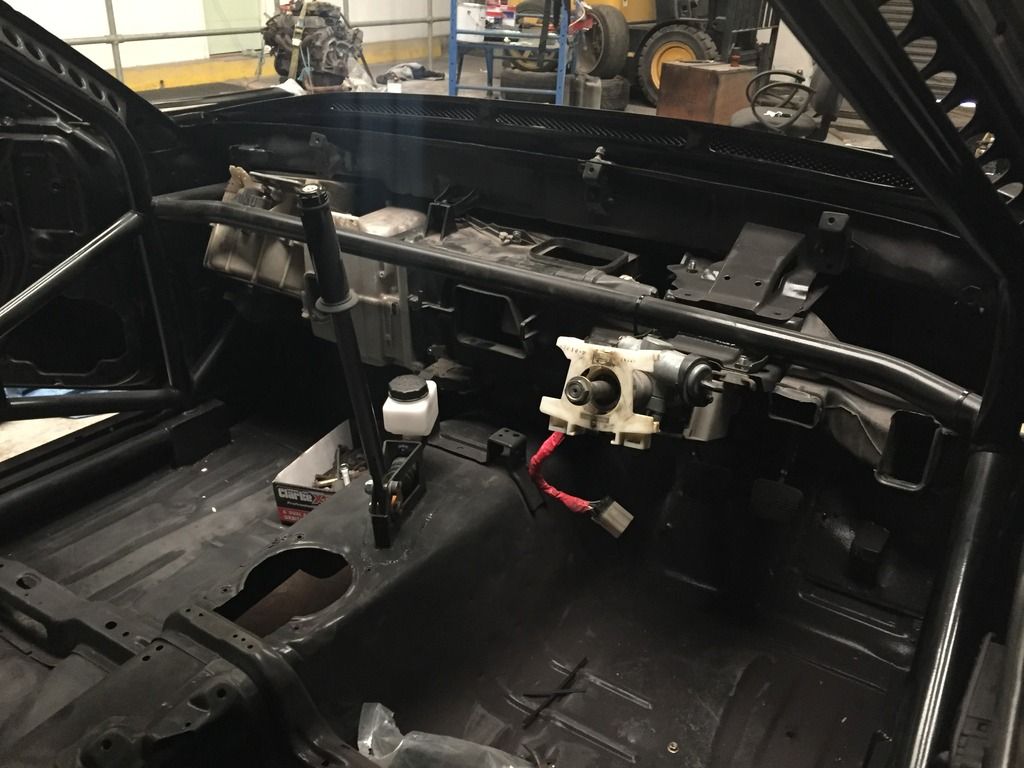
After a few nudges here (with some added cuts), and a kick there it went straight in! So atleast I can retain a fully functional heater setup
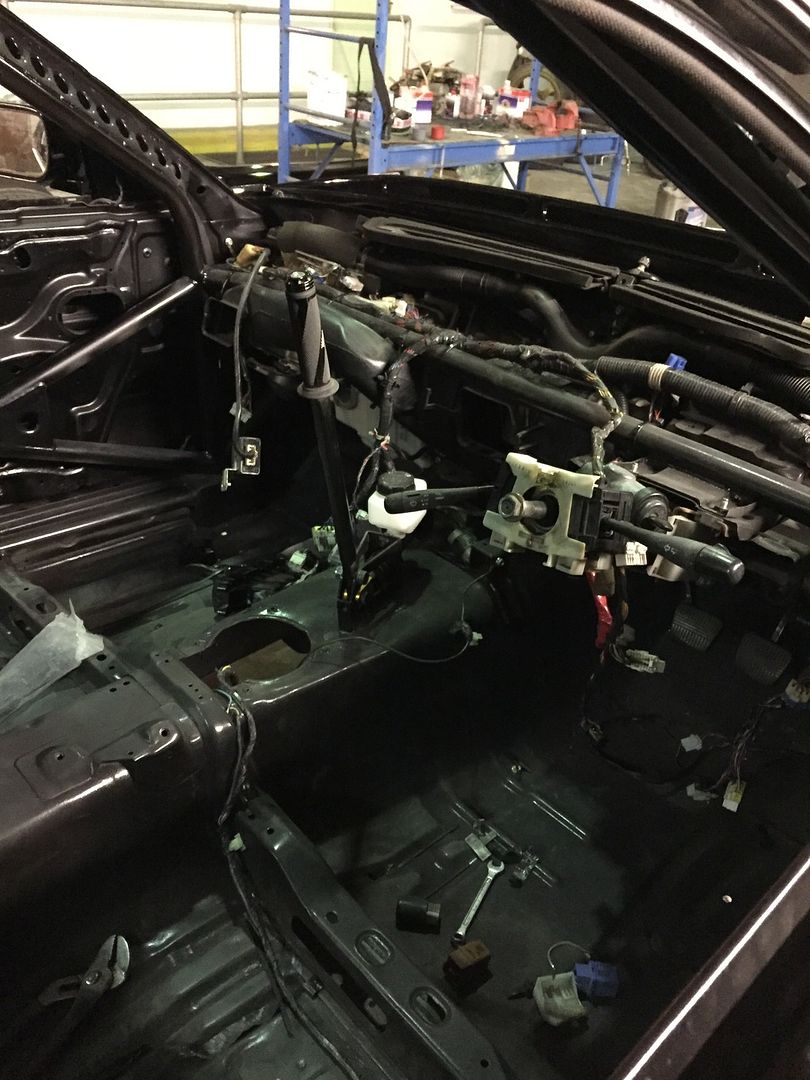
I started speaking to Norfy about my wiring, as the car will have the bare essentials as its not likely itll see the road in the near future. So after speaking to him one evening I began cutting down this mess, and had a date night with the car whilst I was there. (Im 21, I should be out drinking, partying or whatever my friends do! Nope, im just sat there with a car that tests my patience constantly )
)
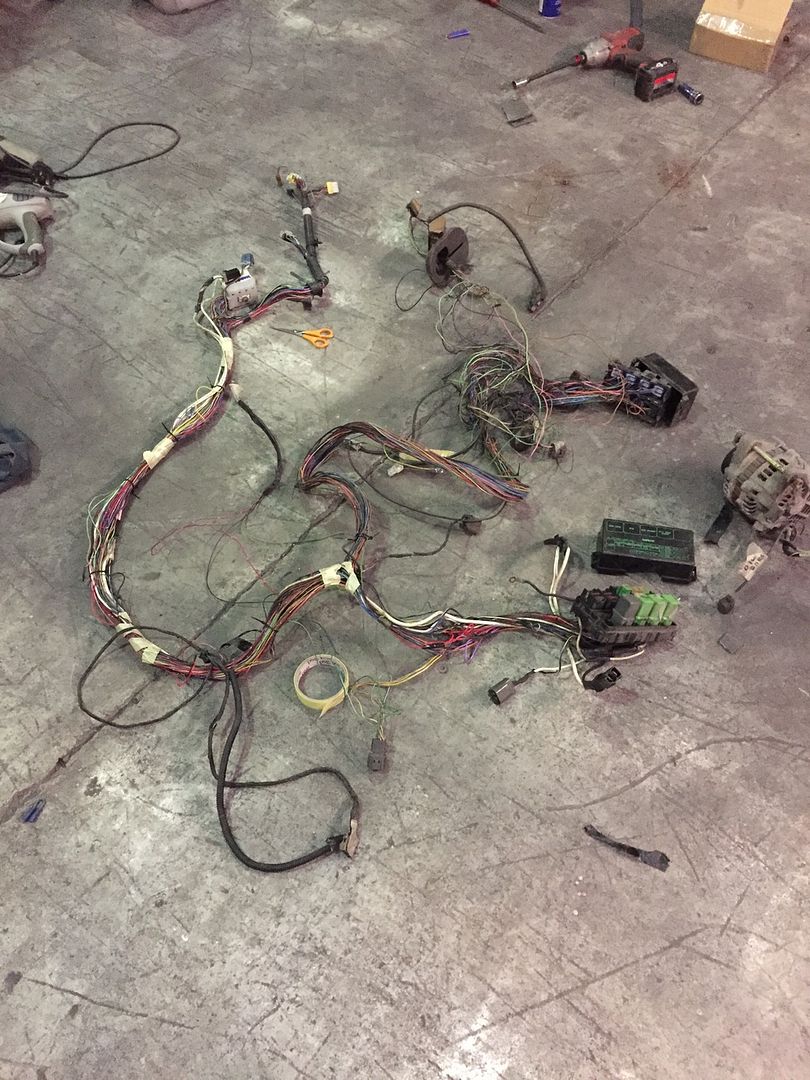
Interior harness in
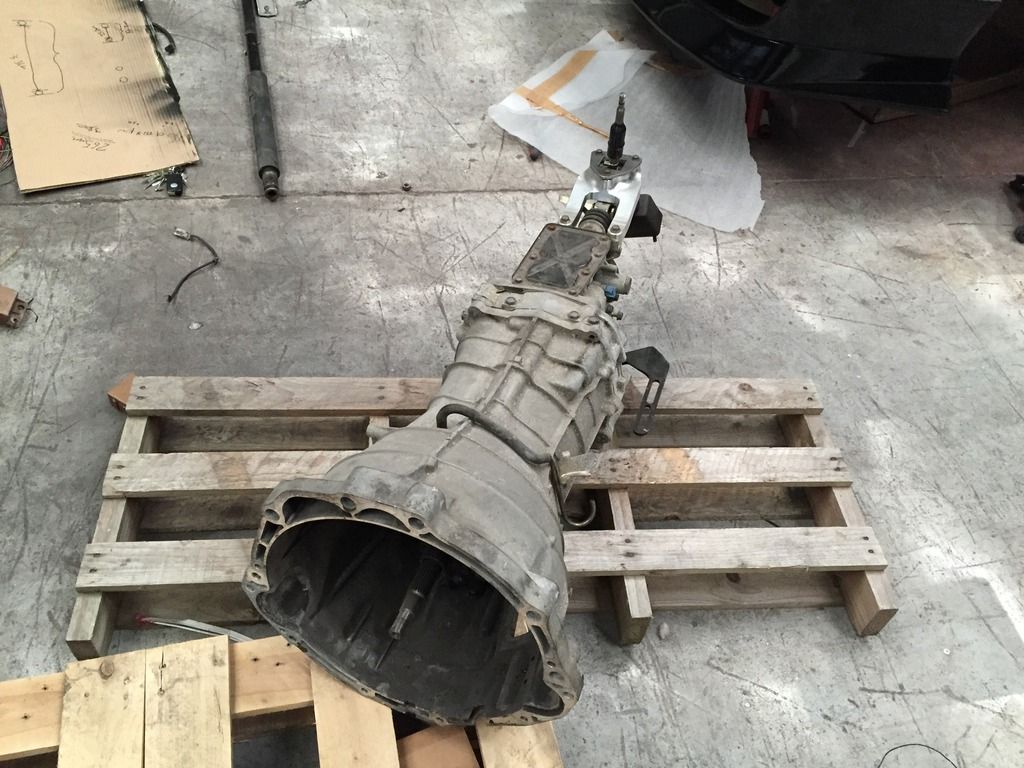
Now for something I wasn’t really looking forward to. For the SR/Z33 gearbox conversion, with the use of an adapter plate you can either chose an S15 clutch and flywheel and leave the bellhousing, or use an S14 clutch setup like I have, and get the bellhousing machined.
So here’s what I started with, 1x Z33 CD009 gearbox.
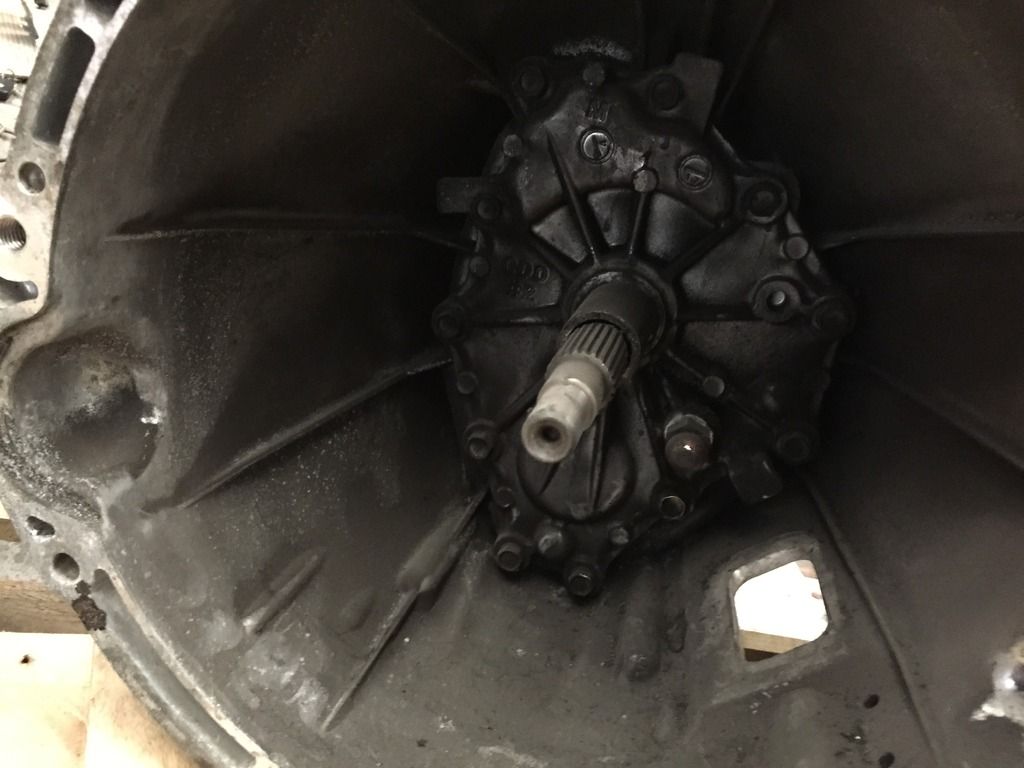
First things first, remove the front cover and 2 circlips;
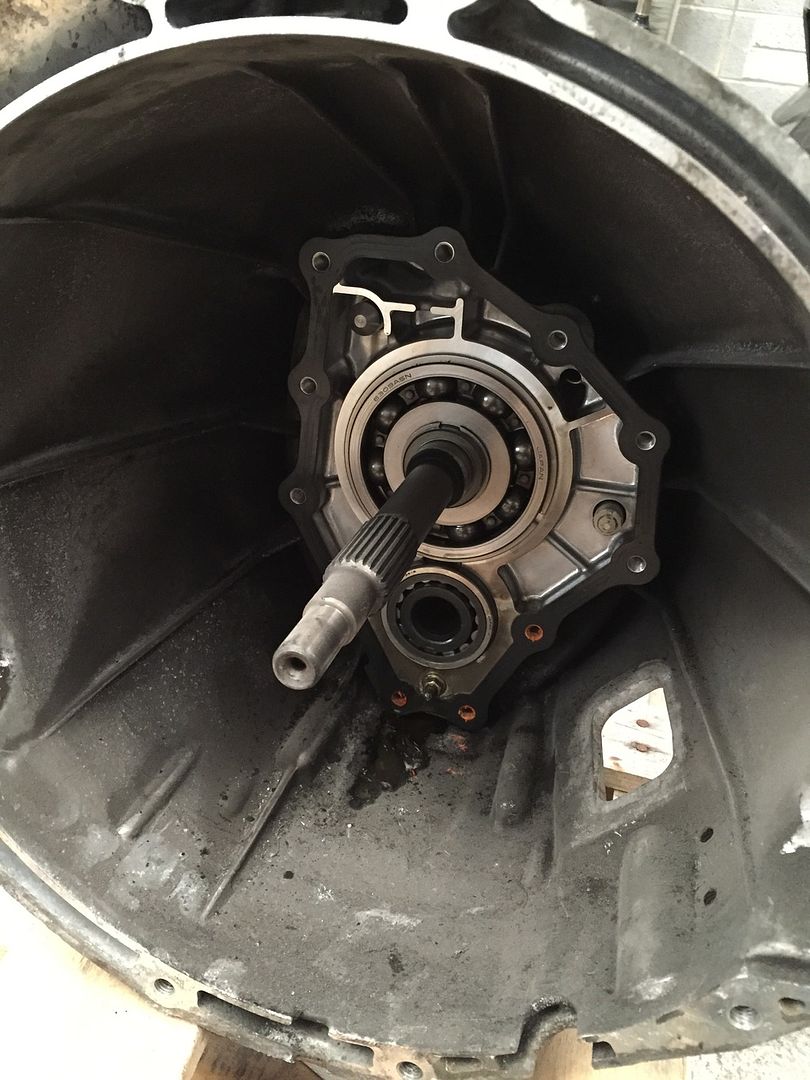
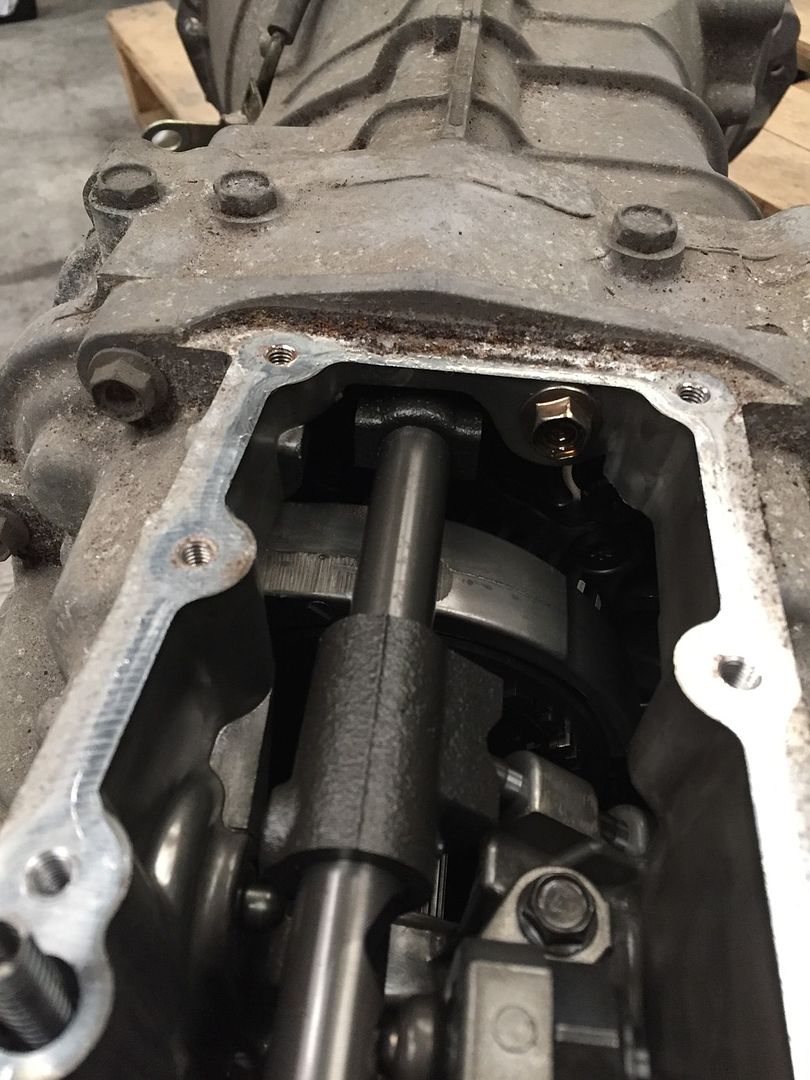
Now its time to remove the obvious bellhousing bolts that essentially sandwich the two halves of the gearbox. Luckily a bit of searching online the day before meant I didnt forget this little one that’s hidden under the plate that covers the shifter mechanism;
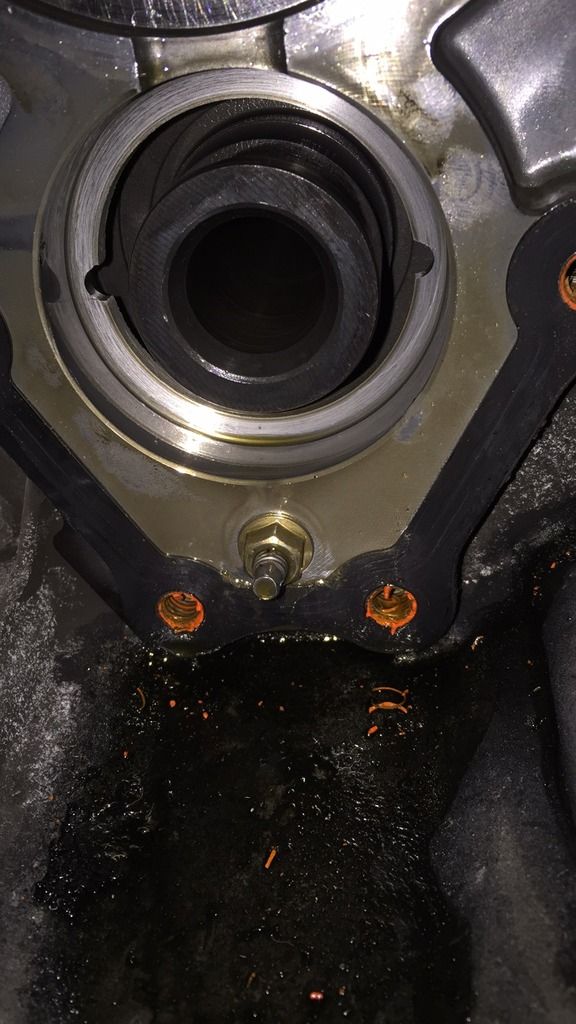
So now it should be ready to simply pull the bellhousing off. After softly prying the bellhousing, it began to move and then stopped. After pulling my hair out a friend told me about a small 10mm nut that holds the windage tray (?) behind where the front cover usually is!
And then, POW!
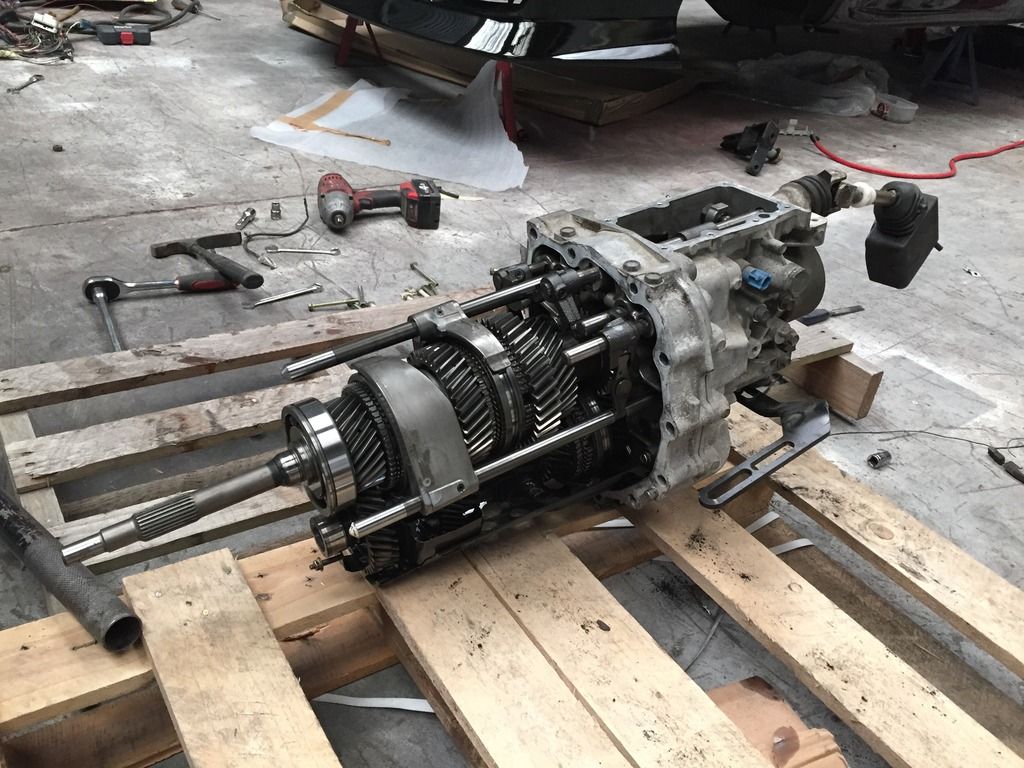
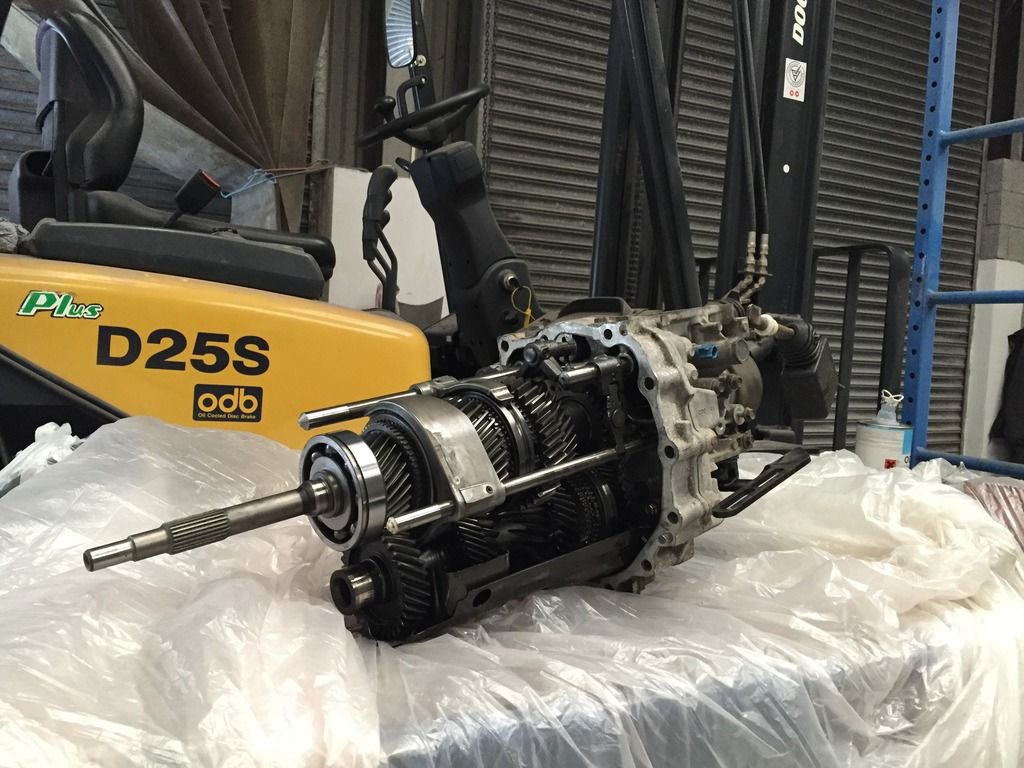
Its hard to get a sense of scale from pictures, but the size of the gears in comparison to a small casing gearbox i.e. SR20/CA18/RB20 is just phenomenal. Oh, and it’s the first time I’ve seen inside the gearbox, so its nice to know all the gears have teeth haha!
The bellhousing itself creates a problem due to the sheer size of it, meaning now any old machine shop will be able to mill the bellhousing. Luckily enough my friend and engine builder came to the rescue and he knew a guy that could
- - - Updated - - -
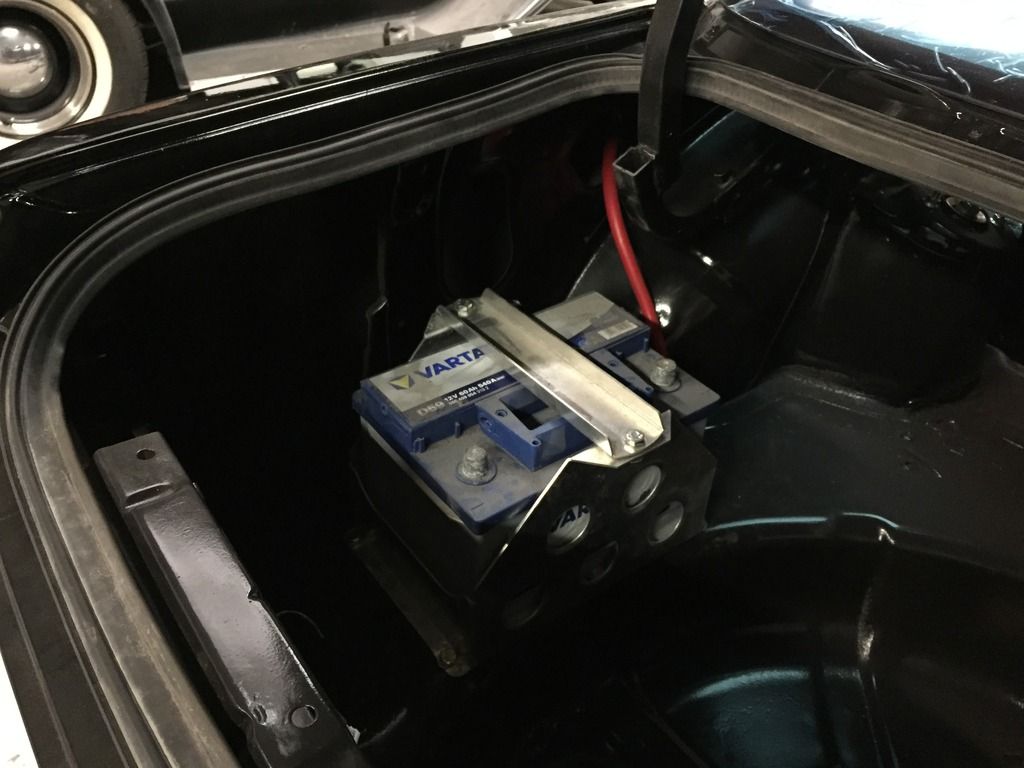
Anyway, back to the car. I relocated the battery to the passenger side of the boot. I thought about having it behind the drivers seat like I did in my old car, but I suppose it could become a deadly object should it come loose, so in the boot it went. And luckily enough it seems like the BMW 540 battery cable I used to use still reaches the dashboard area which is where im hoping to run the front chassis/engine bay loom, ideal!
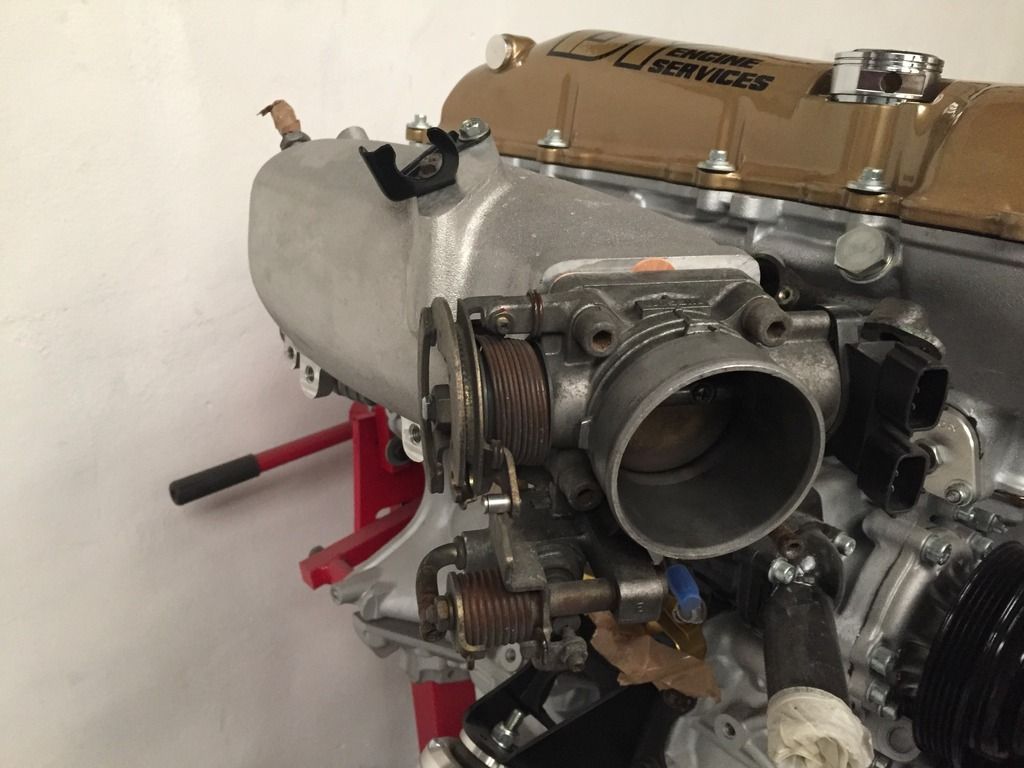
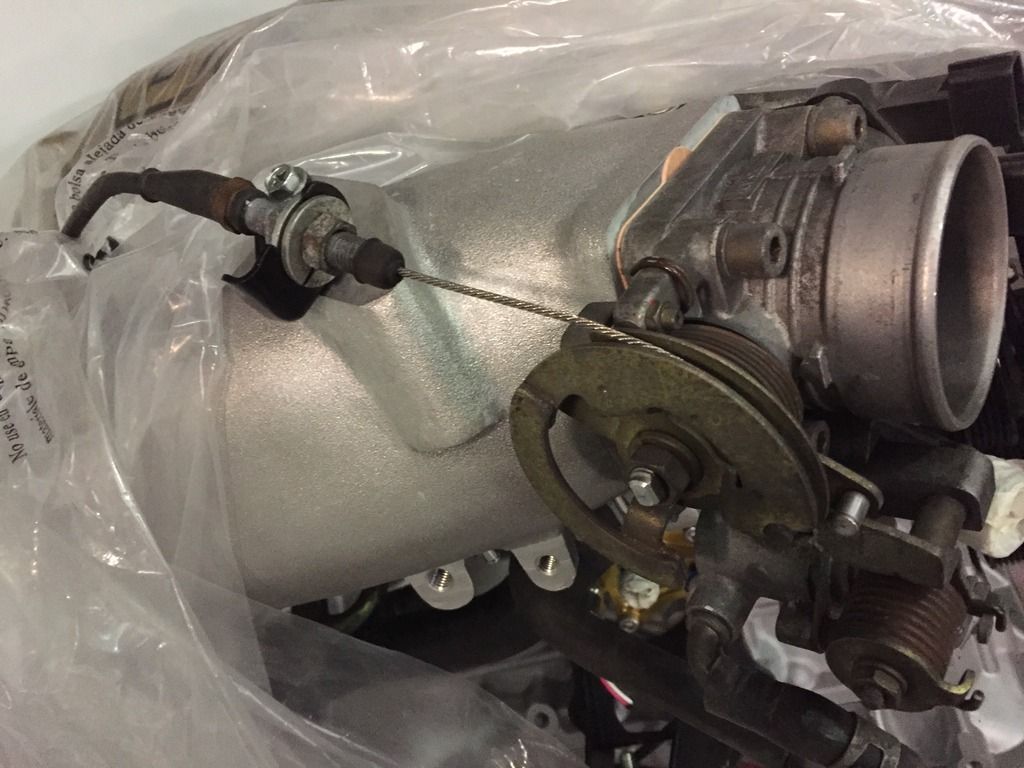
I finally installed the S14 N/A throttlebody too, something that doesn’t look very fancy haha
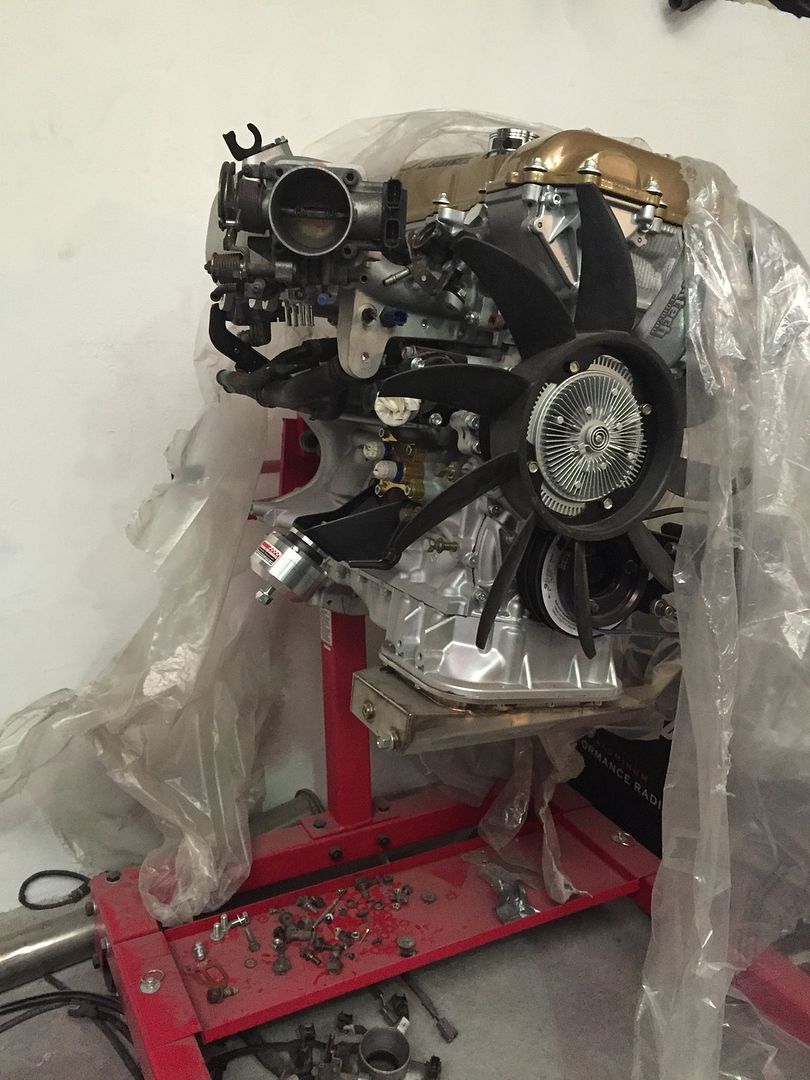
For those that don’t know, when installing the Tomei Oil Block, it ditches the OEM oil/water element, which means the original heater hoses don’t exactly work. After a speaking to a friend whos done the same thing, I went a similar route, which was to simply block off a water way on the block, and the associated connection on the heater side;
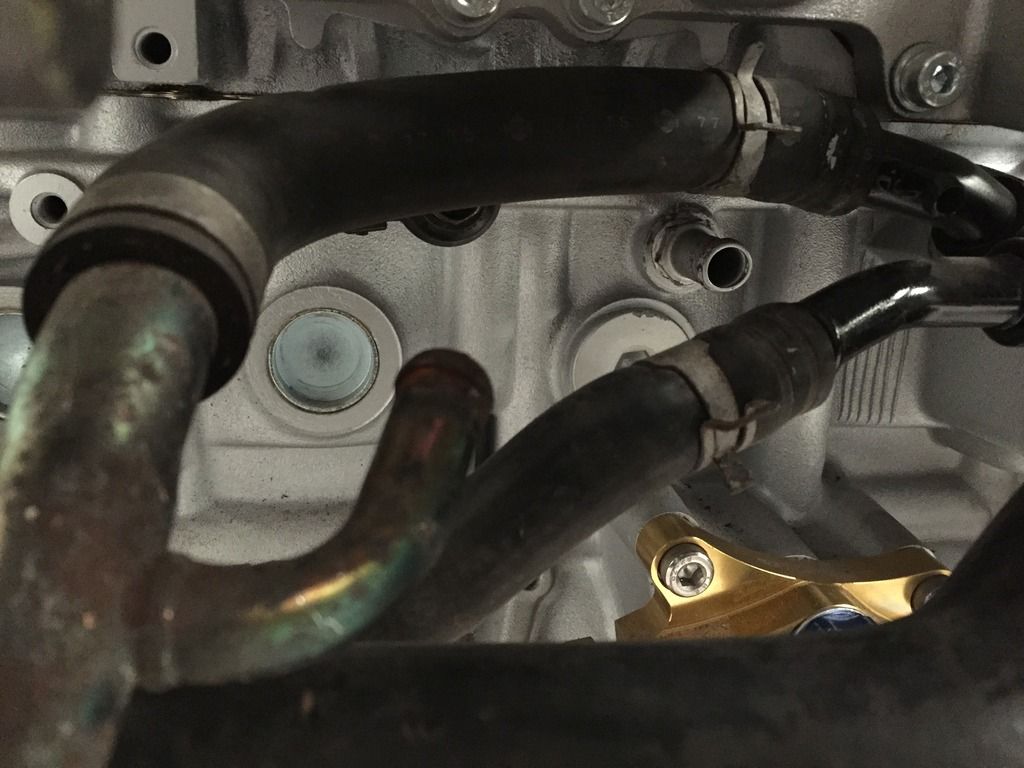
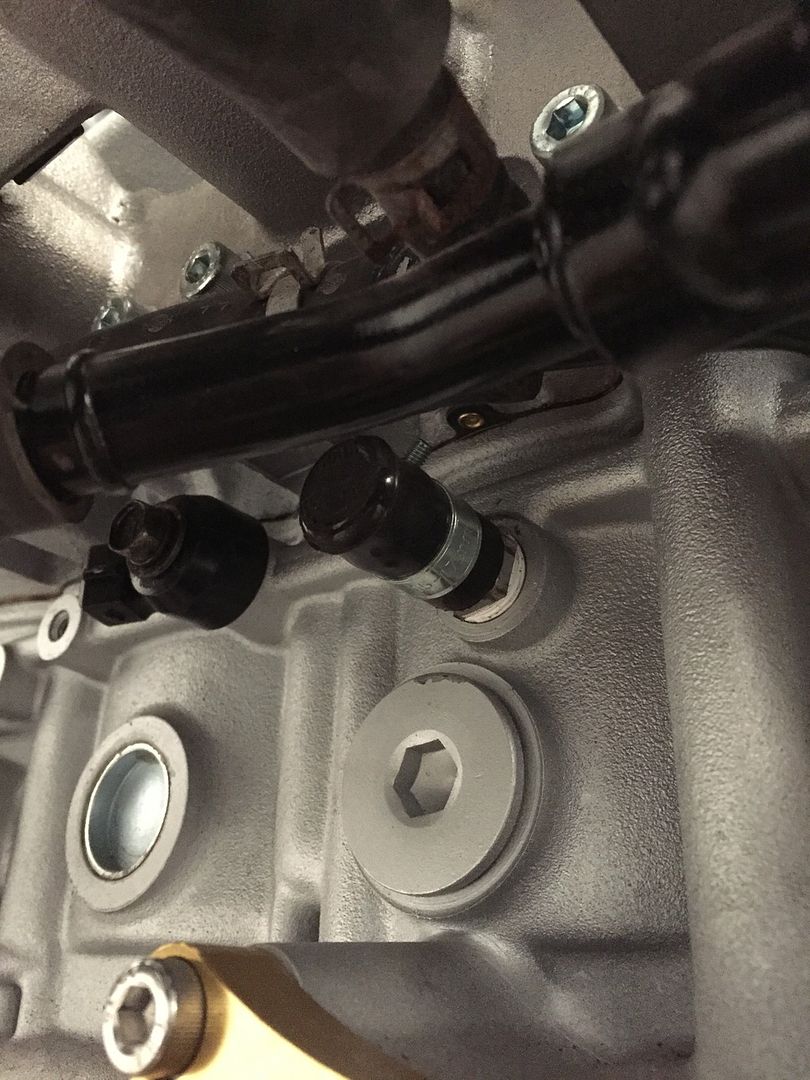
Simple, but avoids having a hose that is massively kinked.
Surprise surpise, I came across another issue, something that shouldn’t have really happened in my eyes. Greddy provided tabs with the inlet to retrofit the standard fuel rail, but for some reason my fuel rail seemed to pull the top of the o-rings as its get bolted down.
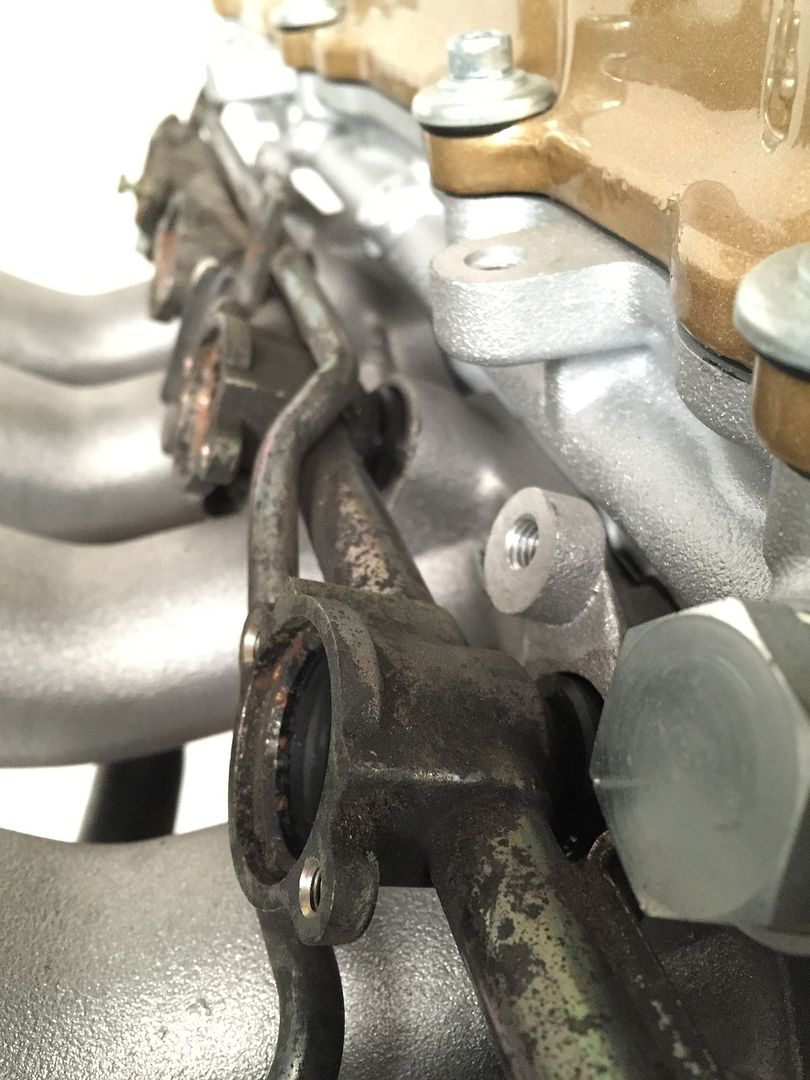
A solution could’ve been to weld some tabs on the rail to other mounting points to pull the top of the o-ring back in. But I cant weld so that option is useless to me. So a friend hooked me up a killer deal on a Mazworx top feed fuel rail and a set of injector Dynamics 1000cc injectors, a bit overkill for the TD06L2, but definitely future proof should I fancy a change to something a bit bigger and begin to push the engine.
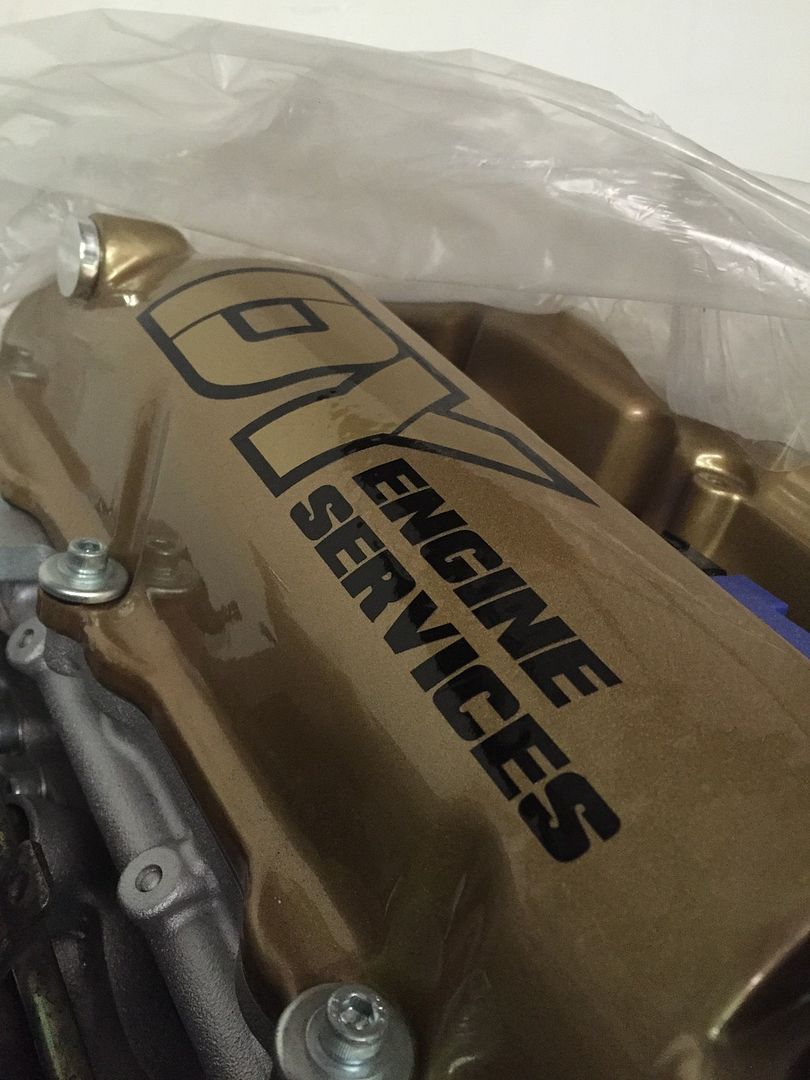
I know I whore the engine off wayyyyyy to much, but I just cant get over how good it looks in the flesh! Suppose its down to this guy though

After a few nudges here (with some added cuts), and a kick there it went straight in! So atleast I can retain a fully functional heater setup

I started speaking to Norfy about my wiring, as the car will have the bare essentials as its not likely itll see the road in the near future. So after speaking to him one evening I began cutting down this mess, and had a date night with the car whilst I was there. (Im 21, I should be out drinking, partying or whatever my friends do! Nope, im just sat there with a car that tests my patience constantly
 )
)

Interior harness in


Now for something I wasn’t really looking forward to. For the SR/Z33 gearbox conversion, with the use of an adapter plate you can either chose an S15 clutch and flywheel and leave the bellhousing, or use an S14 clutch setup like I have, and get the bellhousing machined.
So here’s what I started with, 1x Z33 CD009 gearbox.

First things first, remove the front cover and 2 circlips;


Now its time to remove the obvious bellhousing bolts that essentially sandwich the two halves of the gearbox. Luckily a bit of searching online the day before meant I didnt forget this little one that’s hidden under the plate that covers the shifter mechanism;

So now it should be ready to simply pull the bellhousing off. After softly prying the bellhousing, it began to move and then stopped. After pulling my hair out a friend told me about a small 10mm nut that holds the windage tray (?) behind where the front cover usually is!

And then, POW!


Its hard to get a sense of scale from pictures, but the size of the gears in comparison to a small casing gearbox i.e. SR20/CA18/RB20 is just phenomenal. Oh, and it’s the first time I’ve seen inside the gearbox, so its nice to know all the gears have teeth haha!
The bellhousing itself creates a problem due to the sheer size of it, meaning now any old machine shop will be able to mill the bellhousing. Luckily enough my friend and engine builder came to the rescue and he knew a guy that could

- - - Updated - - -
Anyway, back to the car. I relocated the battery to the passenger side of the boot. I thought about having it behind the drivers seat like I did in my old car, but I suppose it could become a deadly object should it come loose, so in the boot it went. And luckily enough it seems like the BMW 540 battery cable I used to use still reaches the dashboard area which is where im hoping to run the front chassis/engine bay loom, ideal!

I finally installed the S14 N/A throttlebody too, something that doesn’t look very fancy haha


For those that don’t know, when installing the Tomei Oil Block, it ditches the OEM oil/water element, which means the original heater hoses don’t exactly work. After a speaking to a friend whos done the same thing, I went a similar route, which was to simply block off a water way on the block, and the associated connection on the heater side;


Simple, but avoids having a hose that is massively kinked.

Surprise surpise, I came across another issue, something that shouldn’t have really happened in my eyes. Greddy provided tabs with the inlet to retrofit the standard fuel rail, but for some reason my fuel rail seemed to pull the top of the o-rings as its get bolted down.

A solution could’ve been to weld some tabs on the rail to other mounting points to pull the top of the o-ring back in. But I cant weld so that option is useless to me. So a friend hooked me up a killer deal on a Mazworx top feed fuel rail and a set of injector Dynamics 1000cc injectors, a bit overkill for the TD06L2, but definitely future proof should I fancy a change to something a bit bigger and begin to push the engine.
I know I whore the engine off wayyyyyy to much, but I just cant get over how good it looks in the flesh! Suppose its down to this guy though


200sx_
PS13 x TD Power
Next, I began to attack the front end. Quickly mocked the coilovers up and wound them down a bit from where they were to compensate for the Geomaster’s but to allow for a further drop to reduce some of the reverse rake I had.
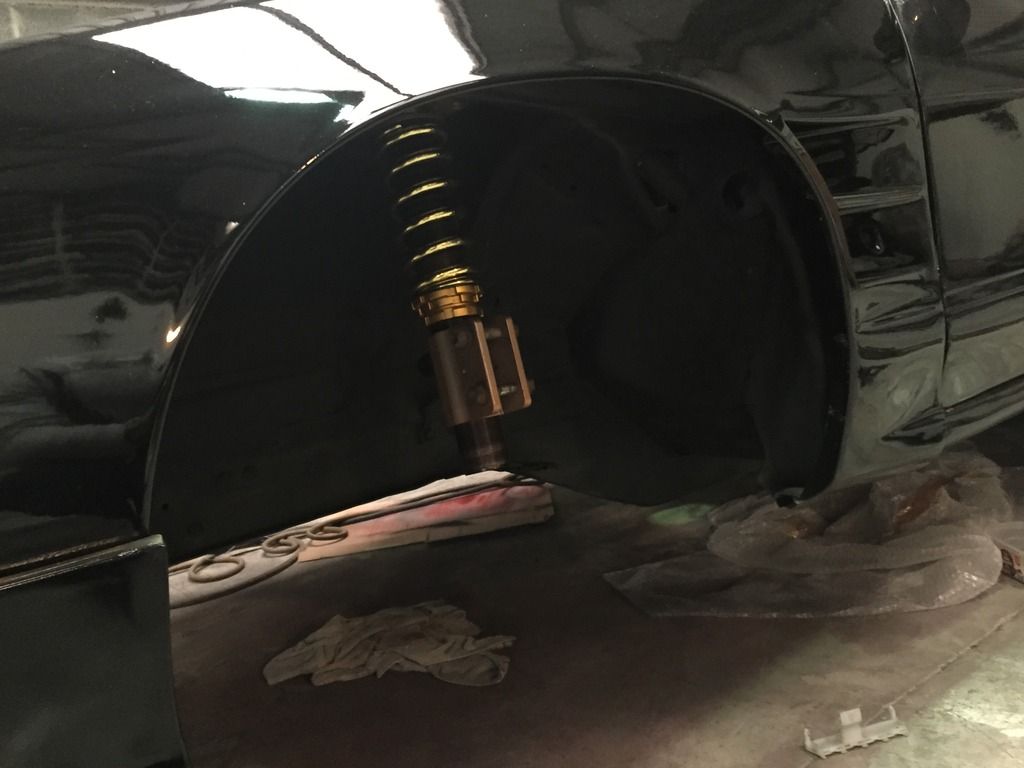
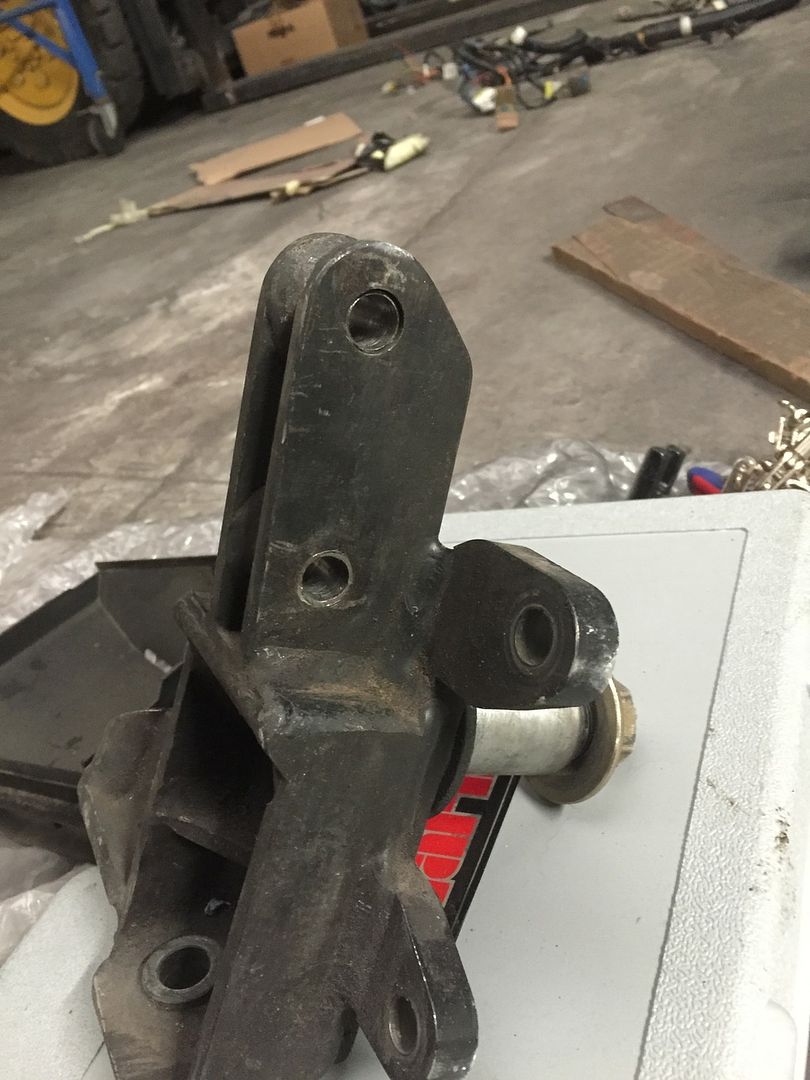
You’d have thought these 2 parts would bolt together nicely, wouldn’t you? Nope. It seems the mounting brackets on the coilover are just chunky enough that the bottoms foul on some welds on the Geo. So I slowly ground/chamfered the bottom edges of the coilover brackets, which luckily enough didn’t take much until both sides just slid on
(It was horrible taking a grinder to brand new coilovers! )
)
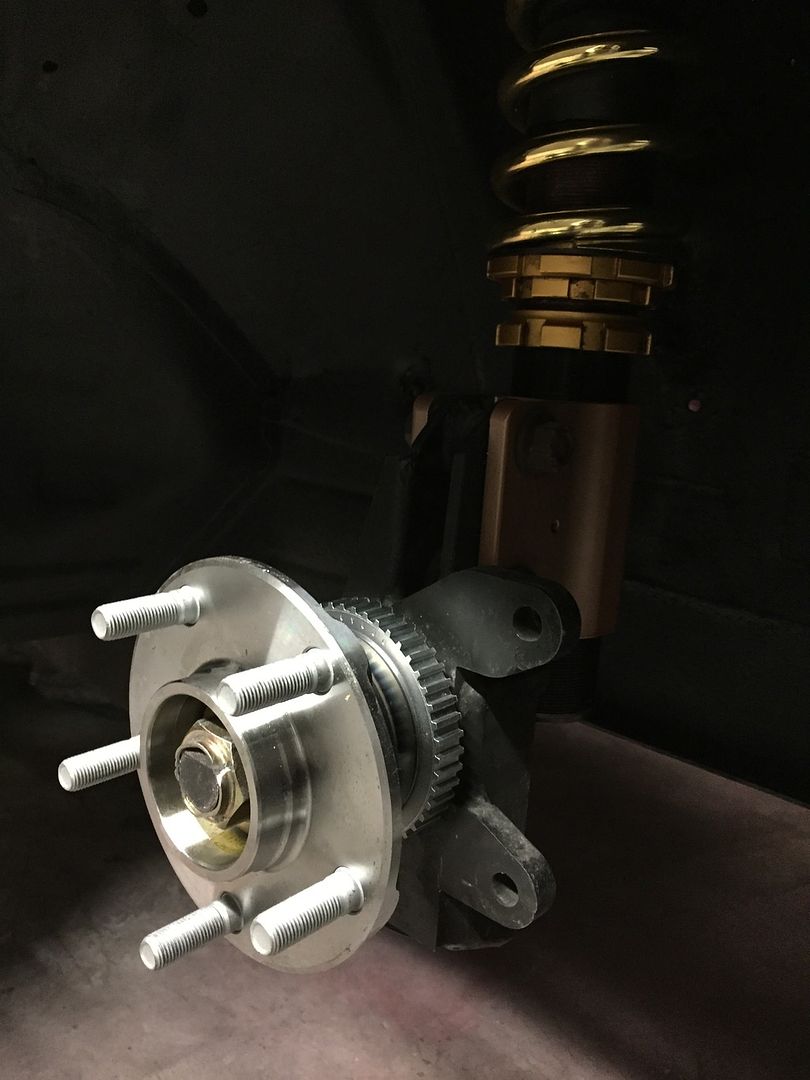
I quickly threw in the Defi water temp sensor whilst I was playing around with the engine, such a neat idea to have the sensor here, rather than cutting into the top radiator hose.
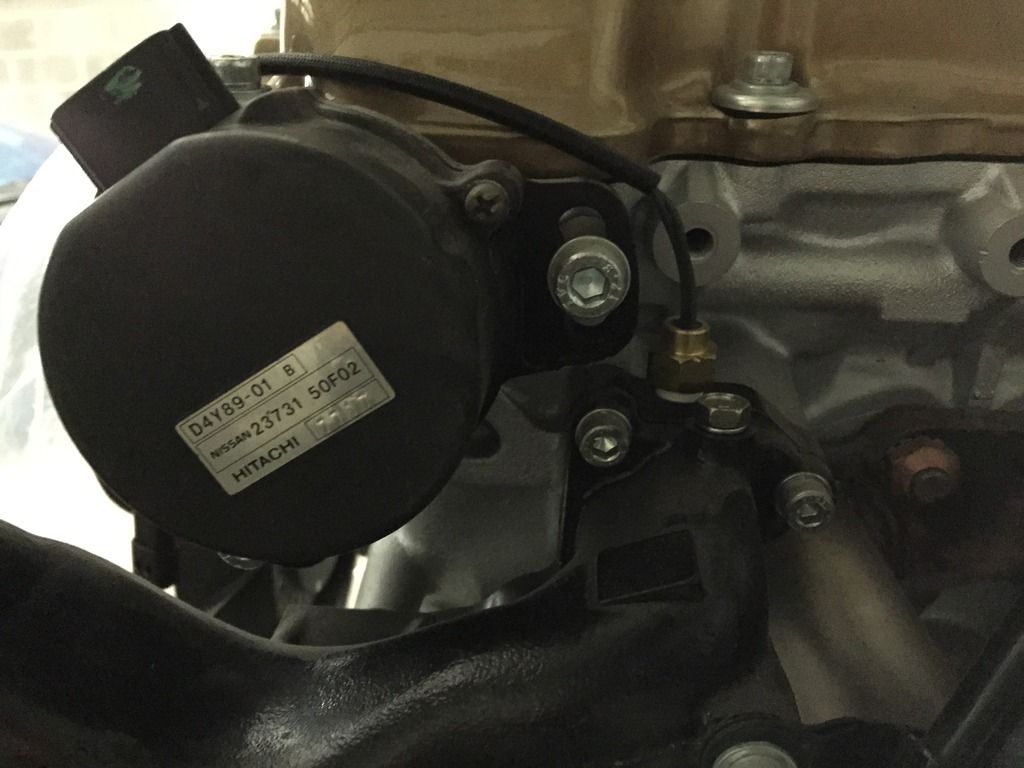
I went to go an tension the power steering pump, but upon its maximum adjustment the belt was still slack, great. Quickly dropped Tarrks an email and it seems it was simply an honest mistake of the wrong belt being shipped to me. Phew, atleast it’s a simple solution. Seeing as they are based in Australia, It didn’t make sense to ship a generic belt across the world, so they’ve given me the part number of the belt I need which doesn’t cost much at all. Thumbs up to Tarrks though, speedy and helpful response
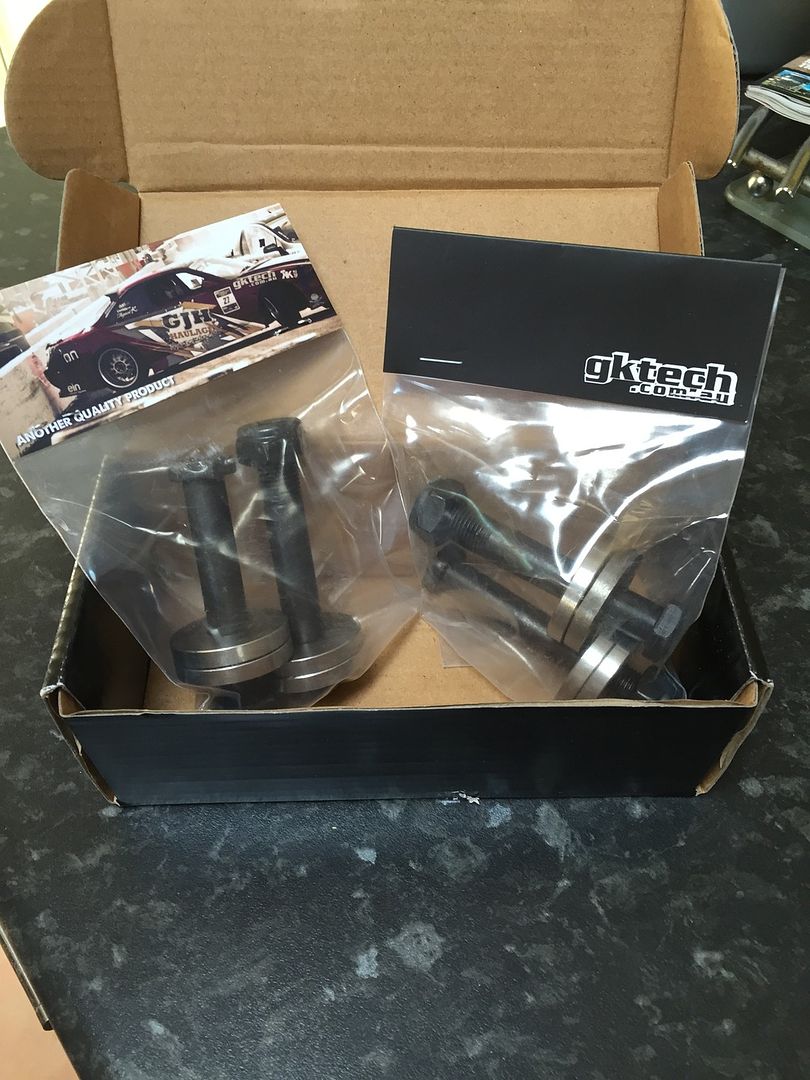
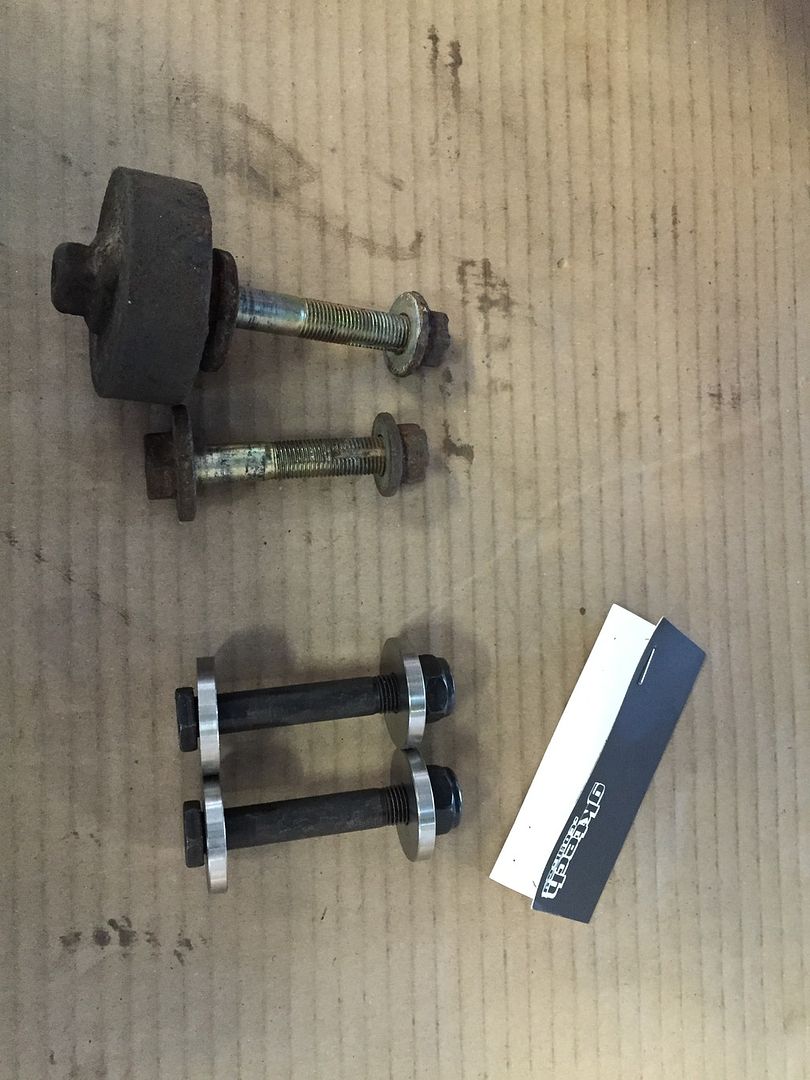
Something that I’ve always wanted to do was to ditch the OEM eccentric bolts on the rear alignment arms. This is something a few of us spoke about before, where we talked about getting something made up. But seeing as nothing came of that, I went and bought GKtech’s kit for the S13 setup;
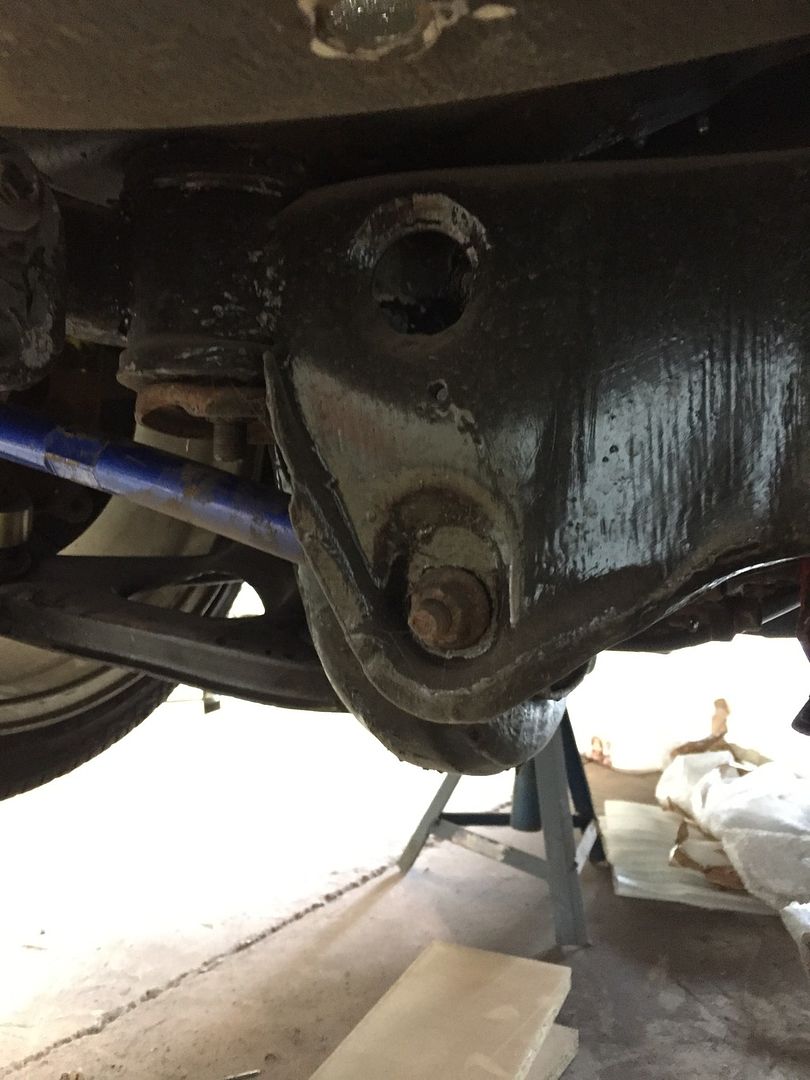
Before;
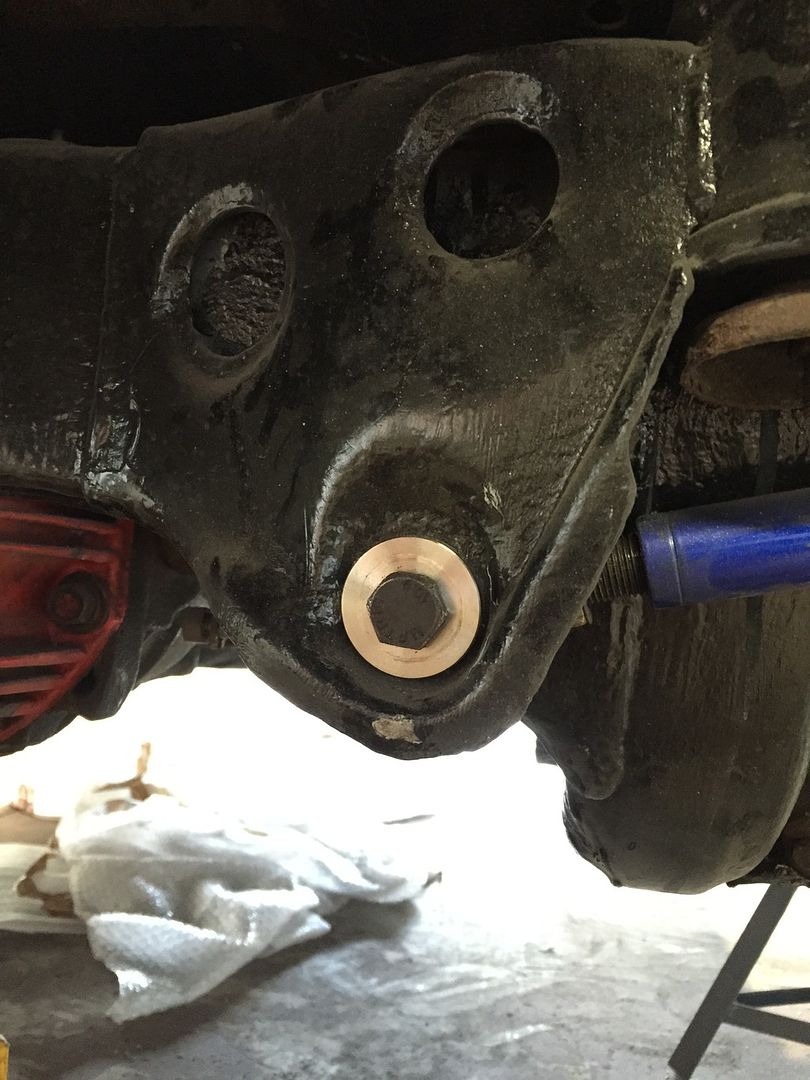
After;
Comparisons between OEM and the GKTech eccentric lockout kit;
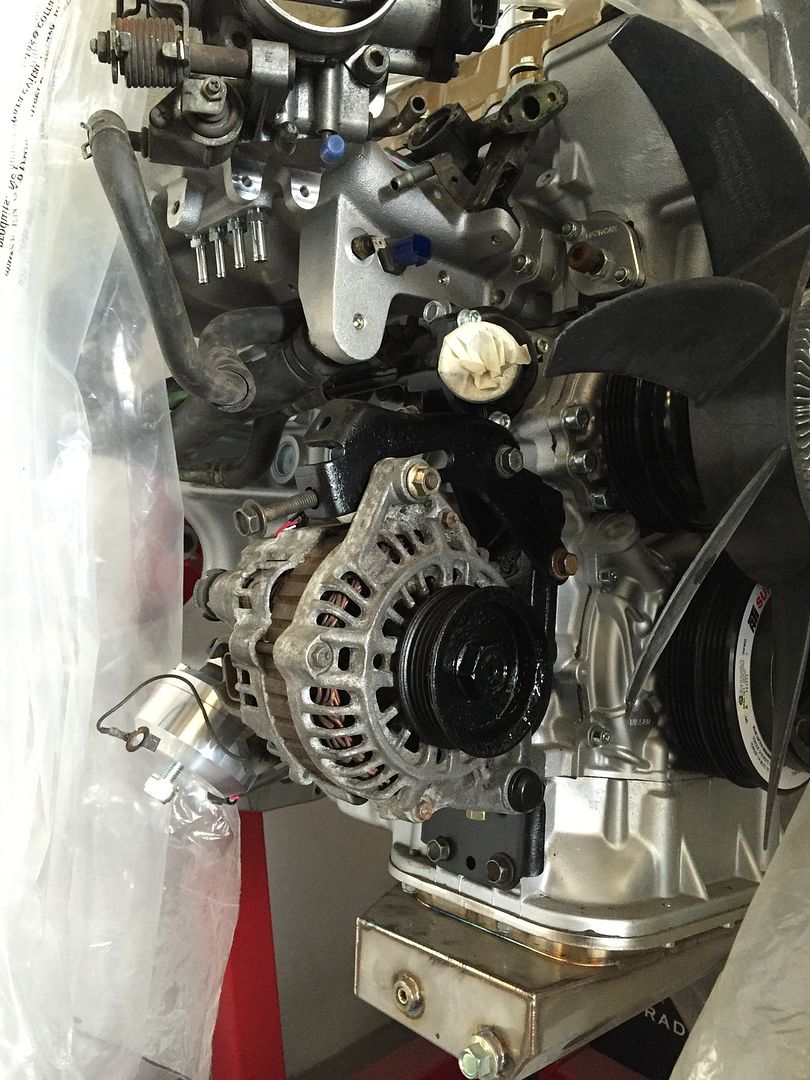
Gave the alternator a quick clean, and quickly slapped some paint on the pulley (I mean quickly slapped haha. I was in a rush, and the paint on the pulley before was dreadful. Luckily enough itll be hidden anyway )
)
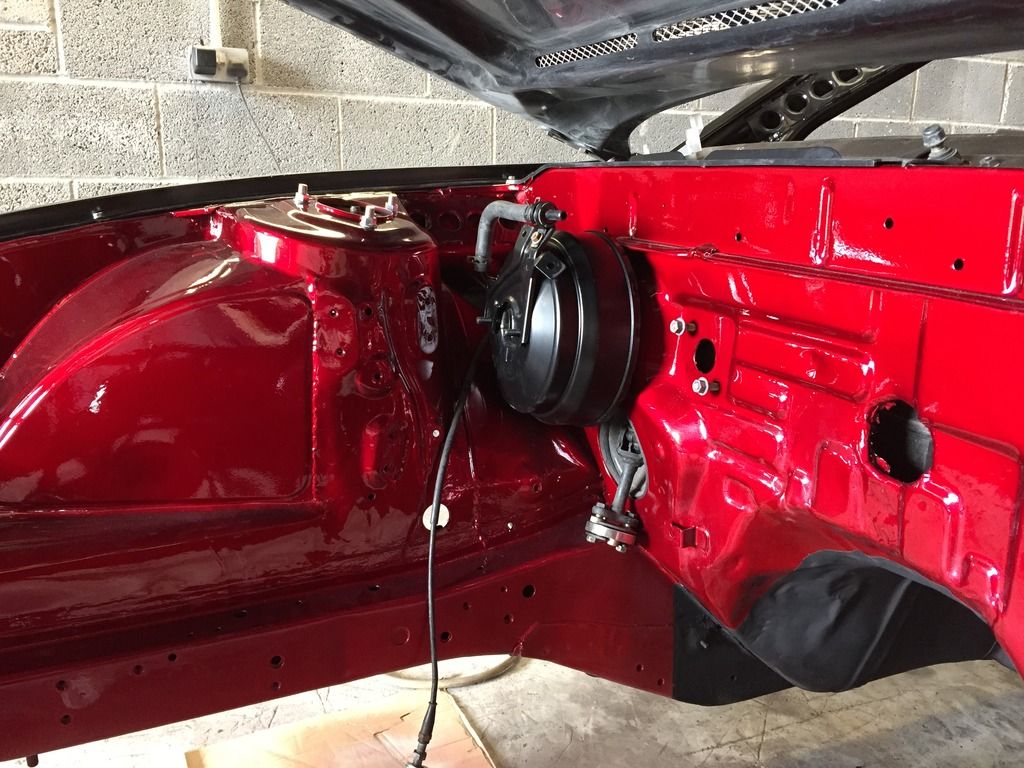
Threw the servo that the PS came with on, which to my understanding is an ABS servo due to the additional thickness? The reason I’m favouring this servo is that my old one was full of a dark liquid, which I can only guess as break fluid, suggesting my old BMC was leaking. No biggie, as I’m planning on switching BMC’s due to the new brakes anyhow.
- - - Updated - - -
I mounted the Tomei FRP too. I wanted it out of the way, but still easyily enough to read the gauge. So I chose to mount it beside the brake servo;
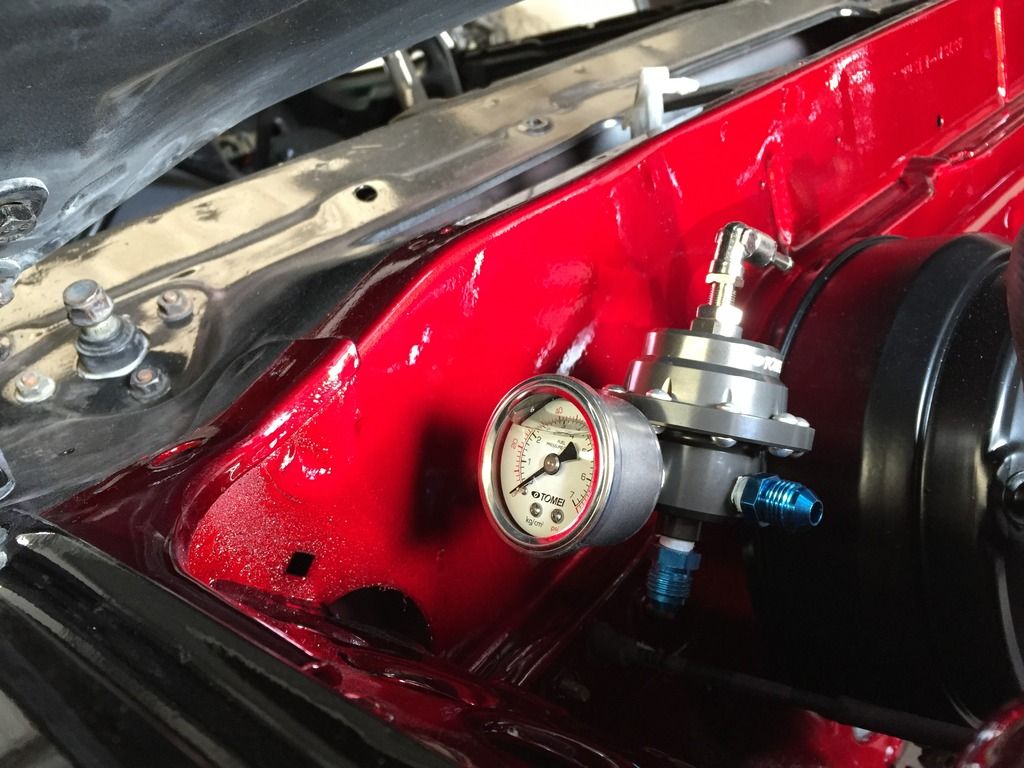
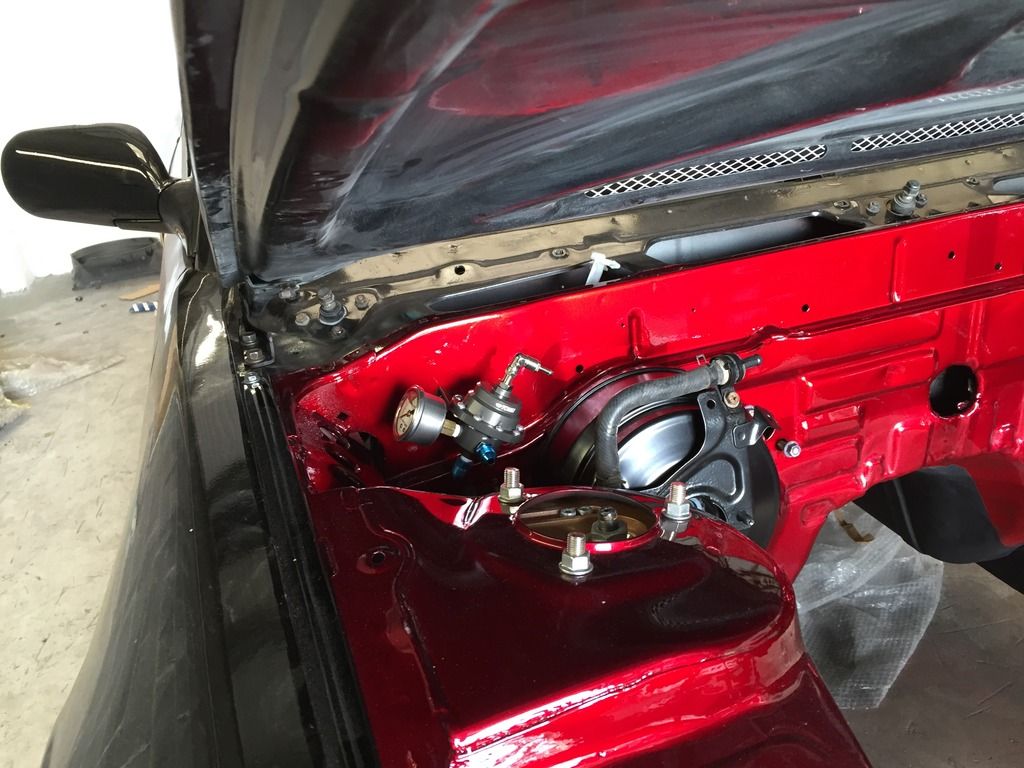
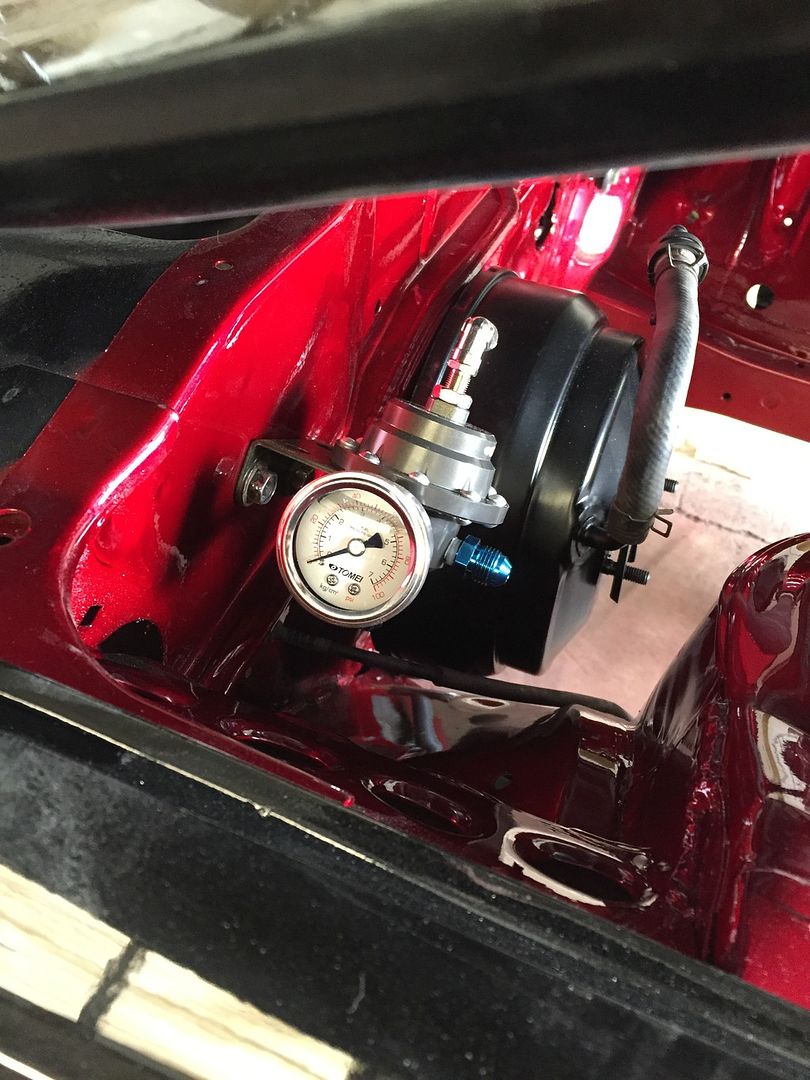
Looks quite smart in my opinion. I did try to follow the angle of the gusset too
Next up was to mount the power steering cooler. My idea was to mount it underneath the passenger side tub/arch like so;
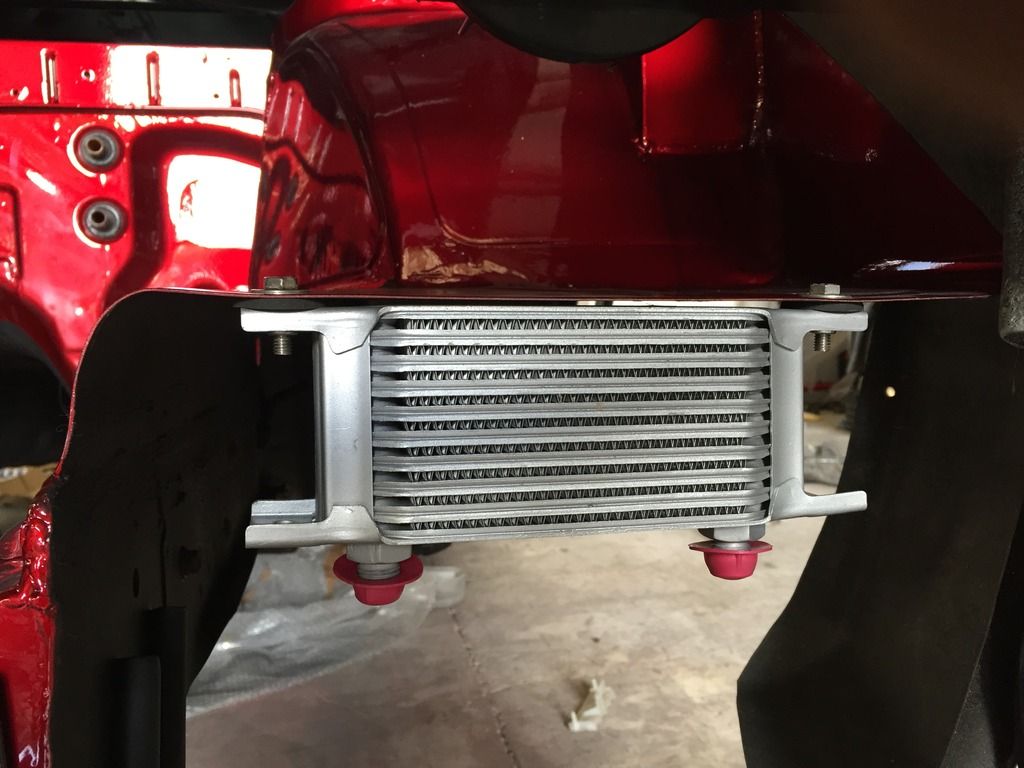
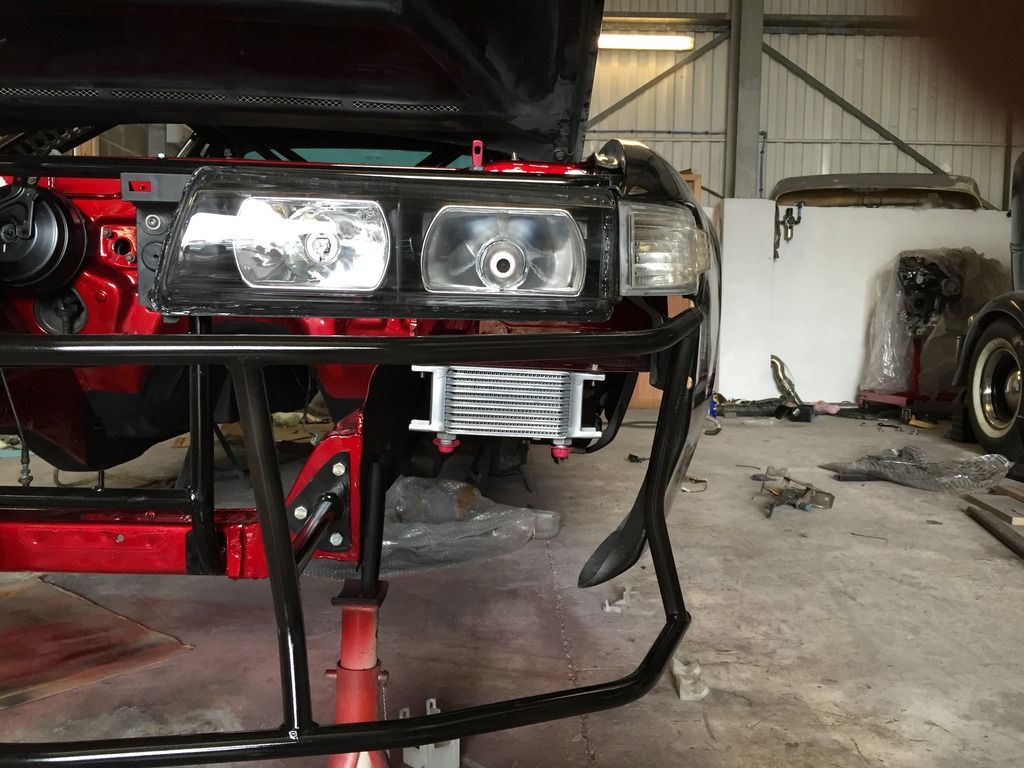
And this is why;
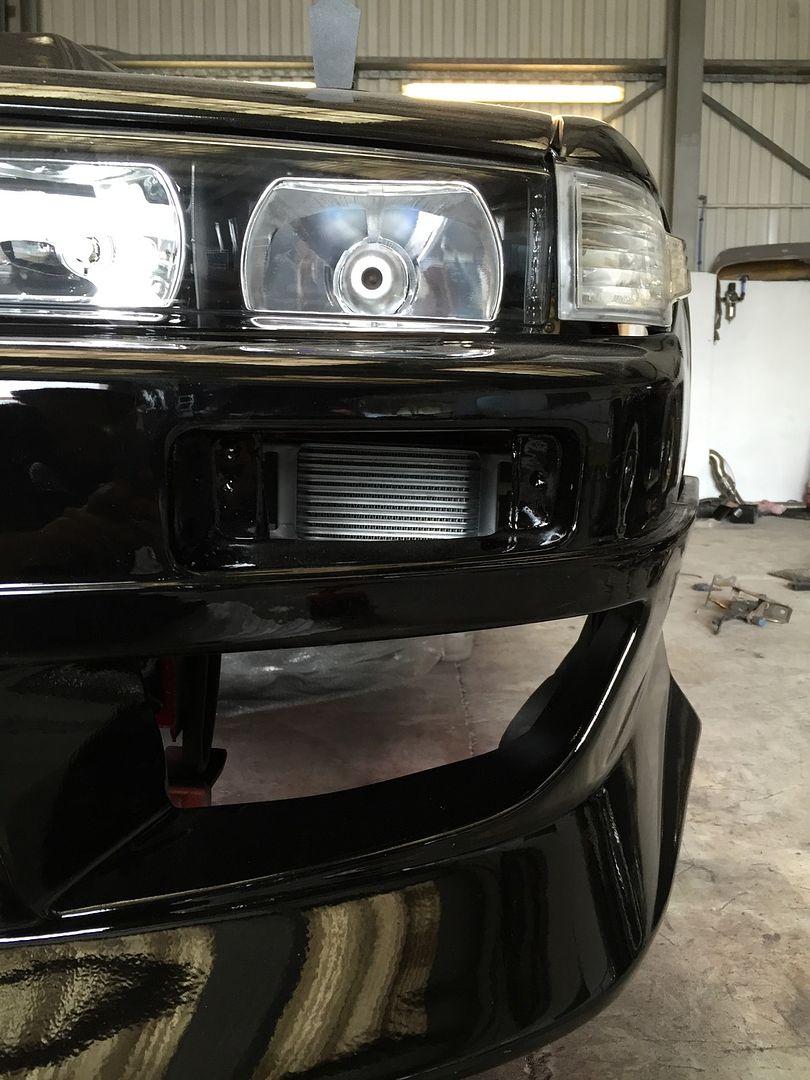
As I wont be running any lights in the bumper, the cut outs give great access to the core, meaning it’ll actually be kinda efficient I guess haha
I finally mount the swirl pot in the boot, using rubber washers and a spacer to keep the pot level;
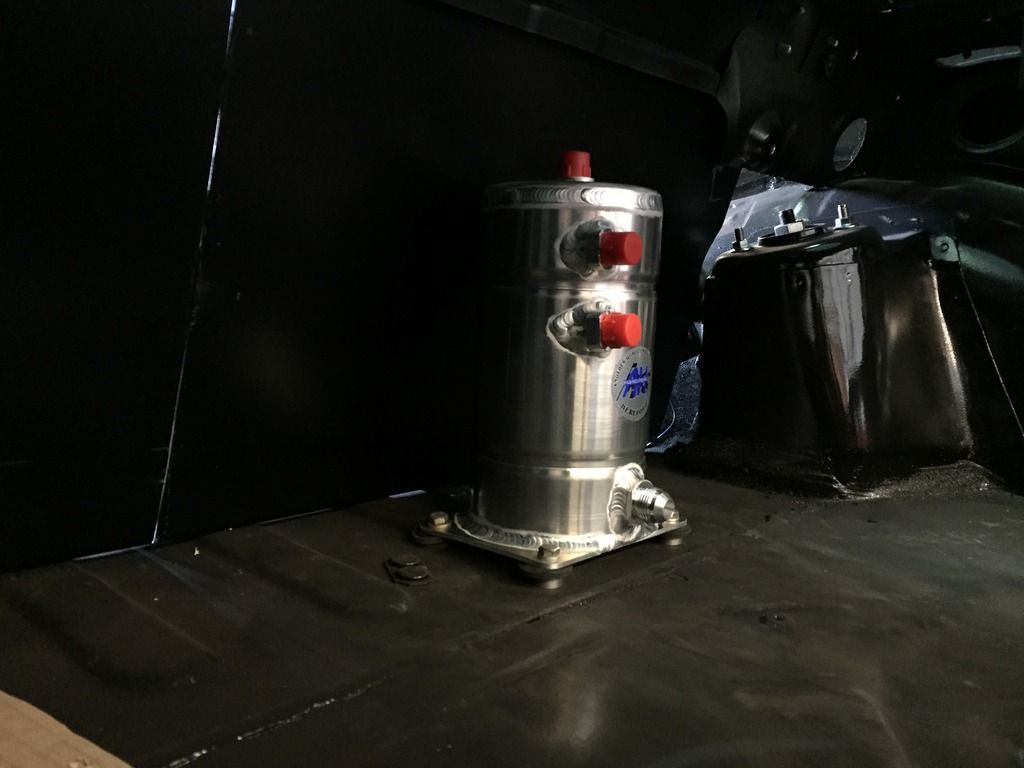
Installing that on my own was not fun, trying to be above and below the car at the same time tightening the nut and bolts was hard work haha.
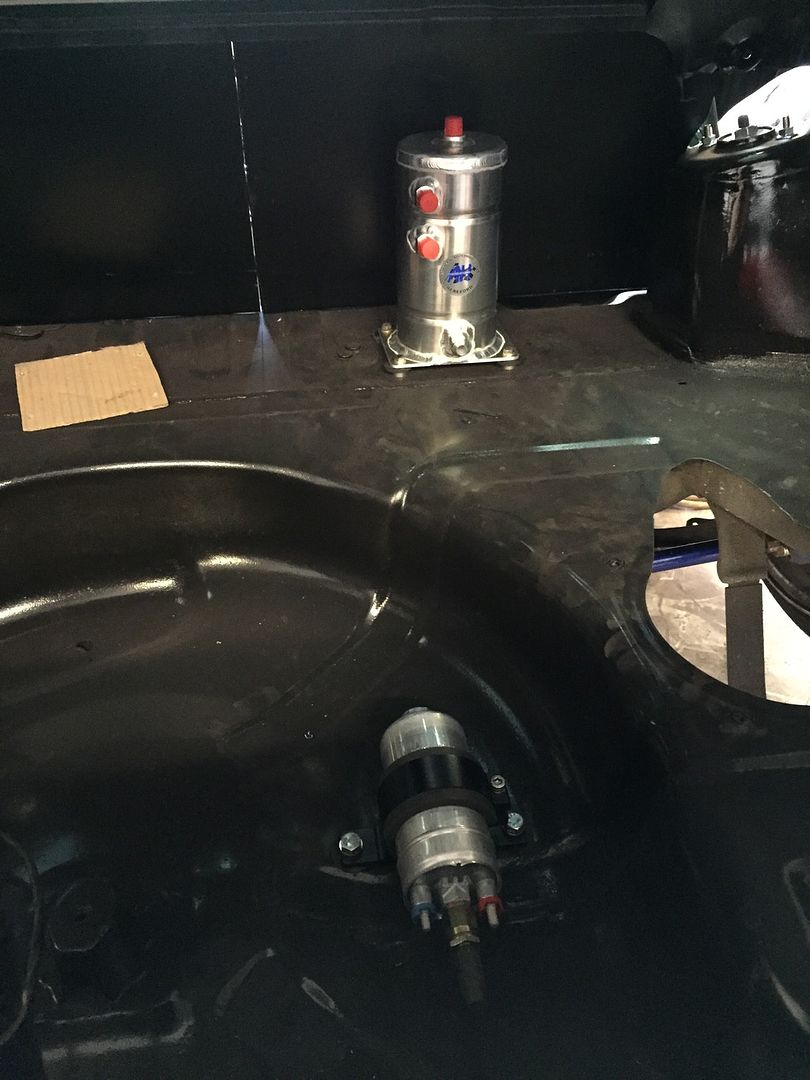
I was originally going to mount the fuel pump directly in front of it as the pump needs to be level or below to get sufficient fuel from the swirl pot. But a friend who runs a swirl pot advised me to run it slightly lower than the swirl pot, as gravity will aid feeding the 044 fuel, and 044’s hate having to “suck” fuel apparently. So I went with his advice and mounted the pump in the wheel well, which lets be honest, wont ever be used for its intended purpose ever again.


You’d have thought these 2 parts would bolt together nicely, wouldn’t you? Nope. It seems the mounting brackets on the coilover are just chunky enough that the bottoms foul on some welds on the Geo. So I slowly ground/chamfered the bottom edges of the coilover brackets, which luckily enough didn’t take much until both sides just slid on

(It was horrible taking a grinder to brand new coilovers!
 )
)
I quickly threw in the Defi water temp sensor whilst I was playing around with the engine, such a neat idea to have the sensor here, rather than cutting into the top radiator hose.

I went to go an tension the power steering pump, but upon its maximum adjustment the belt was still slack, great. Quickly dropped Tarrks an email and it seems it was simply an honest mistake of the wrong belt being shipped to me. Phew, atleast it’s a simple solution. Seeing as they are based in Australia, It didn’t make sense to ship a generic belt across the world, so they’ve given me the part number of the belt I need which doesn’t cost much at all. Thumbs up to Tarrks though, speedy and helpful response

Something that I’ve always wanted to do was to ditch the OEM eccentric bolts on the rear alignment arms. This is something a few of us spoke about before, where we talked about getting something made up. But seeing as nothing came of that, I went and bought GKtech’s kit for the S13 setup;

Before;

After;

Comparisons between OEM and the GKTech eccentric lockout kit;

Gave the alternator a quick clean, and quickly slapped some paint on the pulley (I mean quickly slapped haha. I was in a rush, and the paint on the pulley before was dreadful. Luckily enough itll be hidden anyway
 )
)
Threw the servo that the PS came with on, which to my understanding is an ABS servo due to the additional thickness? The reason I’m favouring this servo is that my old one was full of a dark liquid, which I can only guess as break fluid, suggesting my old BMC was leaking. No biggie, as I’m planning on switching BMC’s due to the new brakes anyhow.

- - - Updated - - -
I mounted the Tomei FRP too. I wanted it out of the way, but still easyily enough to read the gauge. So I chose to mount it beside the brake servo;


Looks quite smart in my opinion. I did try to follow the angle of the gusset too

Next up was to mount the power steering cooler. My idea was to mount it underneath the passenger side tub/arch like so;


And this is why;

As I wont be running any lights in the bumper, the cut outs give great access to the core, meaning it’ll actually be kinda efficient I guess haha

I finally mount the swirl pot in the boot, using rubber washers and a spacer to keep the pot level;

Installing that on my own was not fun, trying to be above and below the car at the same time tightening the nut and bolts was hard work haha.
I was originally going to mount the fuel pump directly in front of it as the pump needs to be level or below to get sufficient fuel from the swirl pot. But a friend who runs a swirl pot advised me to run it slightly lower than the swirl pot, as gravity will aid feeding the 044 fuel, and 044’s hate having to “suck” fuel apparently. So I went with his advice and mounted the pump in the wheel well, which lets be honest, wont ever be used for its intended purpose ever again.

200sx_
PS13 x TD Power
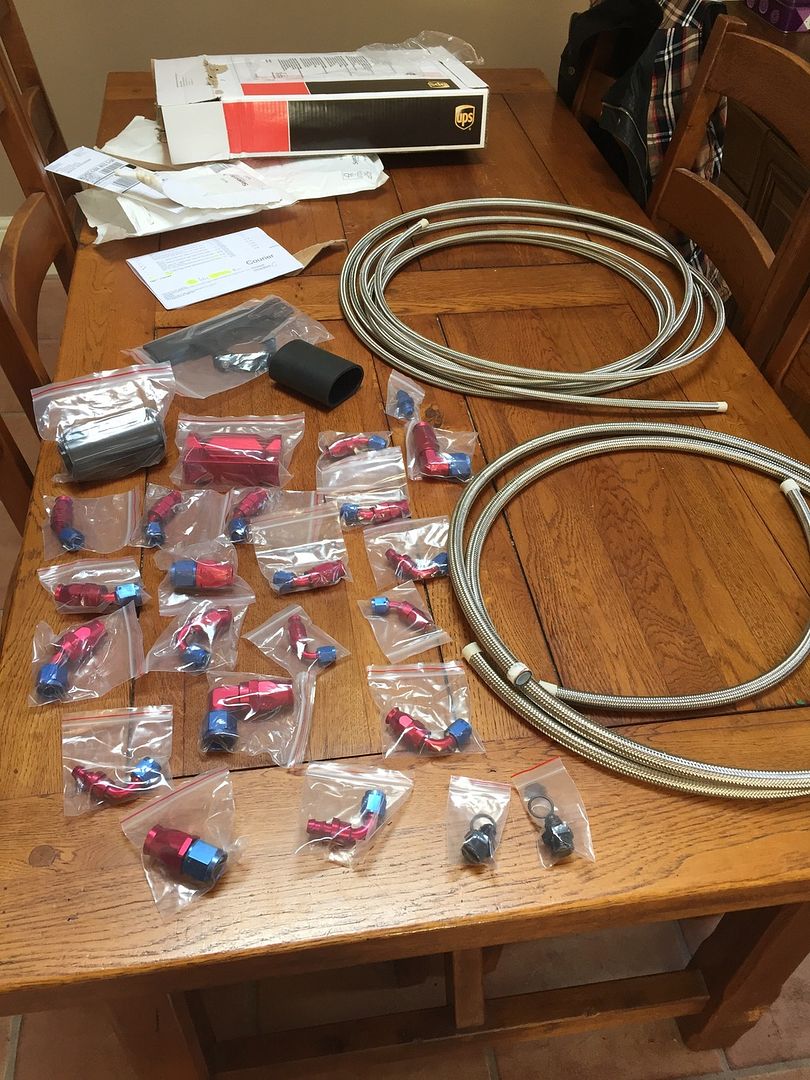
Now this is the bit I was dreading, ordering up the numerous AN/JIC fittings I need. So I began by creating a rough list of what I need;
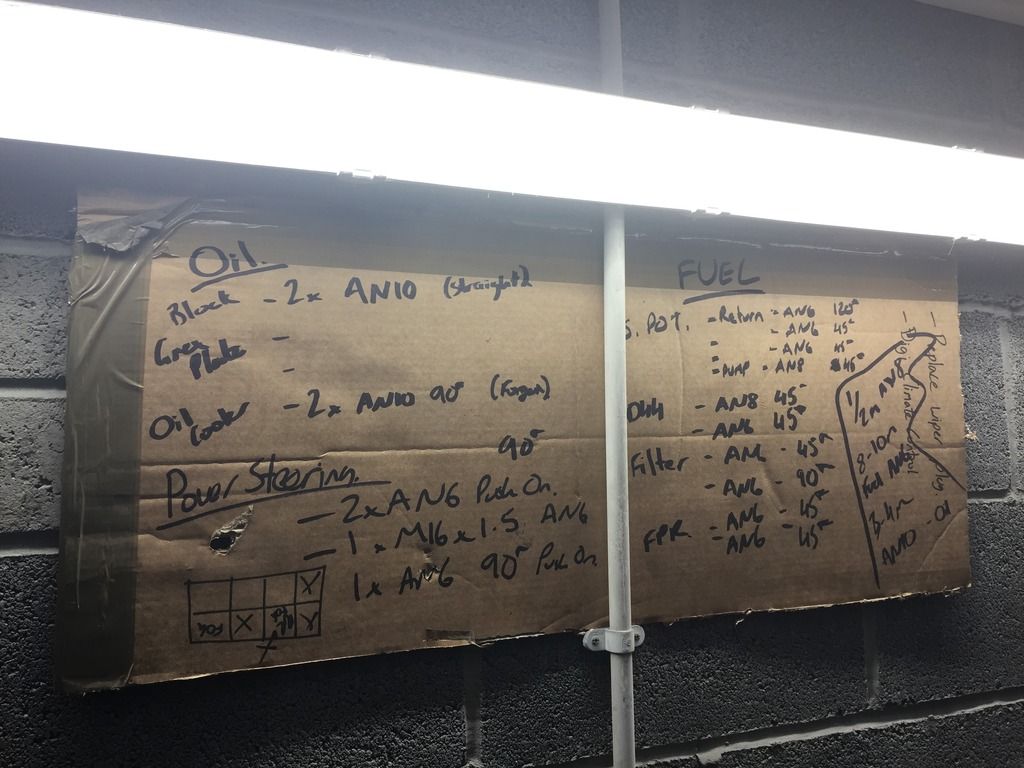
I few friends of mine used Torques UK to get their AN fittings, and they appear to be good quality so dropped them an email. So this lot promptly turned up, and I was somehow £400 lighter (Yup, four-hundred!!!!) But they’re so pretty
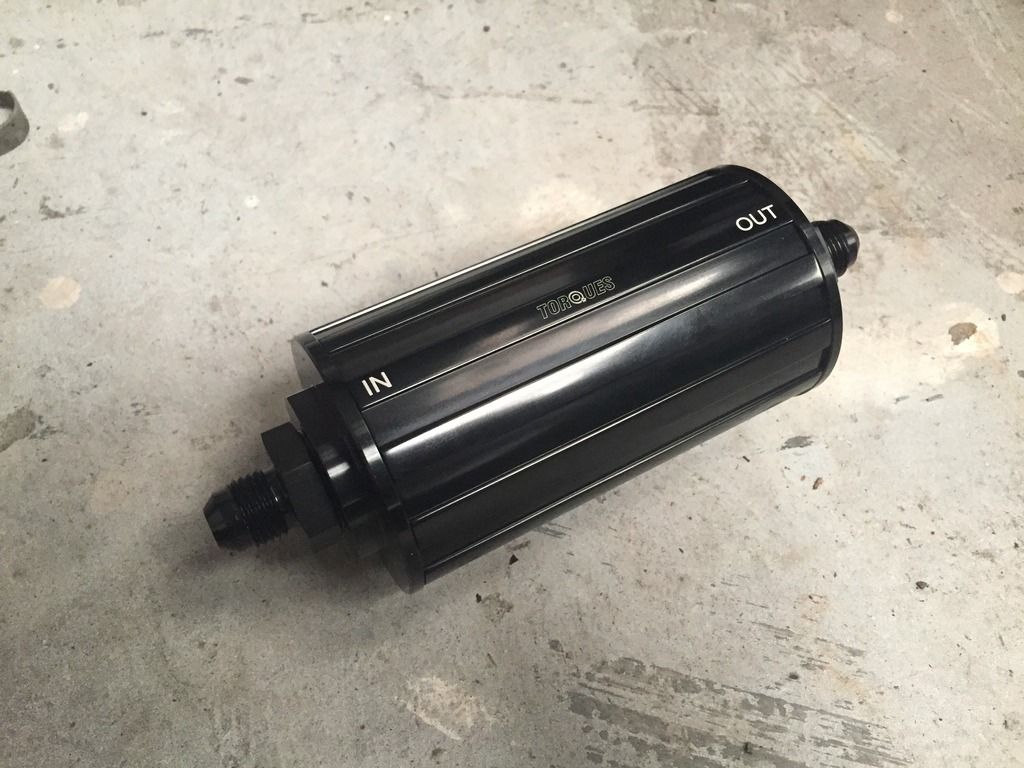
The guy at Torques was super helpful, recommending me which fuel filter to go with as I wont be using the generic Z32 type, as I am now using a billet AN6 high-flow fuel filter after the Bosch 044.
I cant deny how pretty these things are, they kind of make the build step up a notch, plus they all have a pretty important job, so quality is an important factor here.
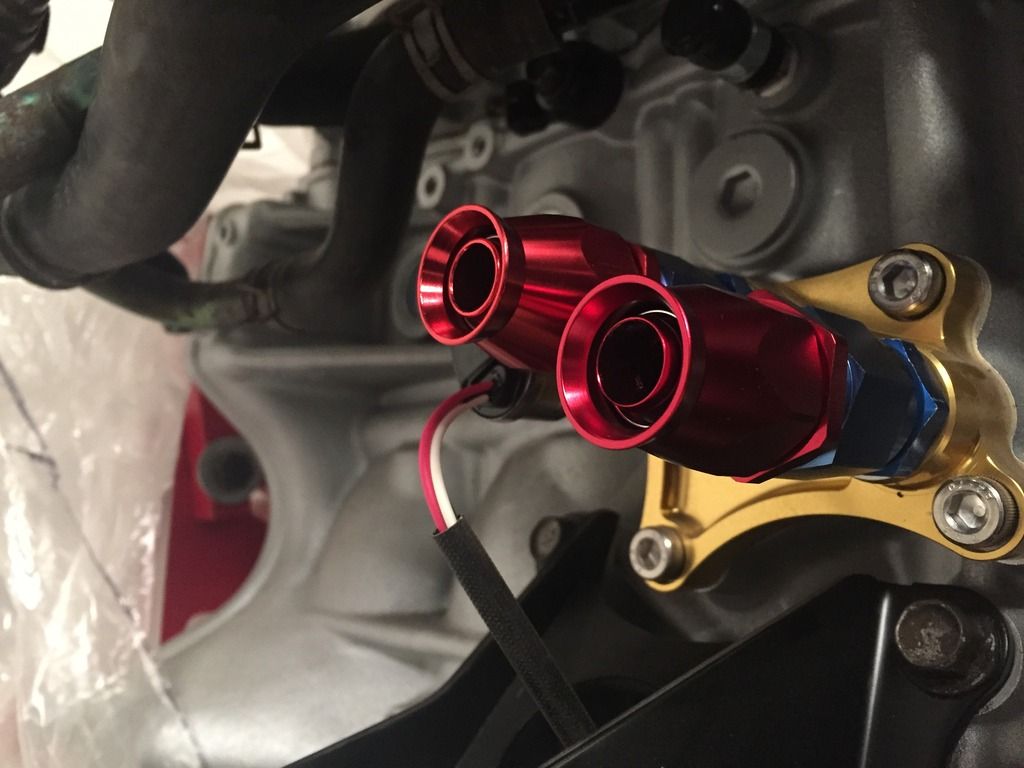
AN4 Turbo feed;
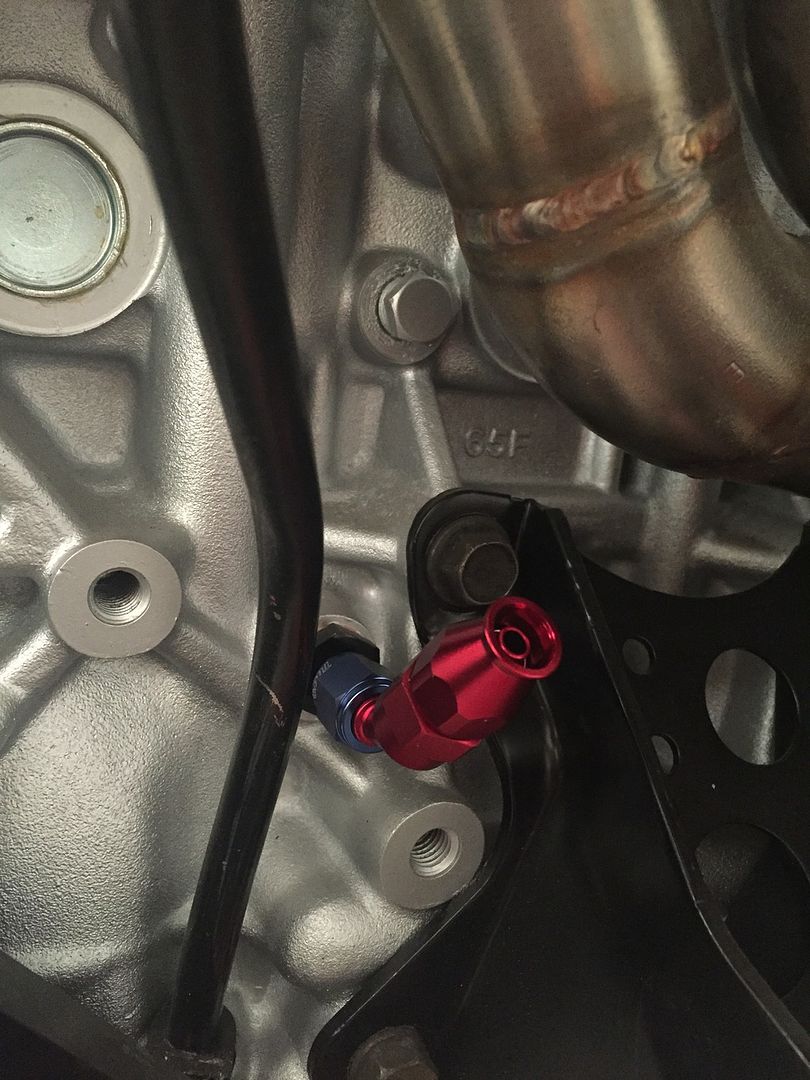
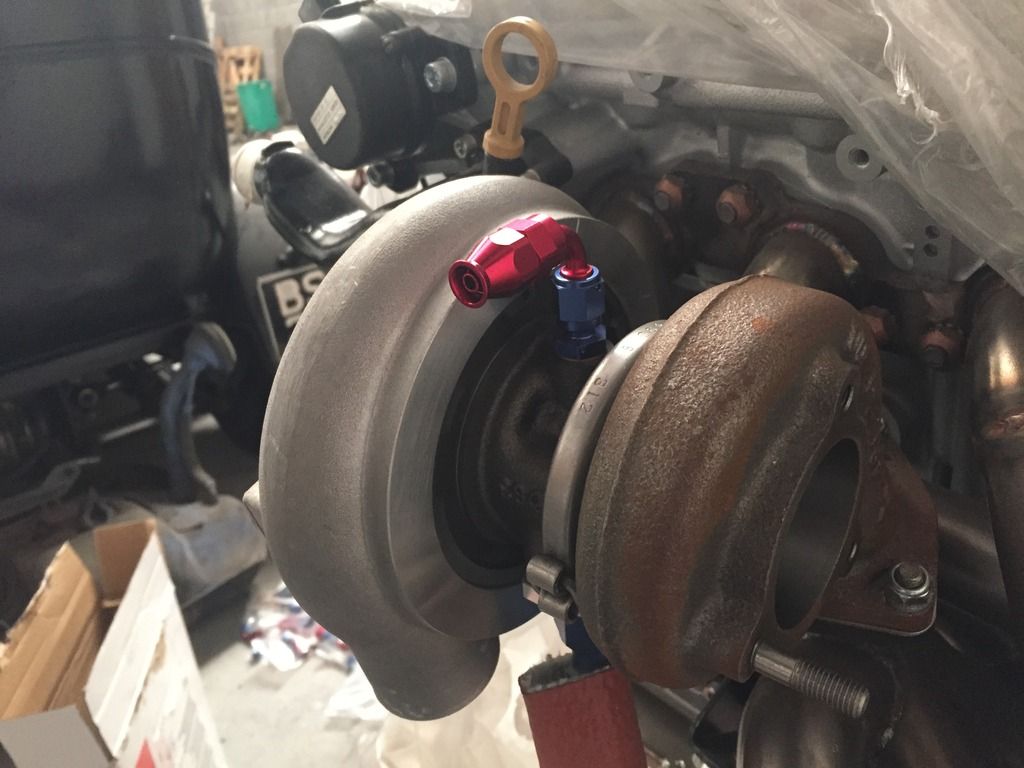
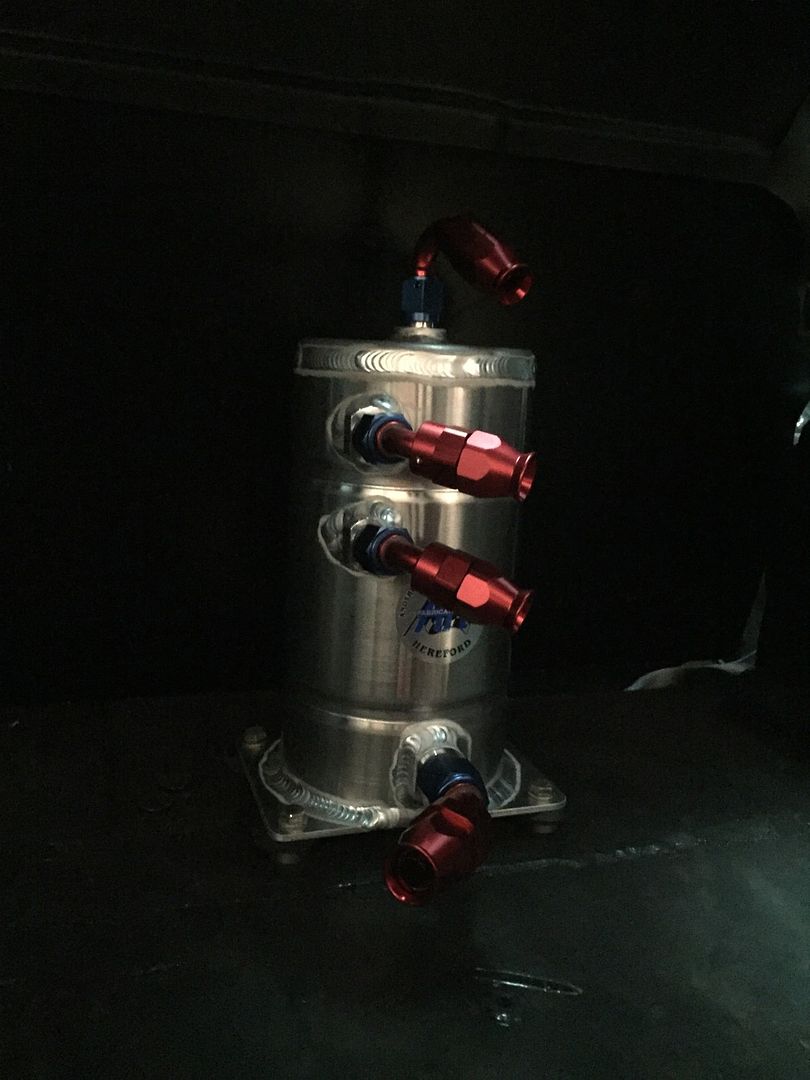
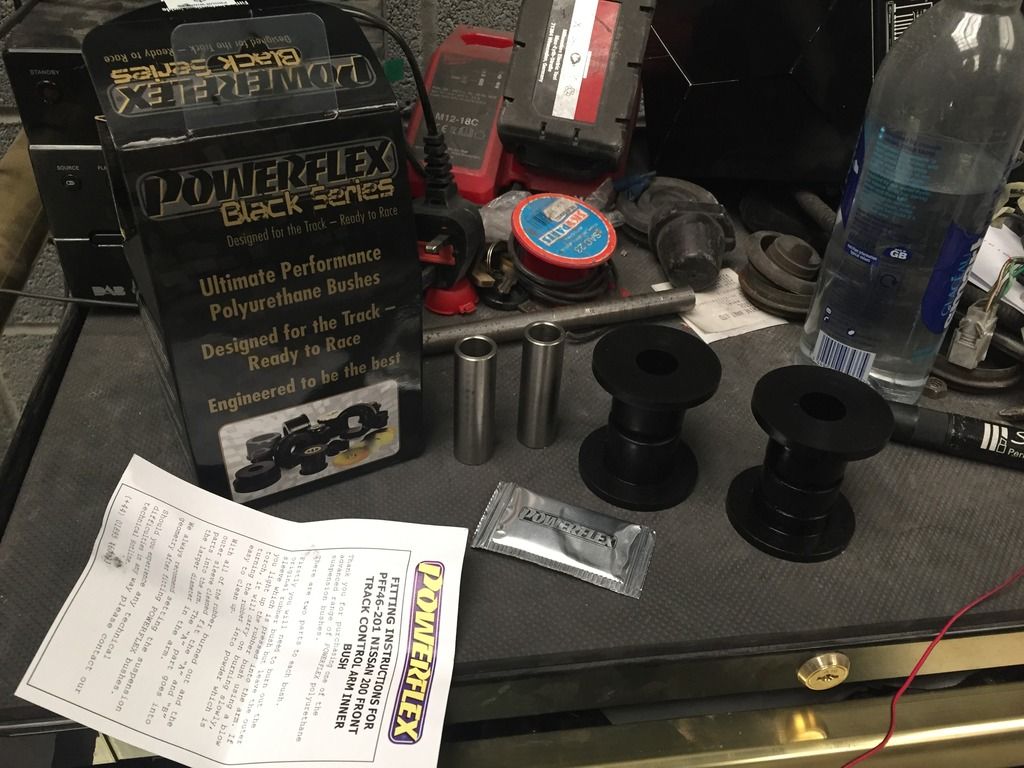
So whilst I was fascinated with these little fittings, I got some fresh LCA bushes from Driftworks, opting for the Powerflex Black Series due to being a harder compound.
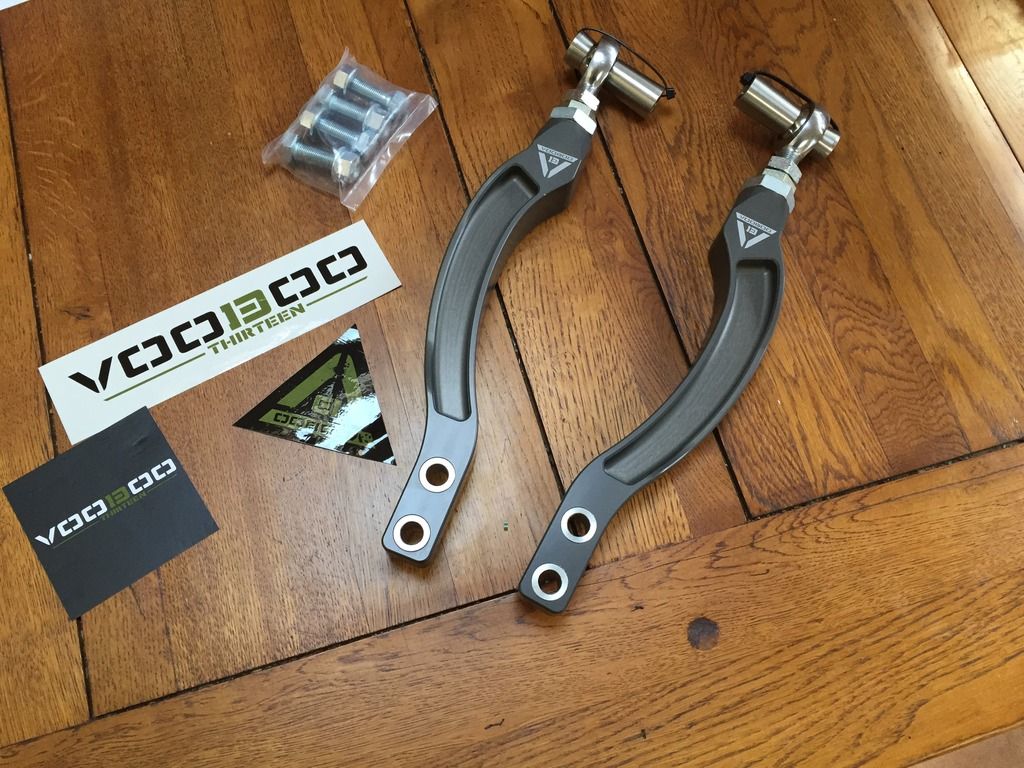
To finish off the front end, I sourced a pair of Voodoo13 front tension rods from the states, something I can honestly say is that the quality of these arms are second to none.
At this point, I had finally dropped my bellhousing was off to be machined which was back the next day. After a quick steam wash to remove the small bits of swarf, it was ready to go back on.
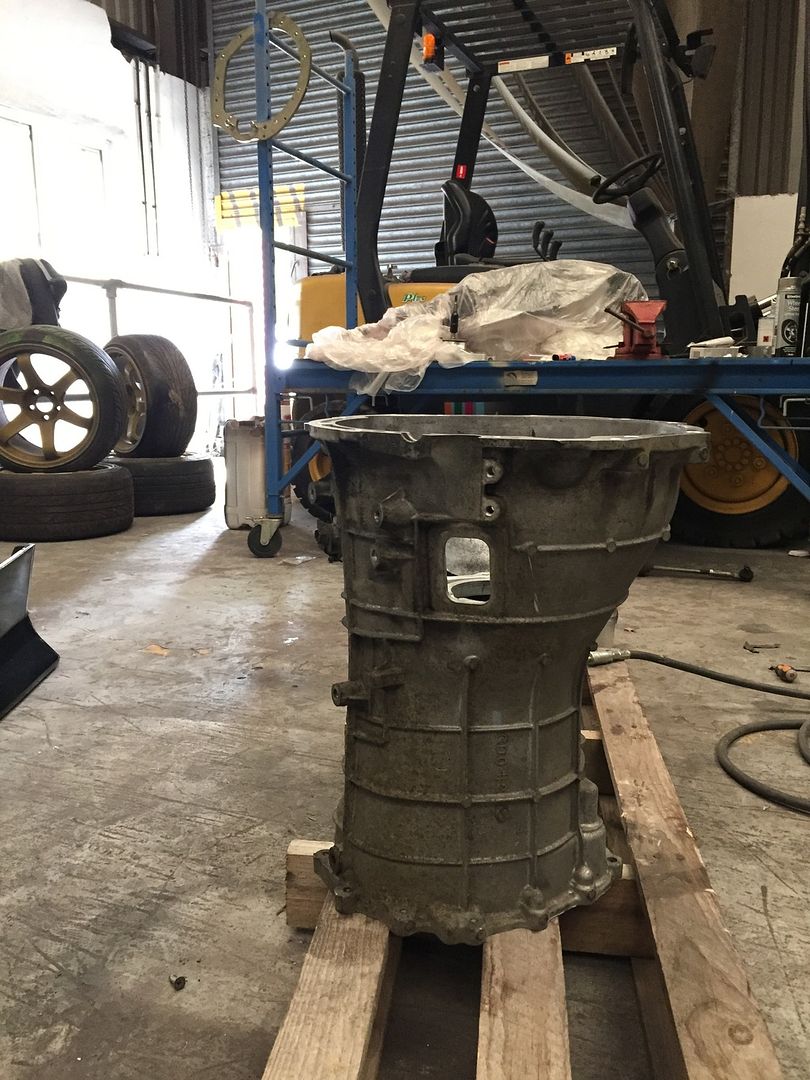
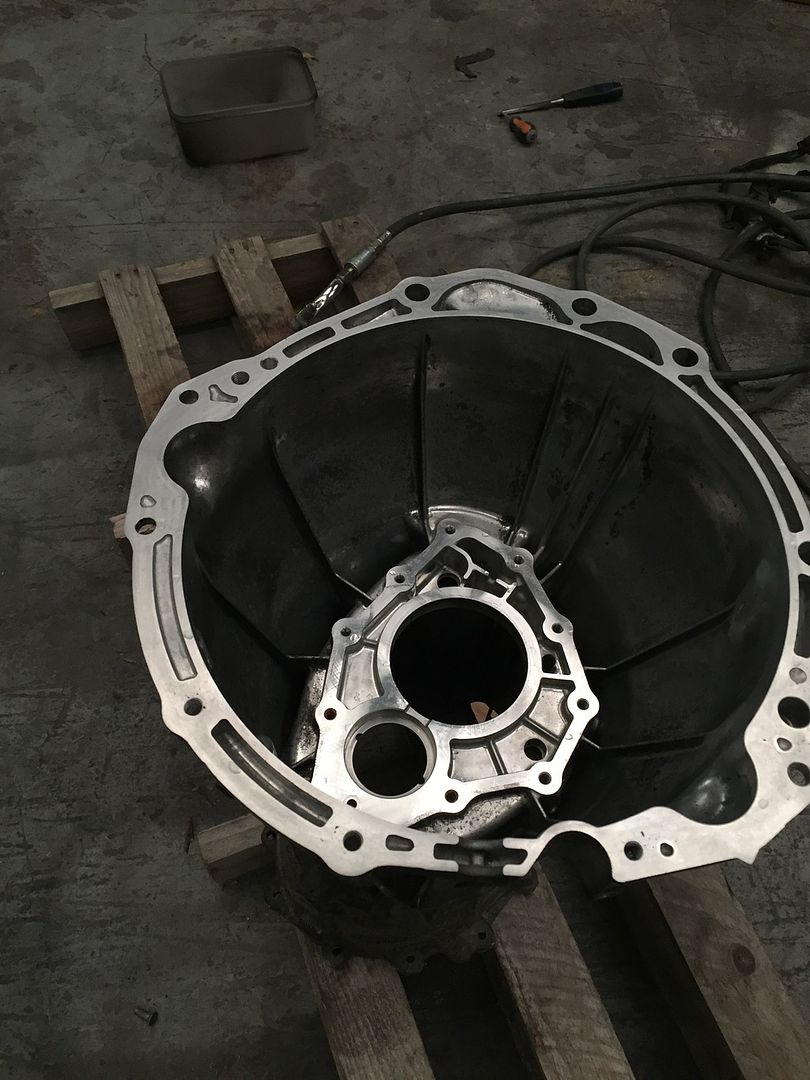
Front cover before;
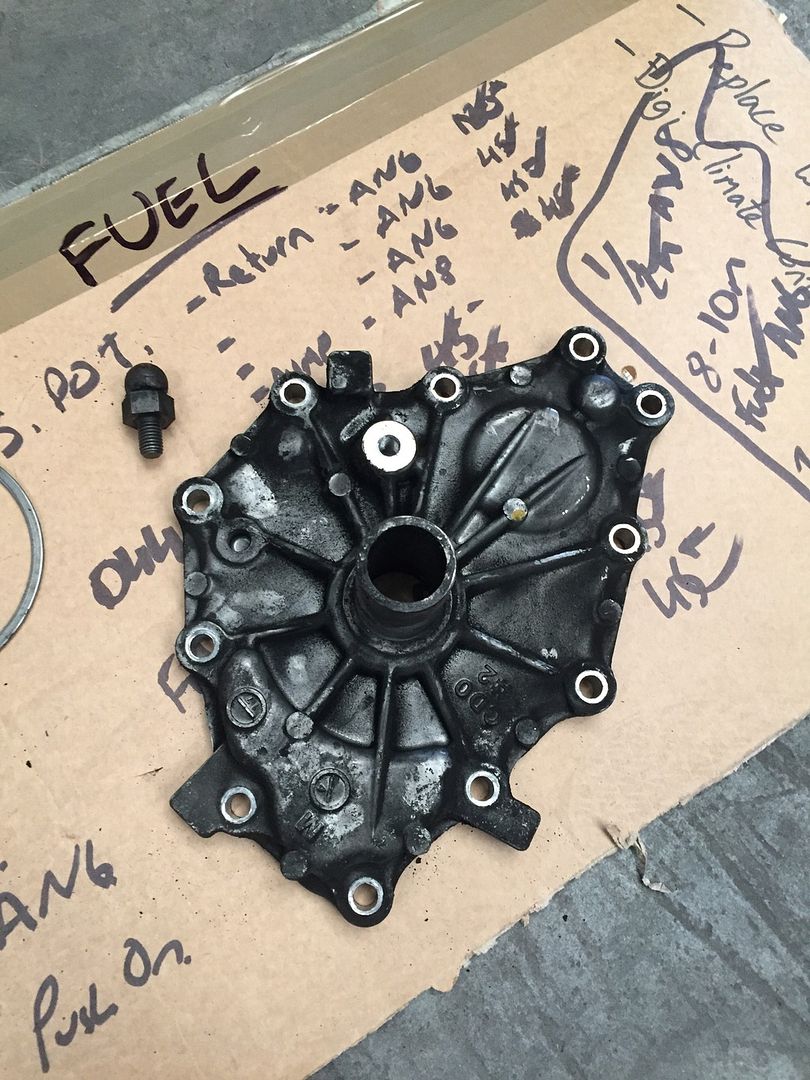
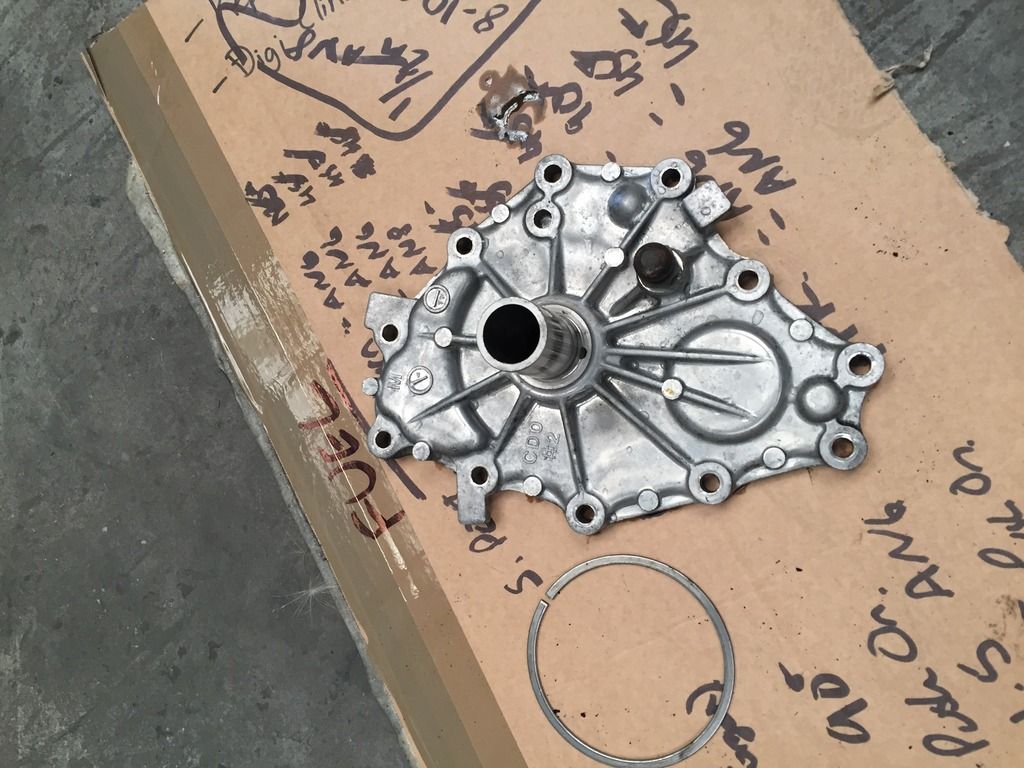
After;
Attempting this myself wasn’t the most fun of tasks, trying to keep the box still whilst ensuring the bellhousing goes on straight!
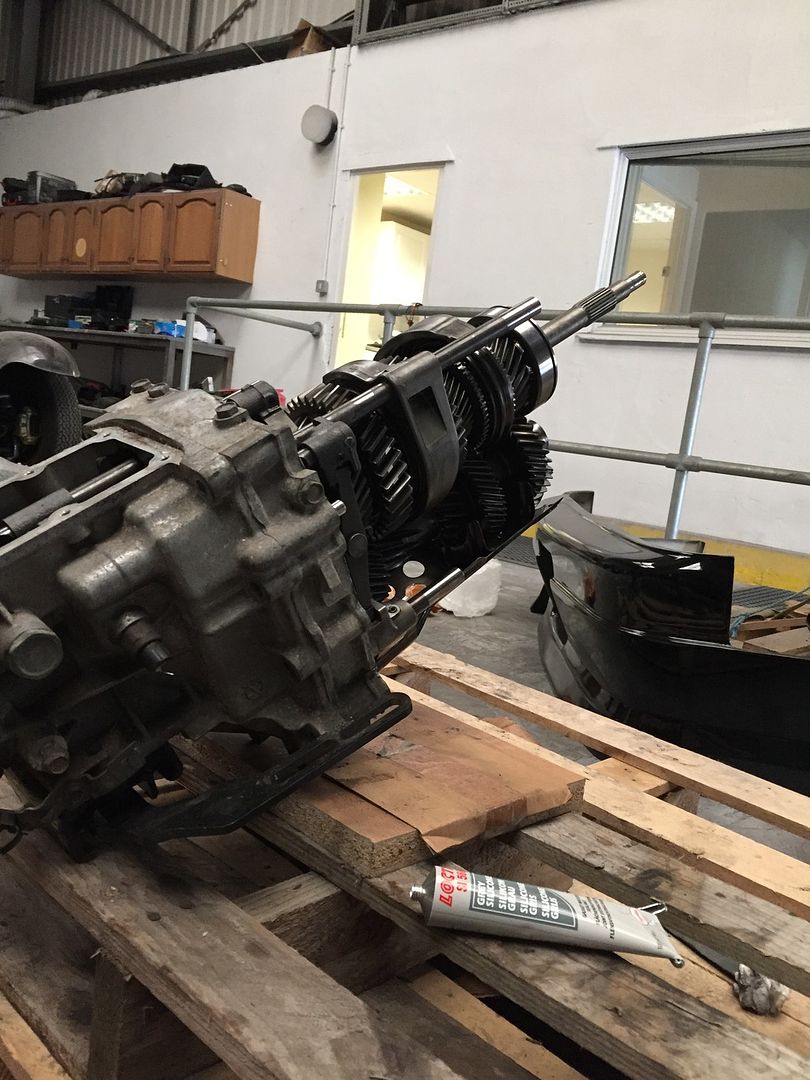
And before long it was all done. Kinda nervous about it leaking as it’ll be an engine out job, but I used a decent sealant, and made sure both mating surfaces were super clean and degreased, so fingers crossed!
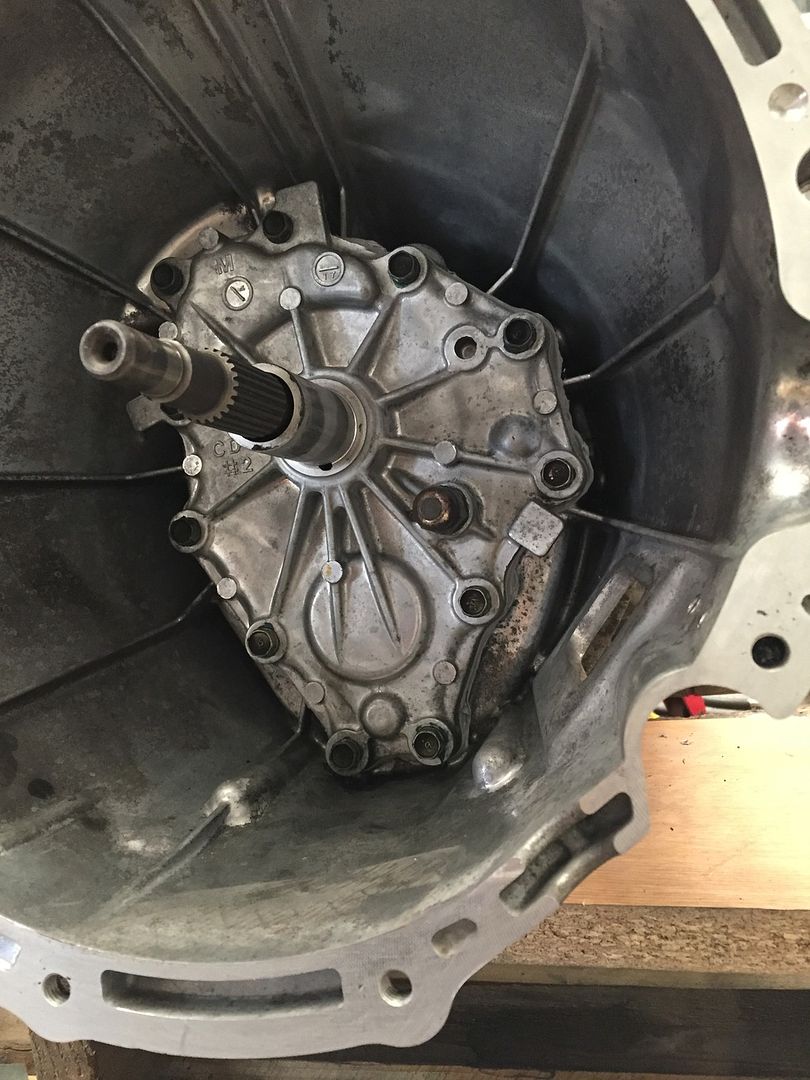

I few friends of mine used Torques UK to get their AN fittings, and they appear to be good quality so dropped them an email. So this lot promptly turned up, and I was somehow £400 lighter (Yup, four-hundred!!!!) But they’re so pretty


The guy at Torques was super helpful, recommending me which fuel filter to go with as I wont be using the generic Z32 type, as I am now using a billet AN6 high-flow fuel filter after the Bosch 044.

I cant deny how pretty these things are, they kind of make the build step up a notch, plus they all have a pretty important job, so quality is an important factor here.

AN4 Turbo feed;


So whilst I was fascinated with these little fittings, I got some fresh LCA bushes from Driftworks, opting for the Powerflex Black Series due to being a harder compound.

To finish off the front end, I sourced a pair of Voodoo13 front tension rods from the states, something I can honestly say is that the quality of these arms are second to none.

At this point, I had finally dropped my bellhousing was off to be machined which was back the next day. After a quick steam wash to remove the small bits of swarf, it was ready to go back on.


Front cover before;

After;

Attempting this myself wasn’t the most fun of tasks, trying to keep the box still whilst ensuring the bellhousing goes on straight!

And before long it was all done. Kinda nervous about it leaking as it’ll be an engine out job, but I used a decent sealant, and made sure both mating surfaces were super clean and degreased, so fingers crossed!

200sx_
PS13 x TD Power
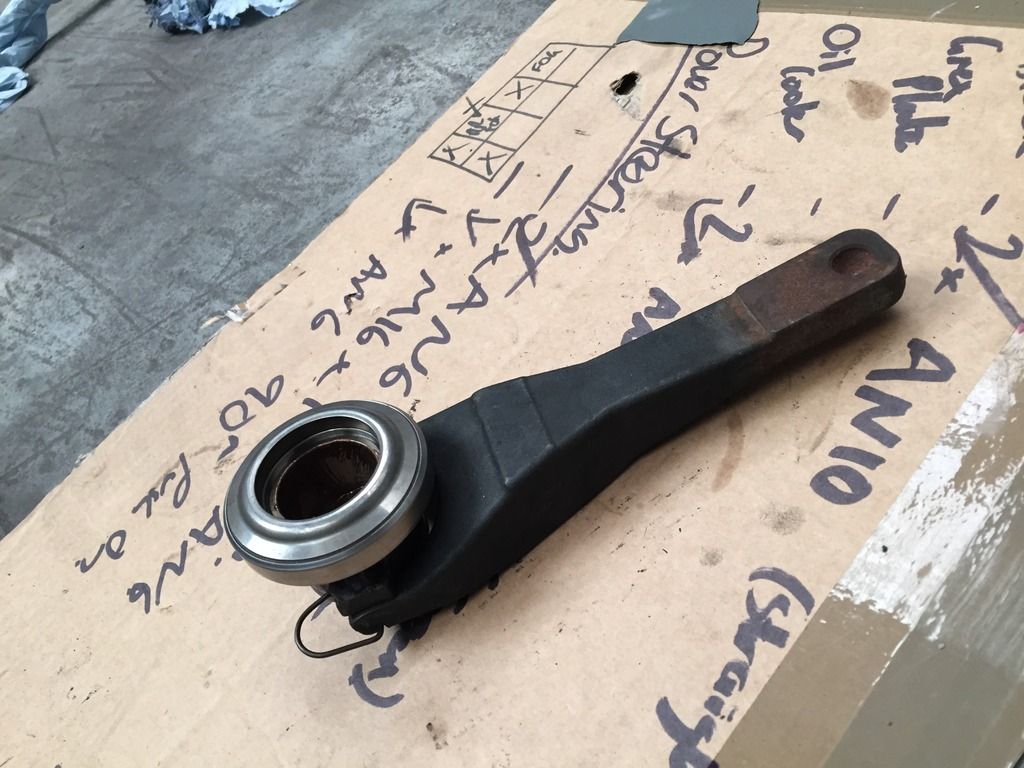
This then means I can tackle the release bearing and sleeve setup. The conversion uses the Z33 fork and retaining clip, combined with an SR release bearing and carrier setup.
Z33 setup;
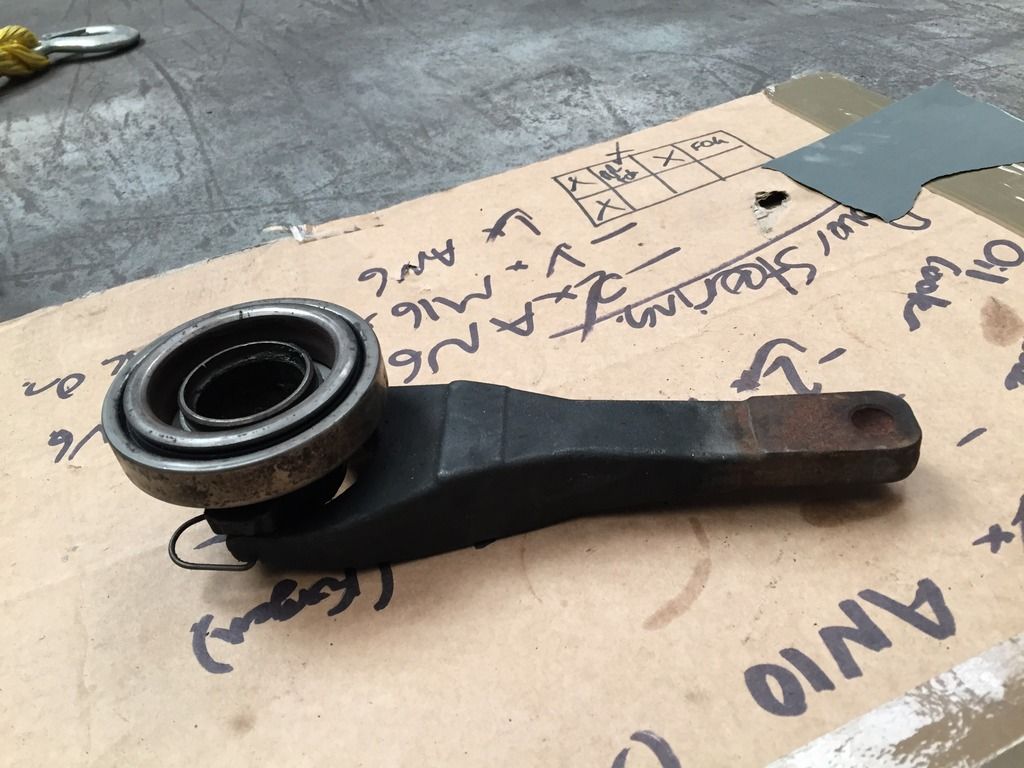
New “Hybrid” combination;
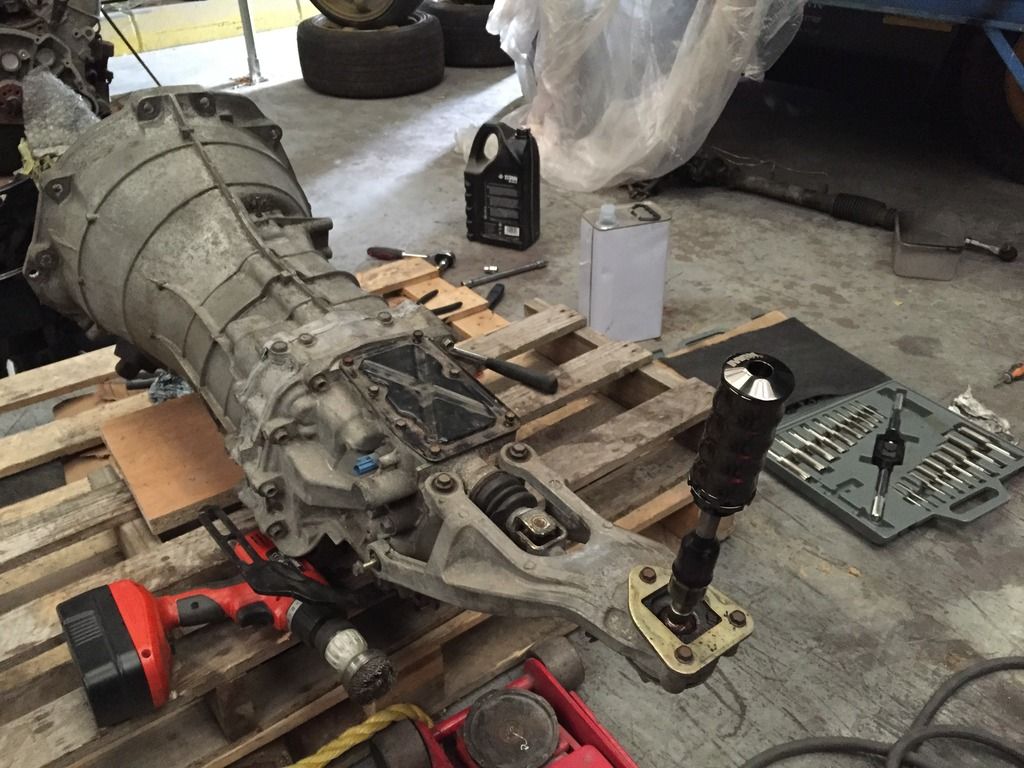
An annoying thing with the gearbox was that the shifter had a slightly damaged thread, meaning my fancy gear knob would screw on. Not to worry, means I can get the good old tap set out and clean it up. (Is it wrong that I enjoyed cleaning a thread haha?!)
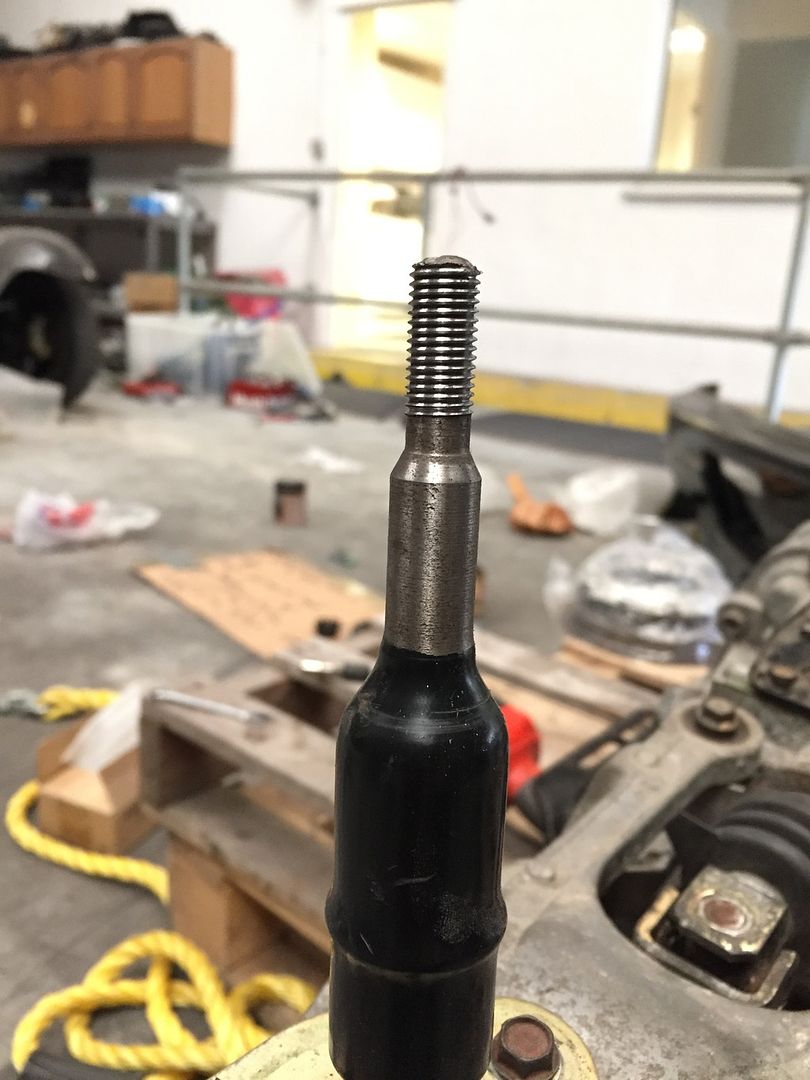
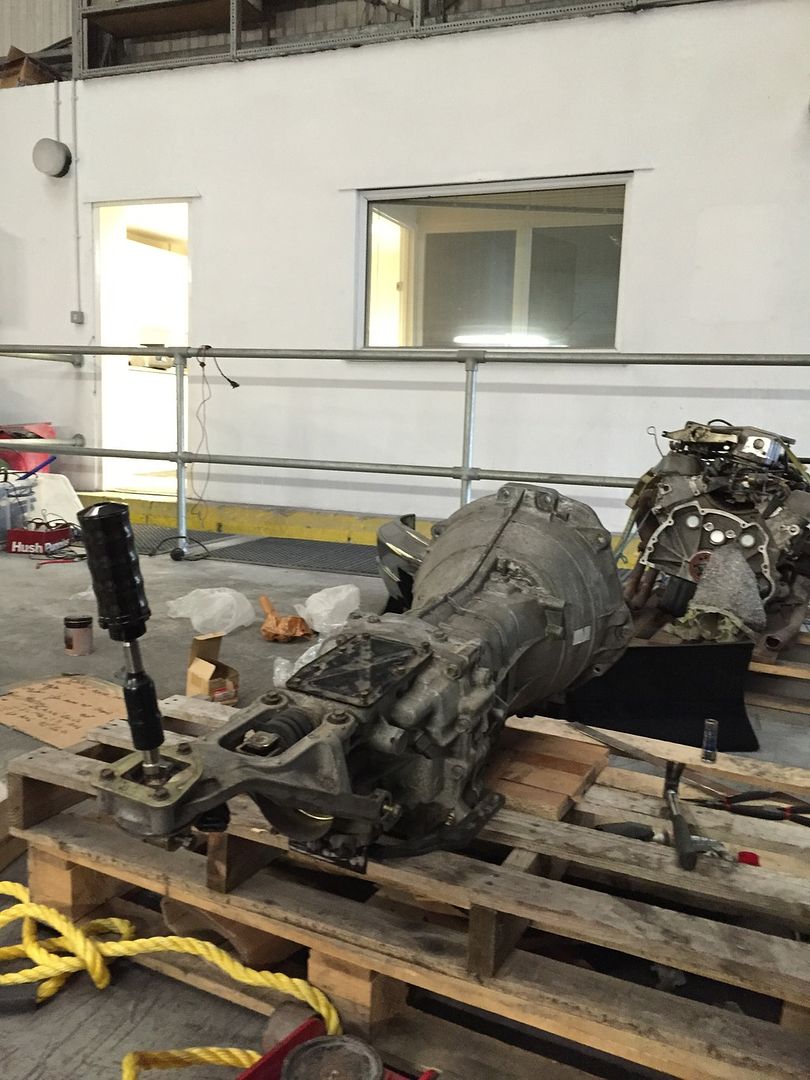
Now I can finally put the Powered by Max shifter on
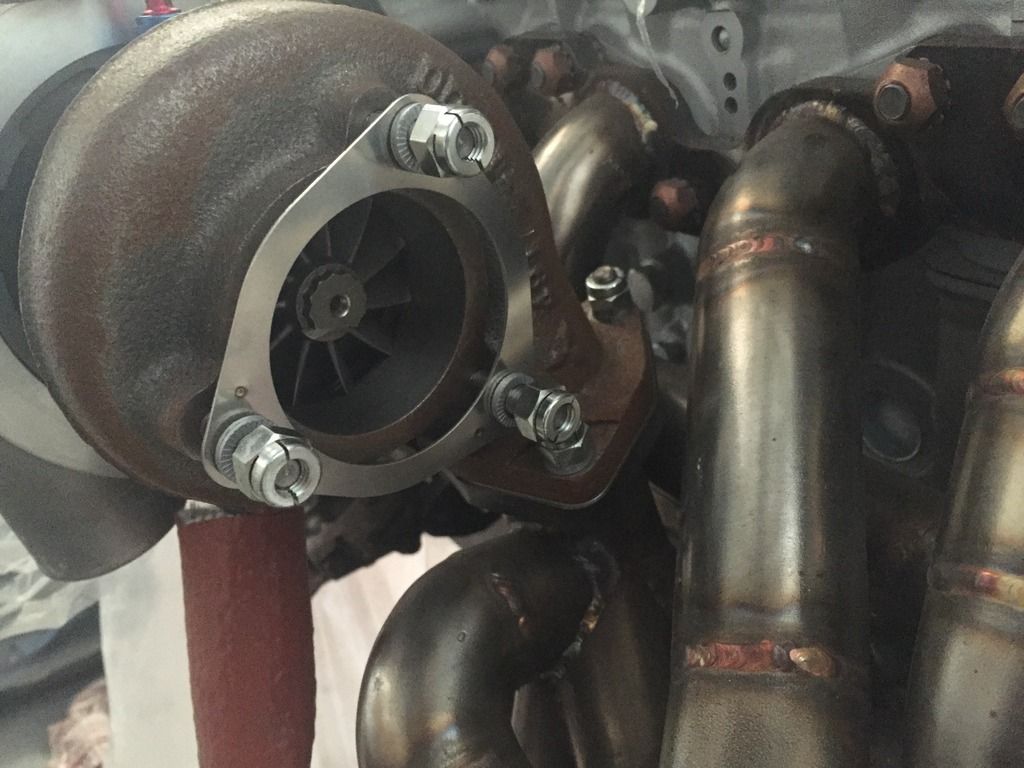
Whilst the engine was out of the car, something I wanted to change was the fact my downpipe setup would’ve used bolts to fix it to the exhaust housing. This didn’t really fill me with confidence (It was my fault as I never put any studs in the exhaust housing), so grabbed some manifold studs and locking nuts from H-Dev, which look 10x better than a generic stainless bolt. Hopefully combined with Nord-Lock washers this should hold everything nice and tight! Whilst I was there, I quickly swapped the nyloc’s used on the manifold-turbo flange in favour of more lock-nuts. Hopefully, this again will reduce my chance of the nuts coming loose in the near future, whenever the car does actually start up and run.
I began to make my first AN line, which was the oil feed line. I read the smaller the fitting, the easier it is, so AN4 sounded perfect. Followed a guide online for the PTFE fittings and I’d like to say everything went well, but time will tell whether they leak or not
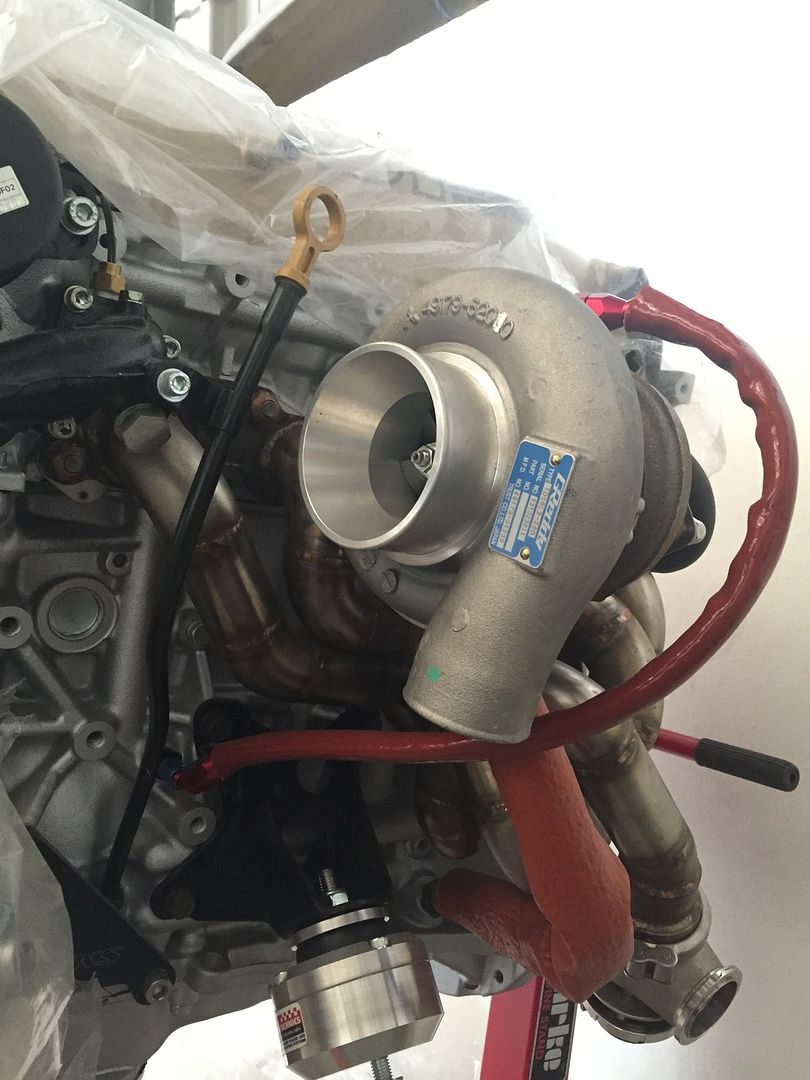
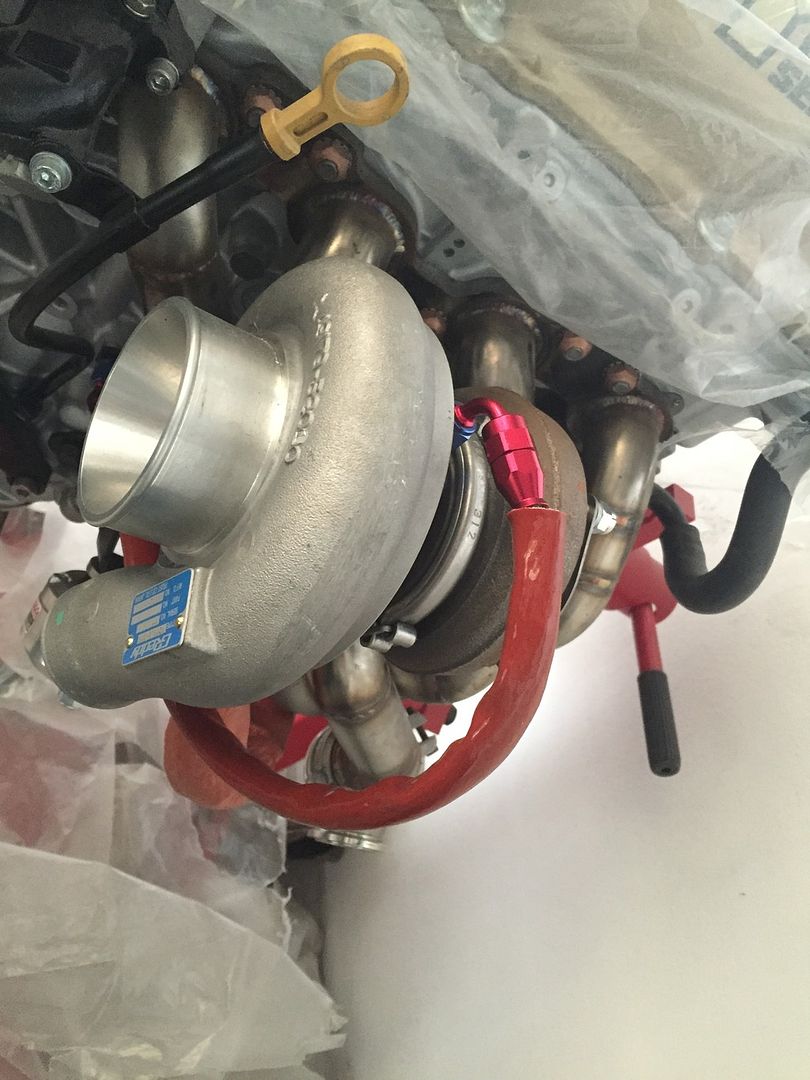
- - - Updated - - -
Next up was the AN8 line between the fuel pump and the swirl pot;
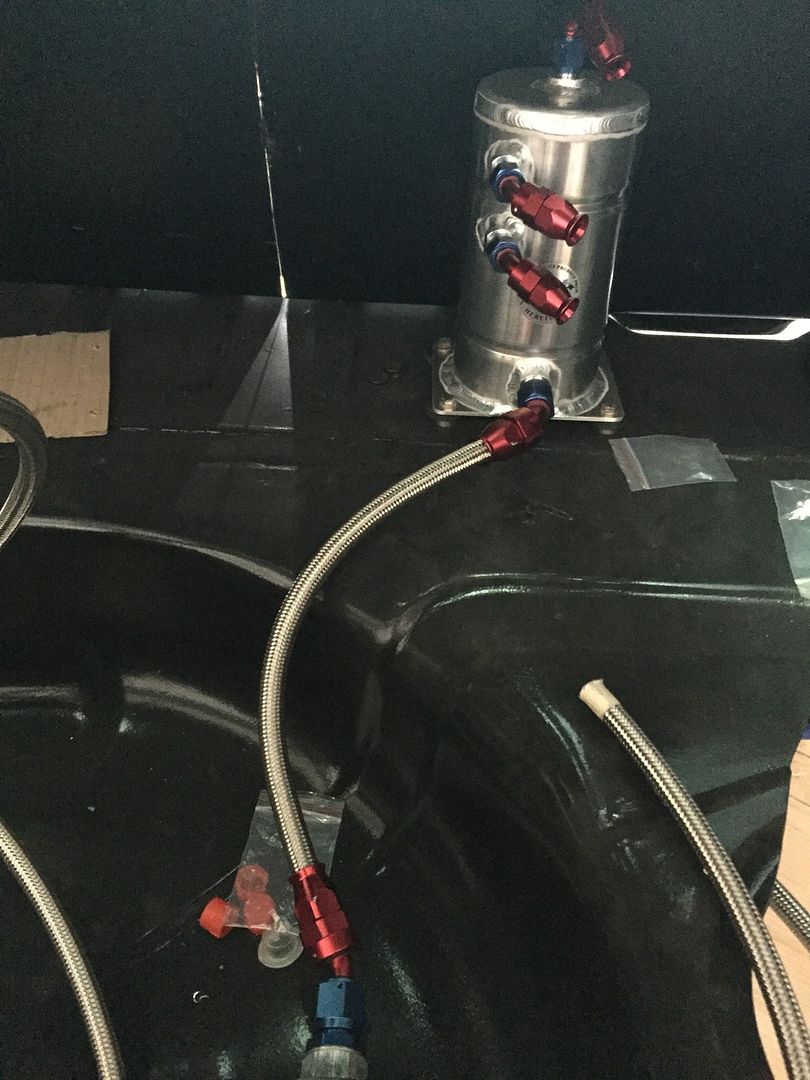
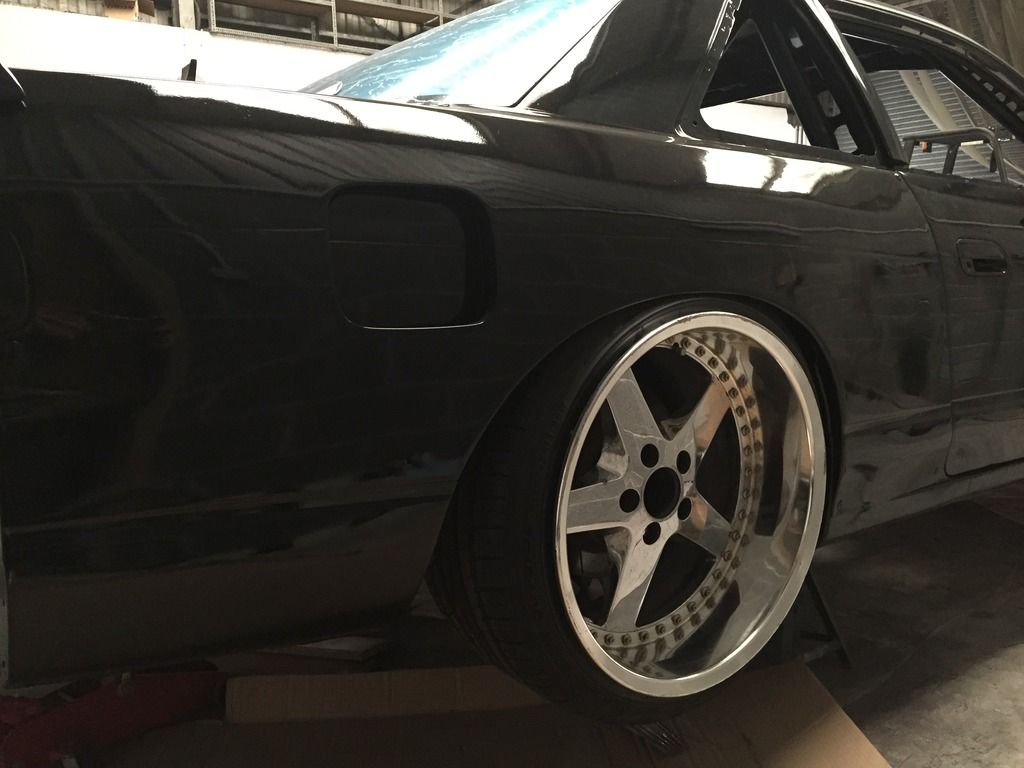
It’d be rude not to throw the Equips on the rear to check the level of fitment, because fitment is the number one priority!
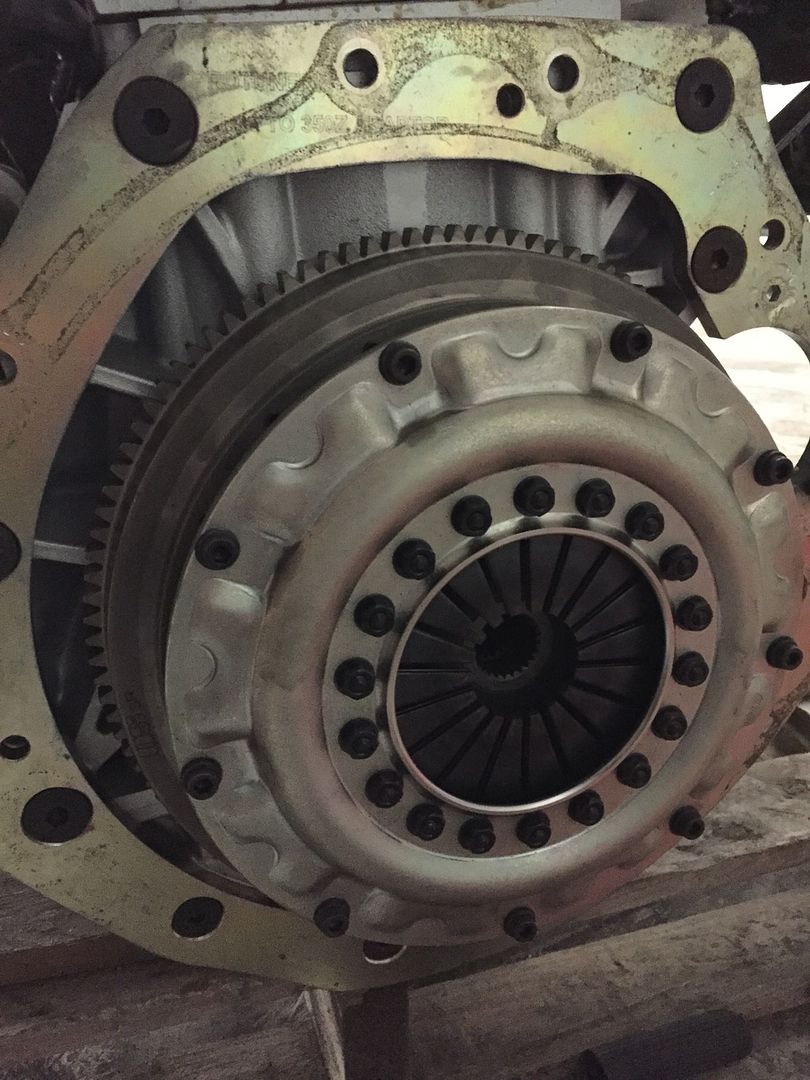
I quickly disassemble the clutch in order to bolt the flywheel and pressure plate on to check the release bearing and carrier is the correct size. The Twin Plate is gorgeous, wish I could just layer each plate in a frame as start at the forever, but that’d mean not driving, so onwards we go.
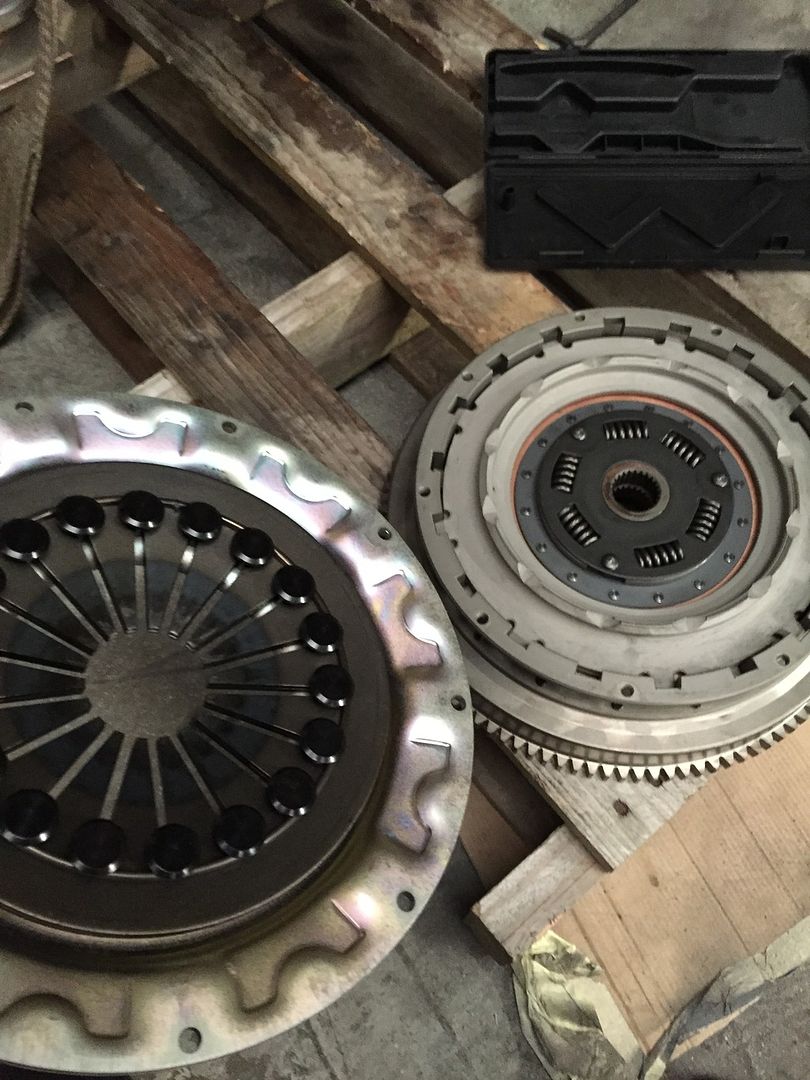
And the fork sat like this with the bearing up against the fingers of the pressure plate;
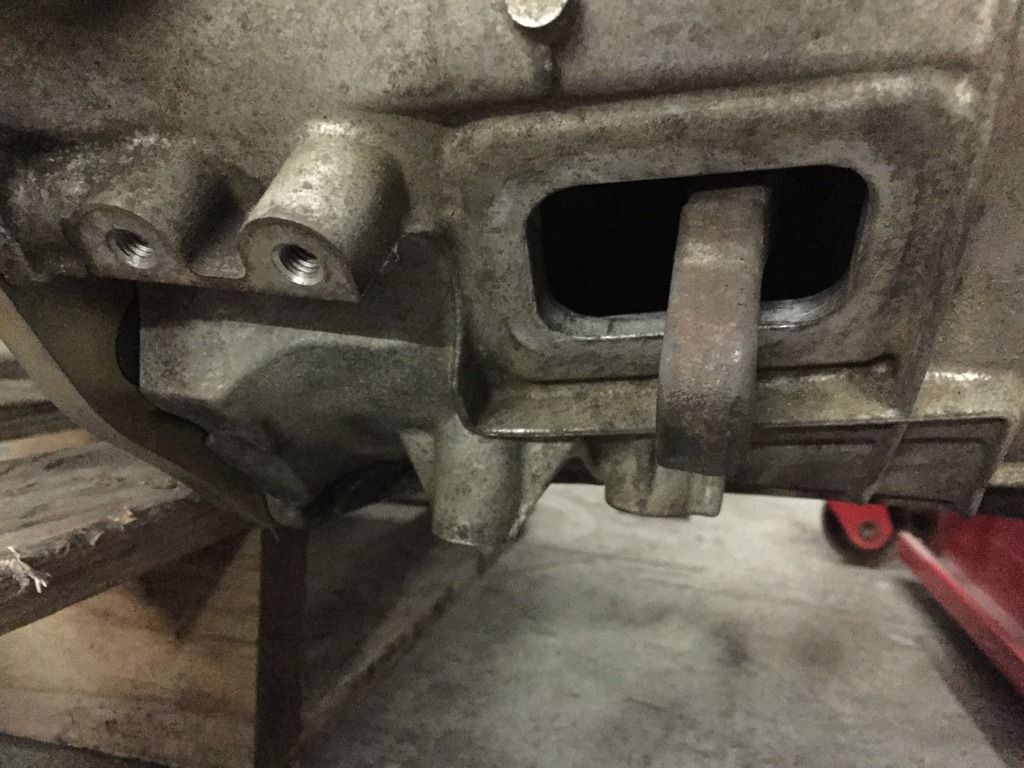
Not good! Its almost bottoms out the hole on the gearbox, let alone the travel of the slave.
So time to take a step back and have a think, which is kinda hard when this is sat in front of you
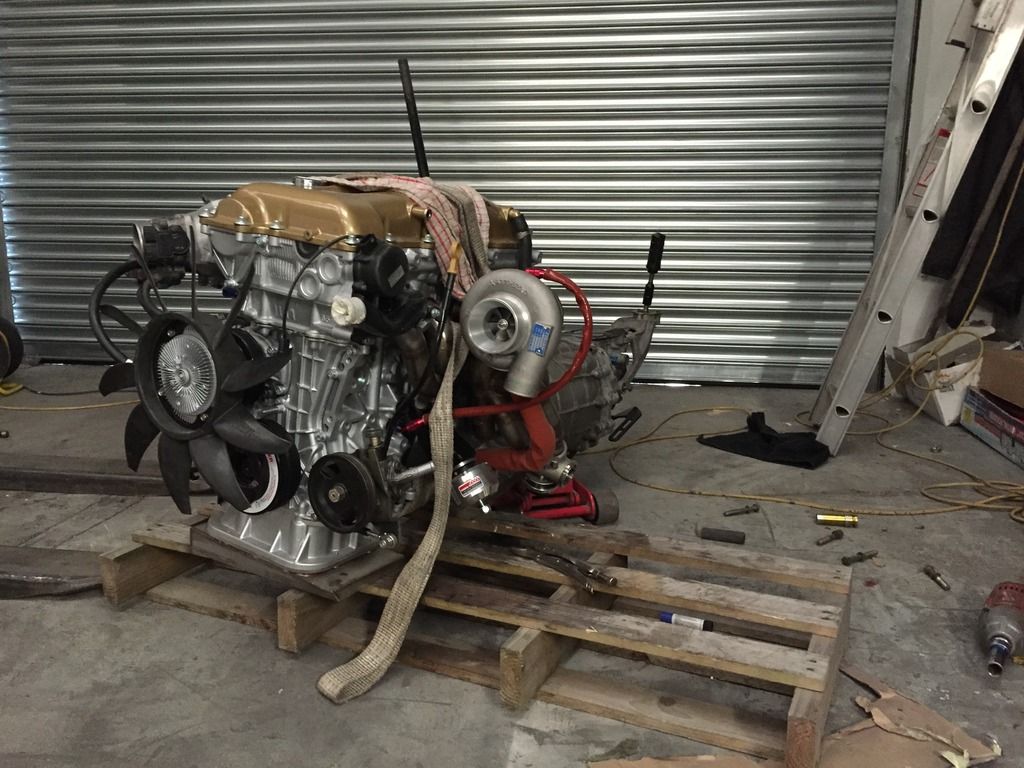
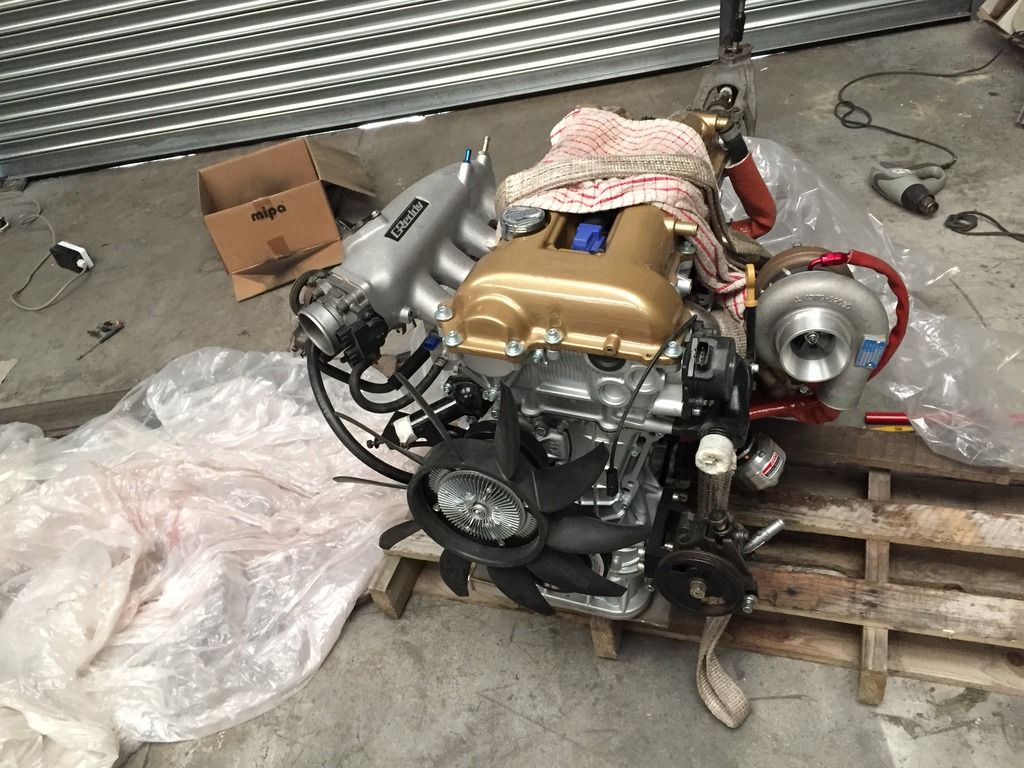
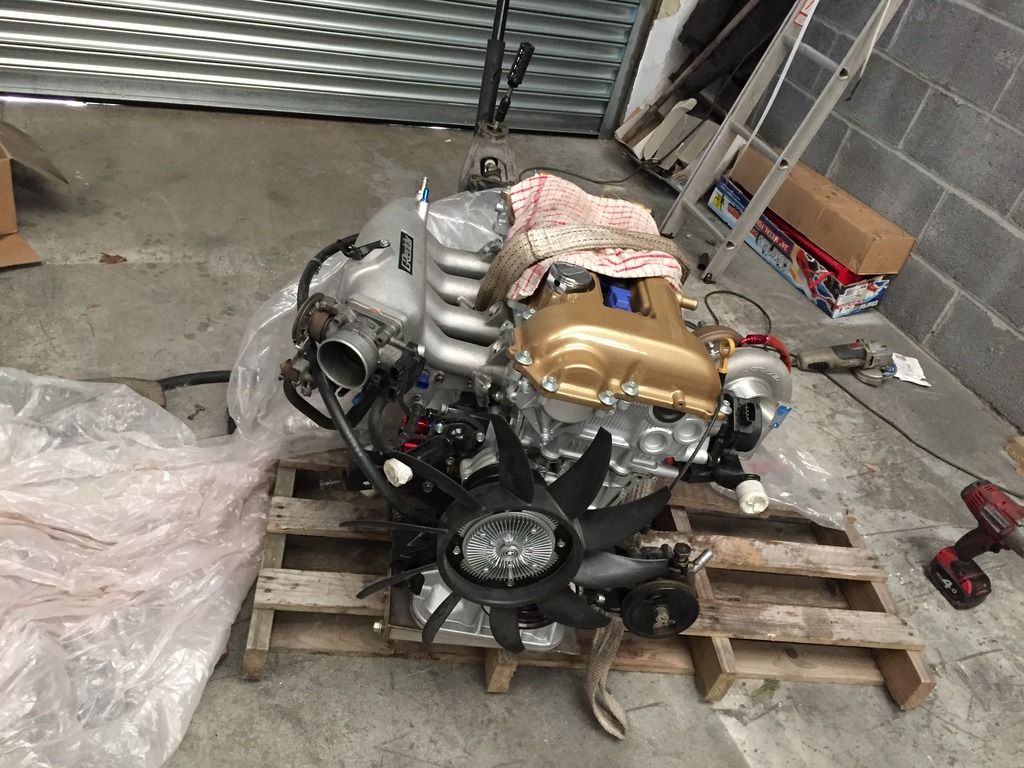
Z33 setup;

New “Hybrid” combination;

An annoying thing with the gearbox was that the shifter had a slightly damaged thread, meaning my fancy gear knob would screw on. Not to worry, means I can get the good old tap set out and clean it up.
 (Is it wrong that I enjoyed cleaning a thread haha?!)
Now I can finally put the Powered by Max shifter on


Whilst the engine was out of the car, something I wanted to change was the fact my downpipe setup would’ve used bolts to fix it to the exhaust housing. This didn’t really fill me with confidence (It was my fault as I never put any studs in the exhaust housing), so grabbed some manifold studs and locking nuts from H-Dev, which look 10x better than a generic stainless bolt. Hopefully combined with Nord-Lock washers this should hold everything nice and tight! Whilst I was there, I quickly swapped the nyloc’s used on the manifold-turbo flange in favour of more lock-nuts. Hopefully, this again will reduce my chance of the nuts coming loose in the near future, whenever the car does actually start up and run.

I began to make my first AN line, which was the oil feed line. I read the smaller the fitting, the easier it is, so AN4 sounded perfect. Followed a guide online for the PTFE fittings and I’d like to say everything went well, but time will tell whether they leak or not


- - - Updated - - -
Next up was the AN8 line between the fuel pump and the swirl pot;

It’d be rude not to throw the Equips on the rear to check the level of fitment, because fitment is the number one priority!


I quickly disassemble the clutch in order to bolt the flywheel and pressure plate on to check the release bearing and carrier is the correct size. The Twin Plate is gorgeous, wish I could just layer each plate in a frame as start at the forever, but that’d mean not driving, so onwards we go.

And the fork sat like this with the bearing up against the fingers of the pressure plate;

Not good! Its almost bottoms out the hole on the gearbox, let alone the travel of the slave.
So time to take a step back and have a think, which is kinda hard when this is sat in front of you


200sx_
PS13 x TD Power
So, the front windows were pretty beat up so I decided to go down the Polycarbonate route like I have with the rear. After a couple of weeks waiting for them to be made, they finally turned up;
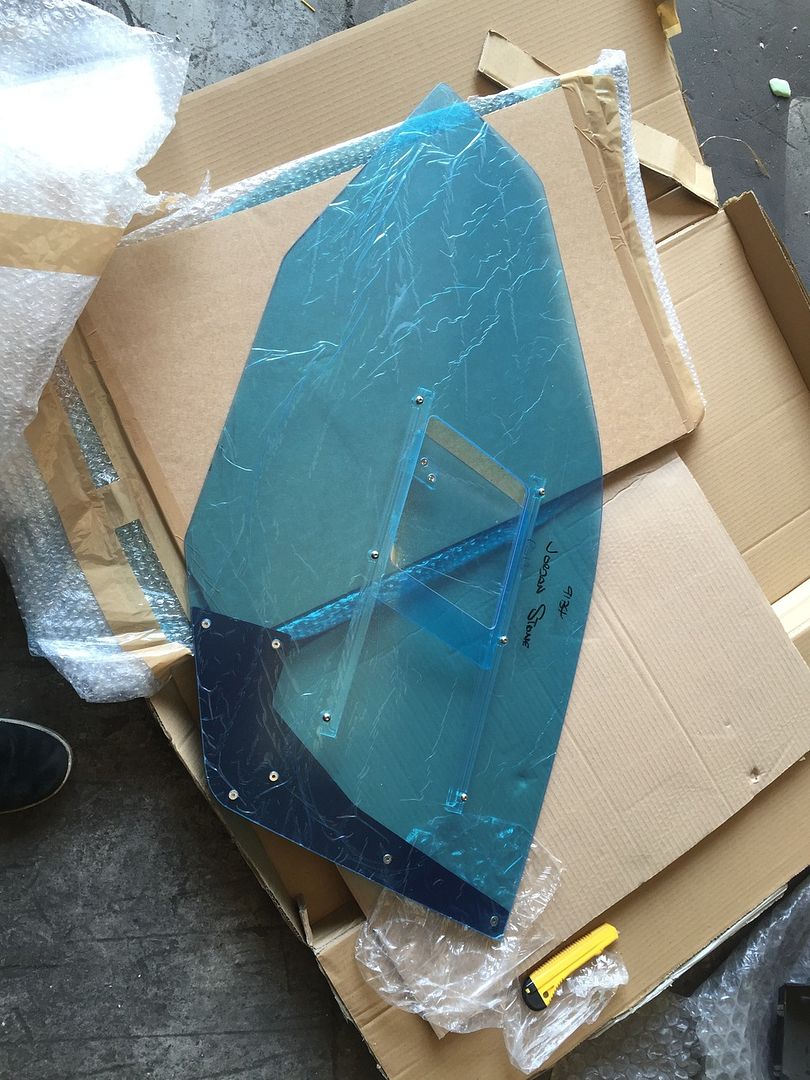
I spoke to a few people regarding how to mount them, with some people just wedging them up against the door, and some utilizing the existing runners. I went for the latter option, so first things first I got the old window in order to pinch the fixing and mark up their positions.
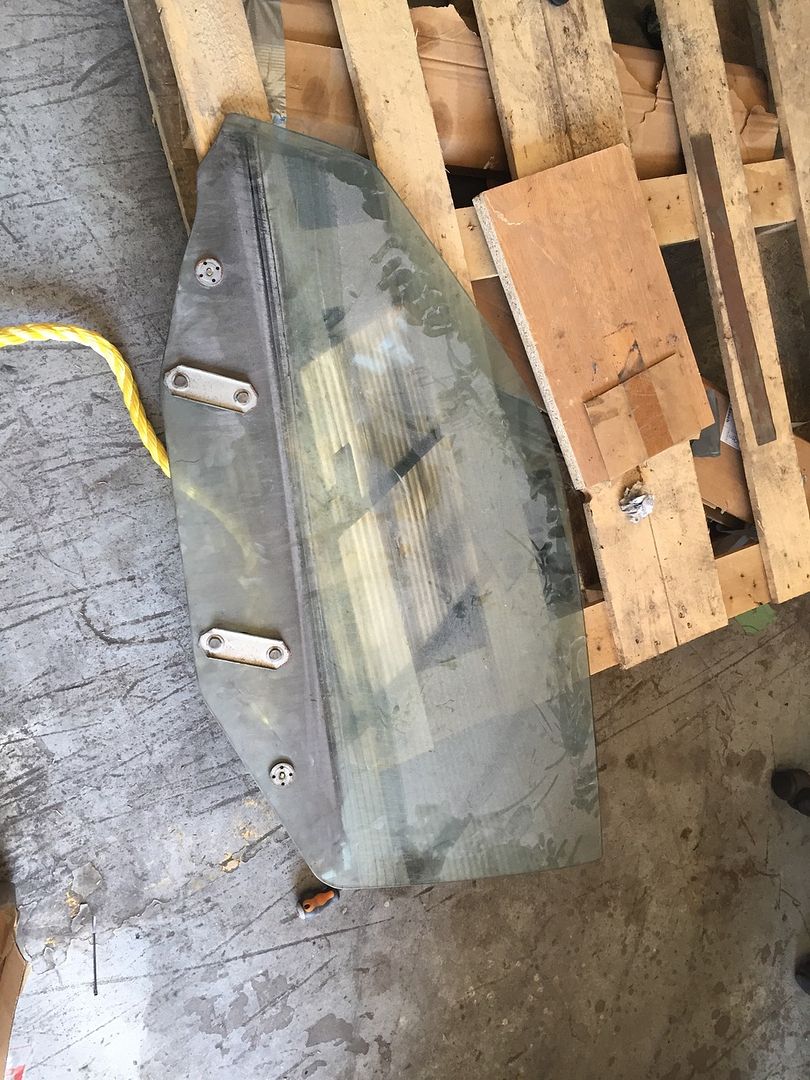
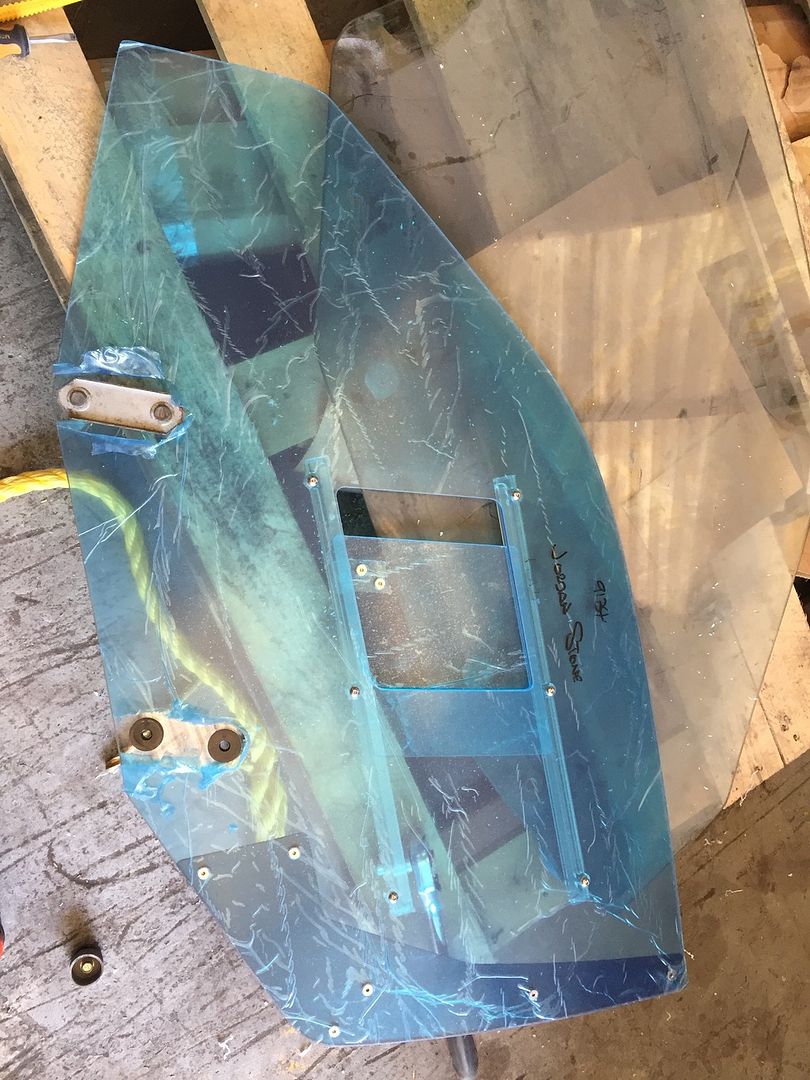
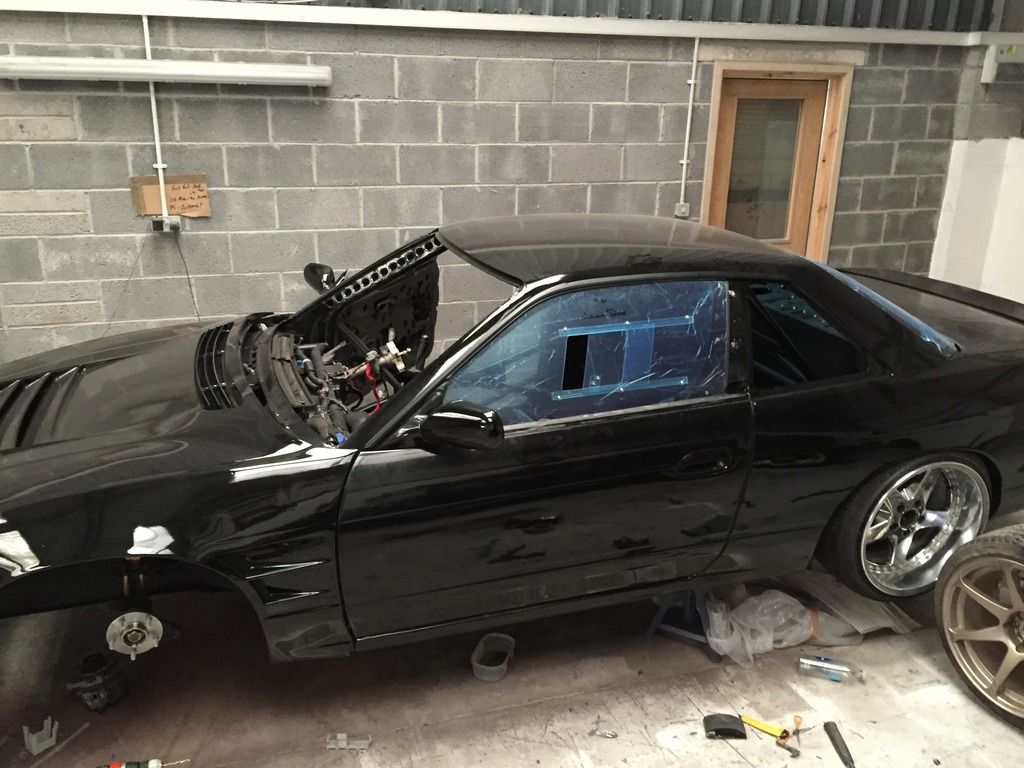
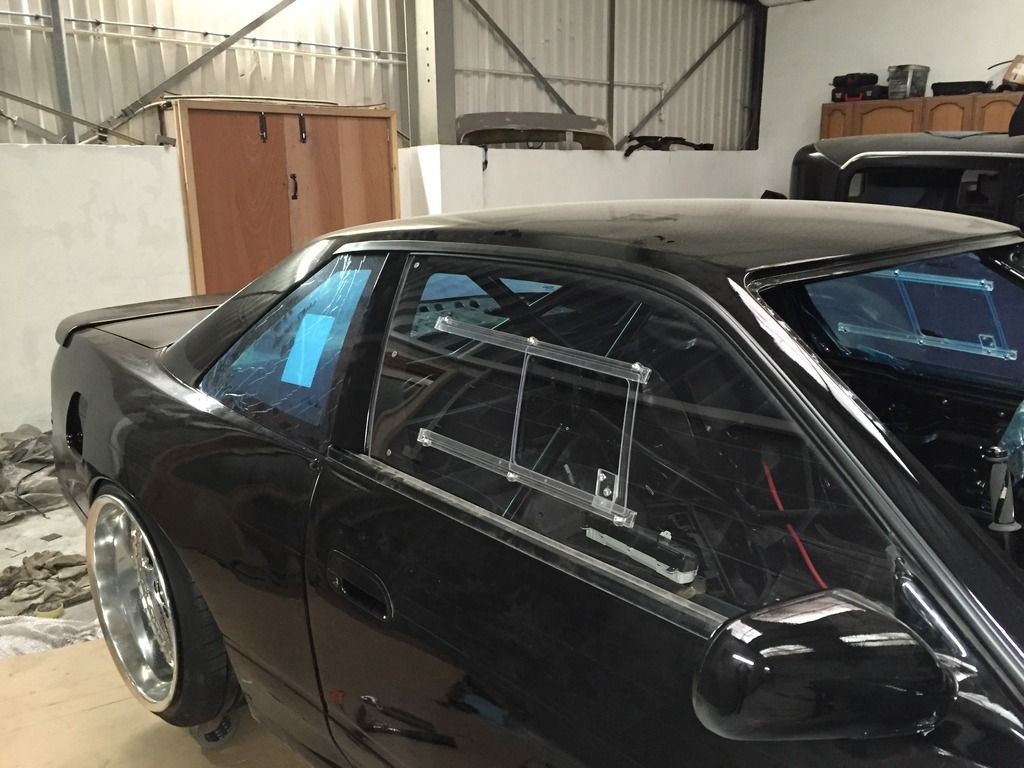
Adjusting them to fit perfectly was a ball ache, as I tried to make them sit under the original trim. 9/10 they sit perfectly with an odd time where they don’t sit flush. Those with a keen eye will see the windows have end plates, something Plastics4Performance offer to help reduce any flex in the windows. When you see cars competing with plastic windows, seeing them distort under movement always looks horrible in my opinion, so anything to avoid this is welcome in my book.
It wasn’t before long until the other side was done. I’m stoked with the outcome, and so happy with the slider. In regards to the sliders, I opted for those with a 15* angle, which I feel suit the lines of an S-body so much nicer, and doesn’t make it look like a serious track car, after all, style is everything
Up next was something I’ve seen a few variations of, which most people will be familiar of the Nismo Powerbrace. Supposedly, bracing the front tension rod brackets will improve the responsiveness and stability of the front end. It just so happens a friend of mine is a welder by trade, who makes things on the side for his and other peoples’ drift cars.
Usually the brackets are welded in situ, whereas we opted to take measurements and drop the brackets off to him. However, a simple type in my measurements meant the first go at the brace didn’t exactly fit. It was such a stupid mistake on my behalf I was kicking myself, but Mocock was a true gent and offered to cut apart the brace and get everything square as it should be, what a hero!
Early stages;
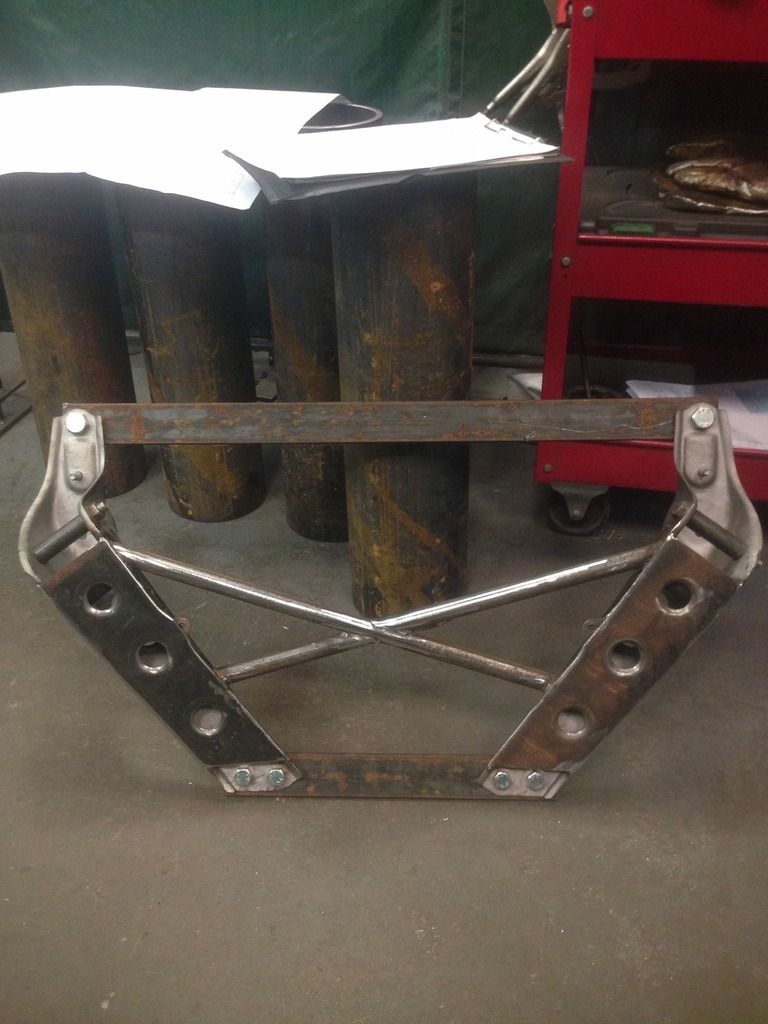
Finished Brace and Zinc Coated;
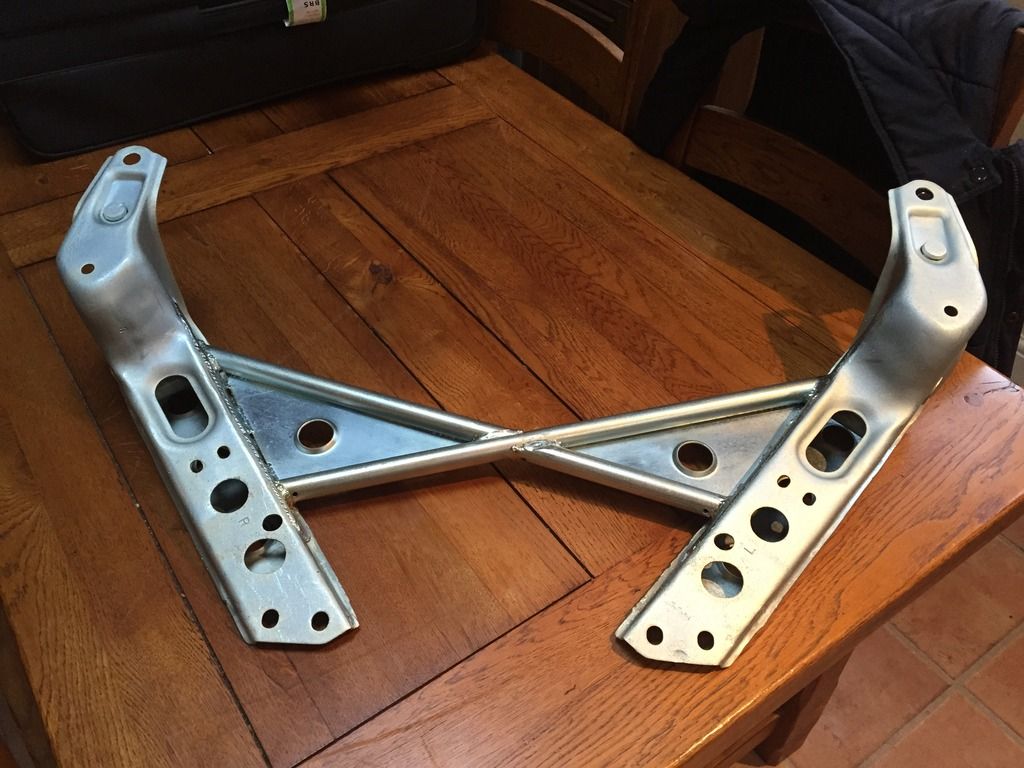
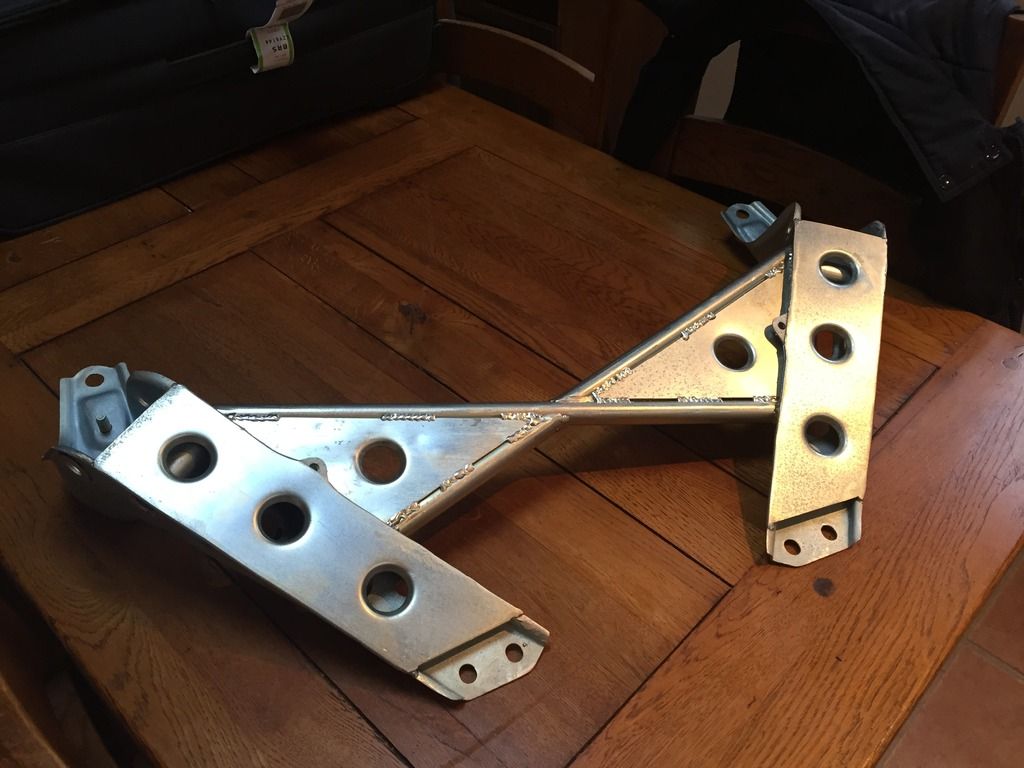
When I found out the measurements I sent were ever so slightly wrong and it didn’t quite fit

I spoke to a few people regarding how to mount them, with some people just wedging them up against the door, and some utilizing the existing runners. I went for the latter option, so first things first I got the old window in order to pinch the fixing and mark up their positions.


Adjusting them to fit perfectly was a ball ache, as I tried to make them sit under the original trim. 9/10 they sit perfectly with an odd time where they don’t sit flush. Those with a keen eye will see the windows have end plates, something Plastics4Performance offer to help reduce any flex in the windows. When you see cars competing with plastic windows, seeing them distort under movement always looks horrible in my opinion, so anything to avoid this is welcome in my book.
It wasn’t before long until the other side was done. I’m stoked with the outcome, and so happy with the slider. In regards to the sliders, I opted for those with a 15* angle, which I feel suit the lines of an S-body so much nicer, and doesn’t make it look like a serious track car, after all, style is everything


Up next was something I’ve seen a few variations of, which most people will be familiar of the Nismo Powerbrace. Supposedly, bracing the front tension rod brackets will improve the responsiveness and stability of the front end. It just so happens a friend of mine is a welder by trade, who makes things on the side for his and other peoples’ drift cars.
Usually the brackets are welded in situ, whereas we opted to take measurements and drop the brackets off to him. However, a simple type in my measurements meant the first go at the brace didn’t exactly fit. It was such a stupid mistake on my behalf I was kicking myself, but Mocock was a true gent and offered to cut apart the brace and get everything square as it should be, what a hero!
Early stages;

Finished Brace and Zinc Coated;


When I found out the measurements I sent were ever so slightly wrong and it didn’t quite fit


200sx_
PS13 x TD Power
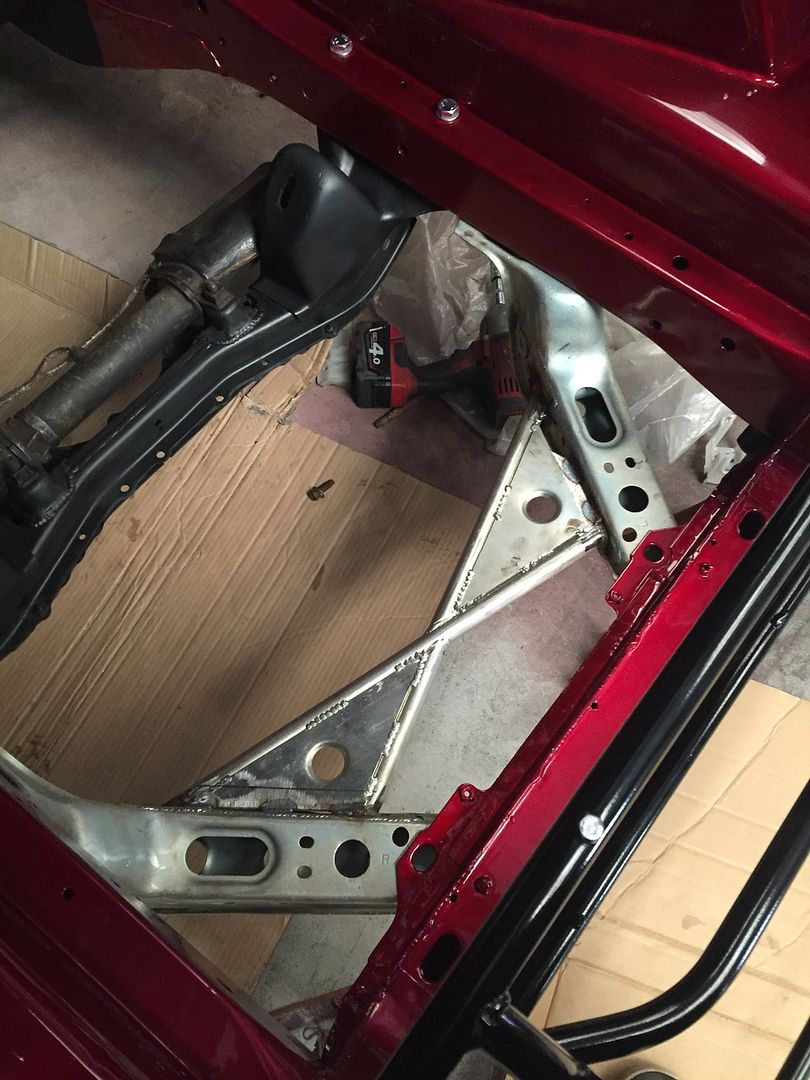
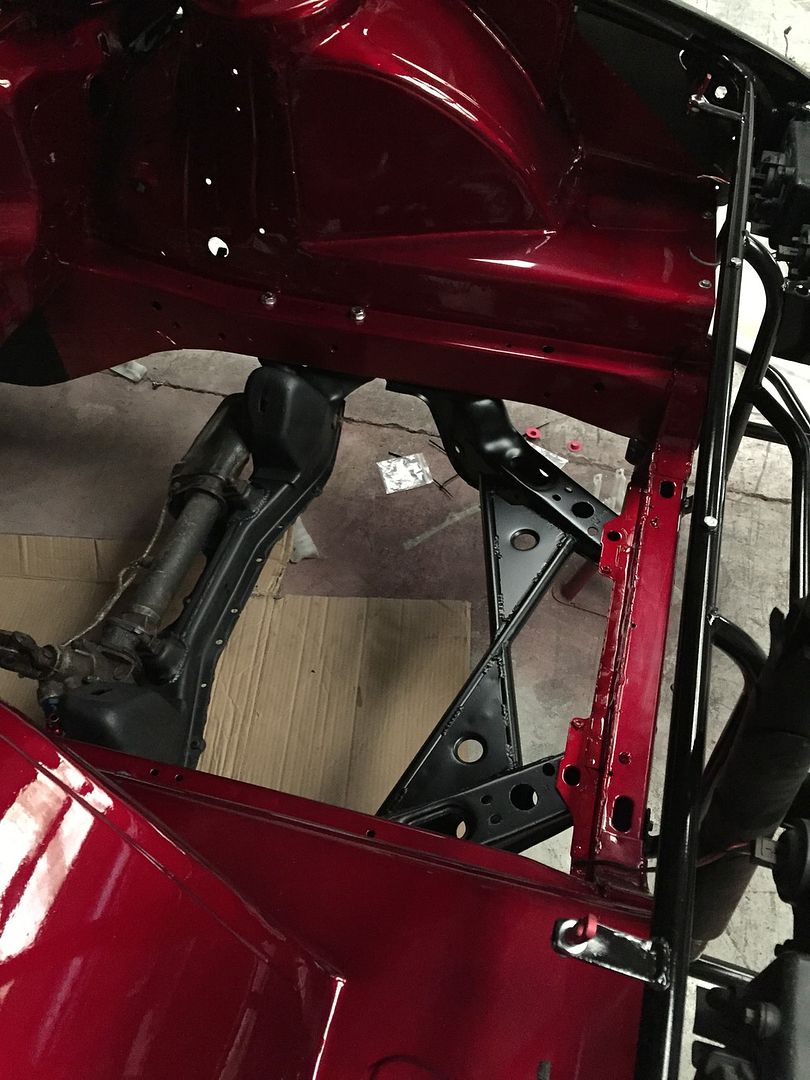
All back from being re-done and quickly sprayed to protect any welds that didn’t have any zinc coating on;
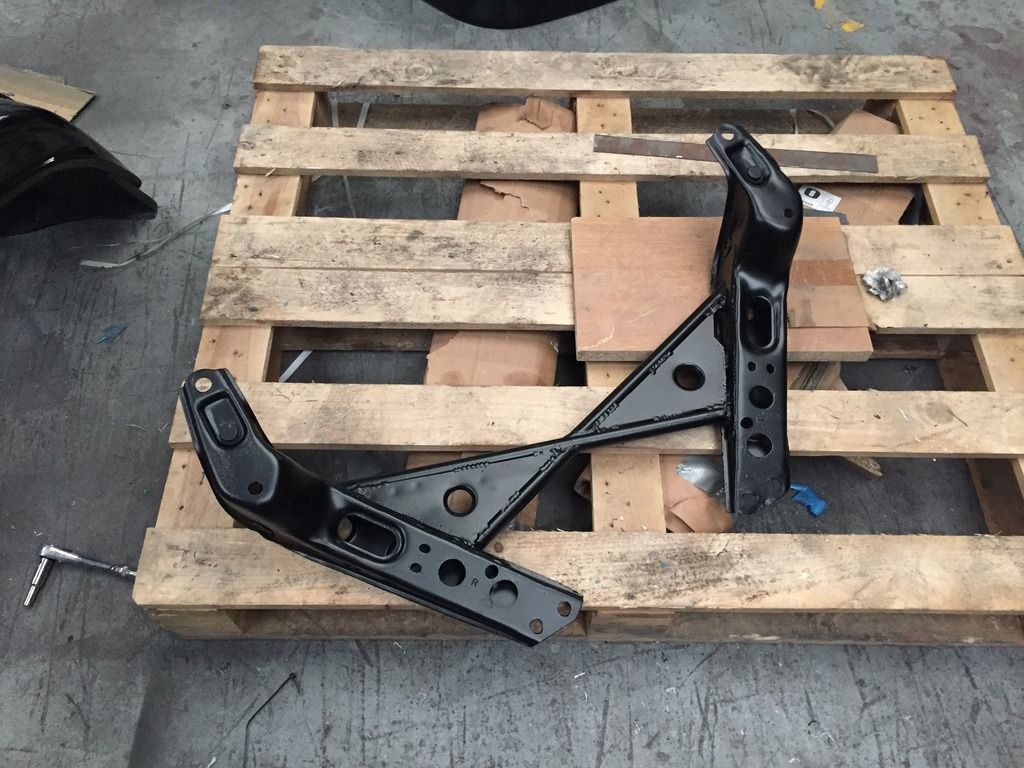
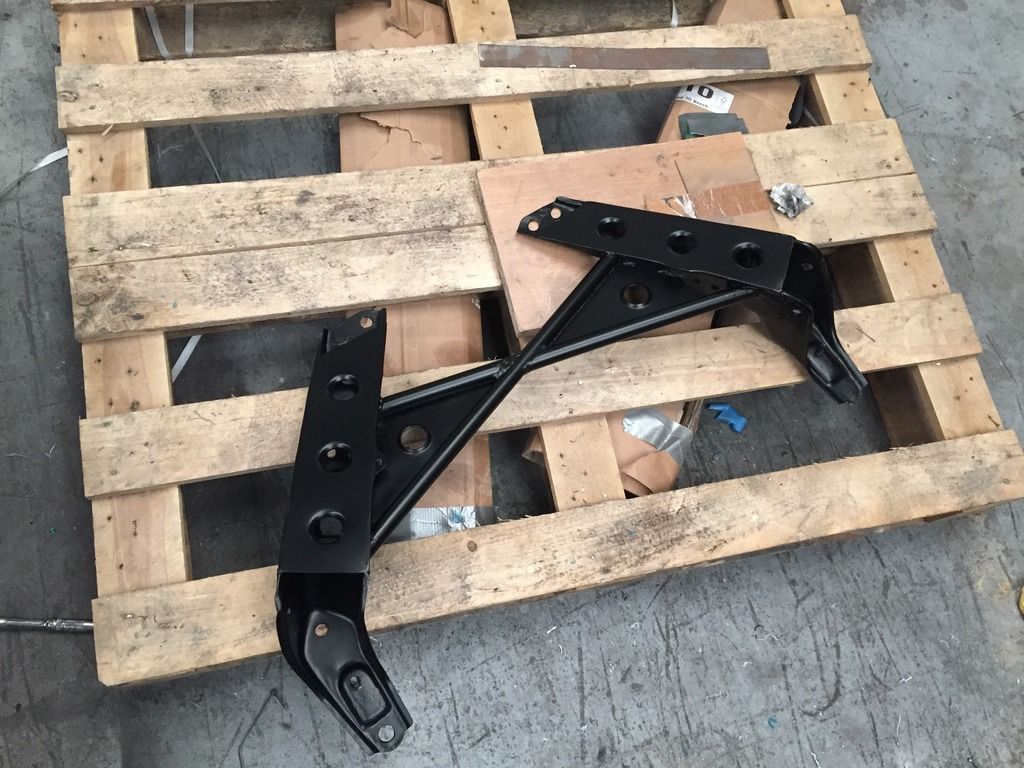
And finally all fitted up as it should Cant believe how good it looks with the engine bay colour, and cant wait to see what difference it’ll make to the front end.
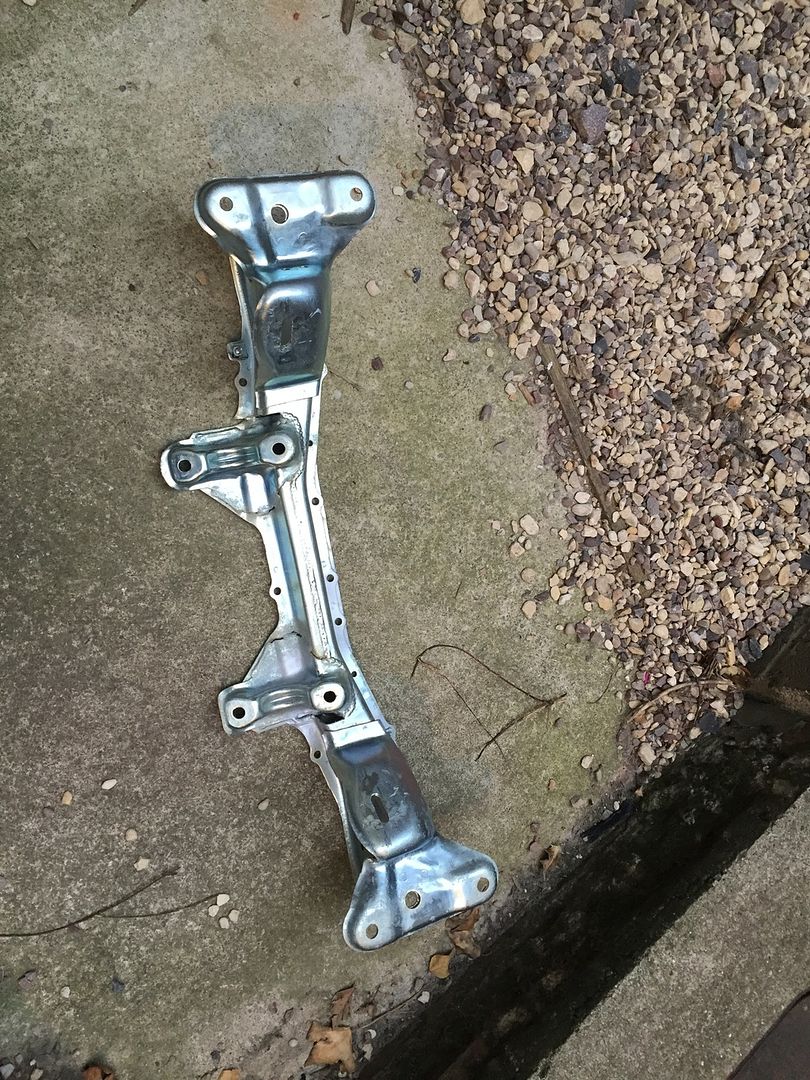
Whilst this was happening, I chose to get the front subframe and lower control arms zinc coated in order to protect them against the elements.
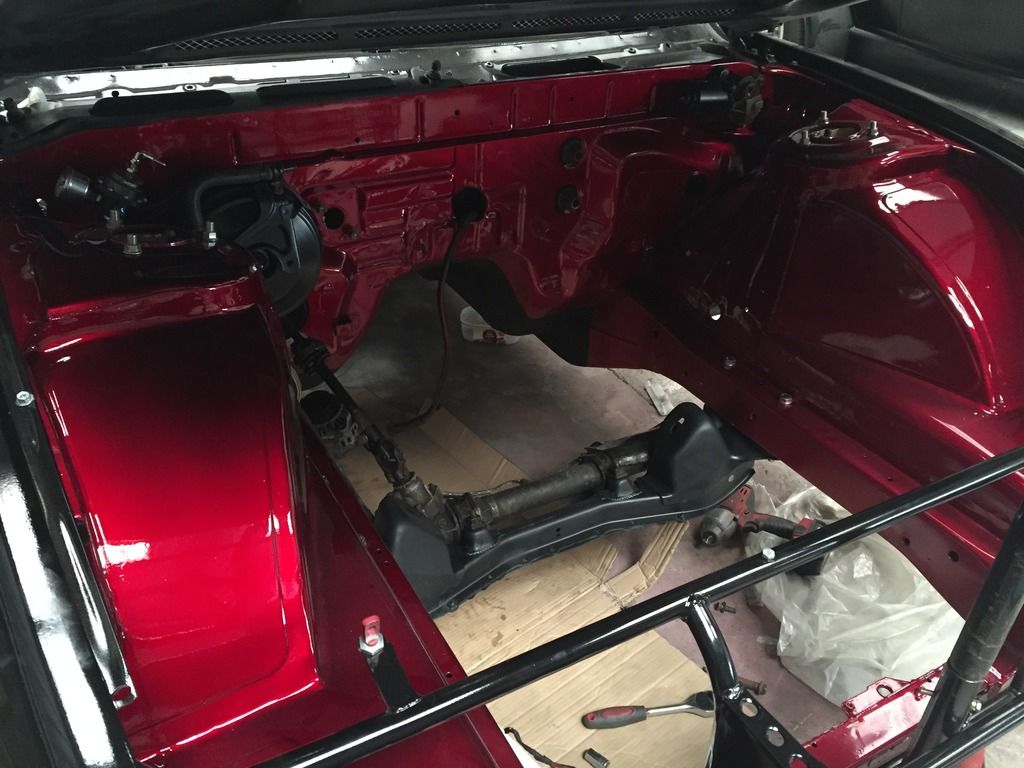
Quickly sprayed the subframe to match the brace, and quickly bolted the steering rack on after a quick clean.
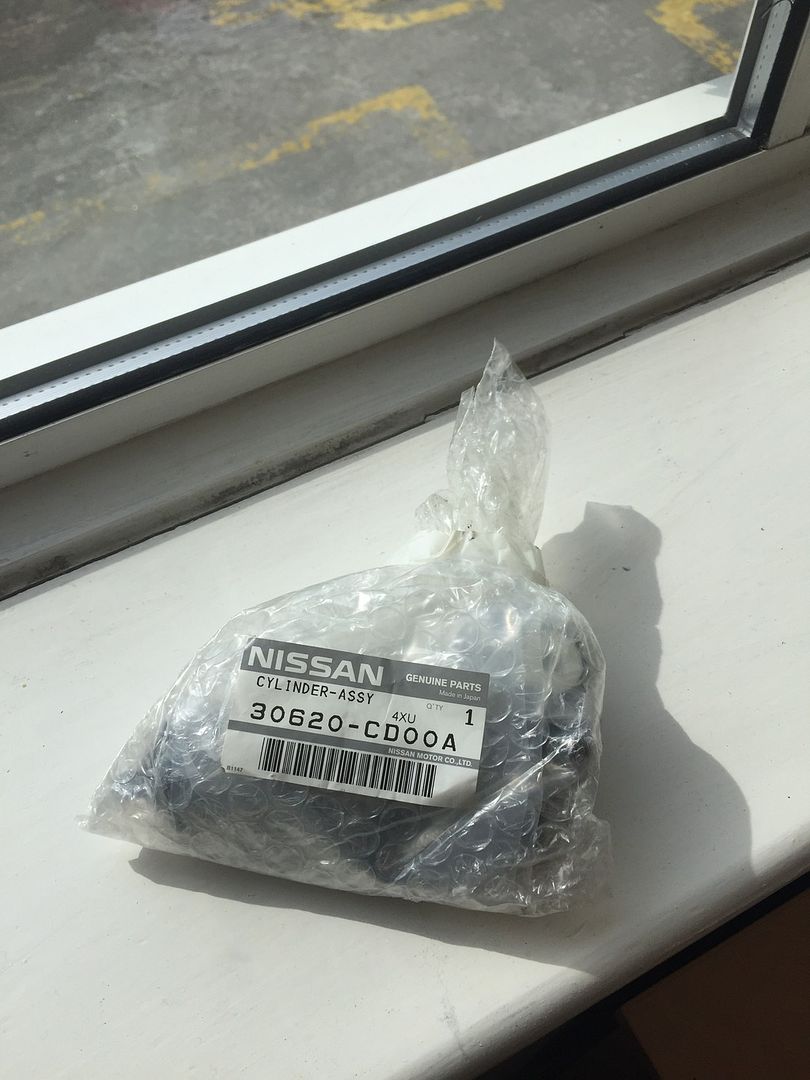
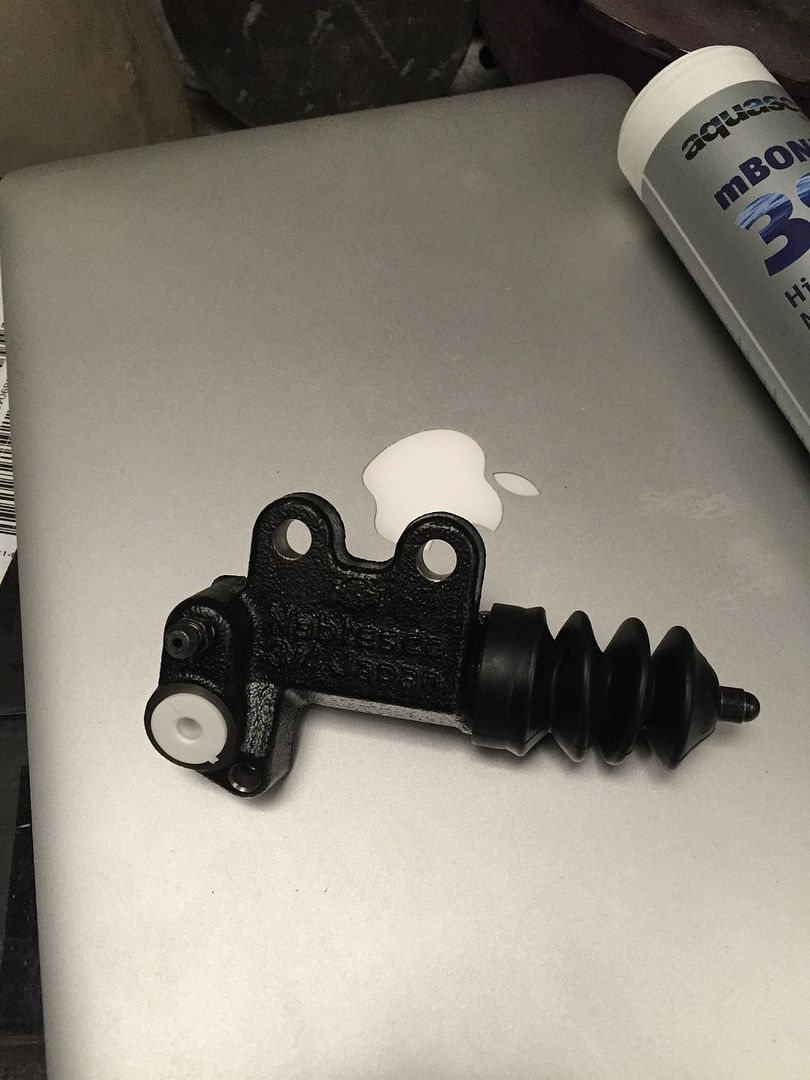
Whilst all this was happening, I bought a brand new OEM Z33 slave cylinder from the states. There are quite a few OE cylinders online, but for the sake of an extra £10 or so, the better quality OEM slave was a no brainer.
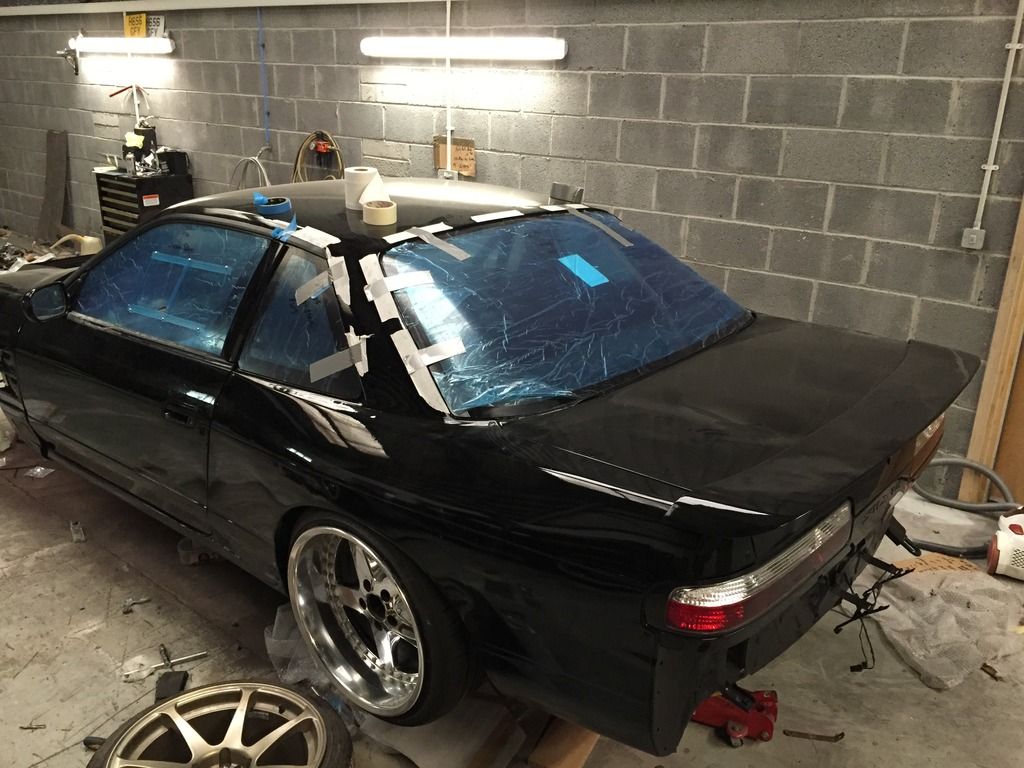
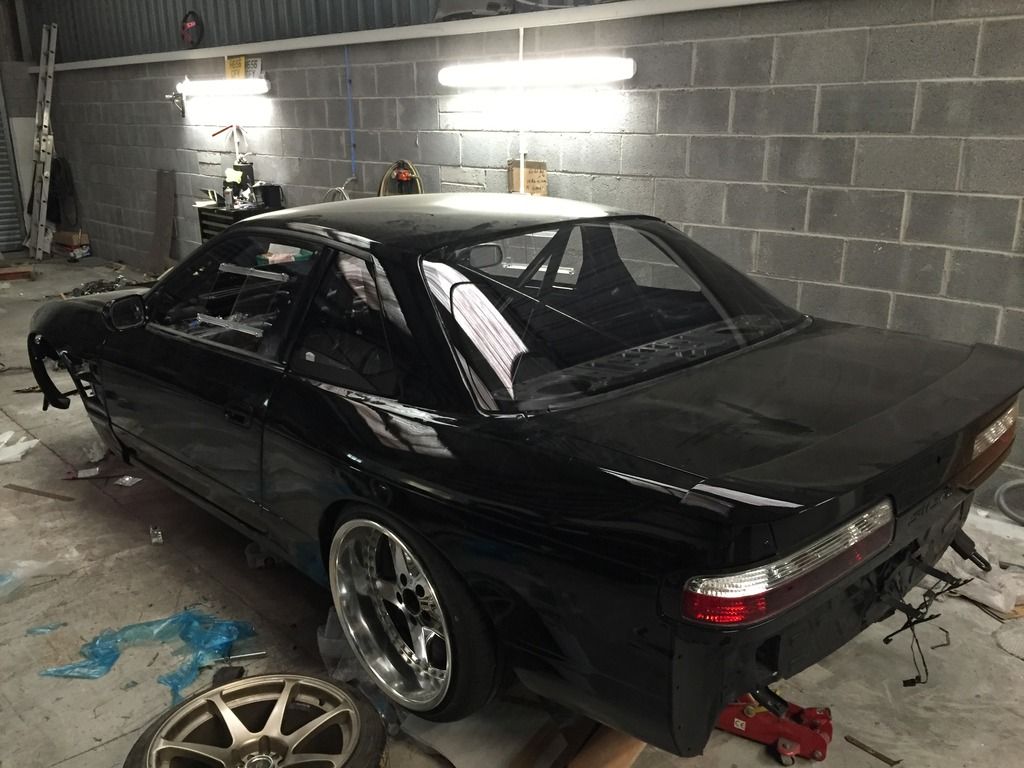
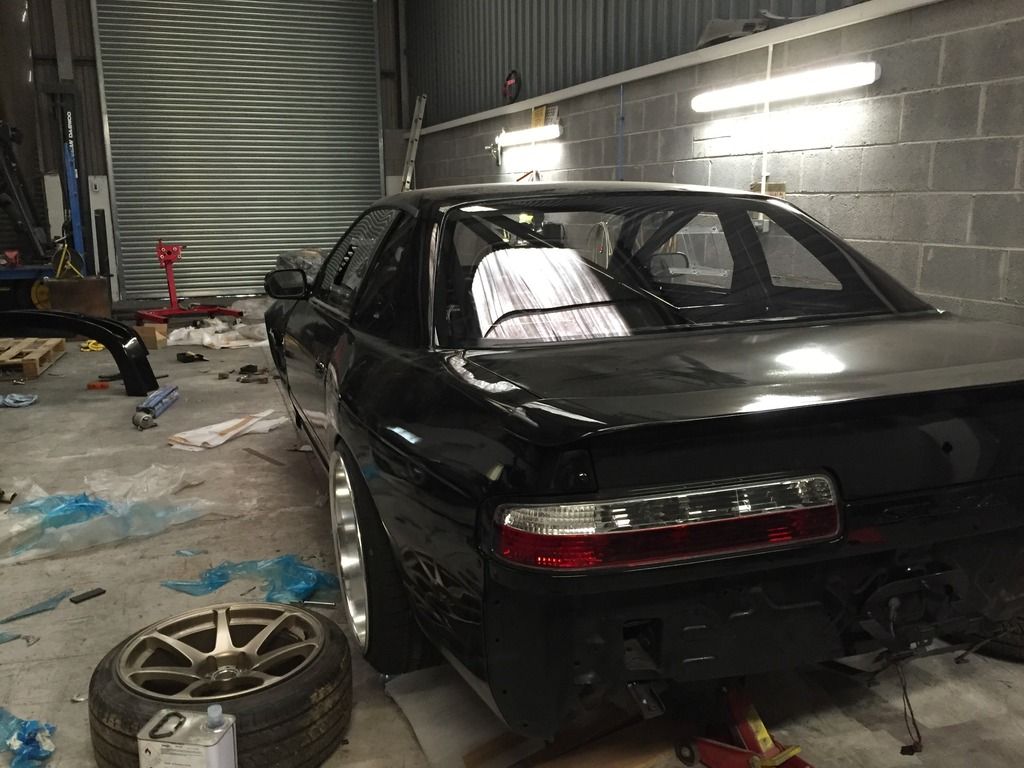
So whilst I was waiting on other things, I ordered up some Aquaseal Mbond 395 bonding adhesive/sealant, something that Plastics4Performace recommend as it is solvent free, which wont attach the polycarbonate. Oh and its formulated for the marine industry to survive harsh vibrations, something thatll suit an SR20 with uprated engine mounts then

- - - Updated - - -
Cue 24hours later;
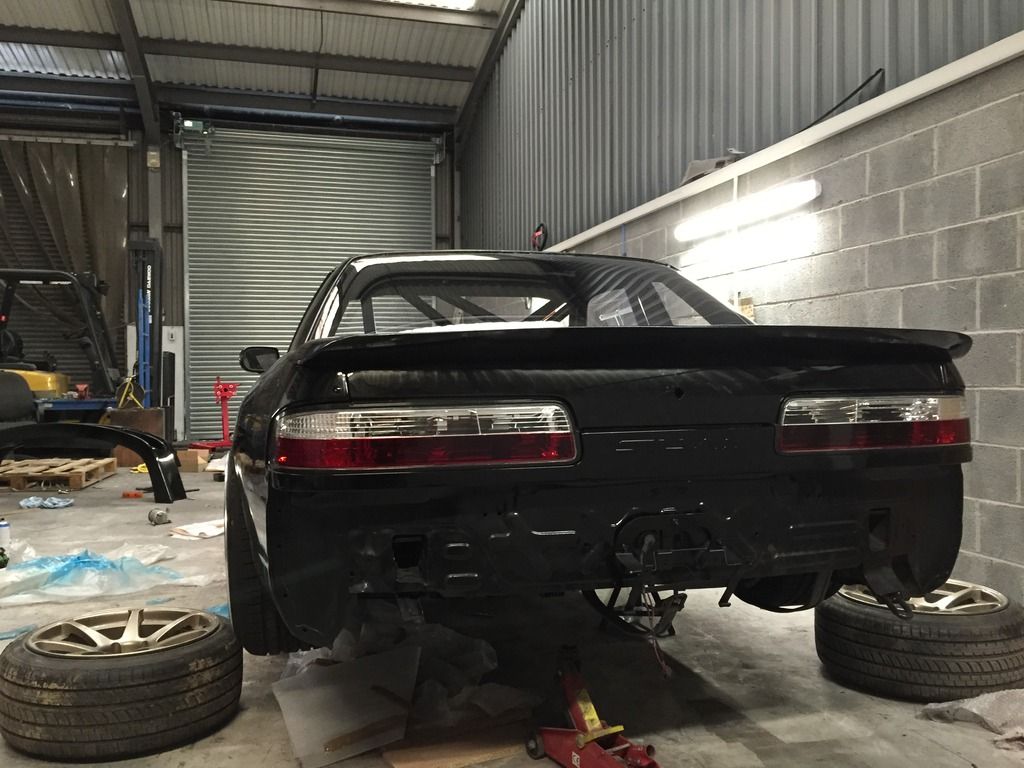
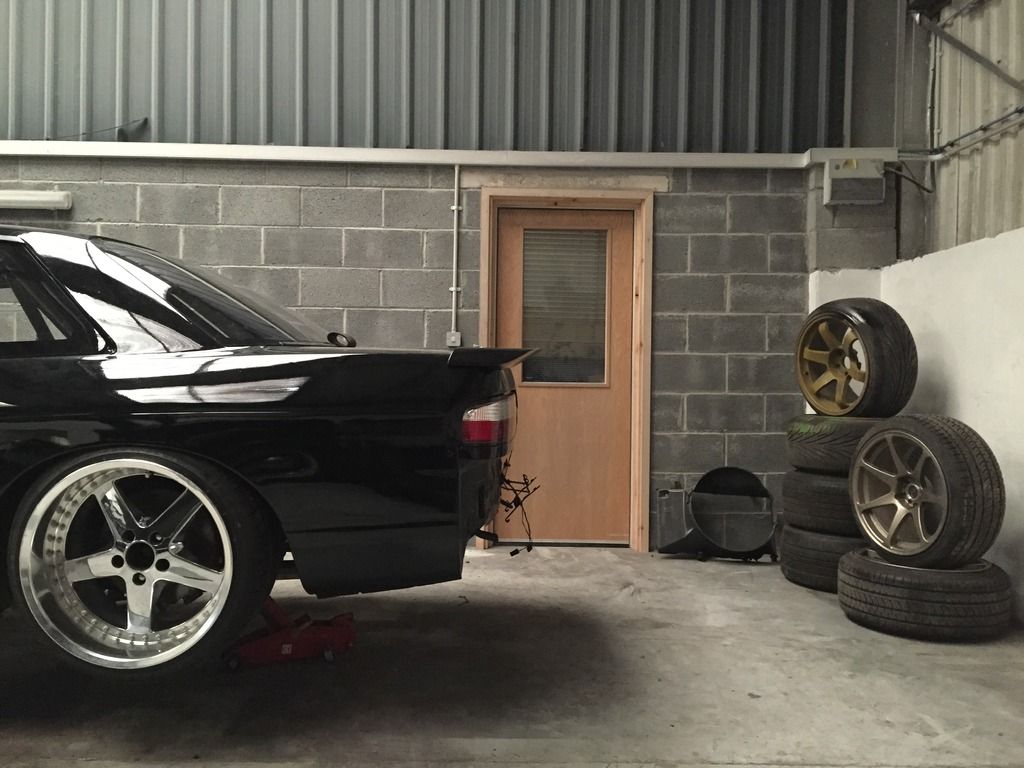
I began to split the 2 pairs of Z32 rear callipers in preparation of their rebuild. Whilst one pair came off my old car which I knew worked fine, and the other pair were supposedly fine, for the sake of a few hours work, a freshen up will do no harm at all.
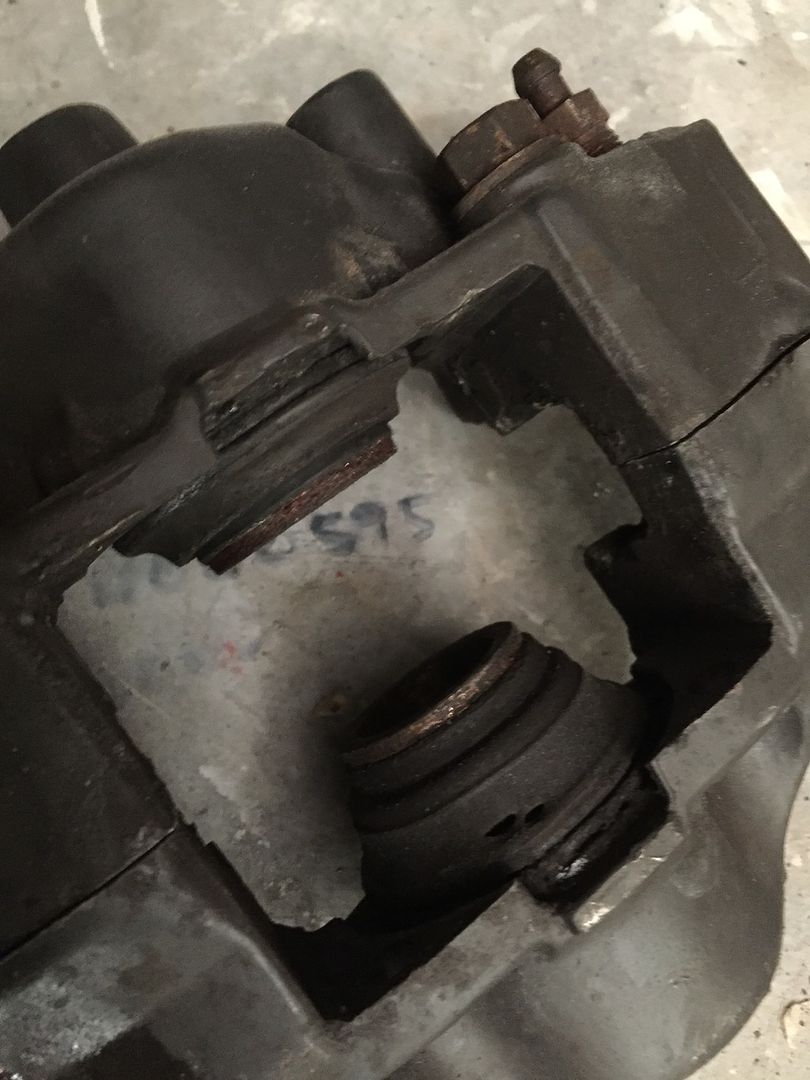
I spotted one of the caliper has a slight tear in the dust seal, so cant imagine it would’ve have been long until water would’ve found its way in and begin to rust the insides.
Who said Dual Caliper setups are fun?!
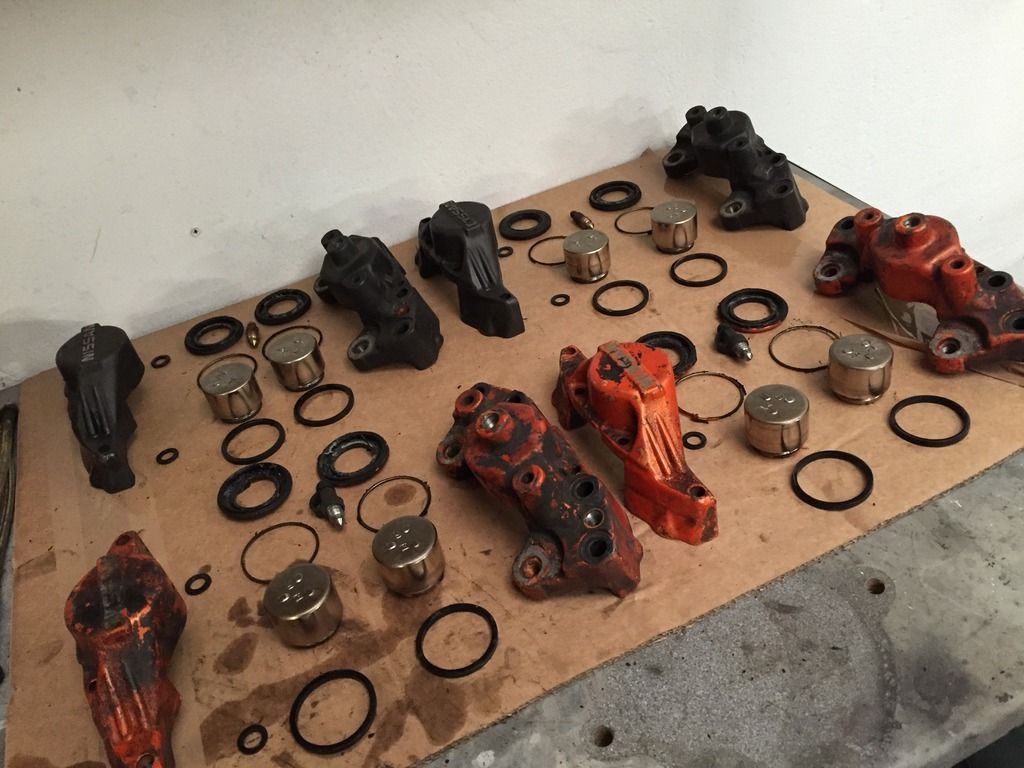
Cleaned up the calipers, and gave them a quick lick of paint (Black to match the front and to keep the dual caliper setup subtle)
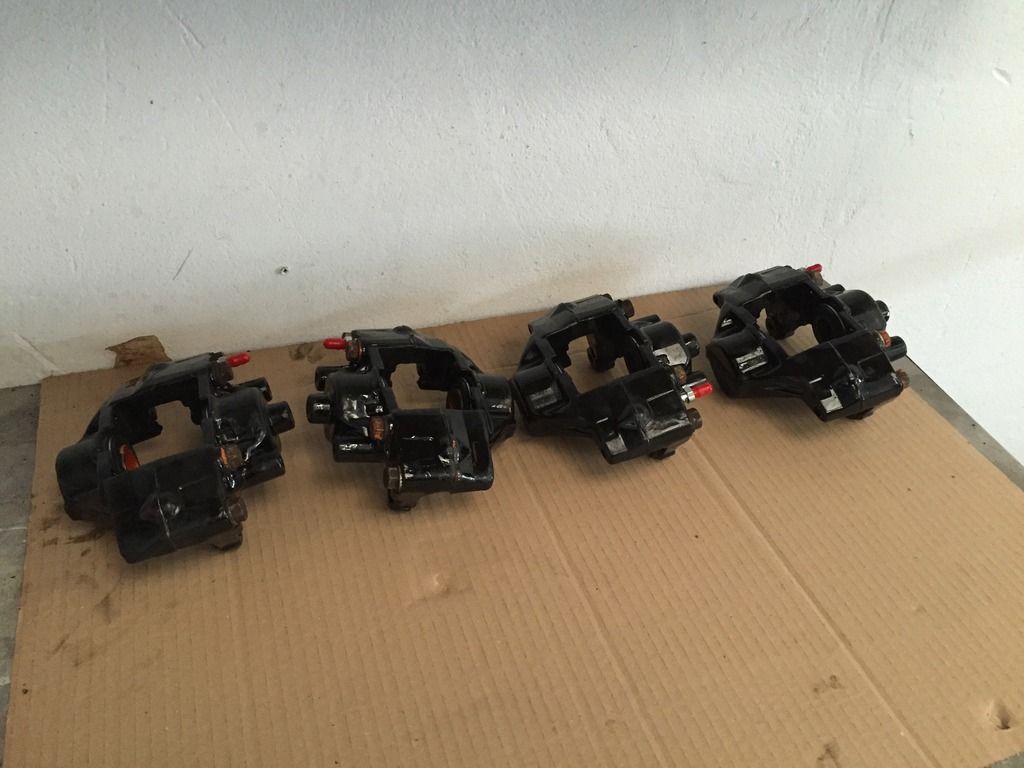
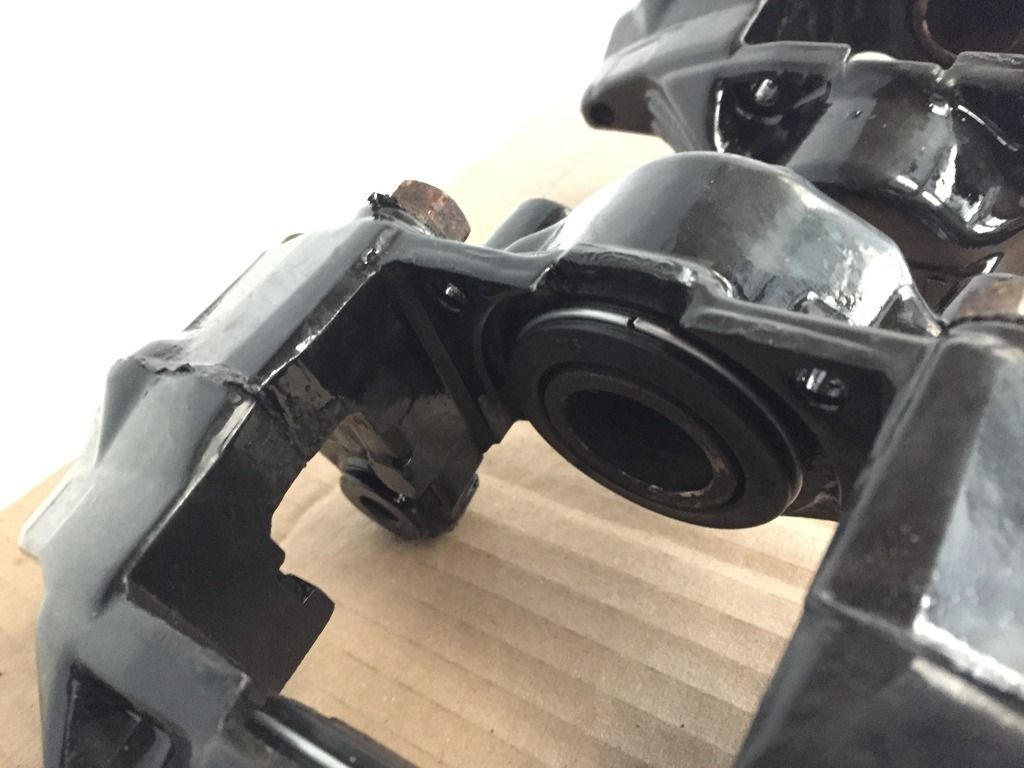
Ive got to say a huge thanks to Bigg Red for providing the seal kits, grease, fresh bleed nipples and top service. The whole kit went back together pretty flawlessly, which hopefully means they will work as they should
- - - Updated - - -
So back to the gearbox drama surrounding the fork positioning. I quickly marked up the fork to see how it sat again. And then added the slave for good measure.
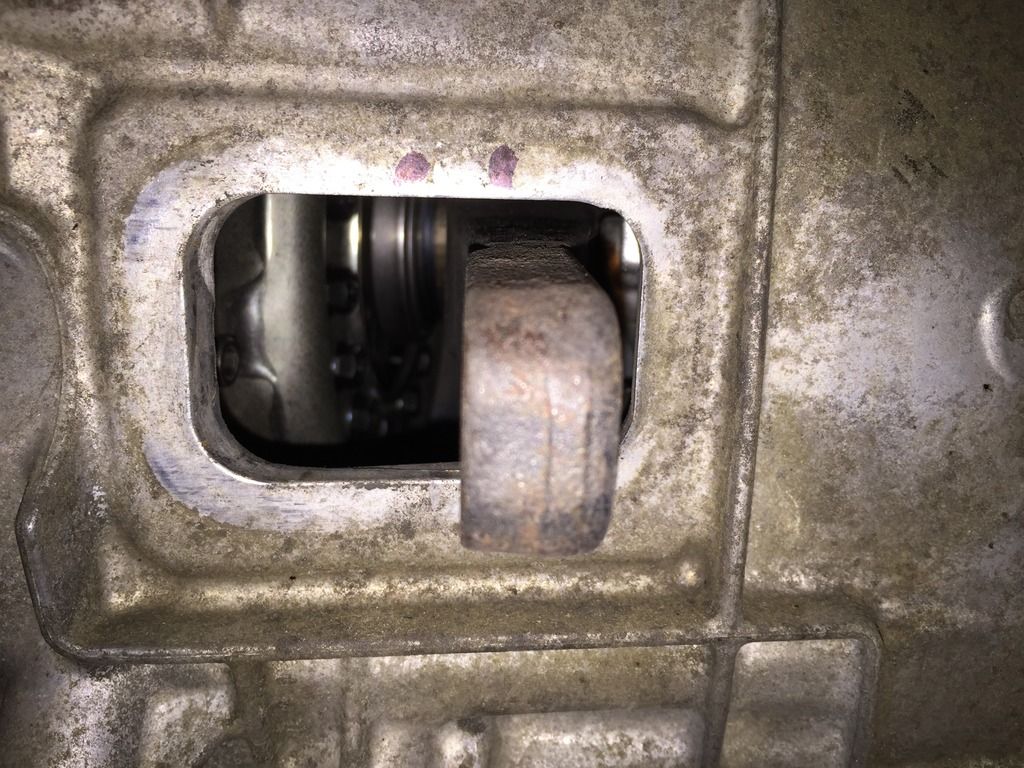
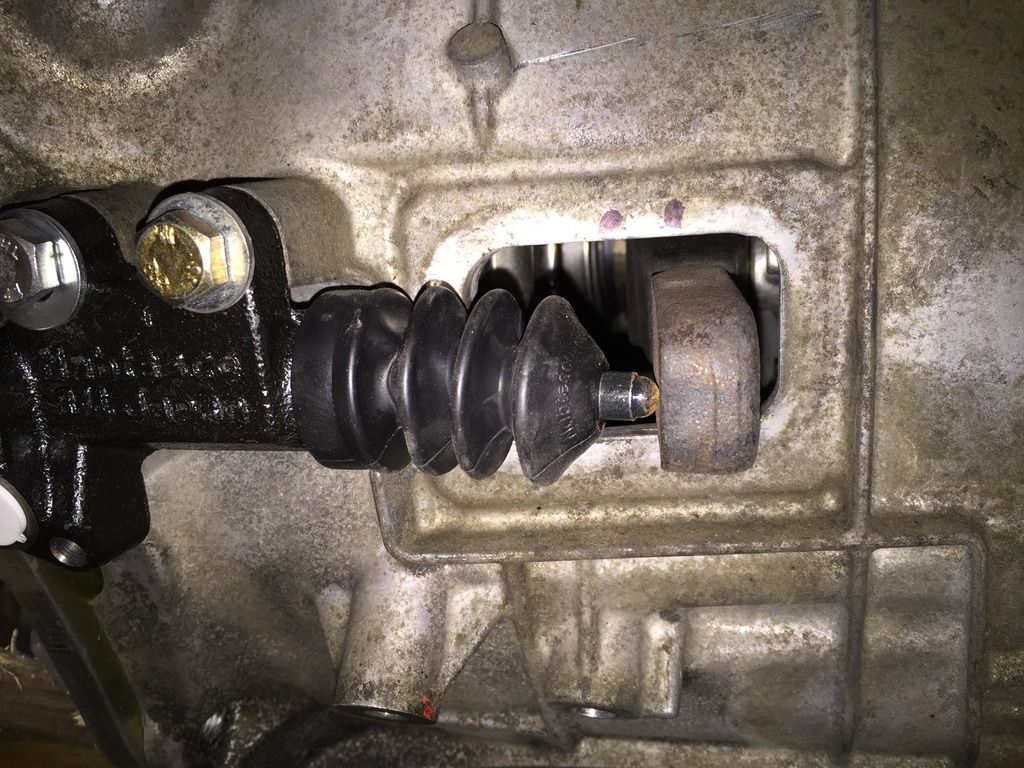
There’s no way in hell that this setup would work, as the fork would physically hit the gearbox bellhousing before fully disengaging the clutch. So back to the drawing board!
So to cheer myself up, and went and grabbed myself a torque wrench, something I’ve never owned, and given the flywheel torque setting, its not something I really want to chance.
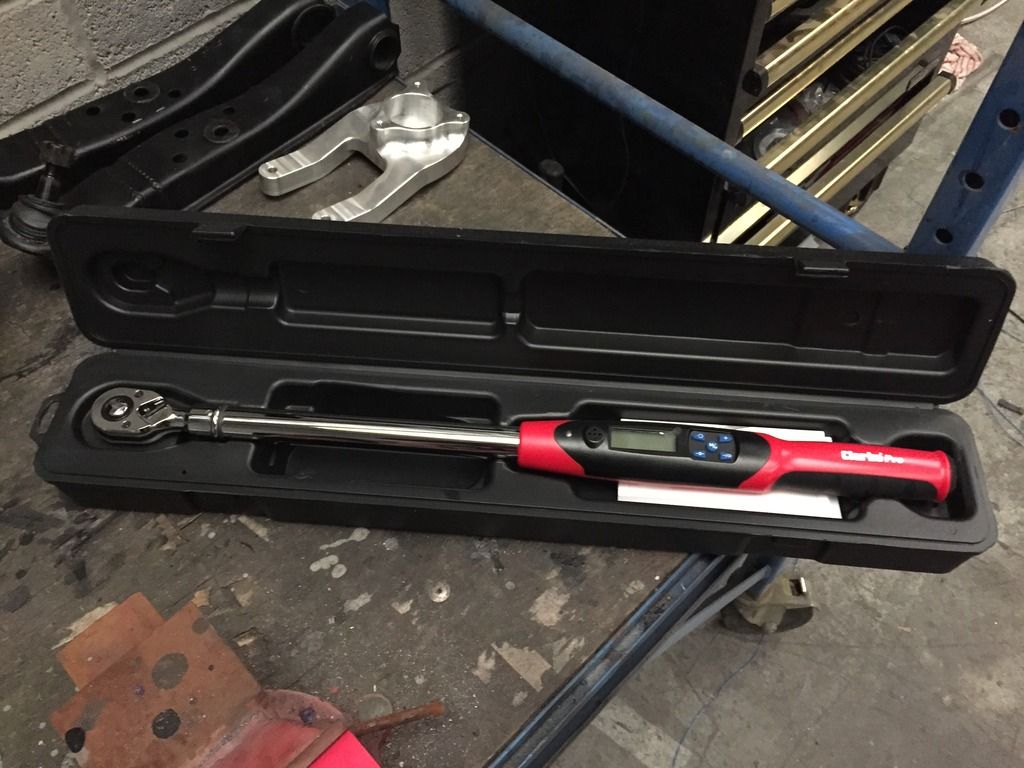
After finally learning how to set the damn thing up, it’s a pretty nifty little tool to be honest. With help from a friend, it wasn’t long until the clutch was on, and all torqued up to OS Giken and ARP’s recommended torque settings.


And finally all fitted up as it should
 Cant believe how good it looks with the engine bay colour, and cant wait to see what difference it’ll make to the front end.
Whilst this was happening, I chose to get the front subframe and lower control arms zinc coated in order to protect them against the elements.

Quickly sprayed the subframe to match the brace, and quickly bolted the steering rack on after a quick clean.

Whilst all this was happening, I bought a brand new OEM Z33 slave cylinder from the states. There are quite a few OE cylinders online, but for the sake of an extra £10 or so, the better quality OEM slave was a no brainer.


So whilst I was waiting on other things, I ordered up some Aquaseal Mbond 395 bonding adhesive/sealant, something that Plastics4Performace recommend as it is solvent free, which wont attach the polycarbonate. Oh and its formulated for the marine industry to survive harsh vibrations, something thatll suit an SR20 with uprated engine mounts then


- - - Updated - - -
Cue 24hours later;


I began to split the 2 pairs of Z32 rear callipers in preparation of their rebuild. Whilst one pair came off my old car which I knew worked fine, and the other pair were supposedly fine, for the sake of a few hours work, a freshen up will do no harm at all.

I spotted one of the caliper has a slight tear in the dust seal, so cant imagine it would’ve have been long until water would’ve found its way in and begin to rust the insides.
Who said Dual Caliper setups are fun?!

Cleaned up the calipers, and gave them a quick lick of paint (Black to match the front and to keep the dual caliper setup subtle)


Ive got to say a huge thanks to Bigg Red for providing the seal kits, grease, fresh bleed nipples and top service. The whole kit went back together pretty flawlessly, which hopefully means they will work as they should

- - - Updated - - -
So back to the gearbox drama surrounding the fork positioning. I quickly marked up the fork to see how it sat again. And then added the slave for good measure.


There’s no way in hell that this setup would work, as the fork would physically hit the gearbox bellhousing before fully disengaging the clutch. So back to the drawing board!
So to cheer myself up, and went and grabbed myself a torque wrench, something I’ve never owned, and given the flywheel torque setting, its not something I really want to chance.

After finally learning how to set the damn thing up, it’s a pretty nifty little tool to be honest. With help from a friend, it wasn’t long until the clutch was on, and all torqued up to OS Giken and ARP’s recommended torque settings.

Last edited:
200sx_
PS13 x TD Power
What with all the problems on my car, I’ve managed to make my dad become interested in his again, which in my opinion is nice to work on another car apart from my own.
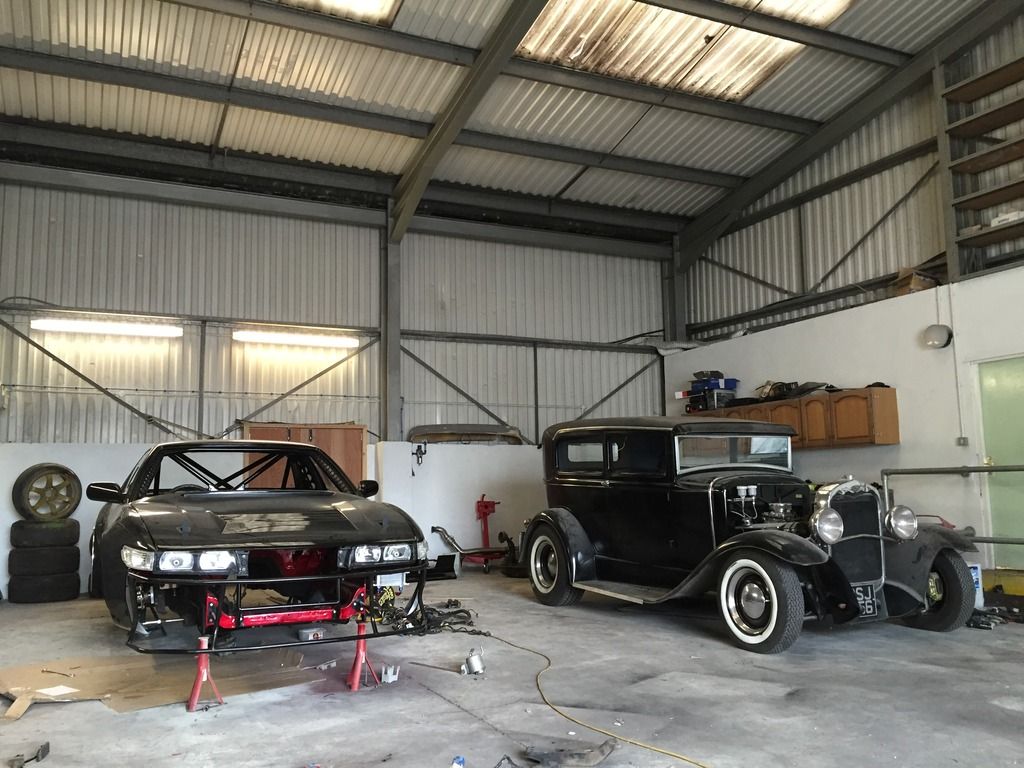
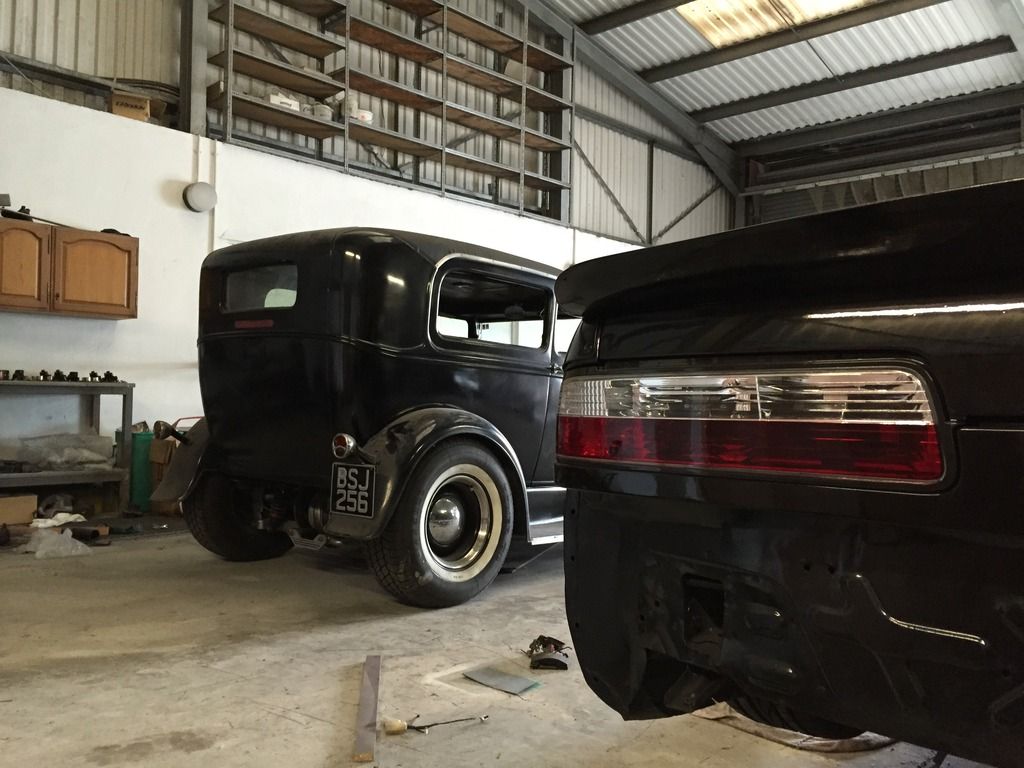
I then got bored, and after an hour or two this kinda happened;
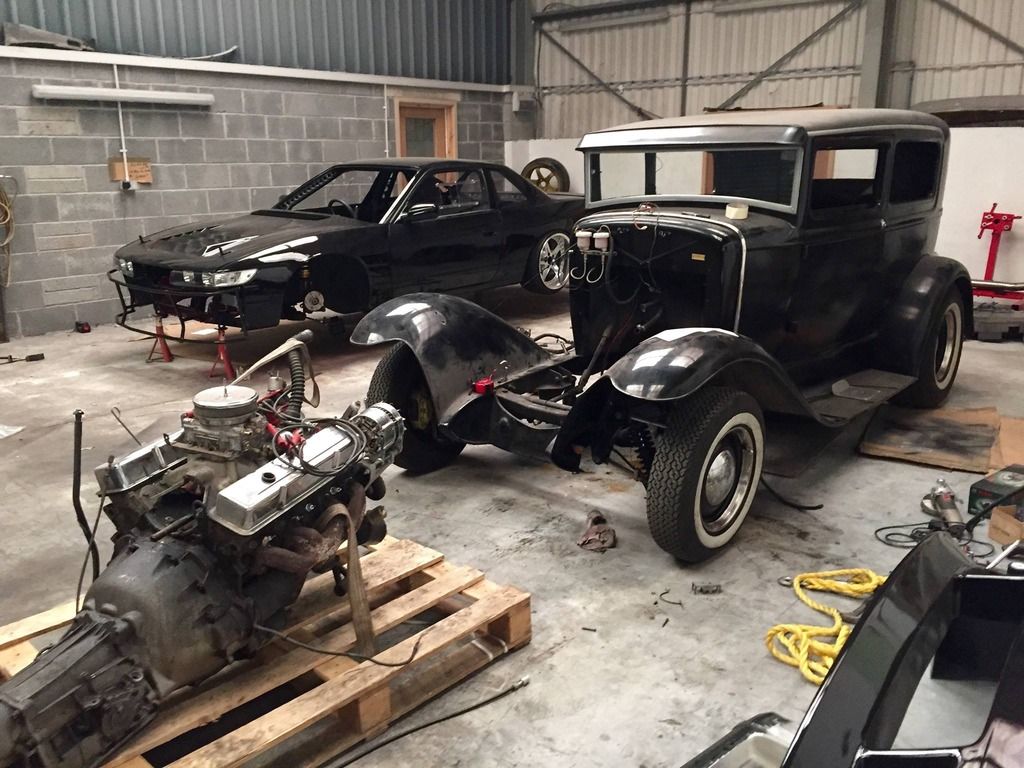
Hopefully the plans are to ditch the Rover V8 that’s in the hot rod now, in favour of something more spicy from the states.
I decided to have another go at the release bearing issue, where I gave RB Motorsport a quick call as they’re the UK OS Giken dealers. After doing some measurements it seemed I needed a 32mm sleeve rather than a 16mm sleeve (I opted to follow the recommend sleeve for an SR box, as various people use the standard SR sleeve and bearing combination for their SR/Z33 conversion, albeit with regular 3-puk clutches).
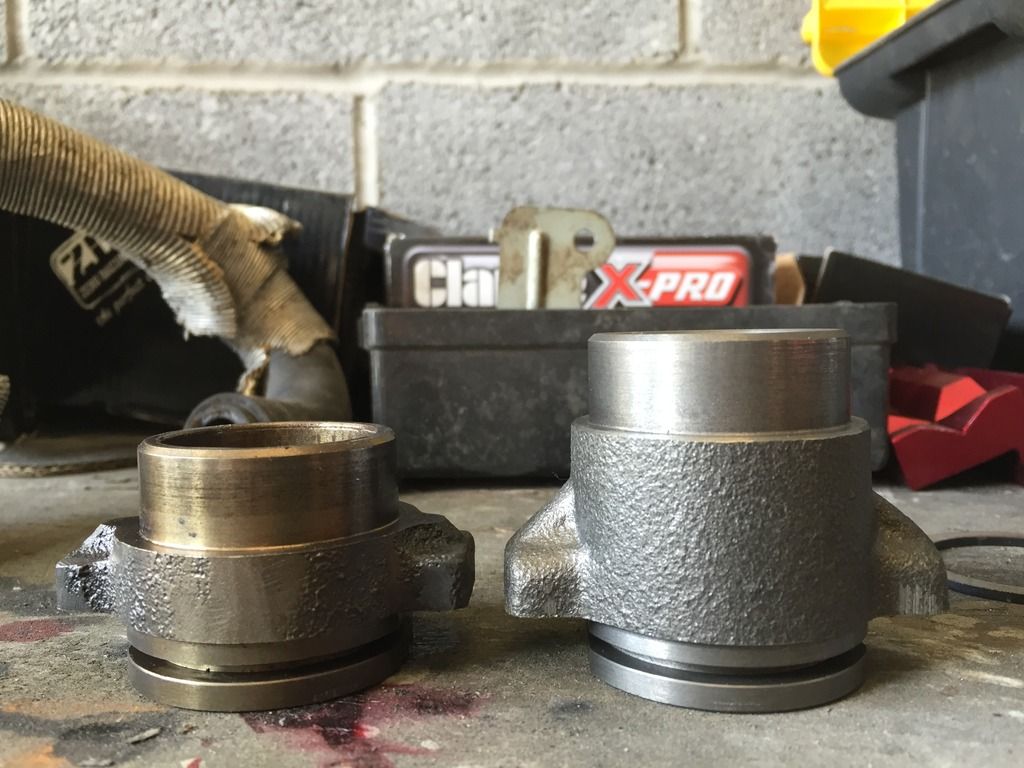
OS Giken only provide sleeves up to 28mm, leaving me 4mm short. Luckily enough, the 16mm sleeve I originally bought is actually a 12mm sleeve, with 2x 2mm washers to space the bearing in order to make up the difference, perfect!
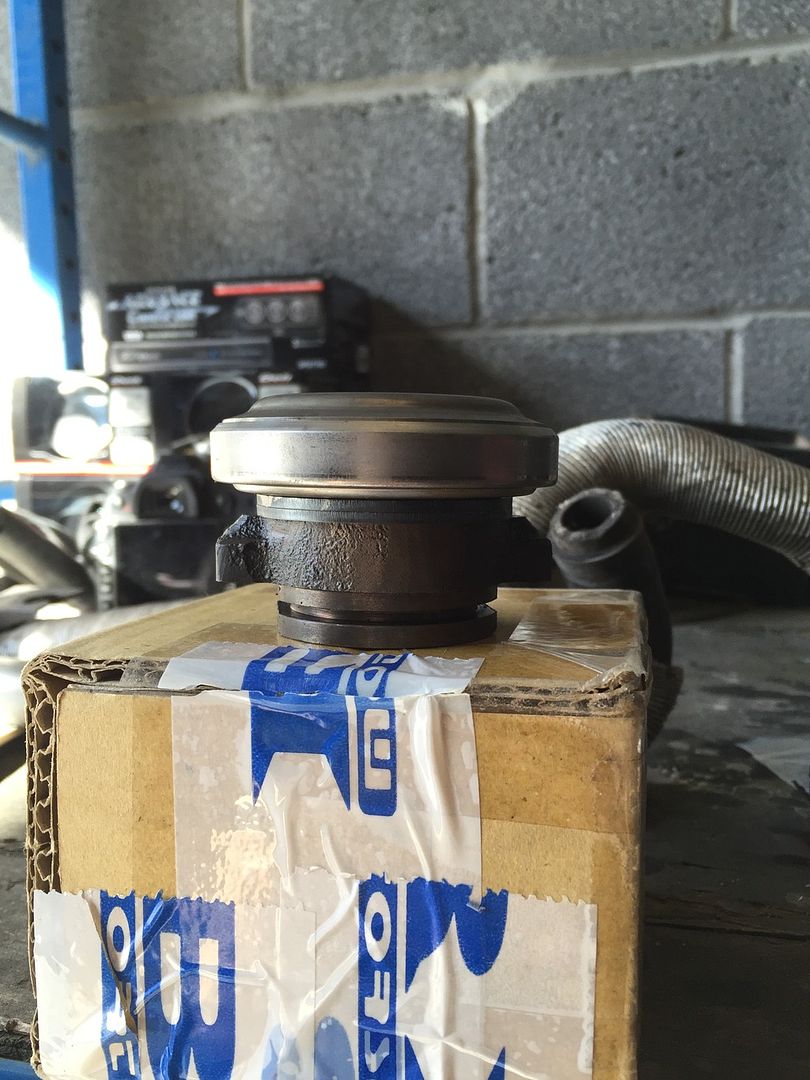
So the awesome guys at RB Motorsport sent me the sleeve which turned up yesterday. Initially I grabbed a few pictures for comparison purposes;
16mm Sleeve;
12mm Sleeve vs 28mm Sleeve;
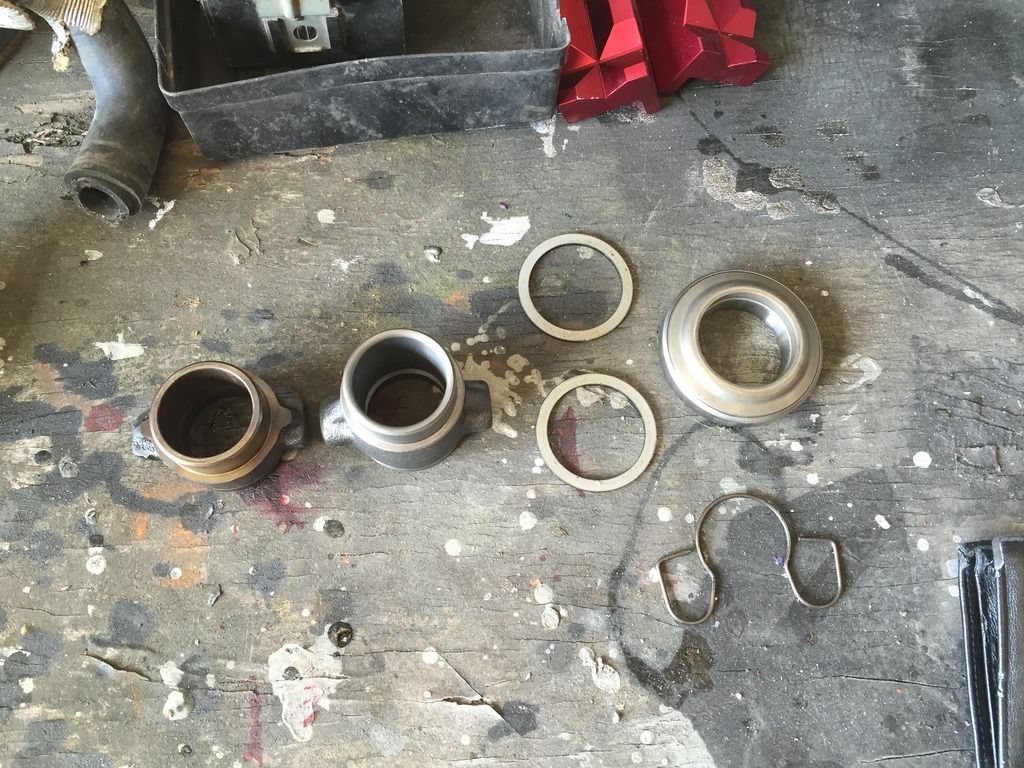
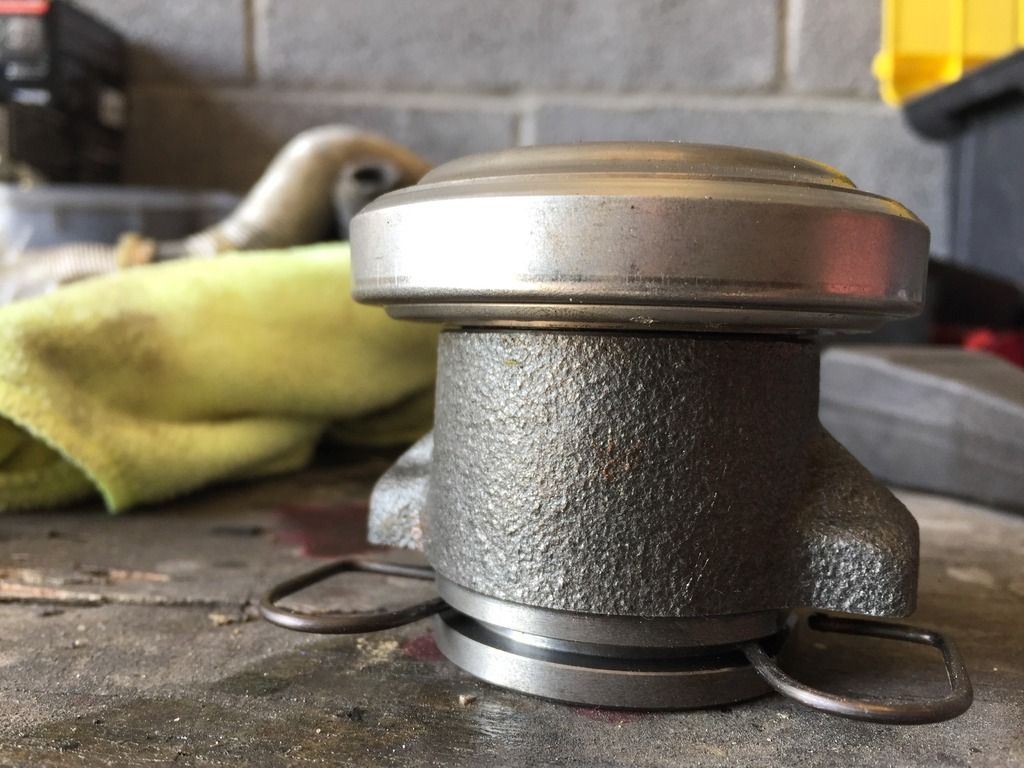
Essentially a 32mm sleeve;
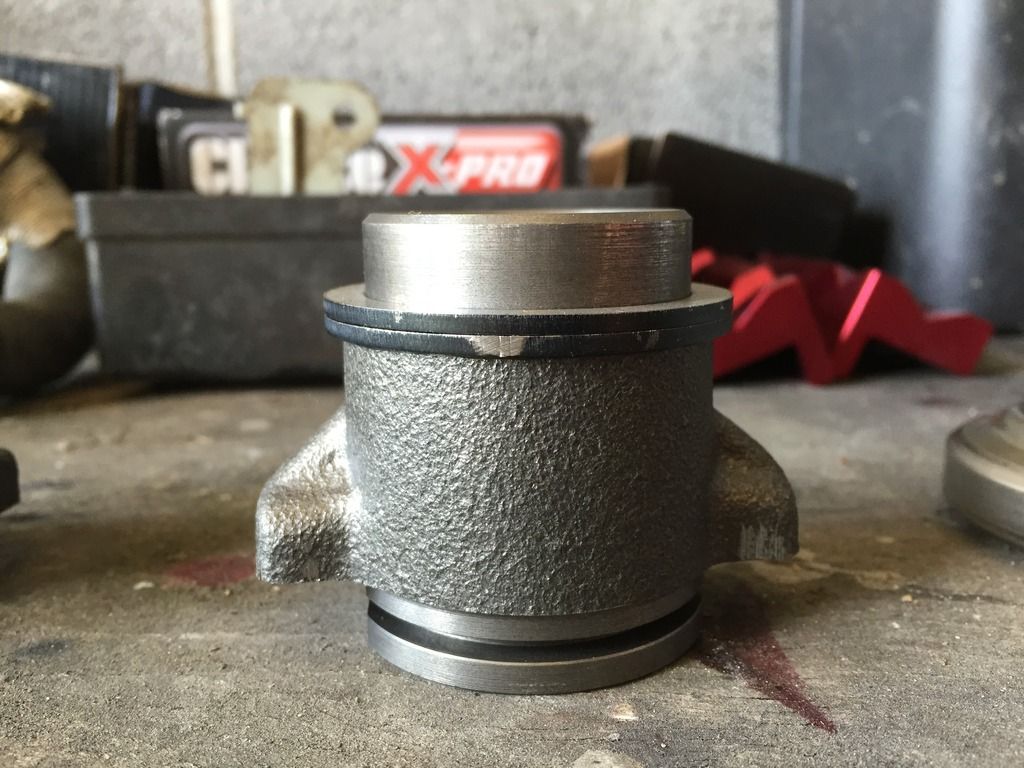
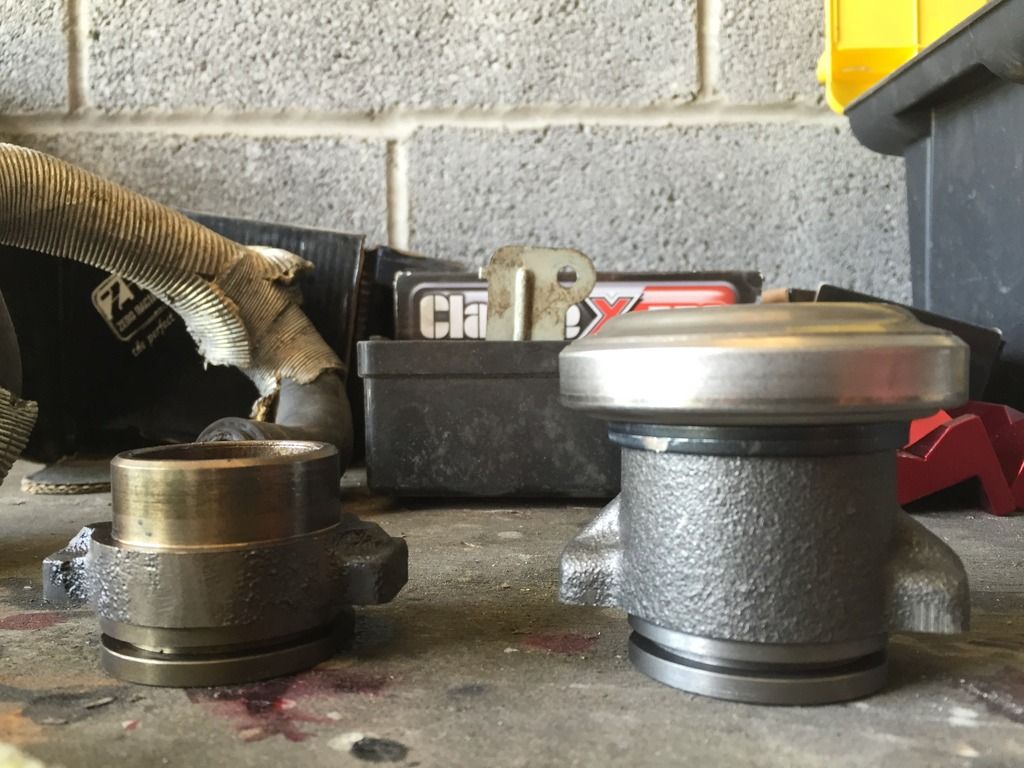
After a few trial and error runs of putting the release bearing sleeve/carrier and bearing together, and reinstalling the gearbox in order to determine whether or not I have OS Giken’s recommended clearance of 6-8mm between the bearing and the fingers of the pressure plate. This is because of the clutch being fresh, where the fingers will essentially expand once the clutch is bedded in.
After a few combinations, it turned out the 28mm sleeve gave me around 7.5/8mm travel, which getting the desired travel is an achievement in itself!
- - - Updated - - -
Another concern was that the OS Giken manual state that the front cover of the gearbox needs to be “trimmed” 4mm, which had gotten me a bit worred as I’ve already sealed the front cover to the gearbox. After speaking to a friend who has a lot more knowledge on clutches than me, we came to the conclusion that if there isn’t contact now, then there wont ever be contact when the springs are depressed, phew! This is because the “snout” of the front cover doesn’t enter the fingers of pressure plate, which will essentially contract as the clutch is depressed/ Given the o/d of the snout is less than the i/d of the fingers, and that the fact the snout is a few mm away from entering the fingers, in theory they should never meet or cause any issues. (Saying that, ive probably just jynx’d myself and will have to eat my own words in the future lol!)
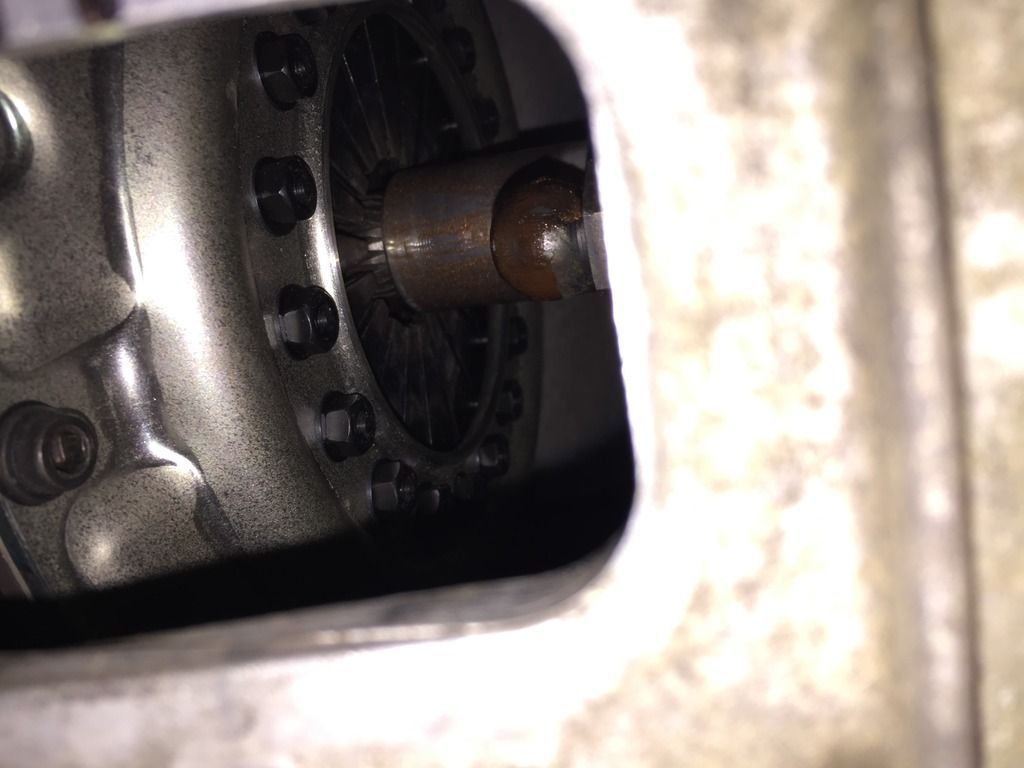
Hopefully this means all that’s needed for the conversion is to shorten the shifter linkage which should be a relatively straight forward job for a friend who can weld.
Another meticulous job was trimming the gearbox bolts down, as the bolts I was given with the adapter plate were for an S15 flywheel setup, which doesn’t need the bellhousing machines. Nothing 10 minutes with a grinder couldn’t sort out though…
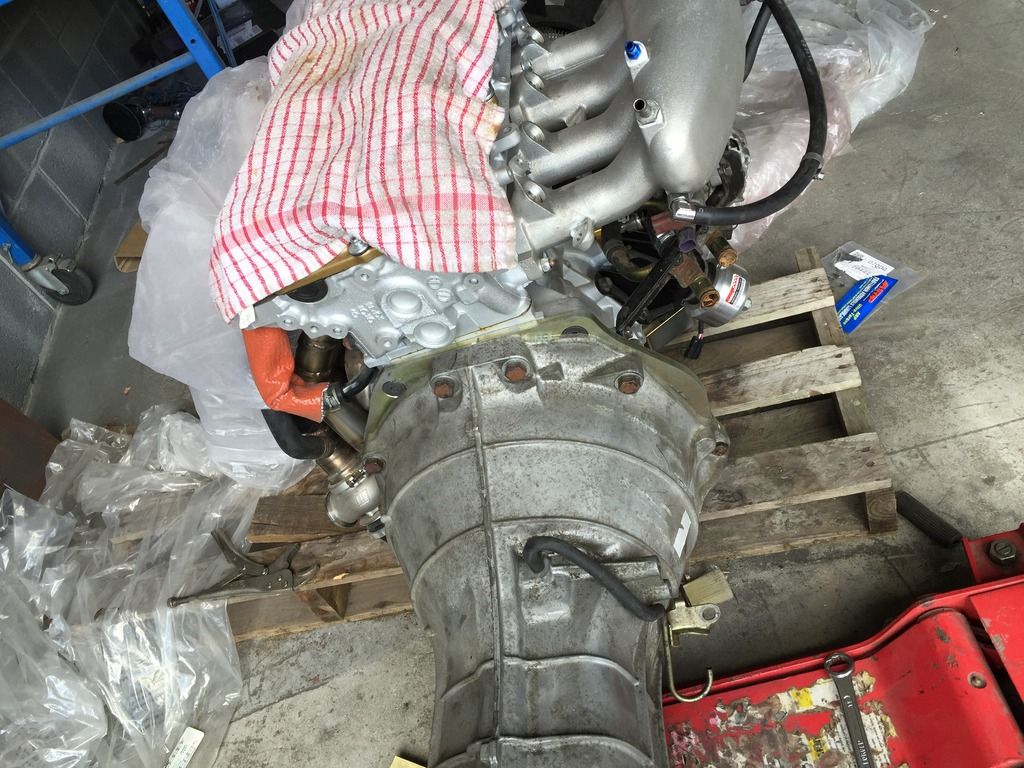
Something else the Protuner adapter plate requires is the thread of the starter motor to be drilled out. For me, this is one of the key points of Protuner’s plate, as the adapter plate has tig welded studs for the starter motor, whereas others on the market require the gearbox off in order to access the bolt heads from behind. So whilst my old starter became scrap due to a snapped solenoid, I thought it’d be best to have a quick go on that before my another fully working starter motor turns up.
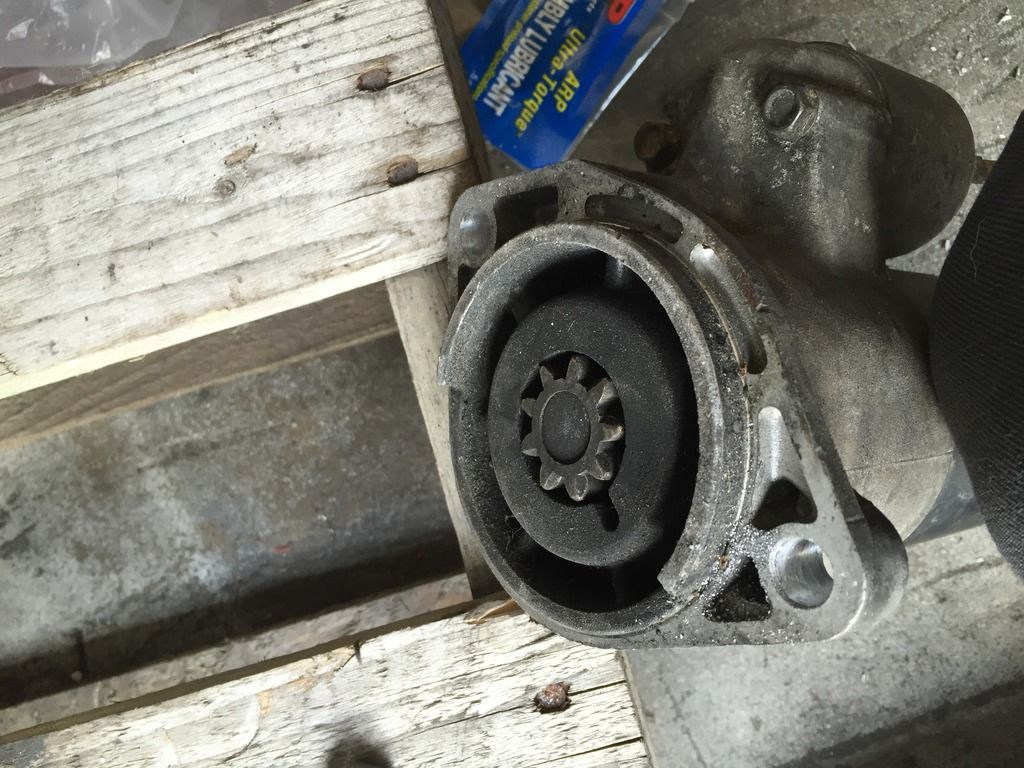
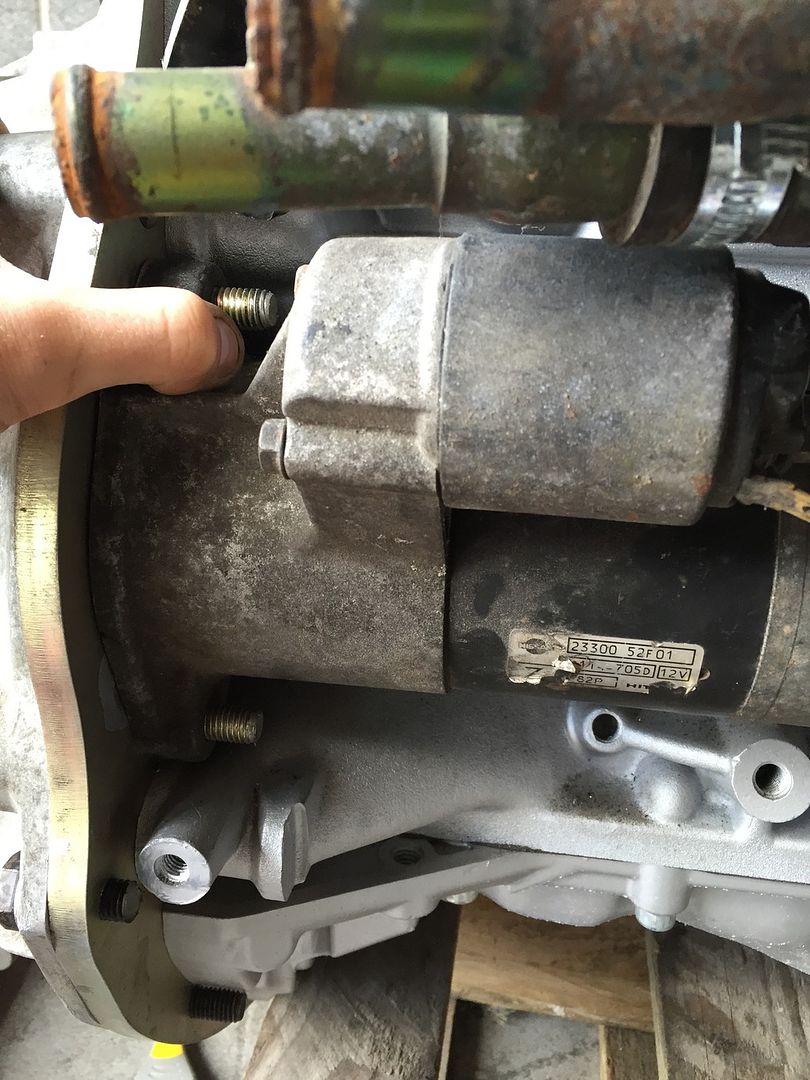
Turns out it’s a pretty simple modification to make


I then got bored, and after an hour or two this kinda happened;

Hopefully the plans are to ditch the Rover V8 that’s in the hot rod now, in favour of something more spicy from the states.
I decided to have another go at the release bearing issue, where I gave RB Motorsport a quick call as they’re the UK OS Giken dealers. After doing some measurements it seemed I needed a 32mm sleeve rather than a 16mm sleeve (I opted to follow the recommend sleeve for an SR box, as various people use the standard SR sleeve and bearing combination for their SR/Z33 conversion, albeit with regular 3-puk clutches).
OS Giken only provide sleeves up to 28mm, leaving me 4mm short. Luckily enough, the 16mm sleeve I originally bought is actually a 12mm sleeve, with 2x 2mm washers to space the bearing in order to make up the difference, perfect!
So the awesome guys at RB Motorsport sent me the sleeve which turned up yesterday. Initially I grabbed a few pictures for comparison purposes;
16mm Sleeve;

12mm Sleeve vs 28mm Sleeve;


Essentially a 32mm sleeve;


After a few trial and error runs of putting the release bearing sleeve/carrier and bearing together, and reinstalling the gearbox in order to determine whether or not I have OS Giken’s recommended clearance of 6-8mm between the bearing and the fingers of the pressure plate. This is because of the clutch being fresh, where the fingers will essentially expand once the clutch is bedded in.
After a few combinations, it turned out the 28mm sleeve gave me around 7.5/8mm travel, which getting the desired travel is an achievement in itself!

- - - Updated - - -
Another concern was that the OS Giken manual state that the front cover of the gearbox needs to be “trimmed” 4mm, which had gotten me a bit worred as I’ve already sealed the front cover to the gearbox. After speaking to a friend who has a lot more knowledge on clutches than me, we came to the conclusion that if there isn’t contact now, then there wont ever be contact when the springs are depressed, phew! This is because the “snout” of the front cover doesn’t enter the fingers of pressure plate, which will essentially contract as the clutch is depressed/ Given the o/d of the snout is less than the i/d of the fingers, and that the fact the snout is a few mm away from entering the fingers, in theory they should never meet or cause any issues. (Saying that, ive probably just jynx’d myself and will have to eat my own words in the future lol!)

Hopefully this means all that’s needed for the conversion is to shorten the shifter linkage which should be a relatively straight forward job for a friend who can weld.
Another meticulous job was trimming the gearbox bolts down, as the bolts I was given with the adapter plate were for an S15 flywheel setup, which doesn’t need the bellhousing machines. Nothing 10 minutes with a grinder couldn’t sort out though…

Something else the Protuner adapter plate requires is the thread of the starter motor to be drilled out. For me, this is one of the key points of Protuner’s plate, as the adapter plate has tig welded studs for the starter motor, whereas others on the market require the gearbox off in order to access the bolt heads from behind. So whilst my old starter became scrap due to a snapped solenoid, I thought it’d be best to have a quick go on that before my another fully working starter motor turns up.


Turns out it’s a pretty simple modification to make

200sx_
PS13 x TD Power
I forgot to mention earlier than upon installing fresh balljoints into my front LCA’s, it appears the balljoint hole may have stretched slightly somehow, meaning they are essentially scrap as the balljoint could be pushed in and span by hand. After seeing current prices of standard S14 LCA’s, and then the cost of extending them 20mm to mimic my old ones, it just didn’t make sense to me. I’ve decided to sell my new polybushes and tensions rods and go down a different route.
So a friend ordered me a pair of S14 LCA’s from Powered by Max, and by god they are phenomenal! As with all of my other Powered by Max stuff, the level of quality is insane.
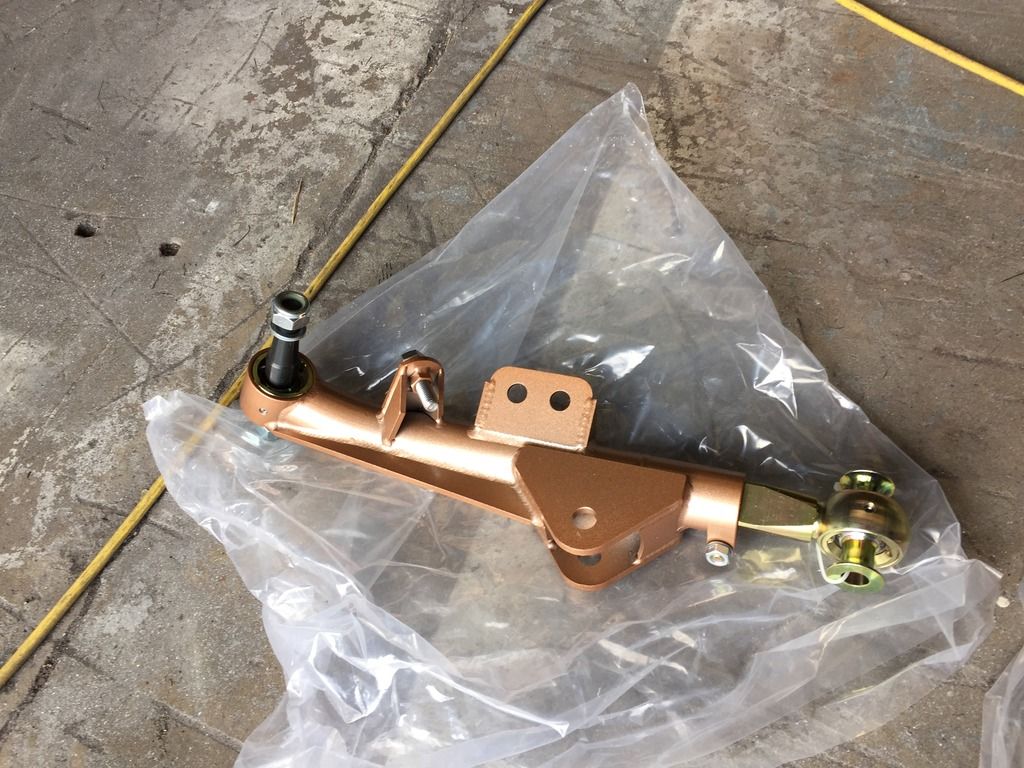
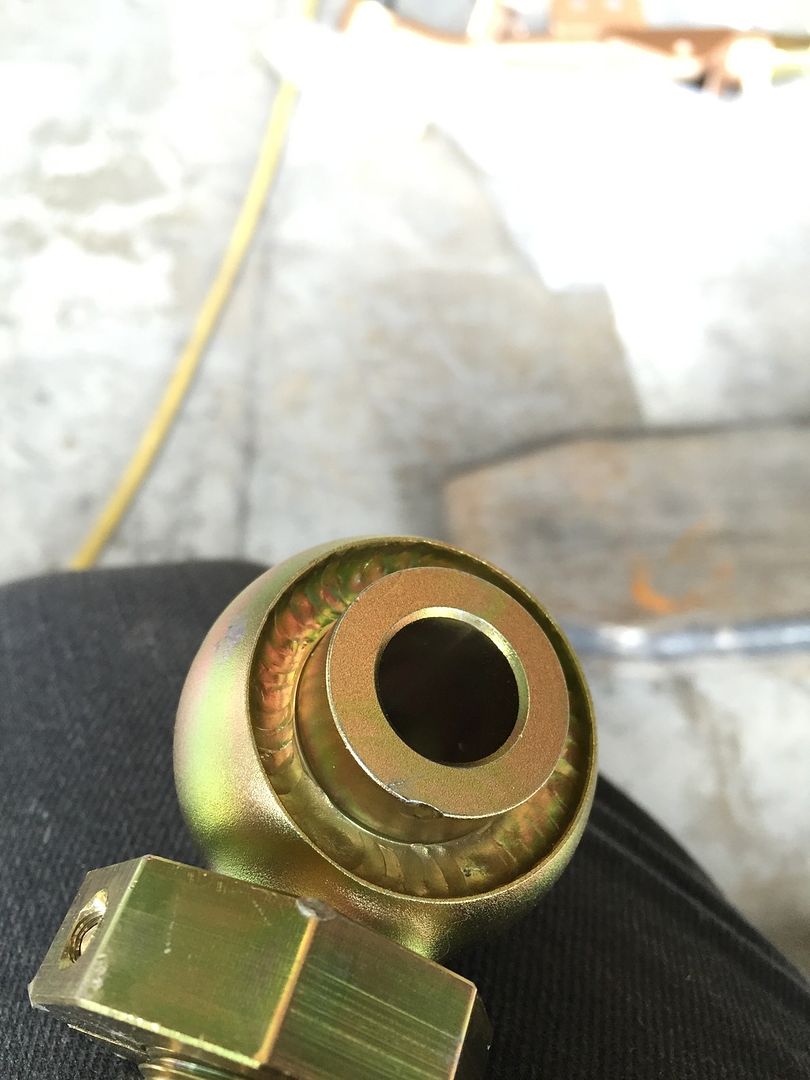
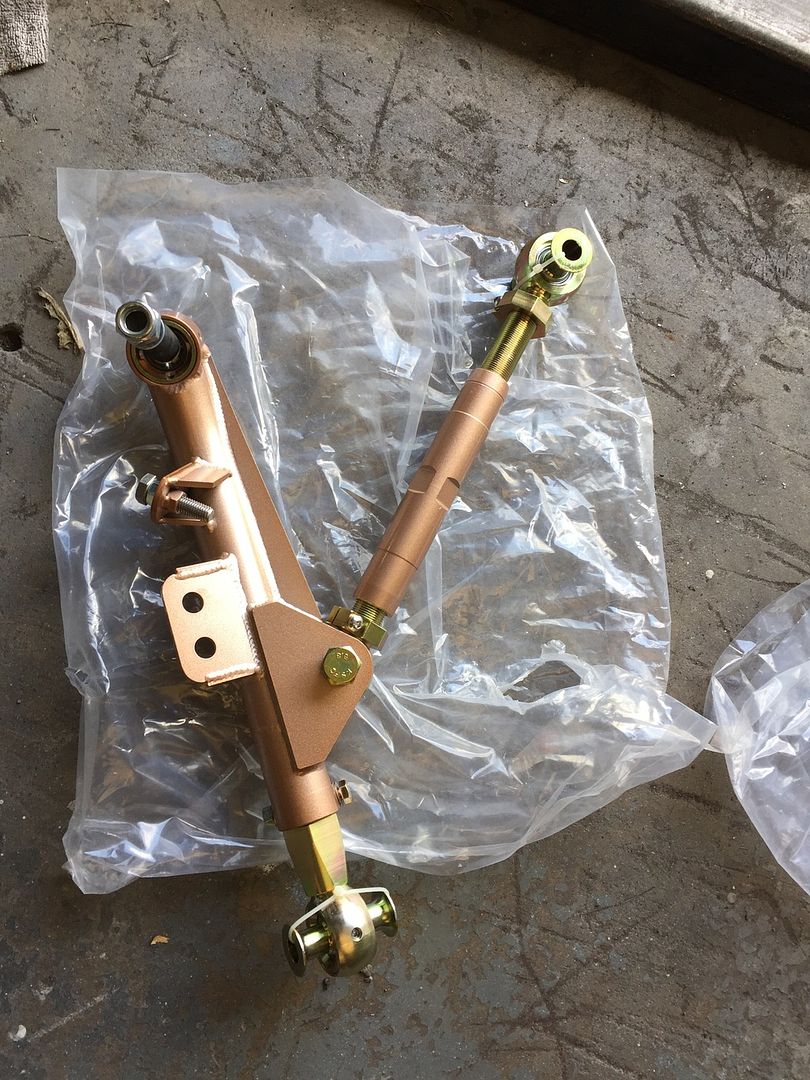
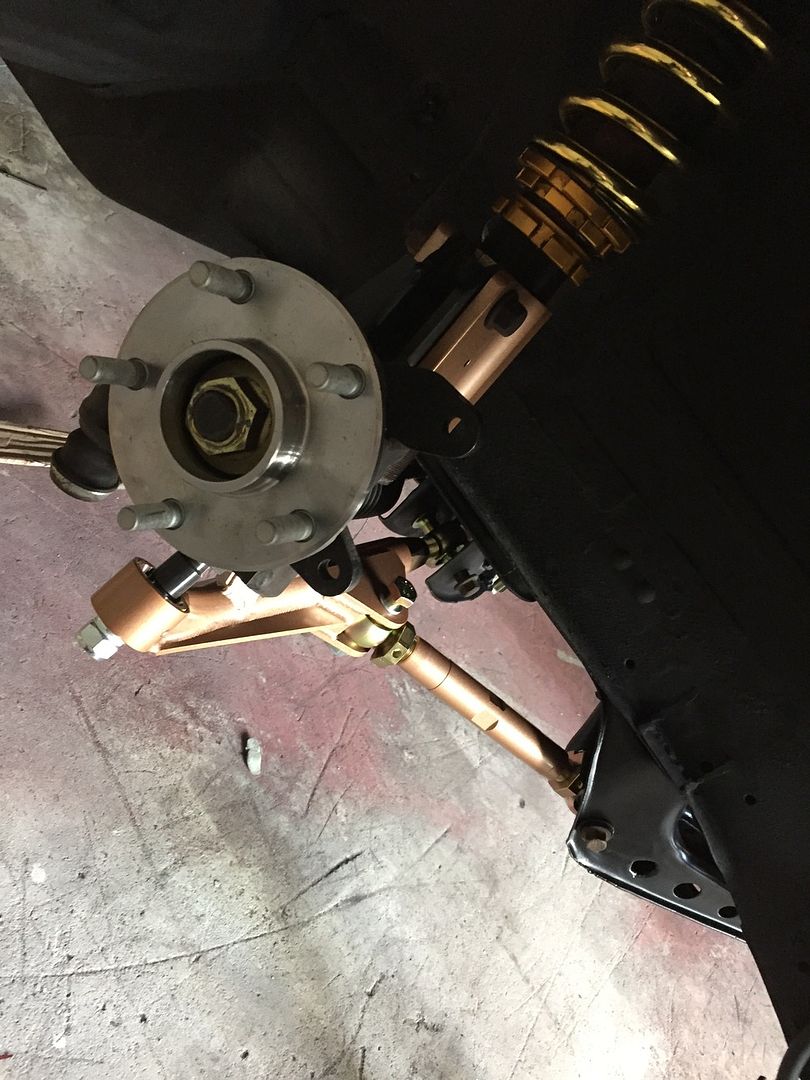
I only quickly put one side on, as today’s job is to go down to the car and get them adjusted to how I want and hopefully get the front end bolted up for good
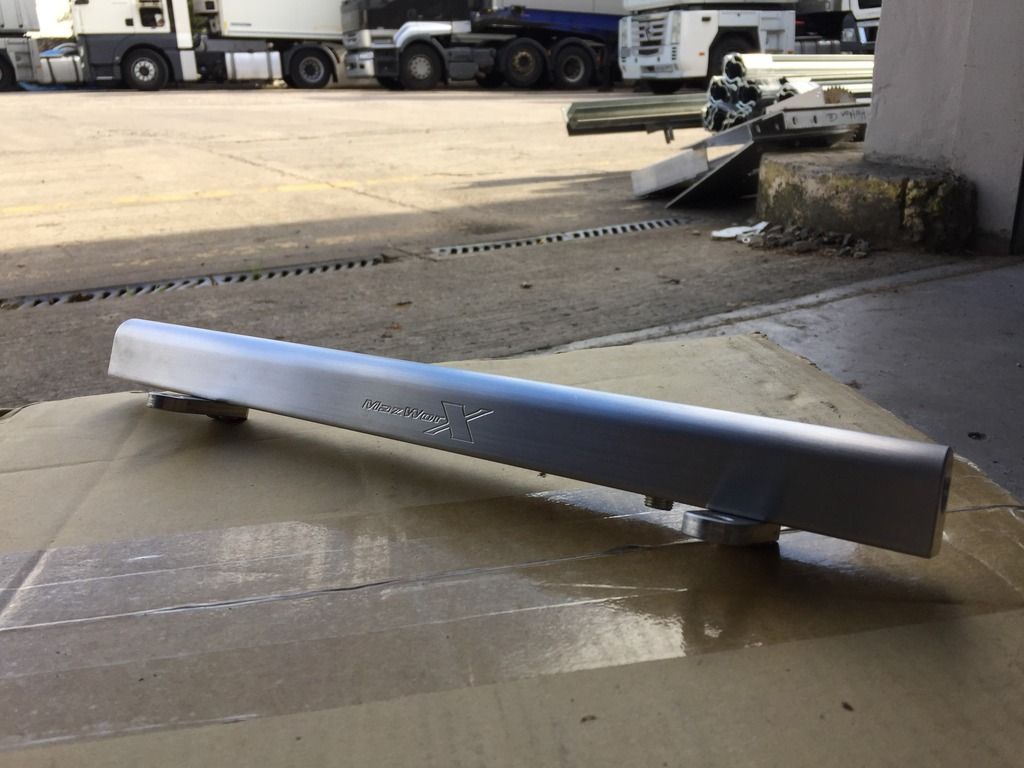
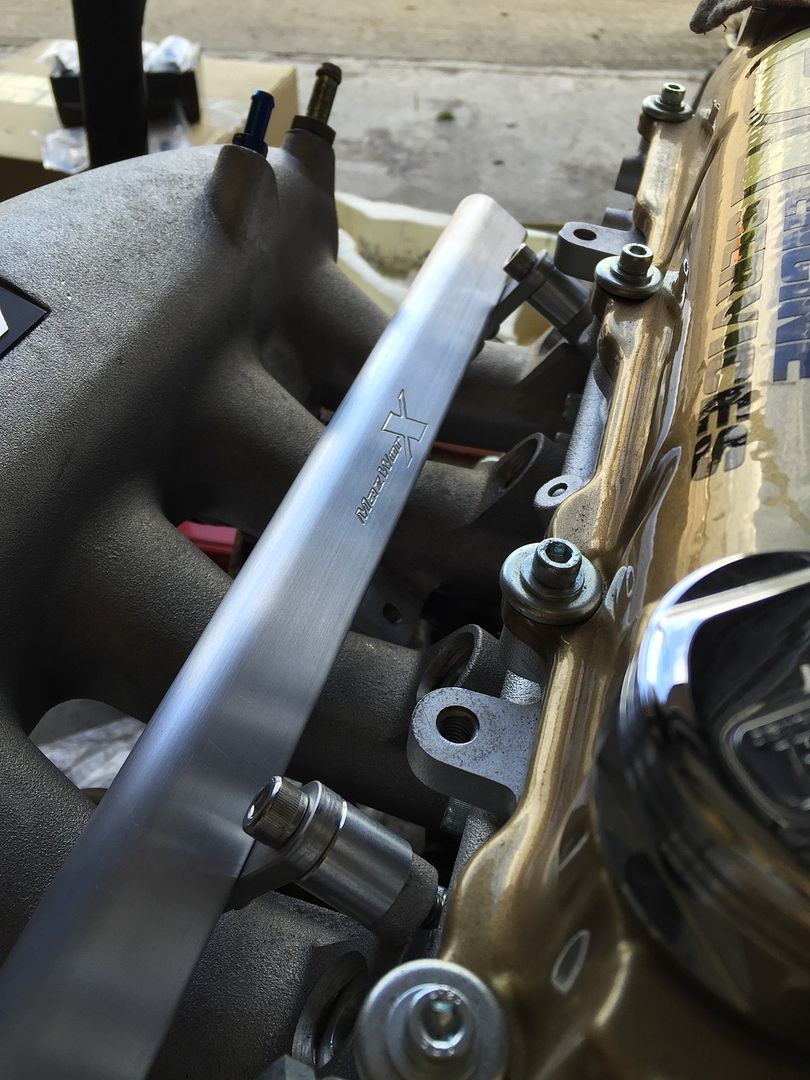
Inside that package was another package, this time from Mazworx!
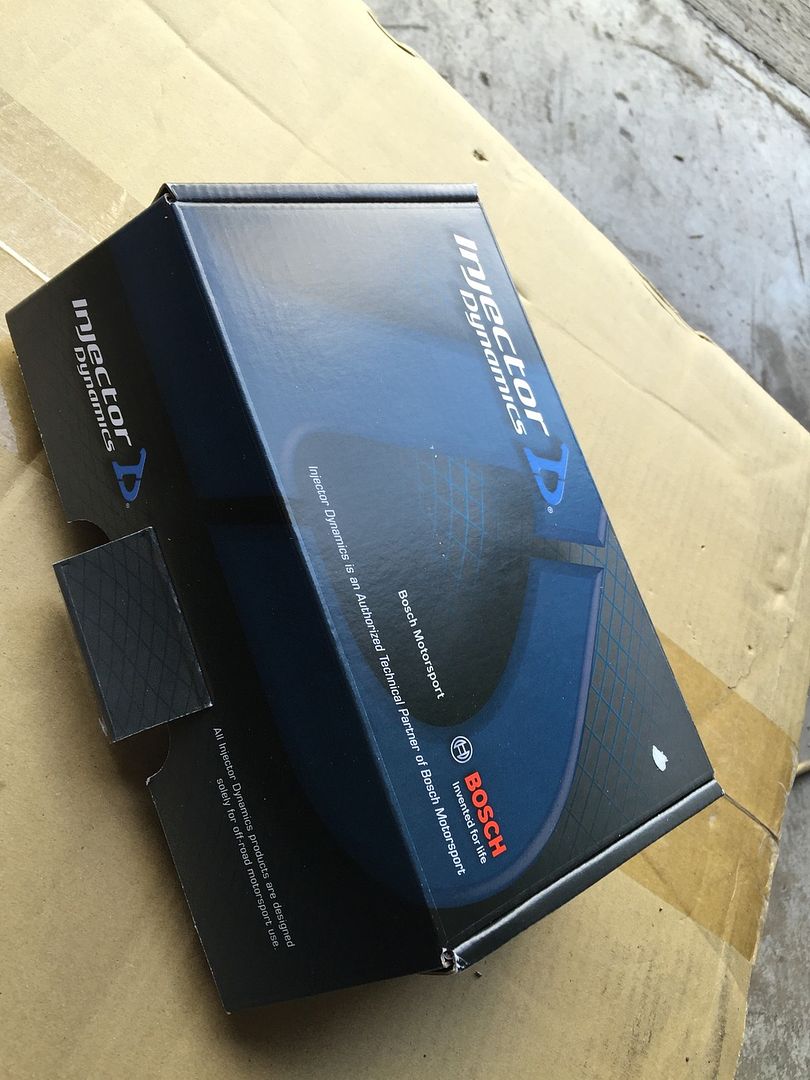
Billet fuel rail;
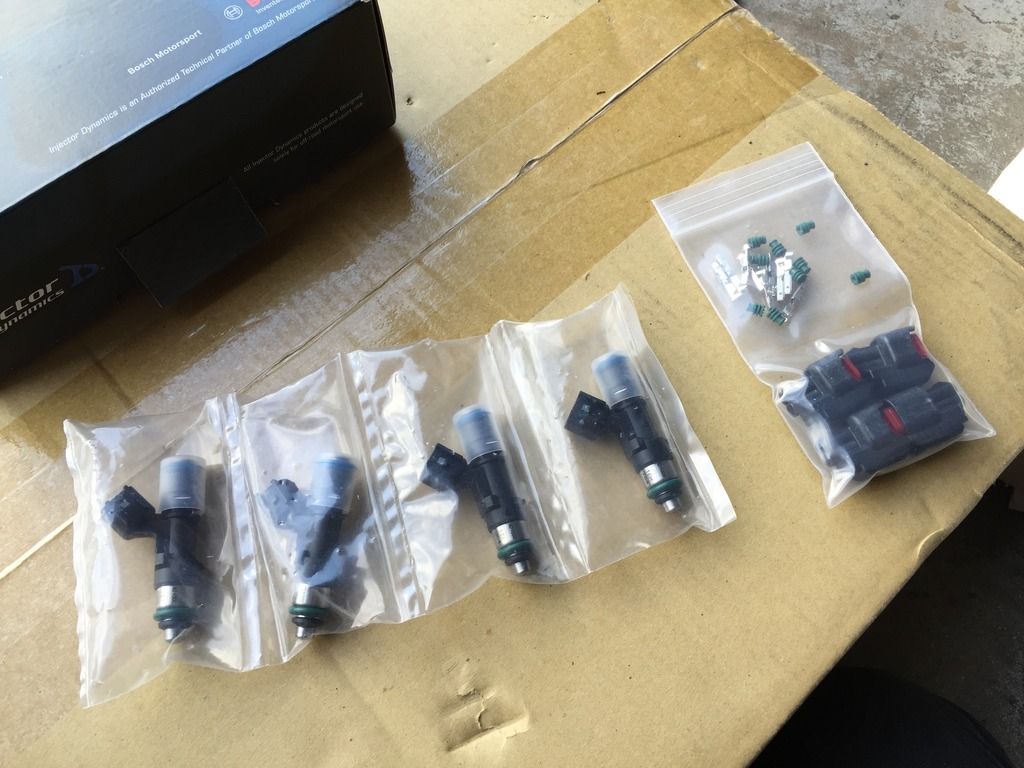
ID1000 Injectors;
Shouldn’t be too long until the engine is the car, maybe that’s wishful thinking but I’d like to think that achievable
So a friend ordered me a pair of S14 LCA’s from Powered by Max, and by god they are phenomenal! As with all of my other Powered by Max stuff, the level of quality is insane.


I only quickly put one side on, as today’s job is to go down to the car and get them adjusted to how I want and hopefully get the front end bolted up for good

Inside that package was another package, this time from Mazworx!

Billet fuel rail;


ID1000 Injectors;

Shouldn’t be too long until the engine is the car, maybe that’s wishful thinking but I’d like to think that achievable

Sir_Squidalot
New Member
You sir are the man! Seriously awesome build.
diamondsink
Kyouto Drift
Nice one Jord, this is some seriously impressive work. Cant pick fault mate and that usually something I do easily. One of the best builds on here and one of the nicest PS's in the country imo.