You are using an out of date browser. It may not display this or other websites correctly.
You should upgrade or use an alternative browser.
You should upgrade or use an alternative browser.
200sx_
PS13 x TD Power
From what I've read on the 350z-uk and US forum's, the z33 box doesn't seem to work as well with anything other than the Nissan fluid. Seems strange with high quality alternatives like the redline but that's what is said.
I was going to get the Nissan fluid, but I've seen a number of people saying the box was great with MT90? As long as it doesn't crunch I'm happy haha, seeing as it won't be for road use.
200sx_
PS13 x TD Power
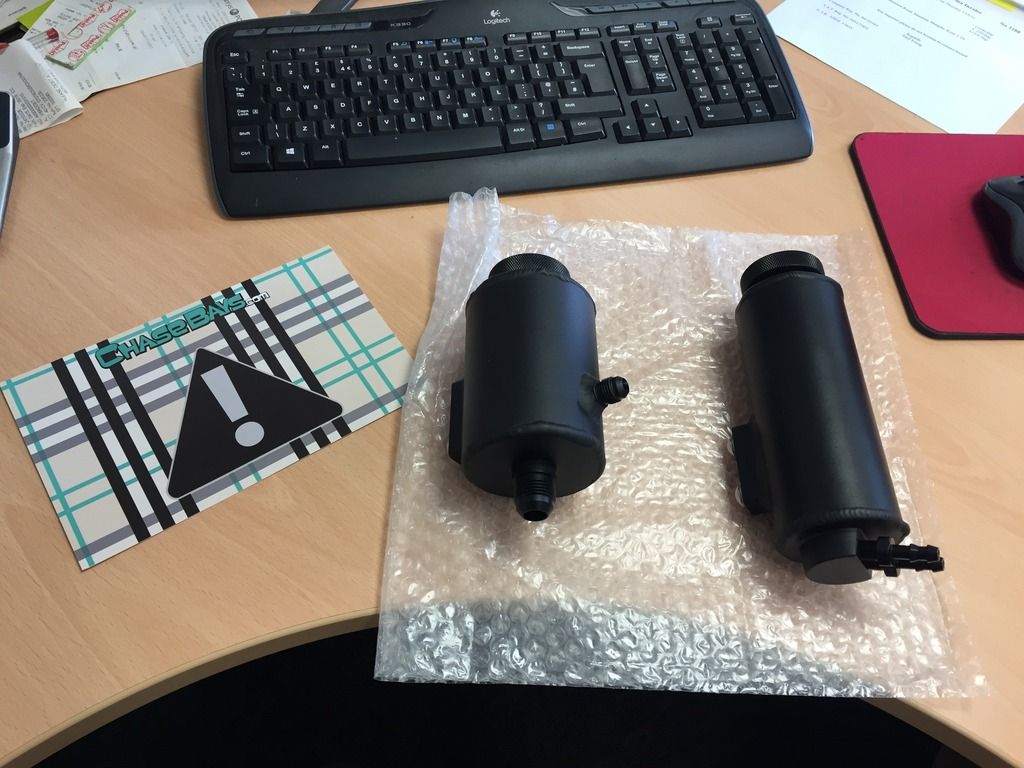
So got a nice little parcel today, my ChaseBays gear finally turned up 
So here it is, Power Steering reservoir on the left with AN6 & AN10 fittings, and the Coolant overflow on the right;
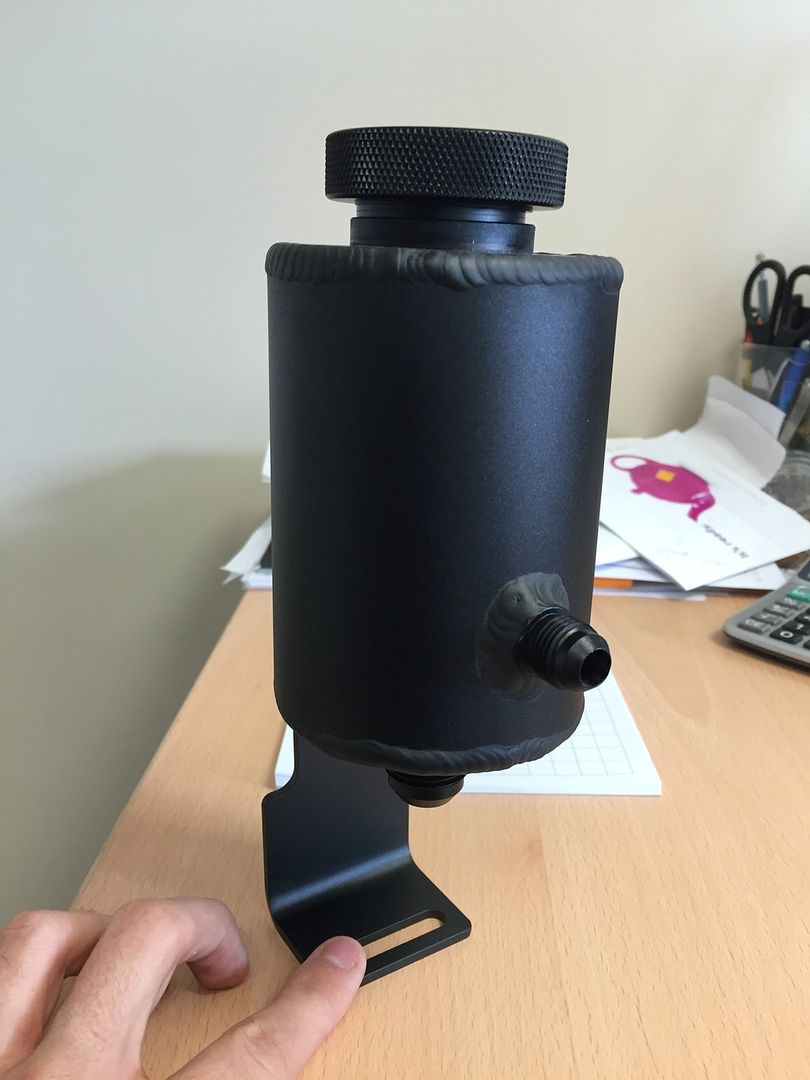
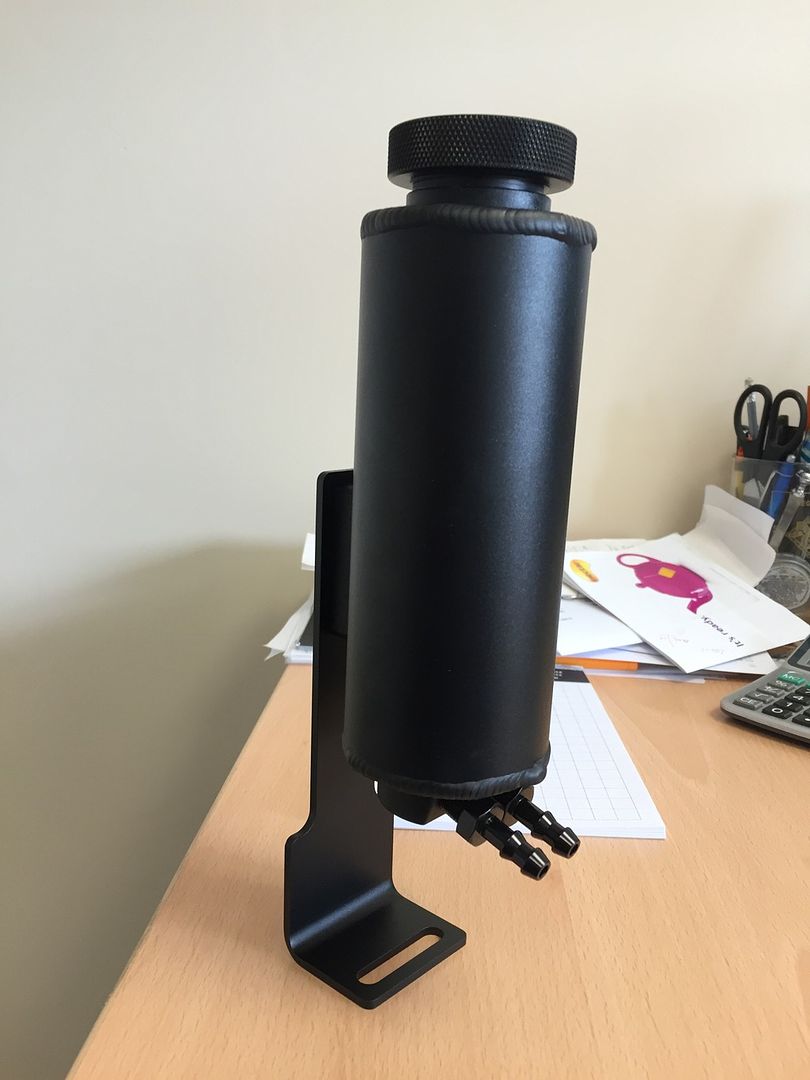
The quality is unreal, even the screw-on lids feel awesome and weighty!
The coolant overflow tank was always going to be a bit of a pain to fit due to the length, but after remounting the tank on the bracket to sit a bit lower, it fits without any dramas Worst case scenario was that i'd mount the bracket upside down from the tubular slam panel, but kinda wanted to avoid that to try and keep as much strength in that tube as possible.
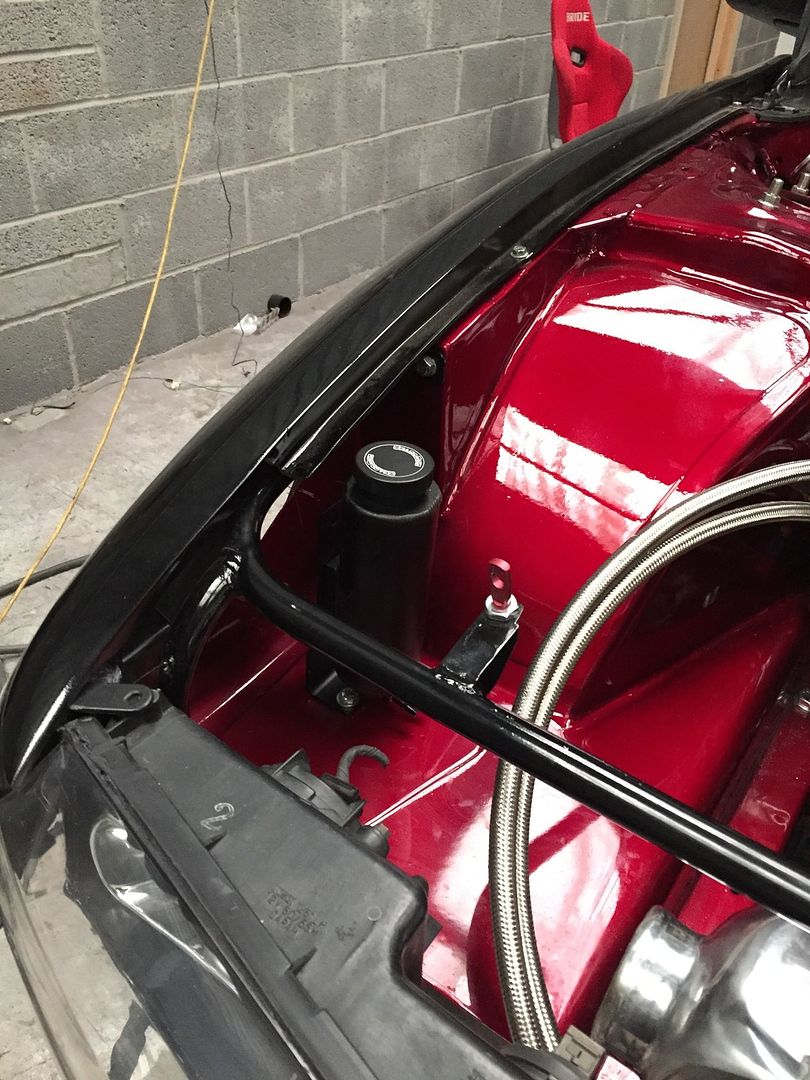
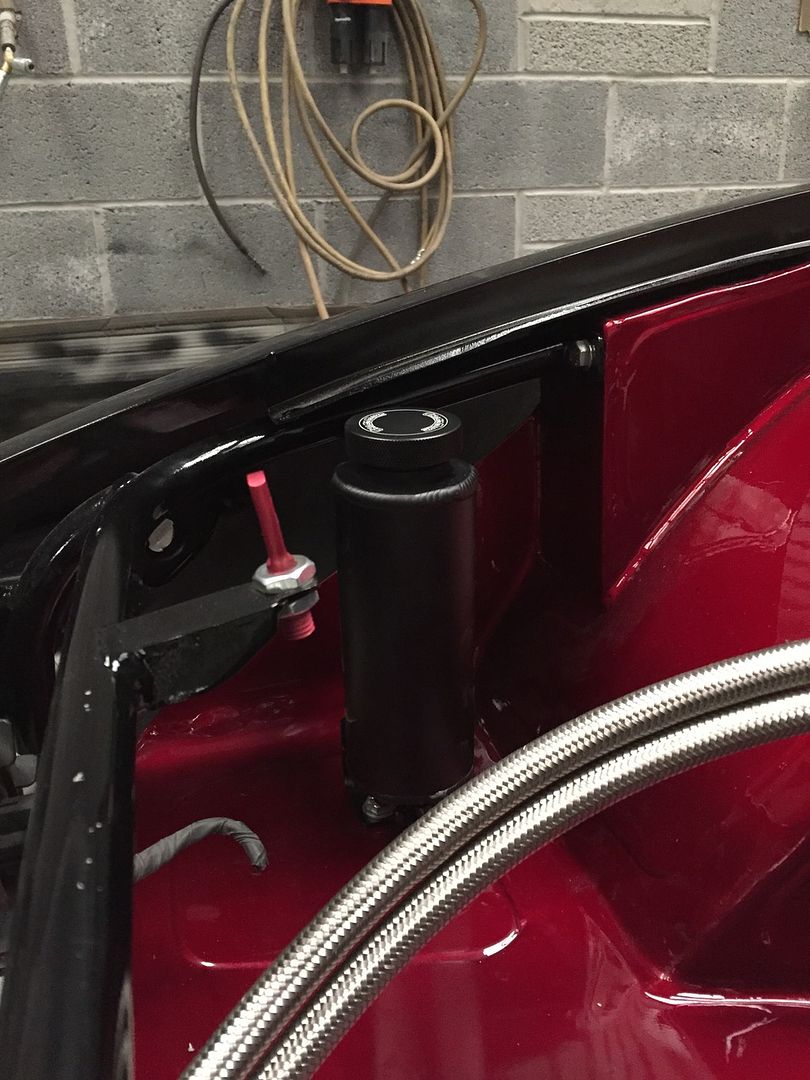
Next up was the power steering reservoir which is shorter, but space is limited due to the intake. So after having a play around with various positions this is how things sit finally;
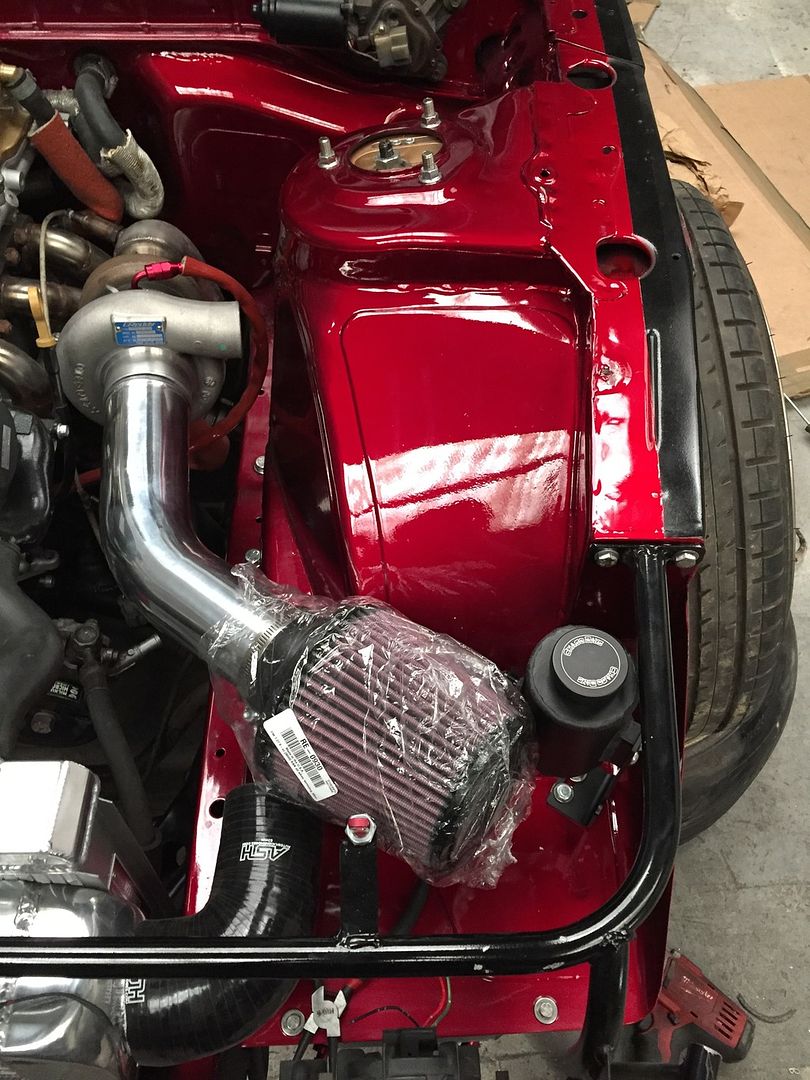
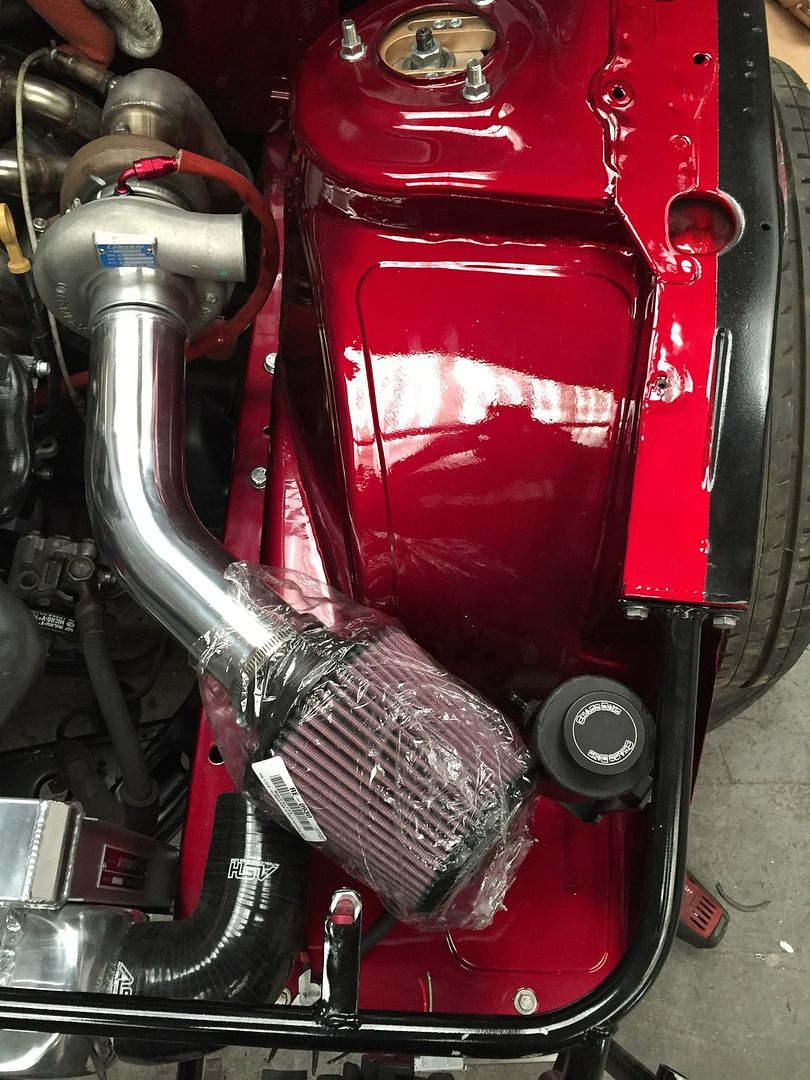
Both AN fittings are "easily" accessible and with a slight trim of the wing the top can be accessed relatively easy. Just need to order the respective AN push-on fittings and hose, then I can get things plumbed up.

So here it is, Power Steering reservoir on the left with AN6 & AN10 fittings, and the Coolant overflow on the right;


The quality is unreal, even the screw-on lids feel awesome and weighty!
The coolant overflow tank was always going to be a bit of a pain to fit due to the length, but after remounting the tank on the bracket to sit a bit lower, it fits without any dramas
 Worst case scenario was that i'd mount the bracket upside down from the tubular slam panel, but kinda wanted to avoid that to try and keep as much strength in that tube as possible.

Next up was the power steering reservoir which is shorter, but space is limited due to the intake. So after having a play around with various positions this is how things sit finally;


Both AN fittings are "easily" accessible and with a slight trim of the wing the top can be accessed relatively easy. Just need to order the respective AN push-on fittings and hose, then I can get things plumbed up.
200sx_
PS13 x TD Power
Do they have sight windows/a level tube? Or do you just have to rely on looking at the top?
They are fucking sexy but id want a quick and easy tell tell if one was running low!
Unfortunately you just have to rely on looking through the top
 but that shouldn't be too hard just a lil more effort
Leno
Member
Ah that kinda sucks, although with a car that's been built properly everything should be a-okay anyway.. guess I'm used to shit heaps :/
Amazing build tho man, envious of your patience to do things right! Being the same age as me (stalker ish i know) makes this car a real inspiration on what can be achieved!
Amazing build tho man, envious of your patience to do things right! Being the same age as me (stalker ish i know) makes this car a real inspiration on what can be achieved!
diamondsink
Kyouto Drift
Whats your plan for your IC pipe work? Them tanks are nice. Change of plan with the mapping then?
200sx_
PS13 x TD Power
this looks so good man, i'd to to scared to drive this, let alone drift it lol. keep up the good work though. will be awesome to see it al together.
Thanks man!
 it's far too shiny at the moment, but once I've driven it on track I'm sure I'll be addicted to it again
Ah that kinda sucks, although with a car that's been built properly everything should be a-okay anyway.. guess I'm used to shit heaps :/
Amazing build tho man, envious of your patience to do things right! Being the same age as me (stalker ish i know) makes this car a real inspiration on what can be achieved!
Everything should be okay, but it shouldn't take much to check the levels but for sure, it'd be much better if they had a small window

Haha no worries dude! It sure is possible, but damn it's hard work! Every penny gets spent on this

Whats your plan for your IC pipe work? Them tanks are nice. Change of plan with the mapping then?
I have the cast 90 to get welded onto the compressor housing. I'll get some silicone bends for the I/C core and see how they sit and order up a mix of piping to see how it'll fit together. From there, there is a guy locally to me who can then weld them together for me and add any barb fittings and threaded fittings for the air intake sensor.
As for mapping, Martin is able to do a site visit which is pretty key for me as he can provide and wire the Link ECU in so I can start the engine up before mapping to check for any issues & leaks before mapping?

He's also given me the option of finding a local rolling road where he can map it rather than towing the car across the country. Just need to find one with hugeeeee fan. But I'll start looking into that in a month's time or so when a date can be set.
If you wanna come nosey on the way home from work dude, you're more than welcome.
Last edited:
200sx_
PS13 x TD Power
Mate that little summary was bang on. Who u using for mapping?
Martin @ MB Automotive will more than likely be providing & fitting the ECU and mapping it

This looks really really nice... Will look even better sideways
Thanks man! Cant wait to get it sideways, or even just running for that matter

So last week I took delivery of the prop/driveshaft from Shaftmasters in the states, and even slipped through customs unnoticed

So here it is!
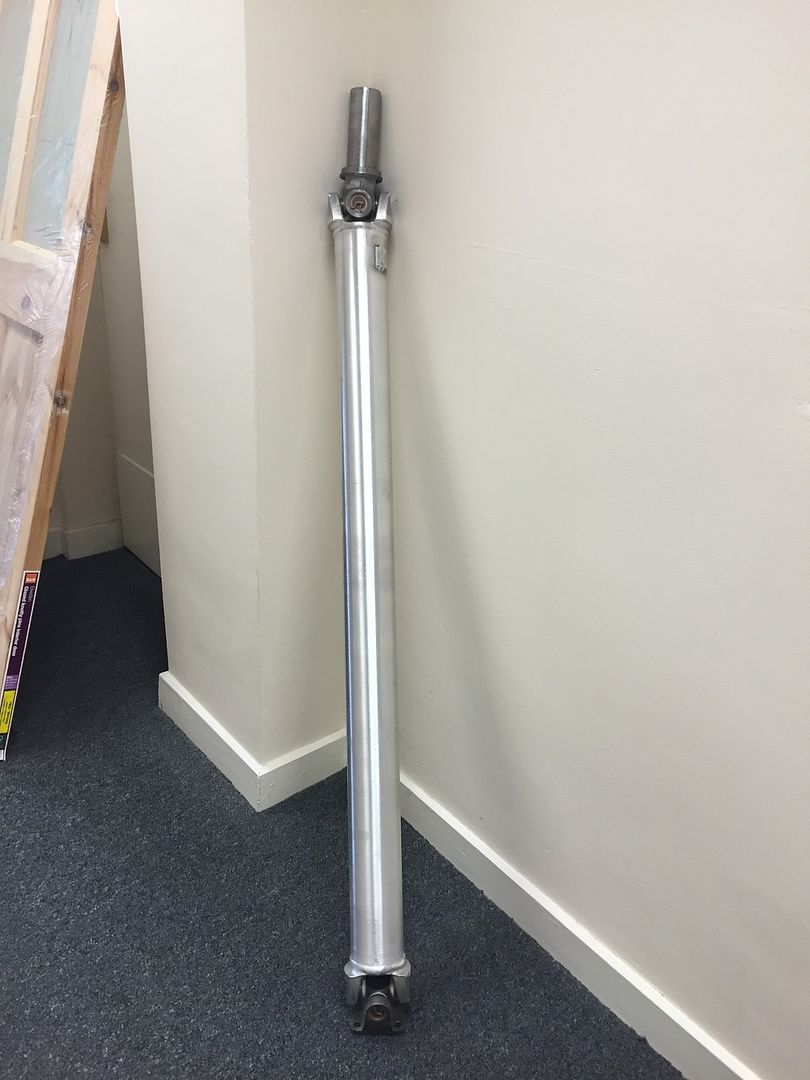
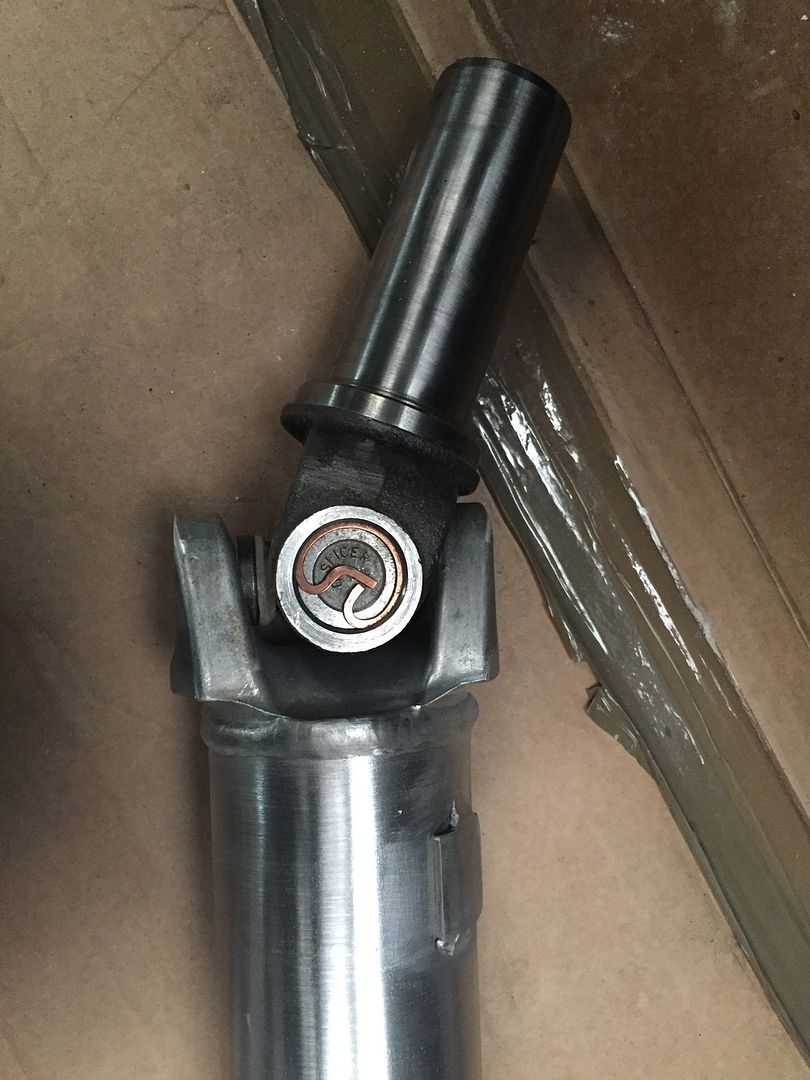
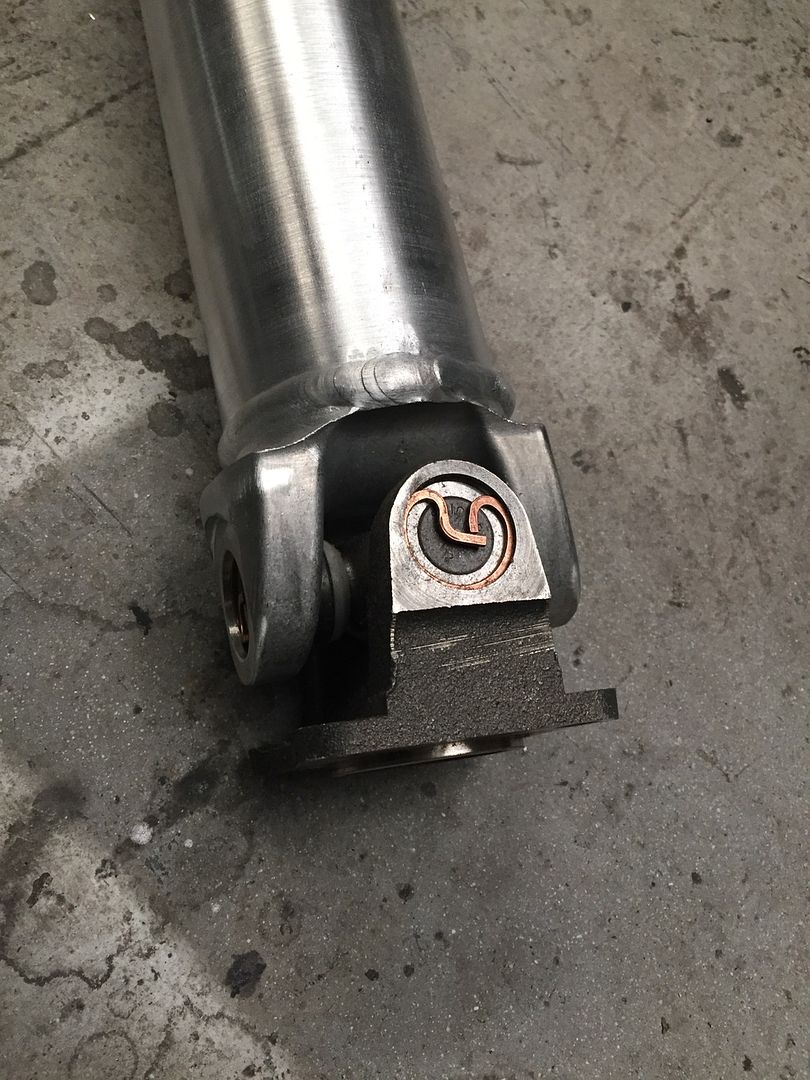
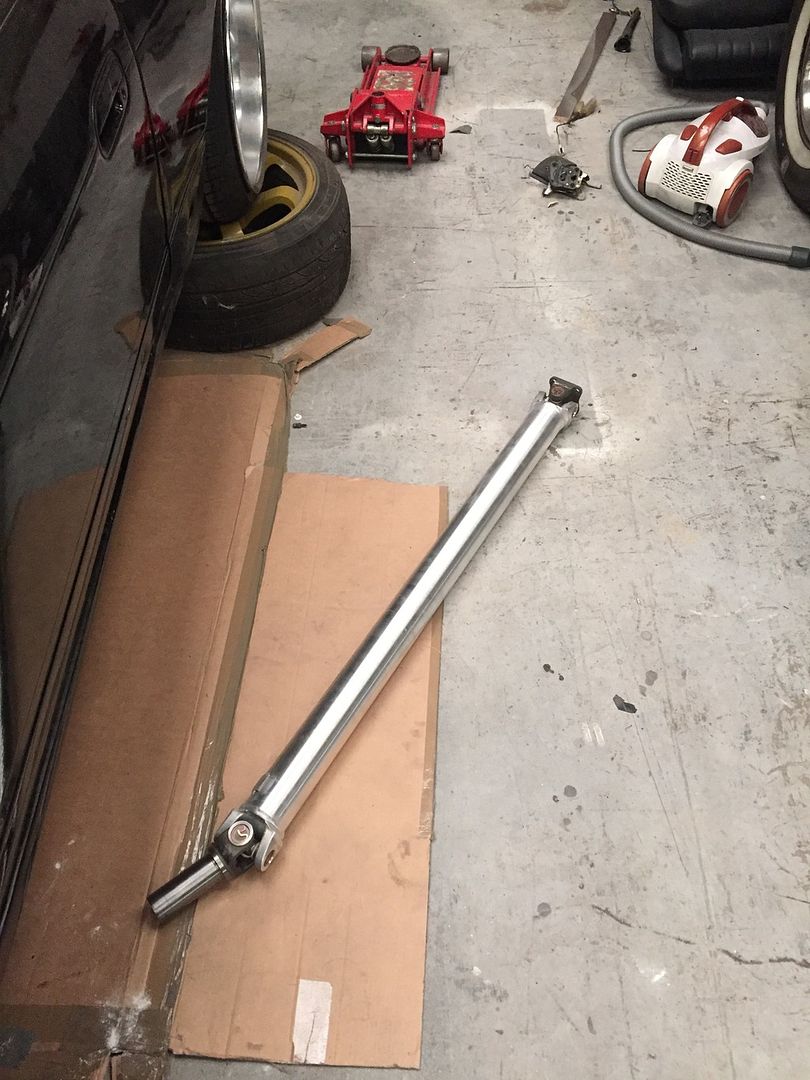
So stoked with the quality of the whole thing too. Although there was a tad bit of discussion on Facebook though with some people arguing how its going to instantly snap :/ But at the end of the day, I've done my research and so many people runs these in the states with zero problems whatsoever, even with more powerful and torquier engines (RB/JZ's), and not to mention some serious drag cars too.
I also ordered what I'm hoping to be the final AN fittings which is a relief to my bank balance

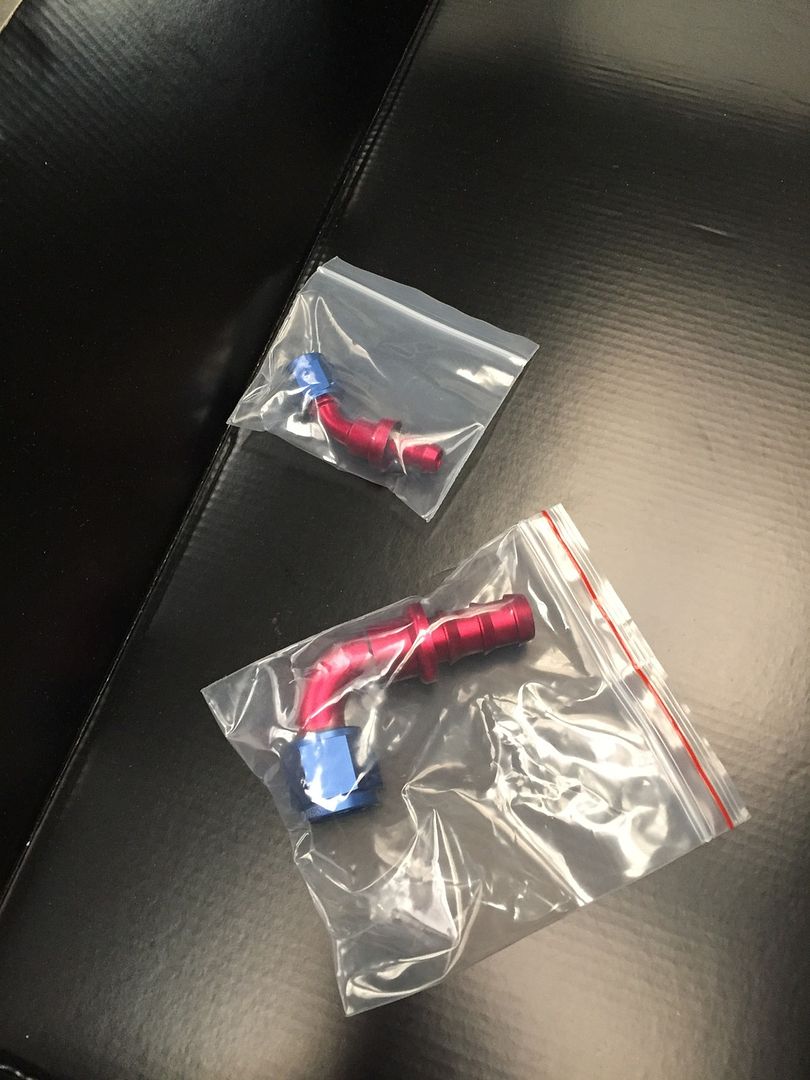
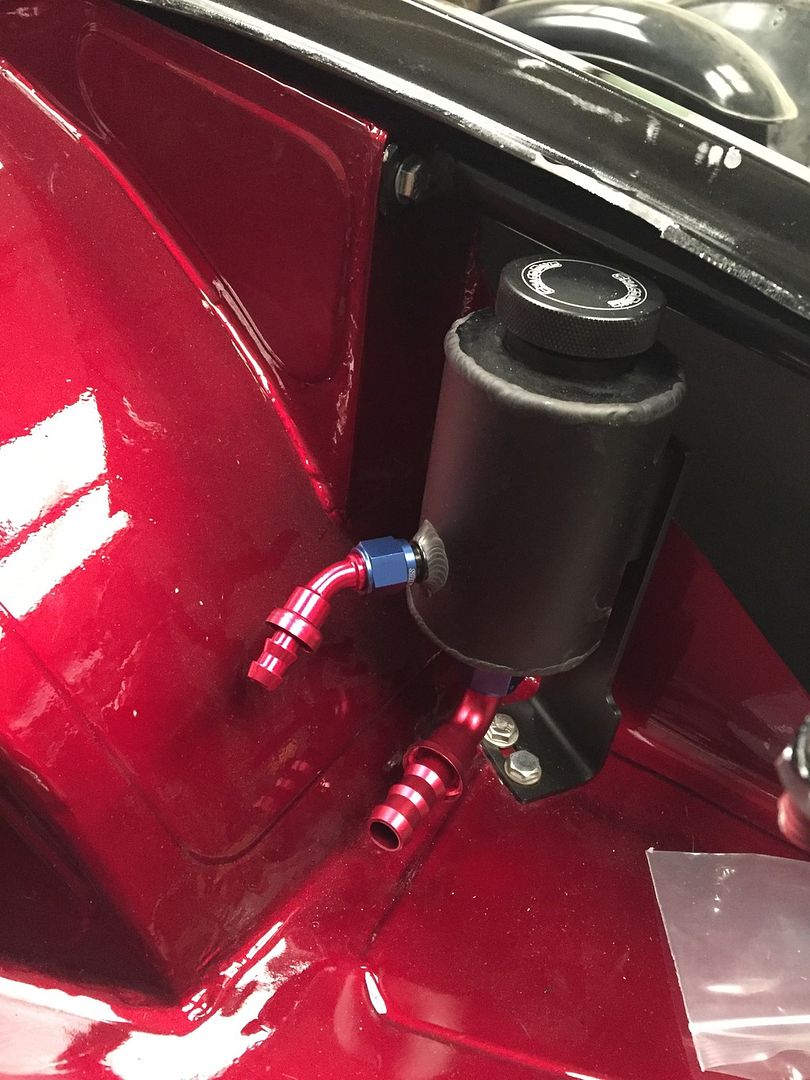
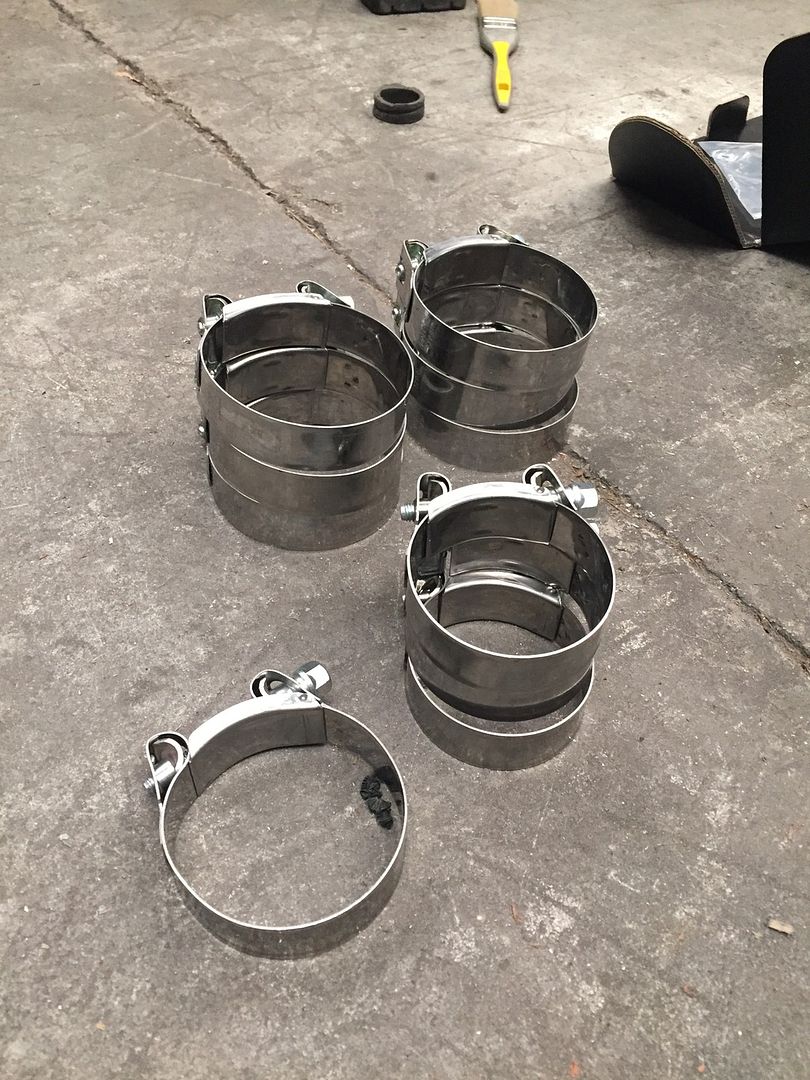
So whenever I have made up the intercooler piping, i'll grab some AN6 & AN10 push on hose and start to plumb up the power steering lines which should be nice and simple *touch wood* For the intercooler piping, I ordered a selection of hoses and stainless bend that I think will fit, as well as a selection of genuine Mikalor clamps which should hopefully hold things together nicely

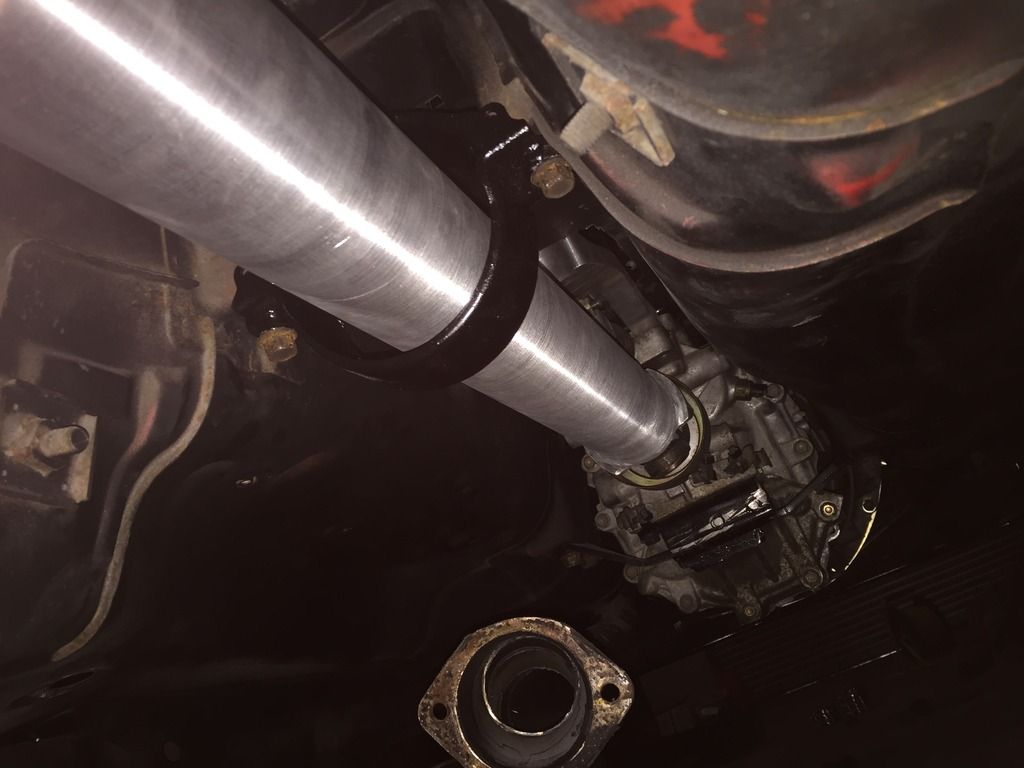
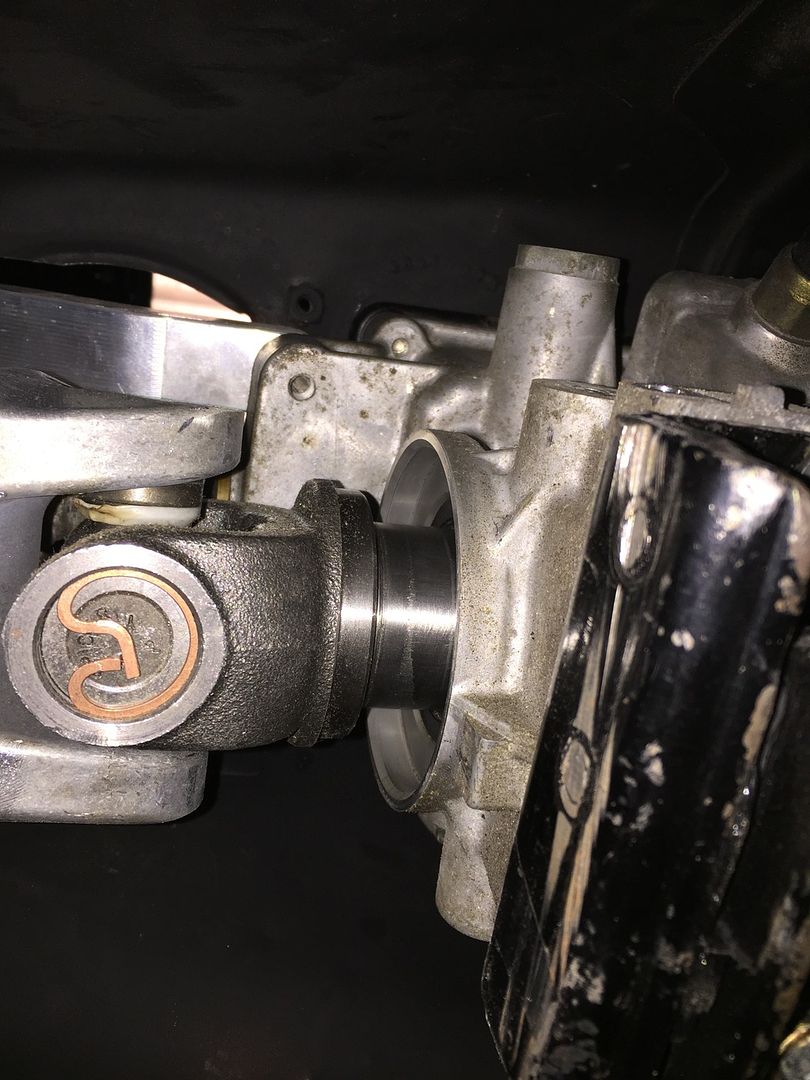
So I installed the prop for good now, but one thing that became apparent after speaking to David @ Shaftmasters again was that the dust shield on the gearbox needs to go to avoid any interference;
(Before I removed the dust shield, but you can see the bracket I reinstalled to try and act as a safety measure which I mentioned previously)
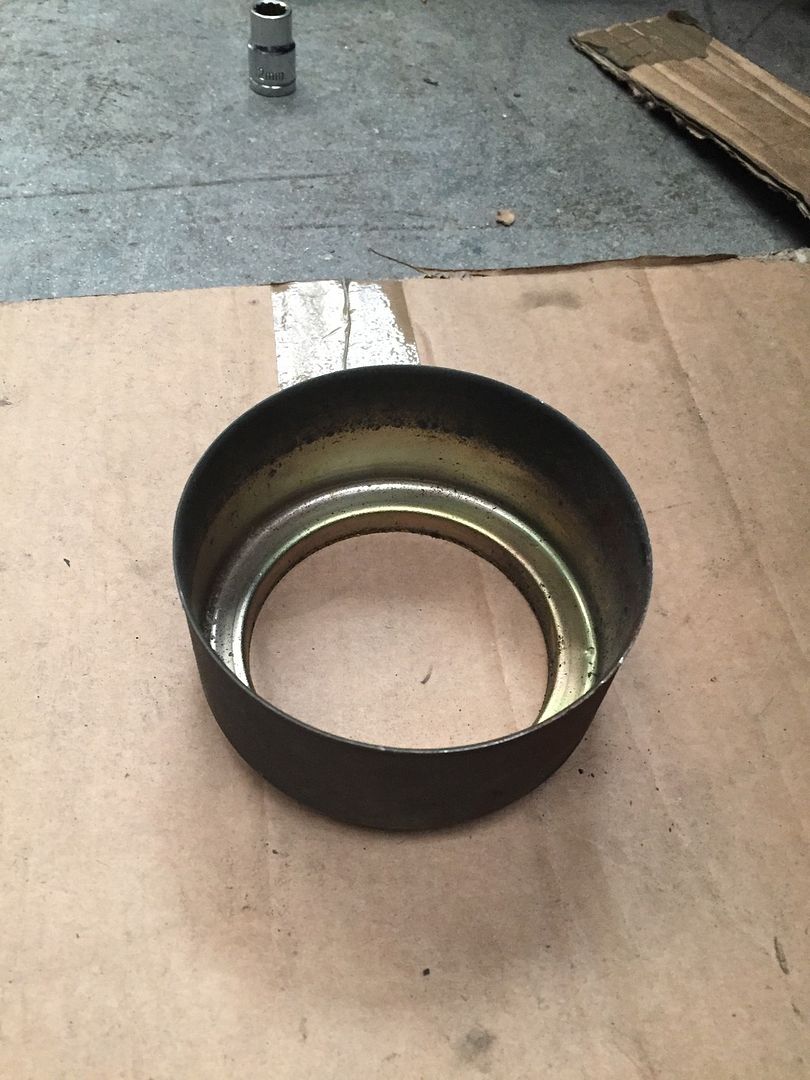
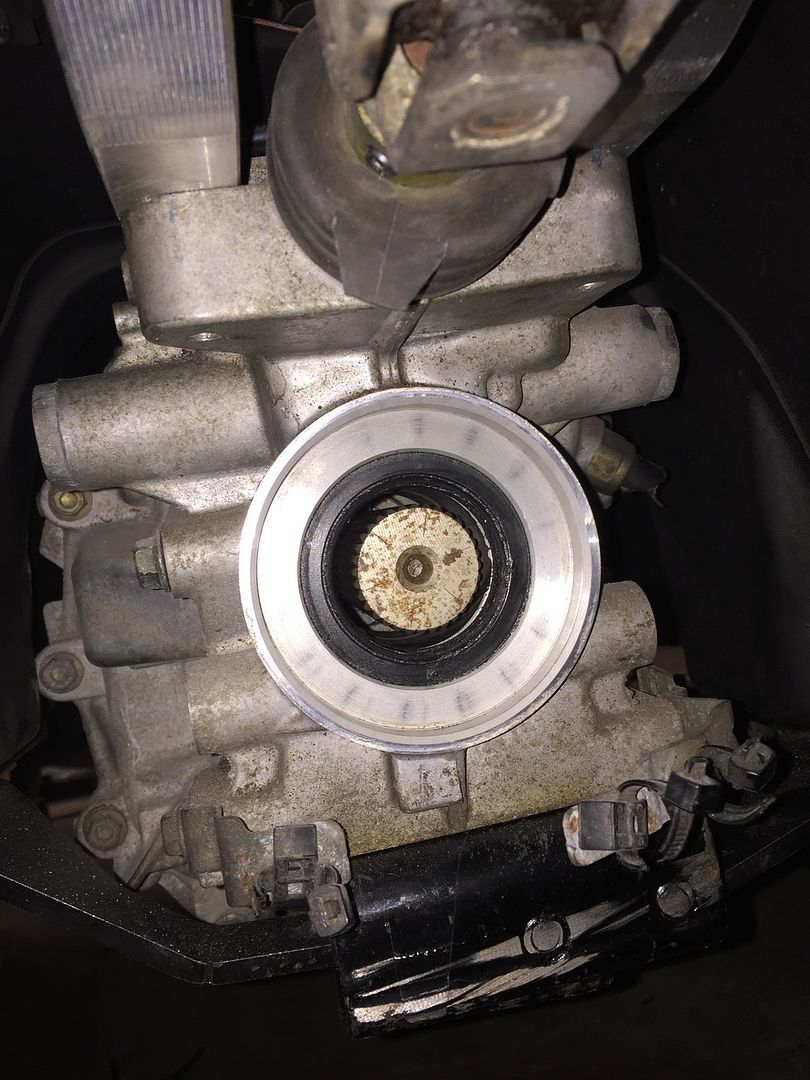
And finally this is how the splines sit as they enter the gearbox, which was the main reason I spoke to David which was to double check the engagement was safe and correct, which I'm pleased to say it is

nissanr34cal
Well-Known Member
Fantastic build and an awesome read.
200sx_
PS13 x TD Power
Man that candy paint is sexual. Great work
Black and candy red reminds me of the low brain drifters odyviamany shiny parts and uber cool kit and wheels is a complete win
cant wait to see this with all the ukaten cars

Thanks guys
 The candy paint is gorgeous! As for the Low Brain car, I've heard that been said before but great minds must think alike haha! As for the last bit, I can't wait to get this on track with some friends and just have some fun. Probably the only thing thats keeping me go at the moment haha!
Fantastic build and an awesome read.
Thanks Callum!

So it’s been a bit of a while since the last update and there hasn’t be huge progress to speak about. Its at that stage now where the majority of the major jobs have been done and its just a million small jobs to try and bring the car together as a whole package, something that is expensive and tedious!
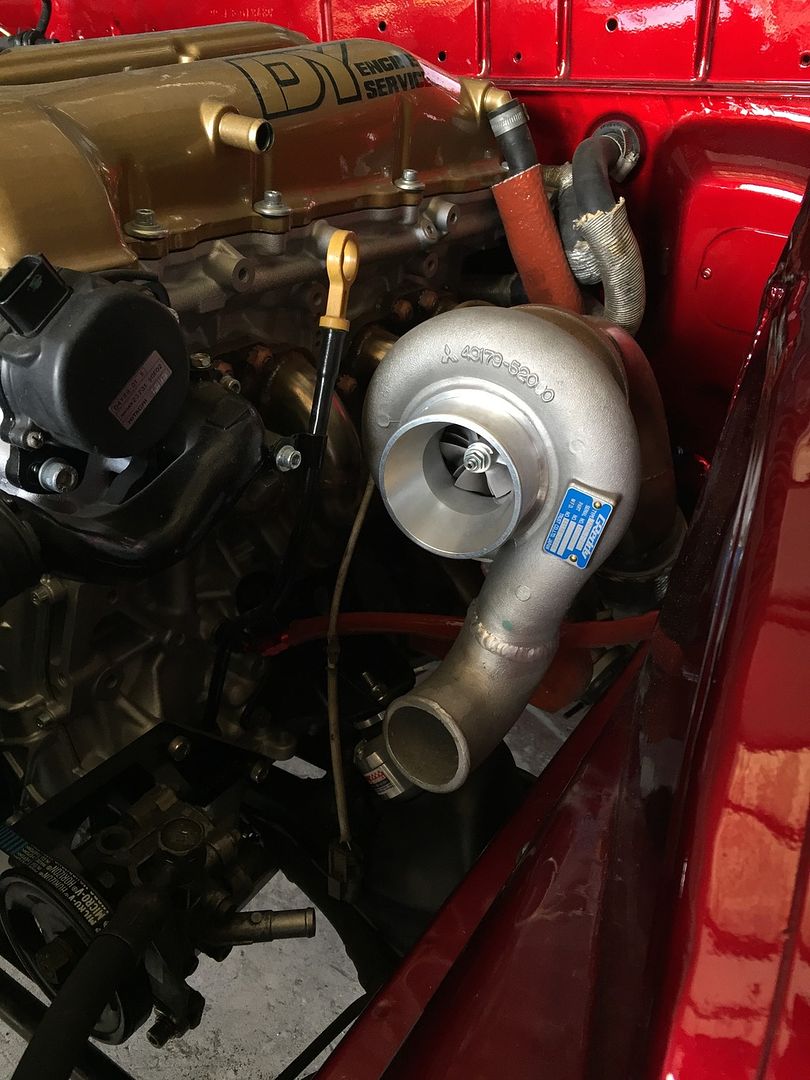
So the first job I set about doing since the last update was to purchase a cast alloy 90* elbow to get welded onto the compressor housing, mainly for reliability reasons to try and avoid a silicon bend near the manifold. (It was quite a daunting process to remove the compressor housing on a brand new turbo!)
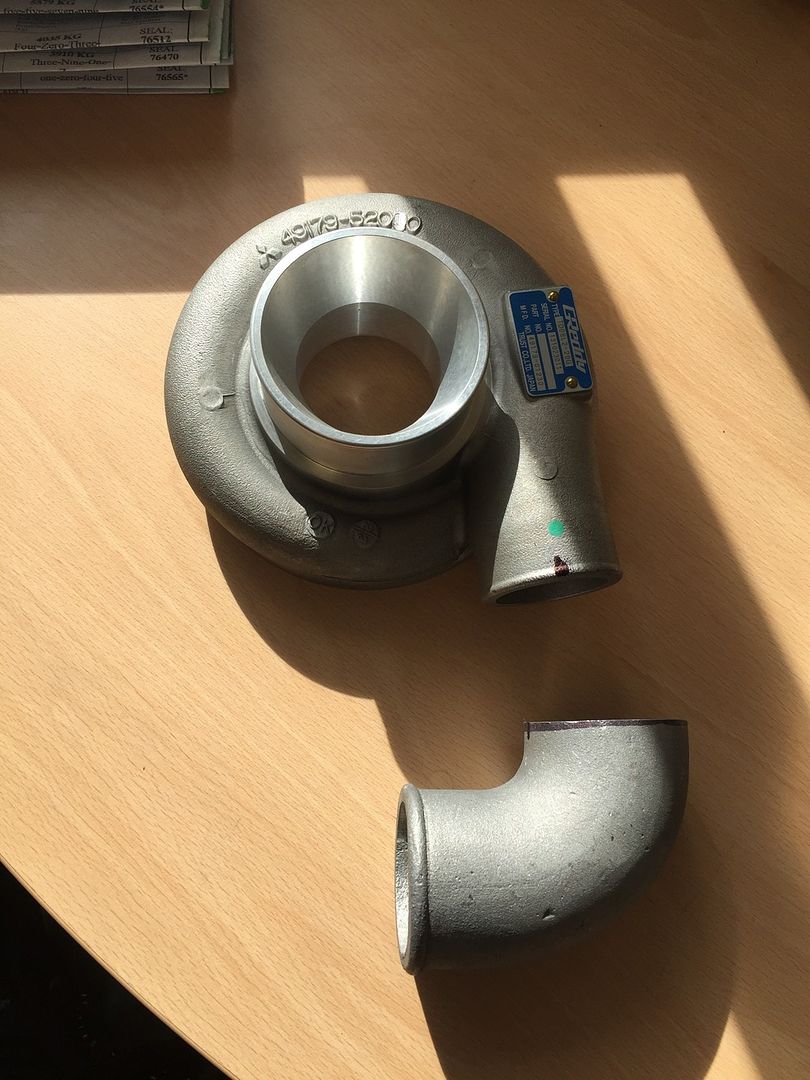
A found a local place near me who’s a welder by trade, so after some beer money it was all done

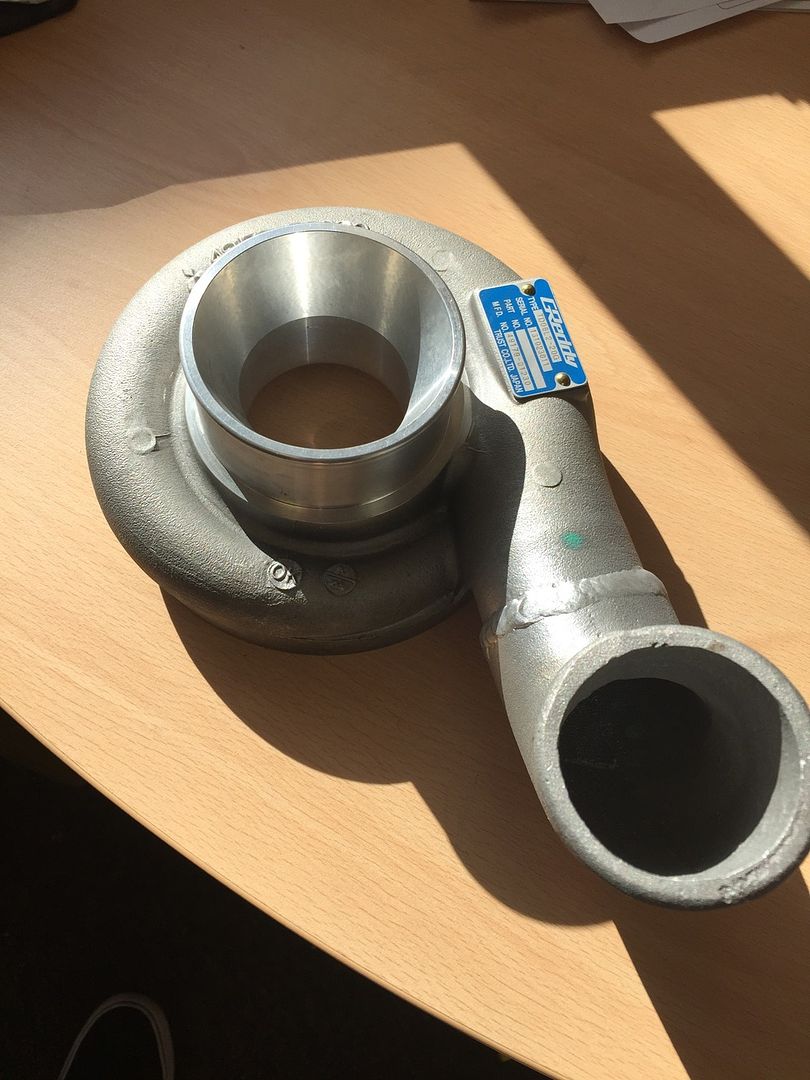
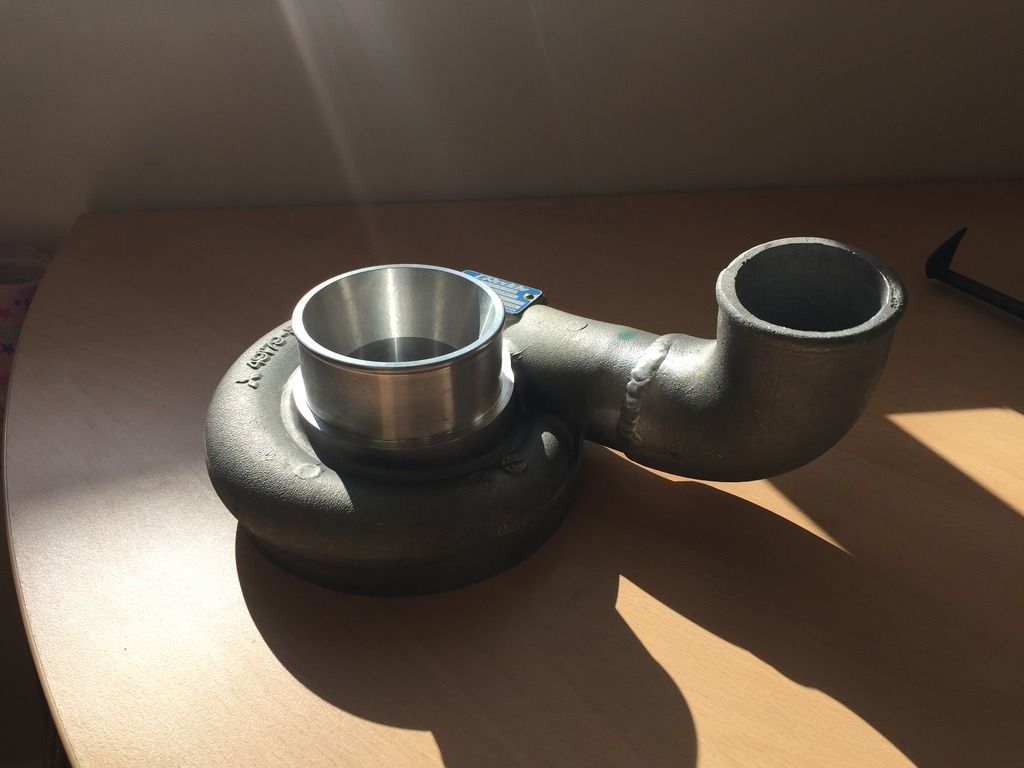
The annoying thing was that the elbow was supposed to be 2” in order to match the diameter of the compressor housing. It actually turned out be a shade over 2.25”, which was kinda on a blessing in disguise as there was enough overlap to weld to and it saves having a huge reducing silicone coupler.
And all back on!
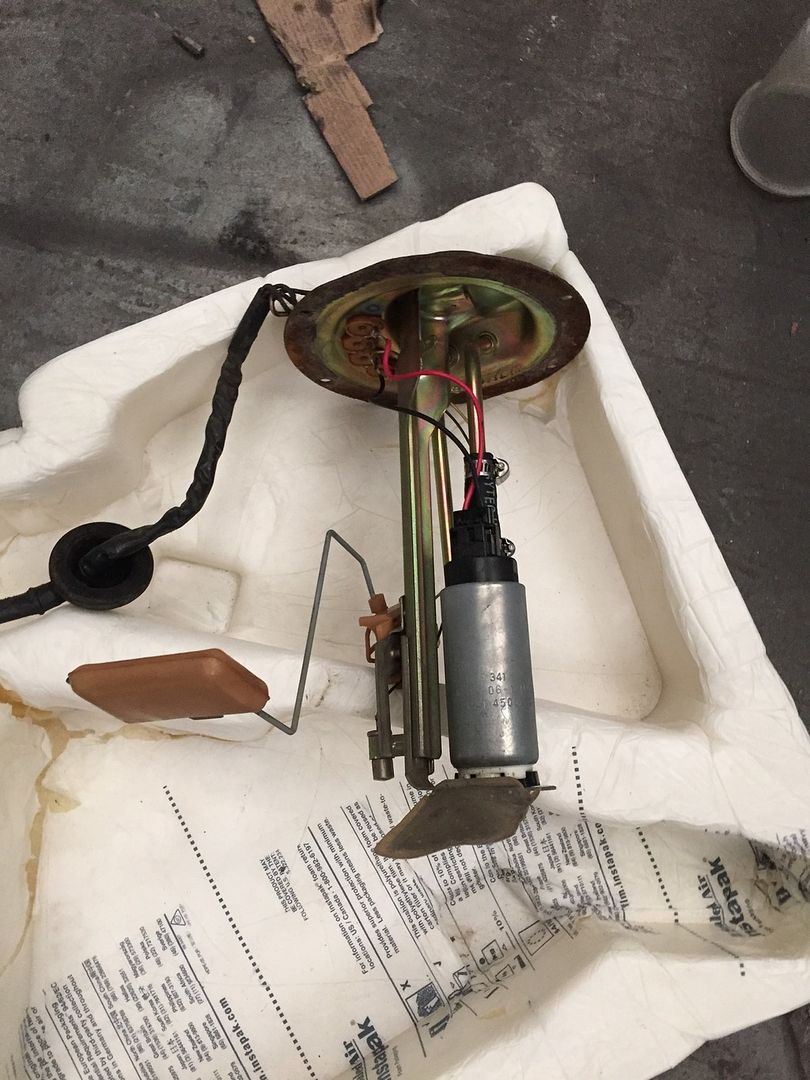
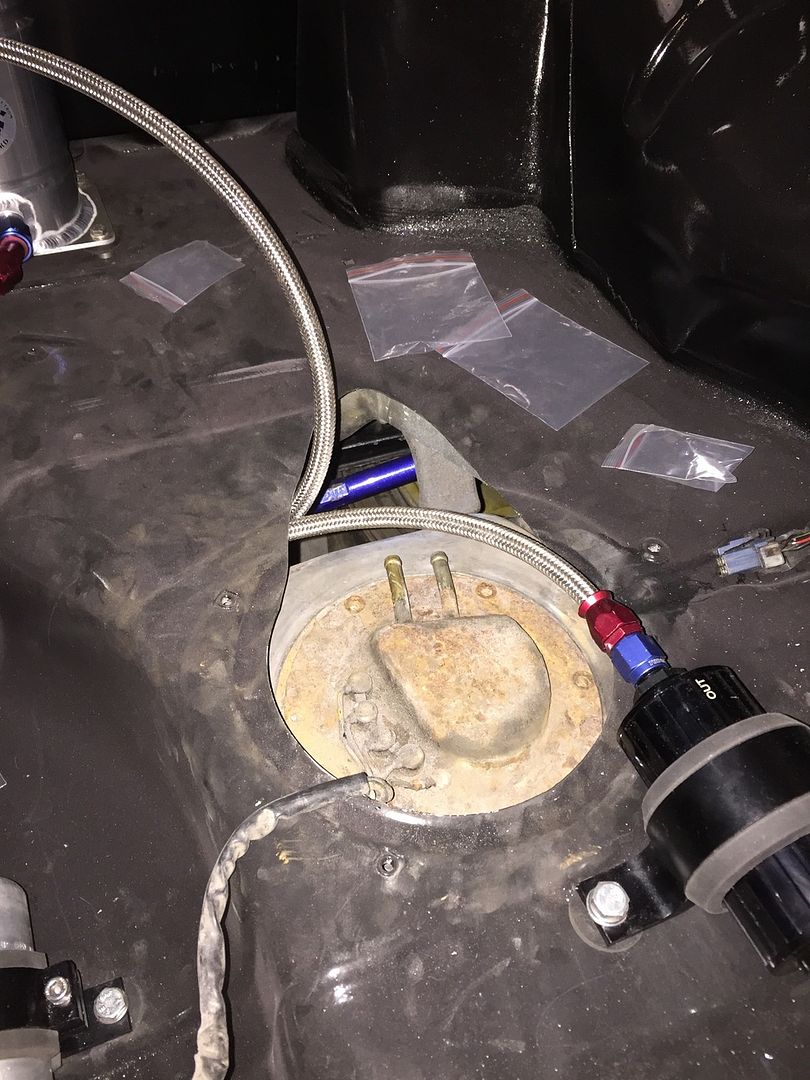
The next job was to change over the in-tank fuel pump for piece of mind and a new filter was desperately needed, after all, I’ve come this far and it’d be a nightmare for something as trivial as the fuel pump to play havoc on track! Plus, I can always keep the old one as a spare

Old pump with a dirty filter;
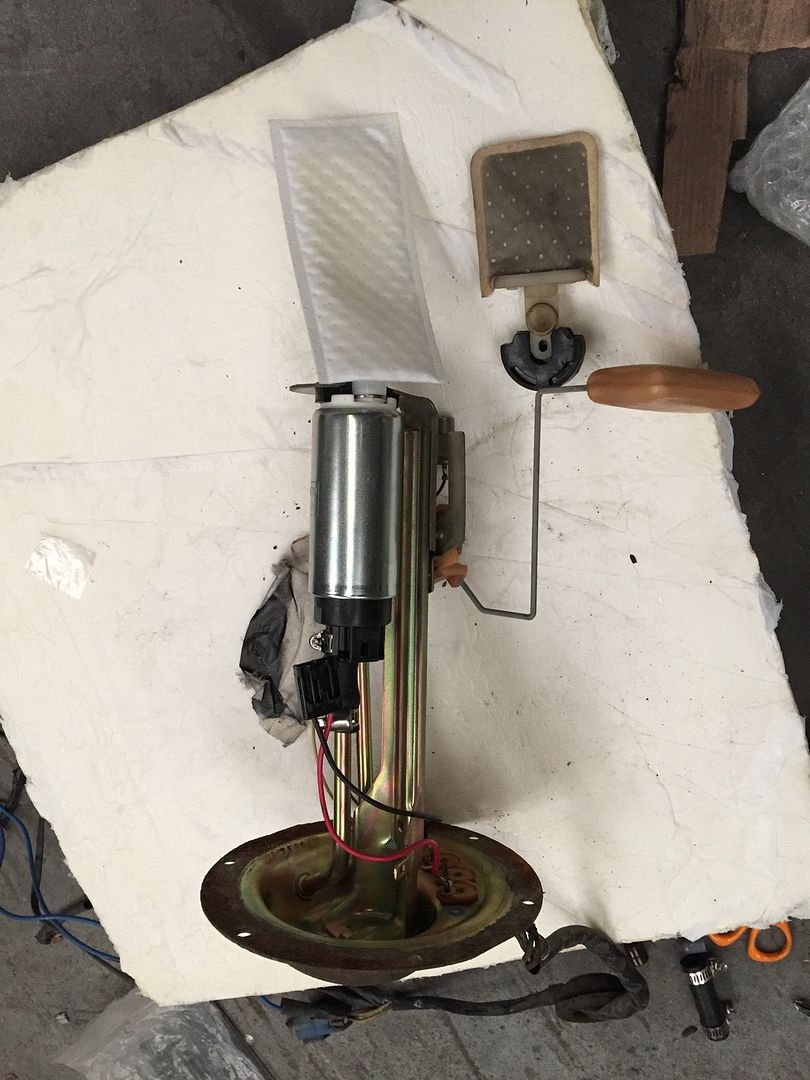
New Walbro which came with a much bigger sock/filter, which cant be a bad thing I suppose;
Generic boring picture of it all hidden away;
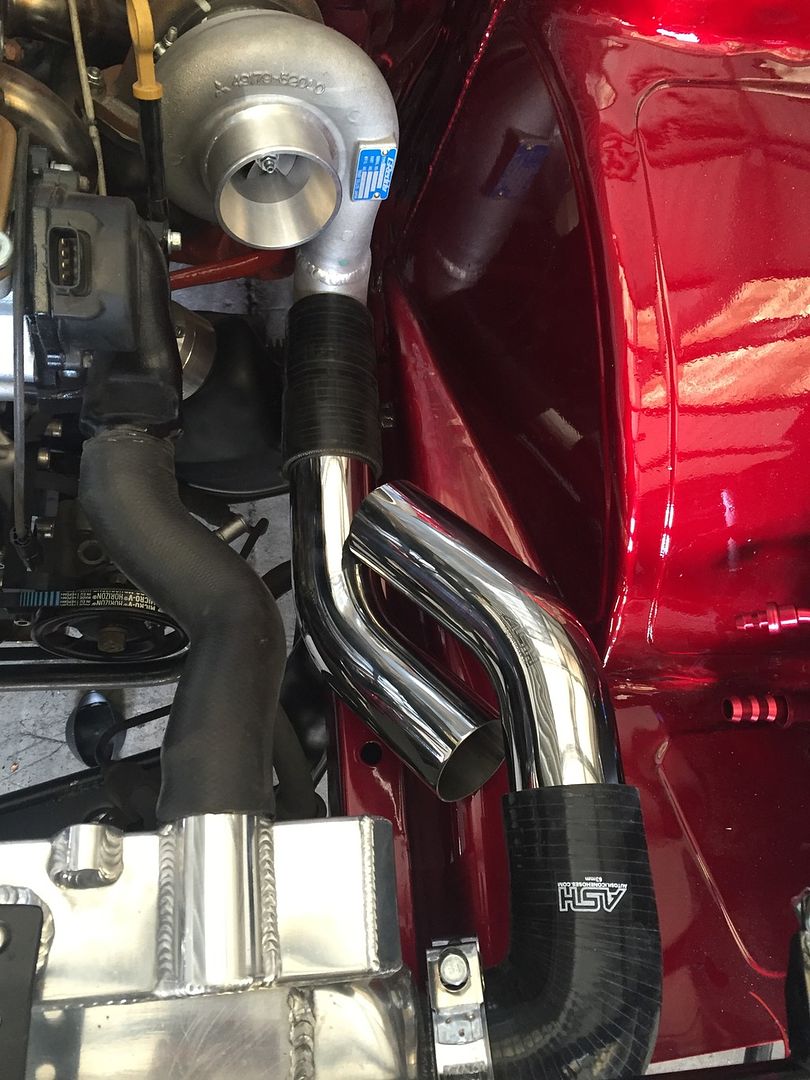
Now it was time to make a start on the intercooler piping, which wasn’t going to be an easy task nor a very difficult one either. So the plan was to order up a mix of stainless bends and try to make something work.
After 10minutes, bingo! The hot side was all marked up and ready to get welded up by the guys who did the compressor housing.
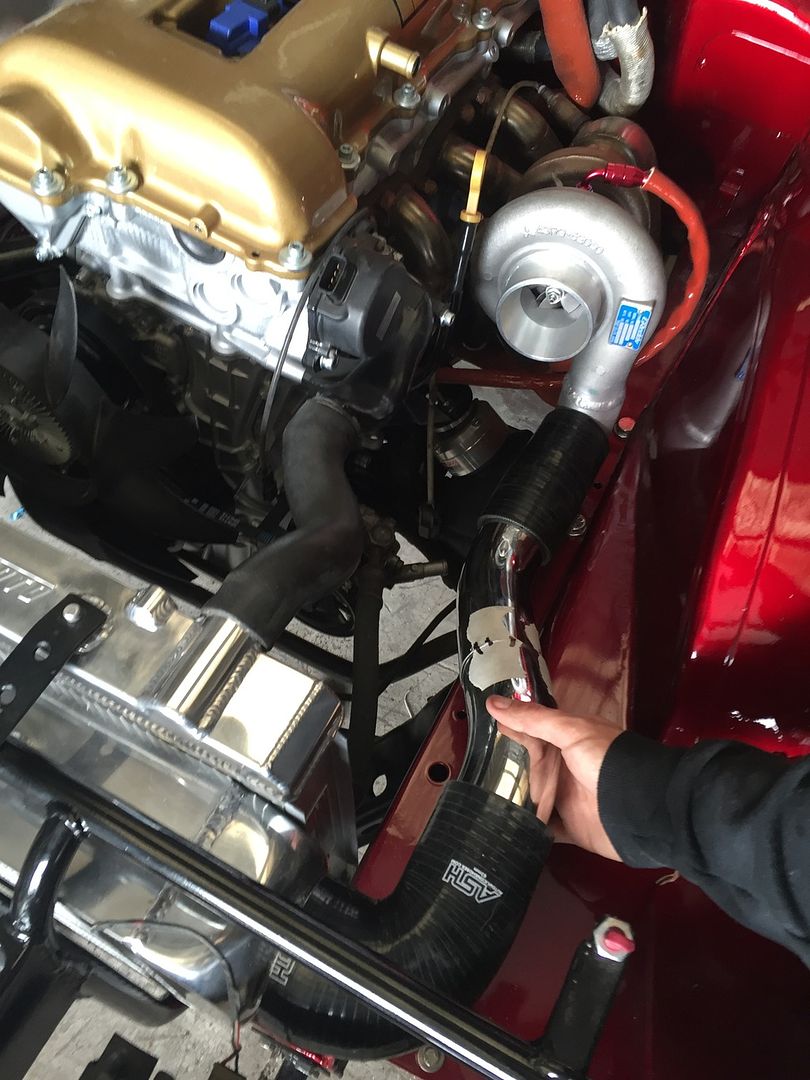
I always thought the cold side would be easier but I was kinda wrong, but cant help think it was because I was overthinking the design. Initially I want to do something similar as the hot side, which was to mix’n’match 2x 45* bends and make something work. But thankfully a friend popped over and instantly had the idea you see below;
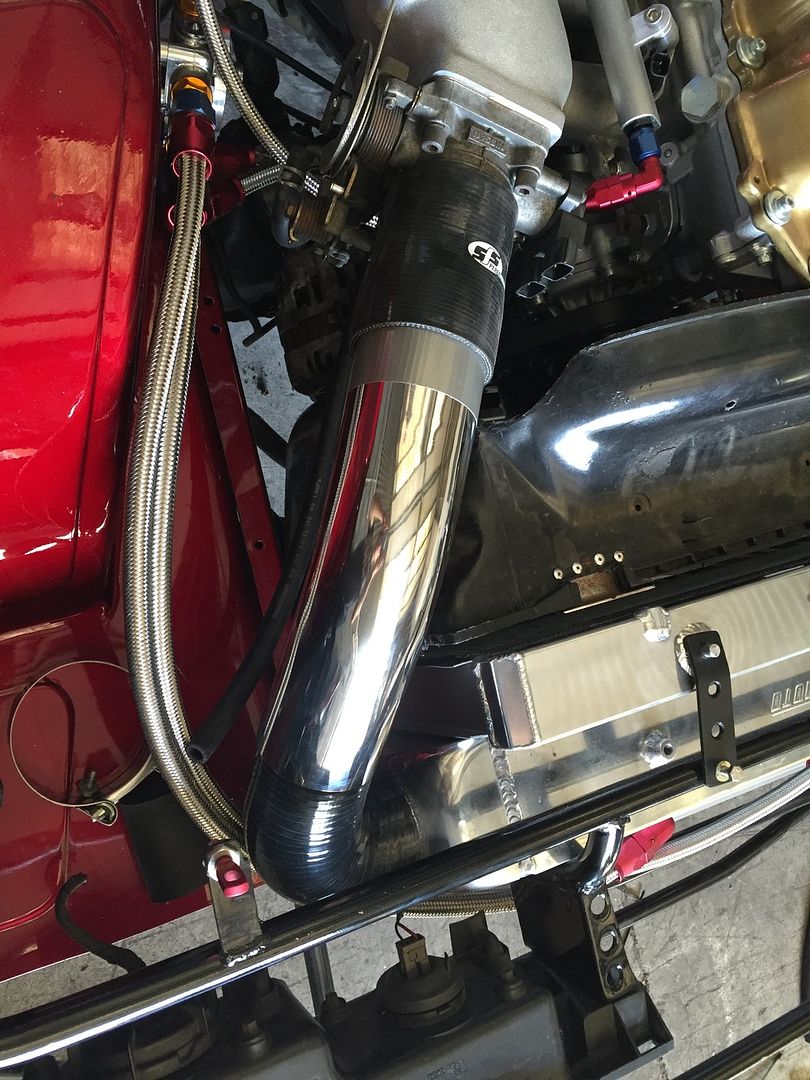
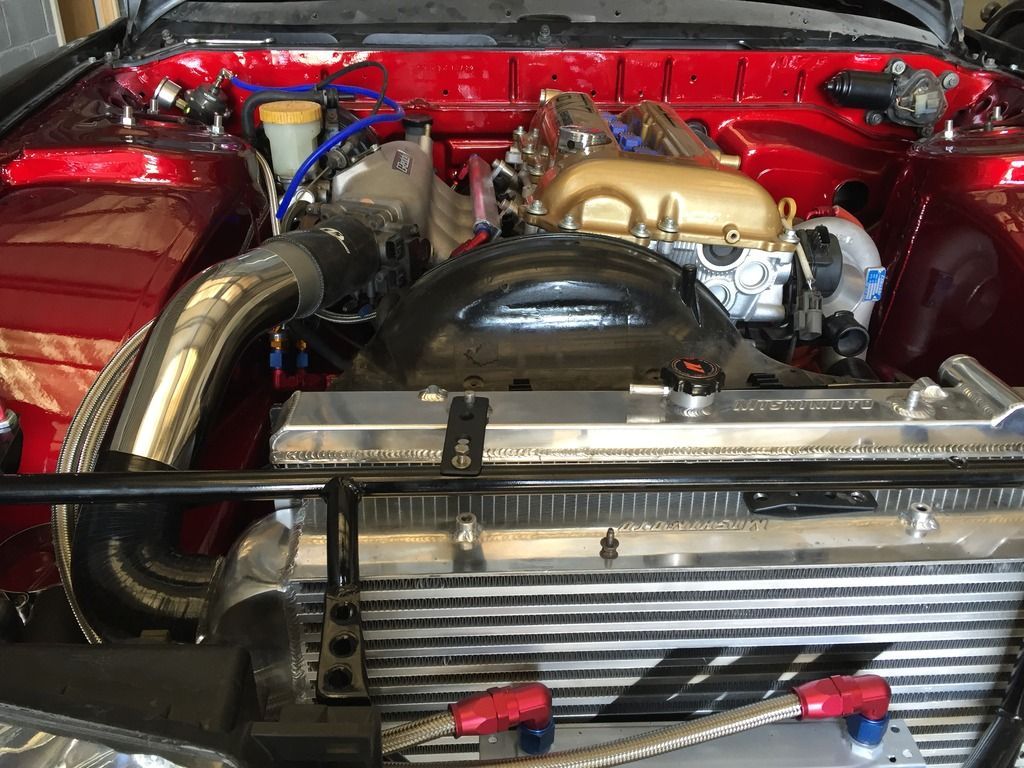
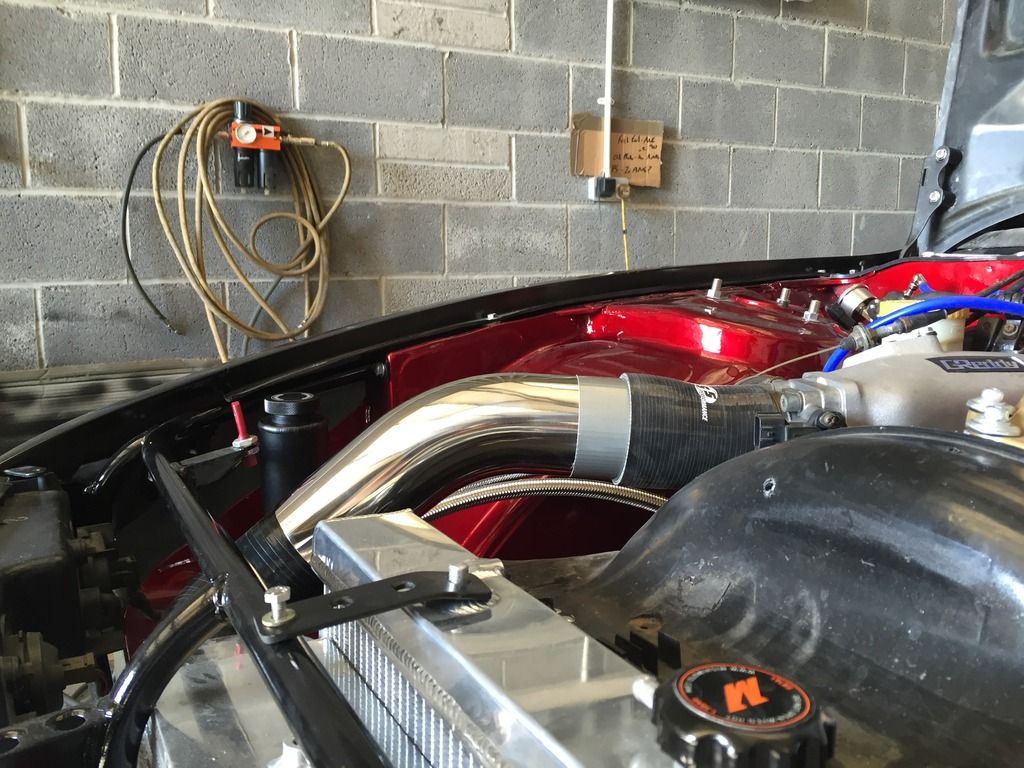
We used the 3” > 2.5” reducer from the hot side to mimic a 90* on the cold side, and with a 3” 45* bend it seemed to line up nicely, albeit on the shorter side, which wouldn’t be a huge issue to get lengthened.
So I ordered up a 3” 90* silicone bend and hoped that it’d all work out once it turned up.
In the meantime, these turned up

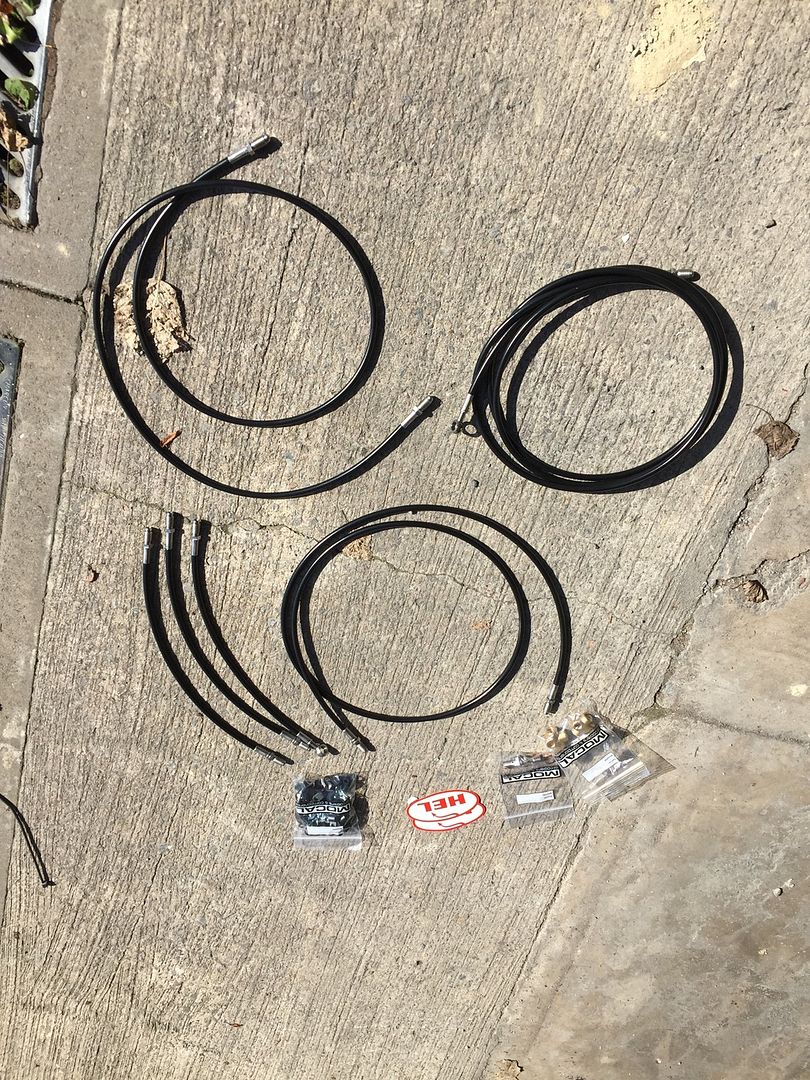
Proline Motorsport over at SXOC were making S14 ABS Delete kits, ideal for me as I wanted to run braided lines throughout. Intially I couldn’t think of any reason why the kits would differ between S-Chassis’ with the likes of GKTech selling a similar kit labelled S13/S14/S15 etc. Anyway, I got chatting to them and he told me that if any lines was too long, he’d shorten them free of charge! Ideal! The lines look great quality with HEL fittings either end

After initially looking at where the T-pieces would sit, one of the lines were definitely too long, which after fitting them all up, the rear passenger line was far too long, almost double the required length. Whether this was a mistake their end or a difference in the chassis, who knows but they shortened the line free of charge with a super quick turn around! Its so handy to know of a place like them, especially when I’ll be needing custom lines for the clutch and hydro setup

Another picture to prove I was actually working on the car fitting the brake lines

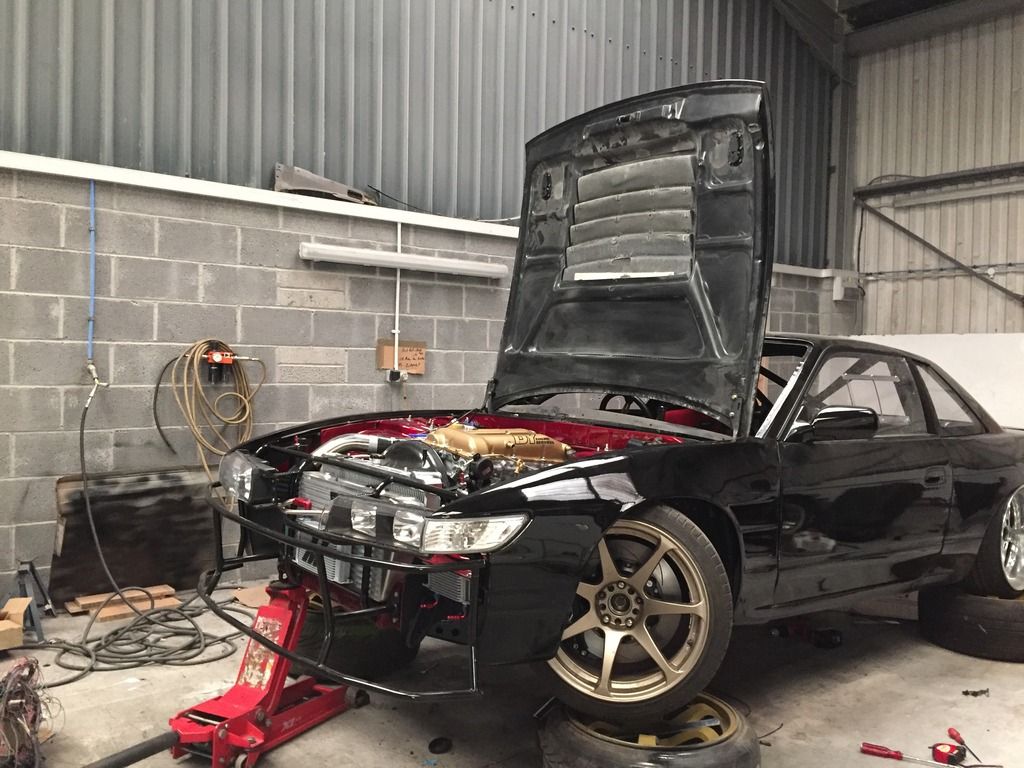
Here’s how I ran the front brake line, similar to the OEM positioning, although I’ve tried to hide it above the line and run it as far away as the turbo as I could. Stoked with how neat it looks though.
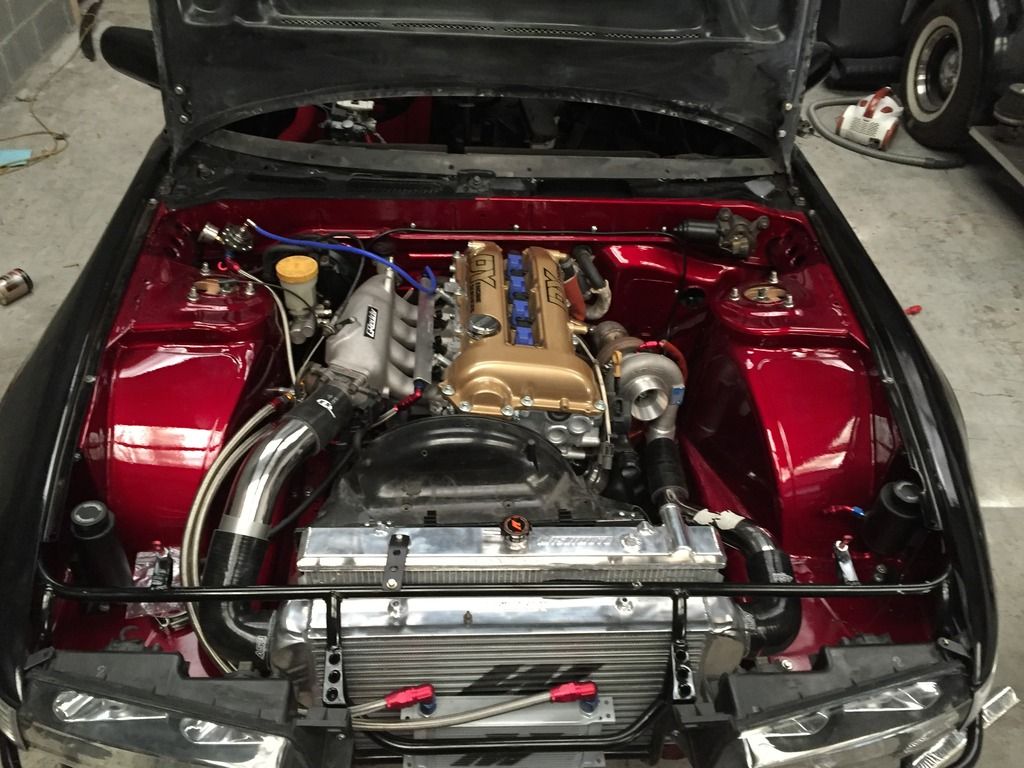
200sx_
PS13 x TD Power
So, the 3” silicone 90* turned up so I wasted no time in offering it up to double check how it’d sit.
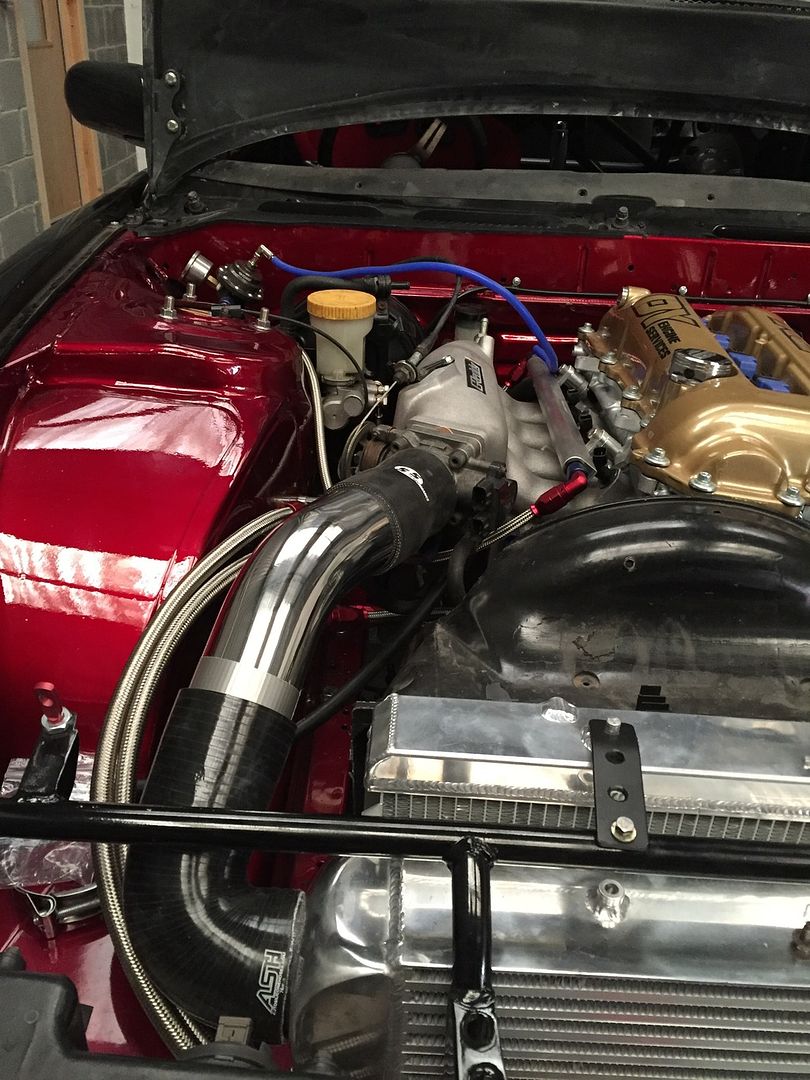
The silicone sits flush around the pipe, with the coupler at the throttlebody using a tiny bit of flex in order to create a more natural bend. Nothing a decent clamp will secure.
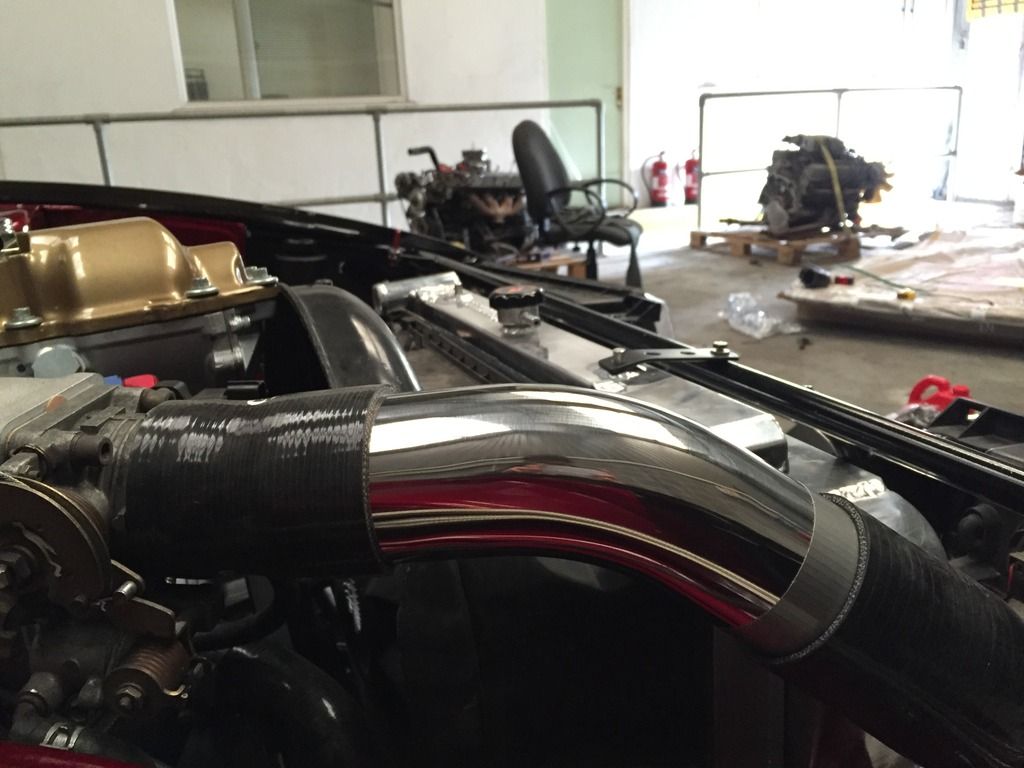
After a bit of thinking, it needs to be extended around 1.5/2” to be on the safe side, nothing to complex. Once this was done I set about order 2x hose tail/barb fittings to get welded onto the hot side (pressure source for the boost solenoid) and one for the cold side (IACV source), as well as a 3/8NPT boss for the IAT Sensor.
The correct coupler turned up for the intake, as the snout on the compressor housing is 81mm, as opposed to the 76mm intake I have. Bit of an odd size, but its all sorted now.
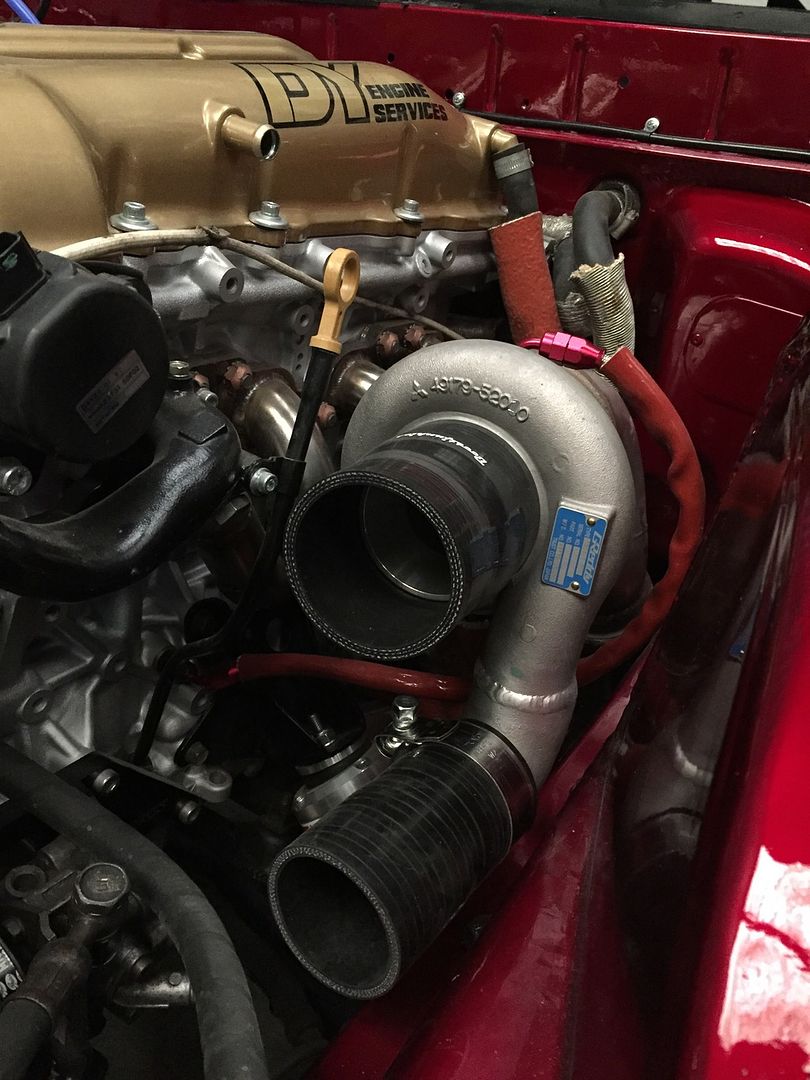
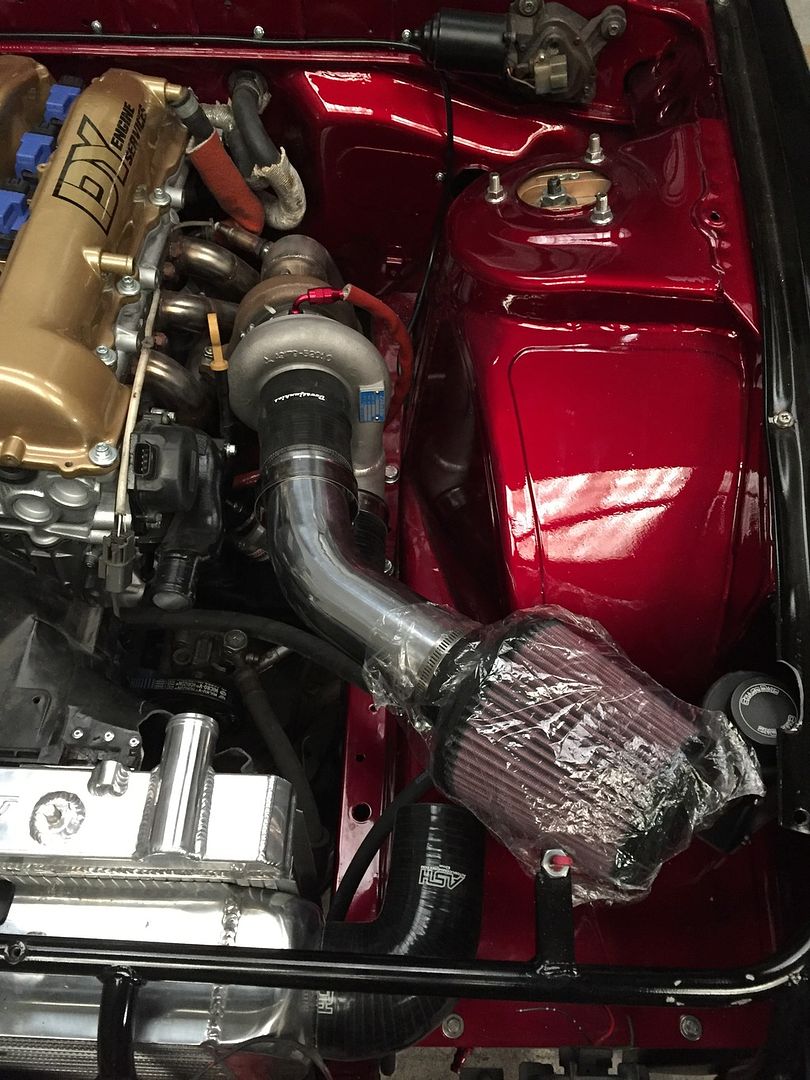
That’s roughly how the intake will finally sit, but final positioning wont be confirmed until the hot side is all welded up and installed below it.
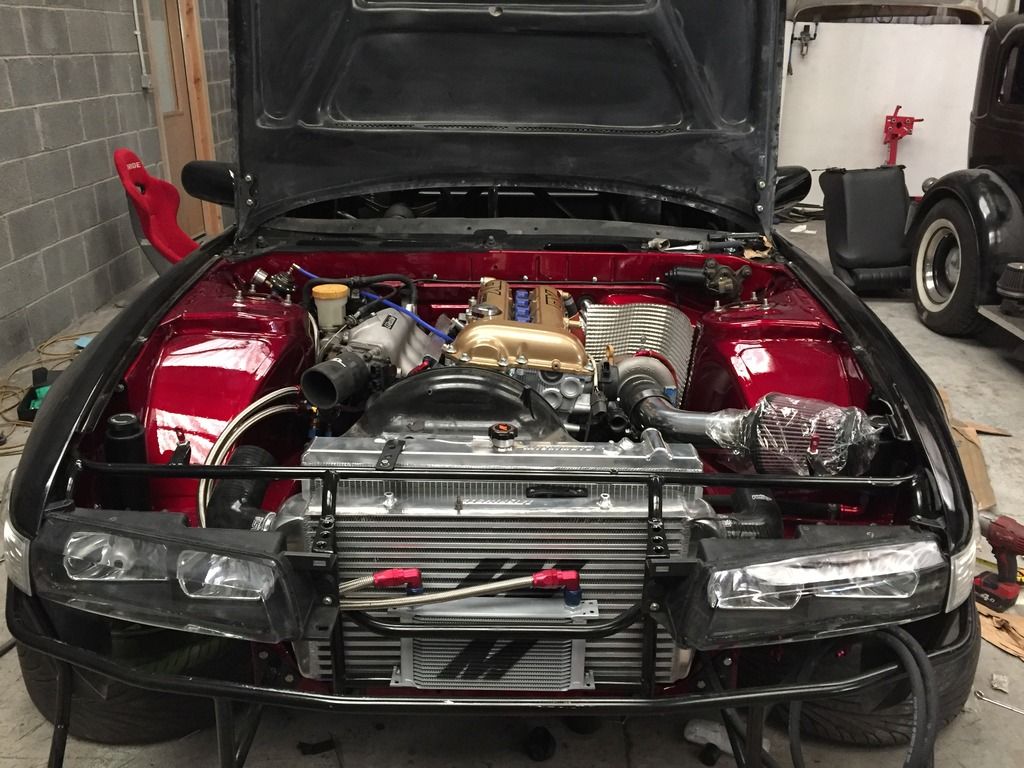
The next task I wanted to tackle was heat management surrounding the heater matrix hoses, purely because I didn’t have much faith the torn cardboard heat reflective material Nissan used, what with the downpipe sitting much closer than a stock turbo setup. So, first thing I did was to completely remove the Nissan stuff in order to re-protect the hoses;
(I trimmed the top hose for those that may notice. The aim here was to try and “pull” the hose up and away from the downpipe without trying to kink the hose.)
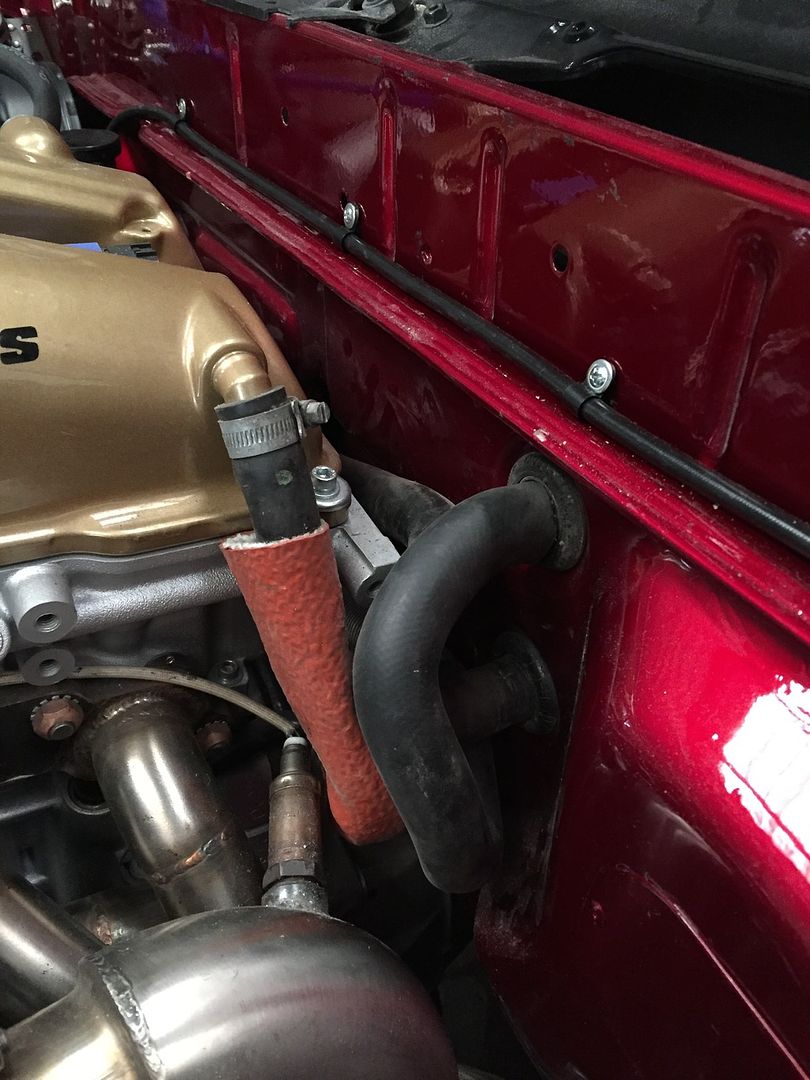
Unfortunately I forgot to take a picture of the heat sleeving I used, but I grabbed some heat reflective sleeving from Merlin Motorsport who are kinda local to me. You may just about notice it in the following pictures
Whilst I was at Melrin Motorsport, I grabbed some Nimbus GII Heat Shielding, which I’ve only heard good things about, even the chap at the counter was praising how effective the stuff is. I got this idea via 2 friends and kinda think it makes the how setup look more purposeful as well as more effective. Thanks to one of them, Diamondsink on here, I noticed he runs a fire extinguisher nozzle in the corner of the shielding, something I wouldn’t mind doing in the near future when I get round to installing a fire extinguisher setup.
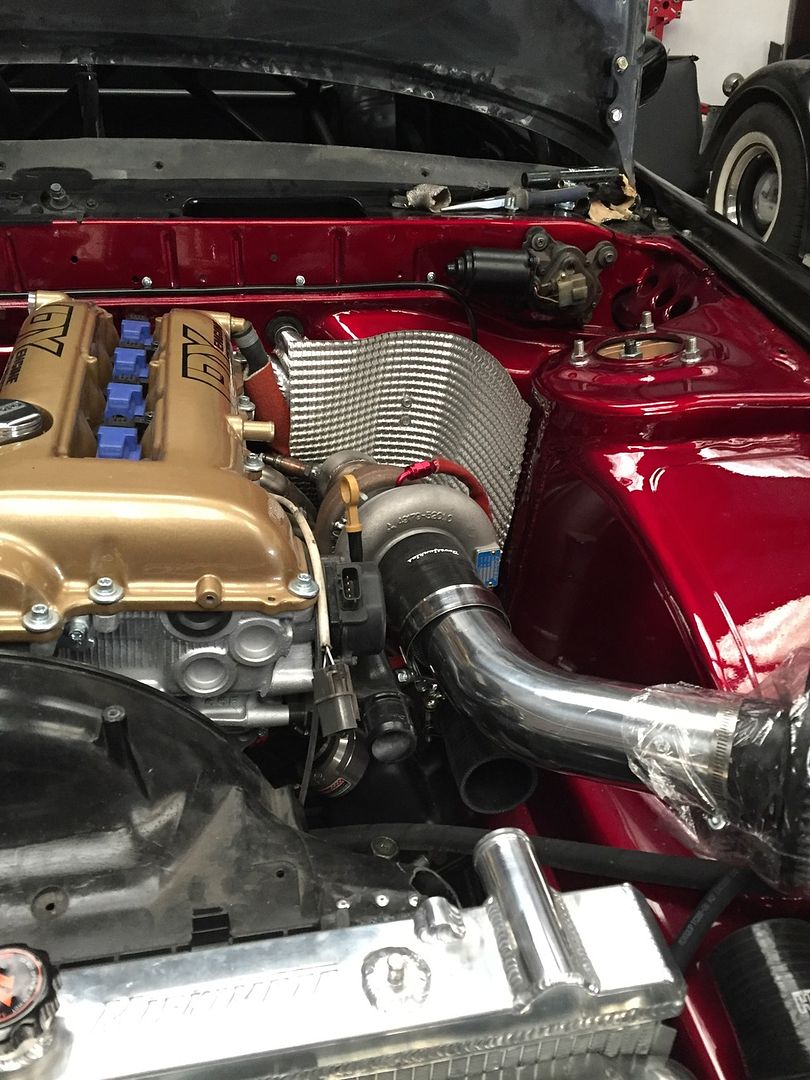
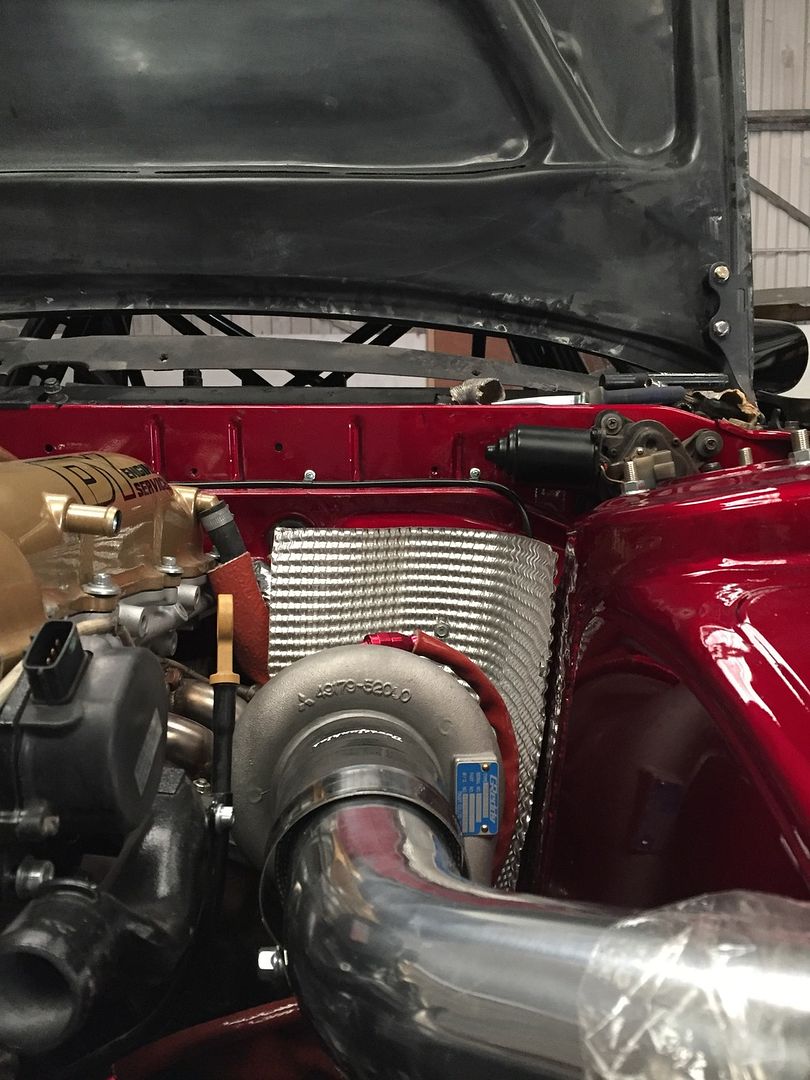
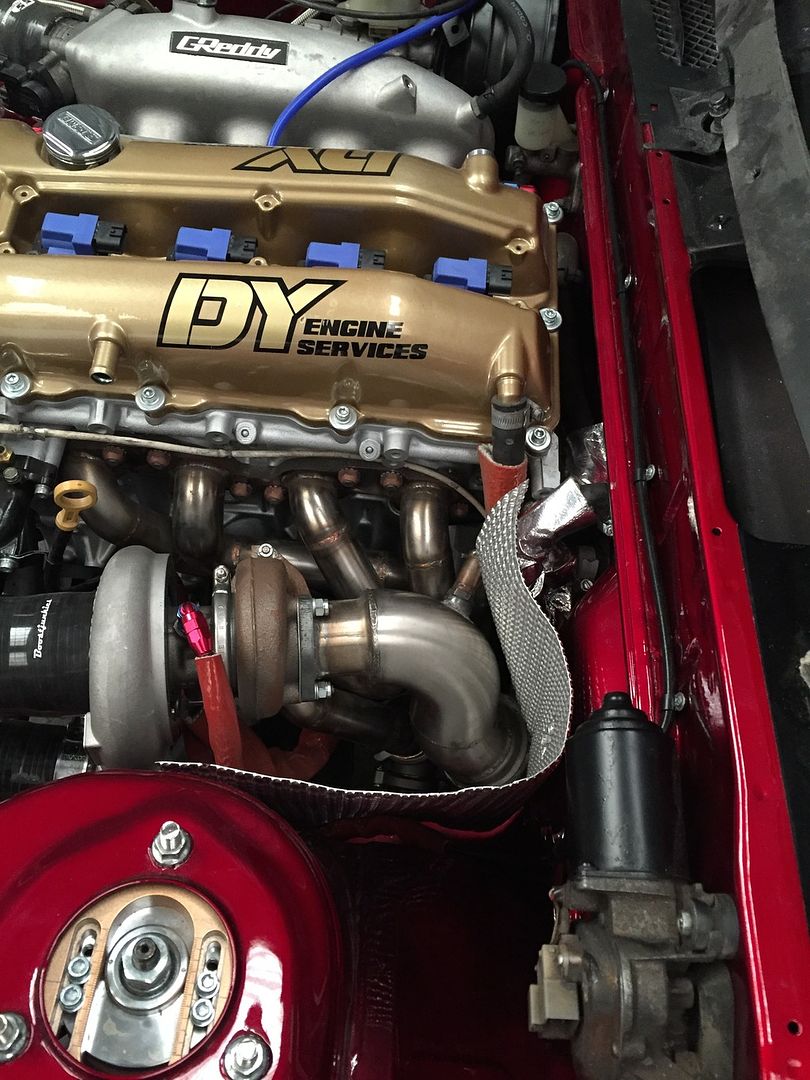
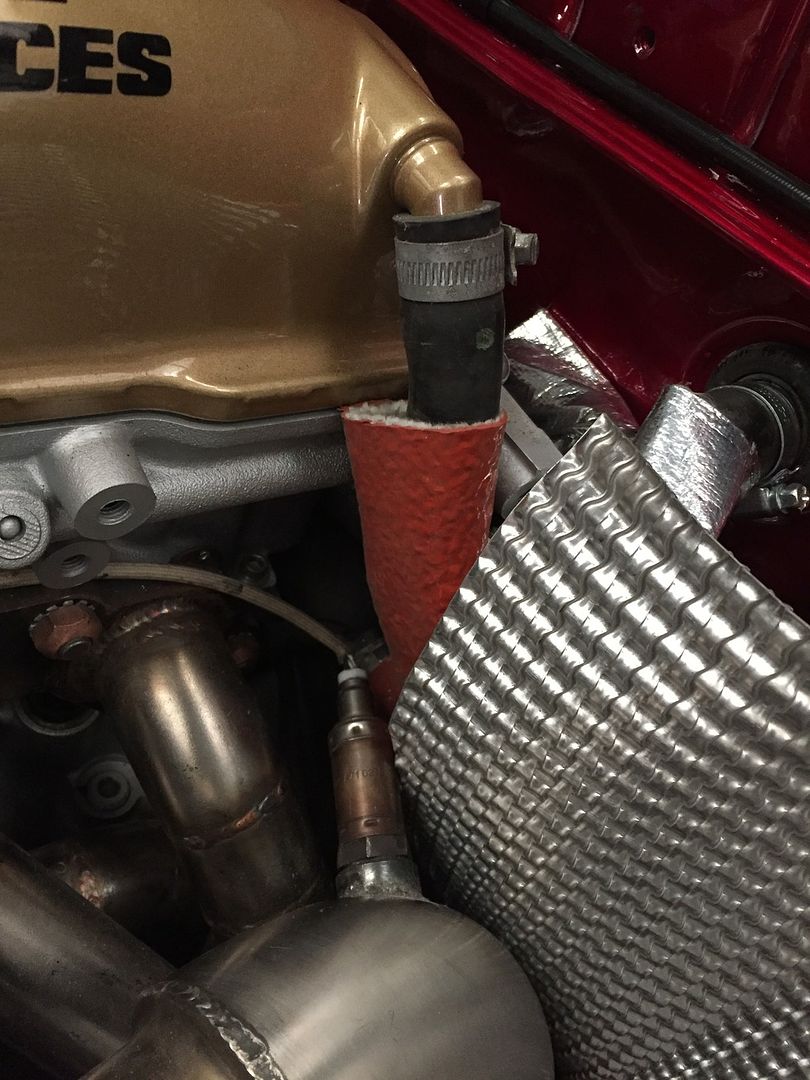
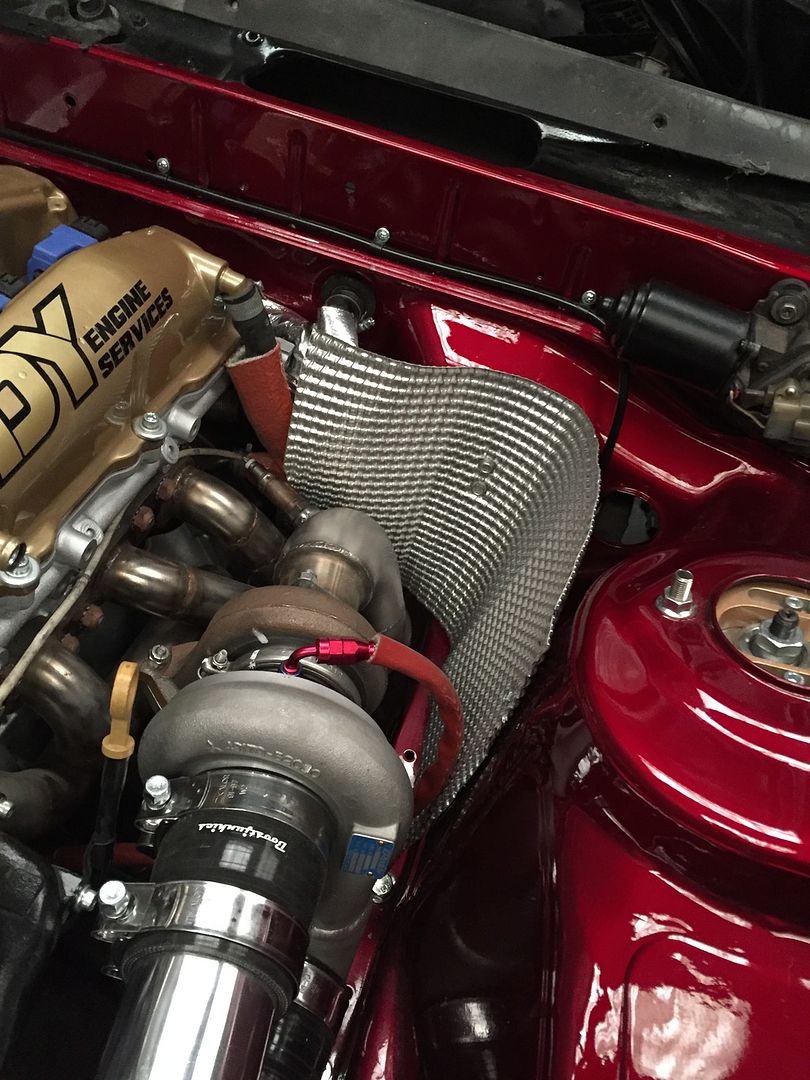
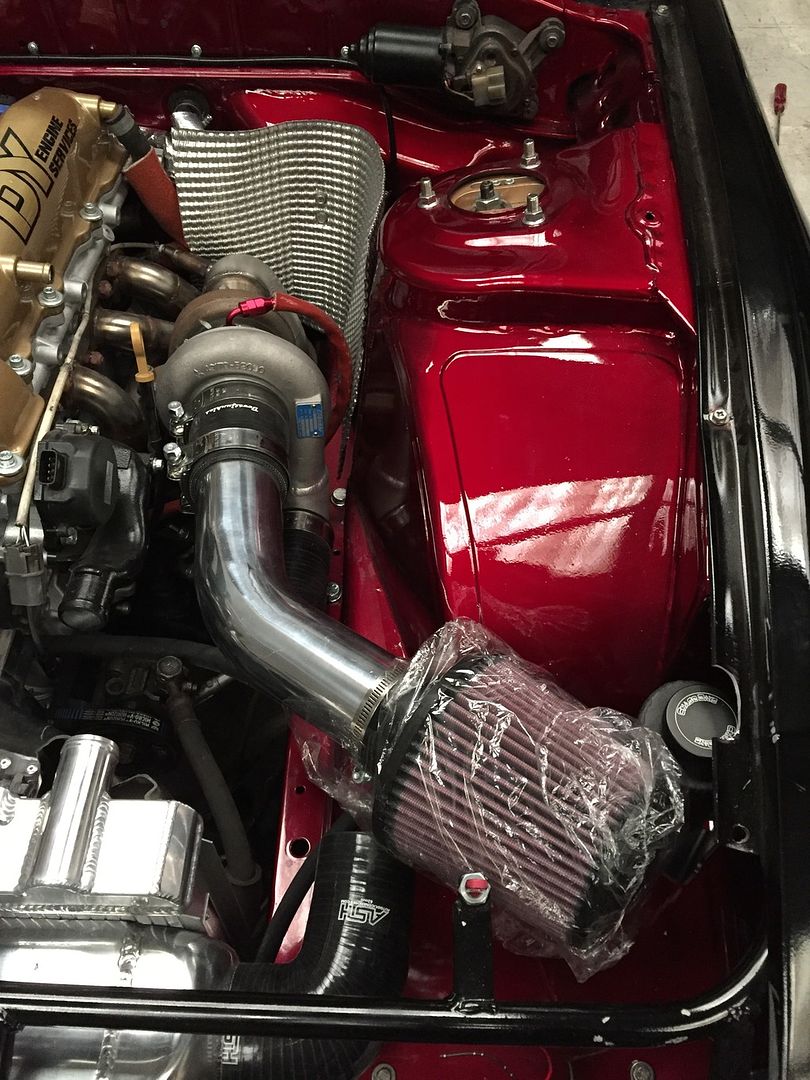
The heat shielding is a god send to work with! I tried to get a nice fluent curve to make it look neat, whilst making sure it follows the areas its trying to protect. For example, you cannot see it in the pictures, but the bottom of the heat shielding near the firewall mimicks the downpipes shape to try and control where the heat is dispersed to
- - - Updated - - -
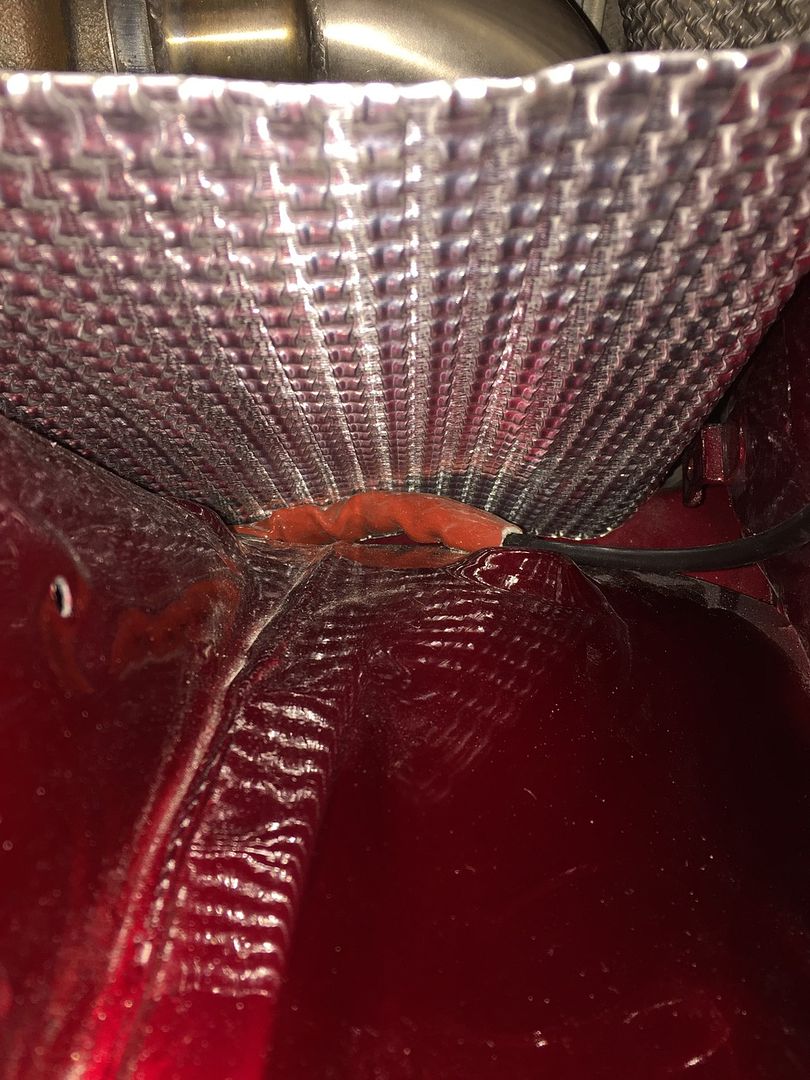
What with the turbo sitting fairly low to a conventional top mount setup, I was kind of worried about the brake line. So I made sure the heat shielding sat low enough to protect the brake line, as well as a bit of fire proof sleeve for good measure
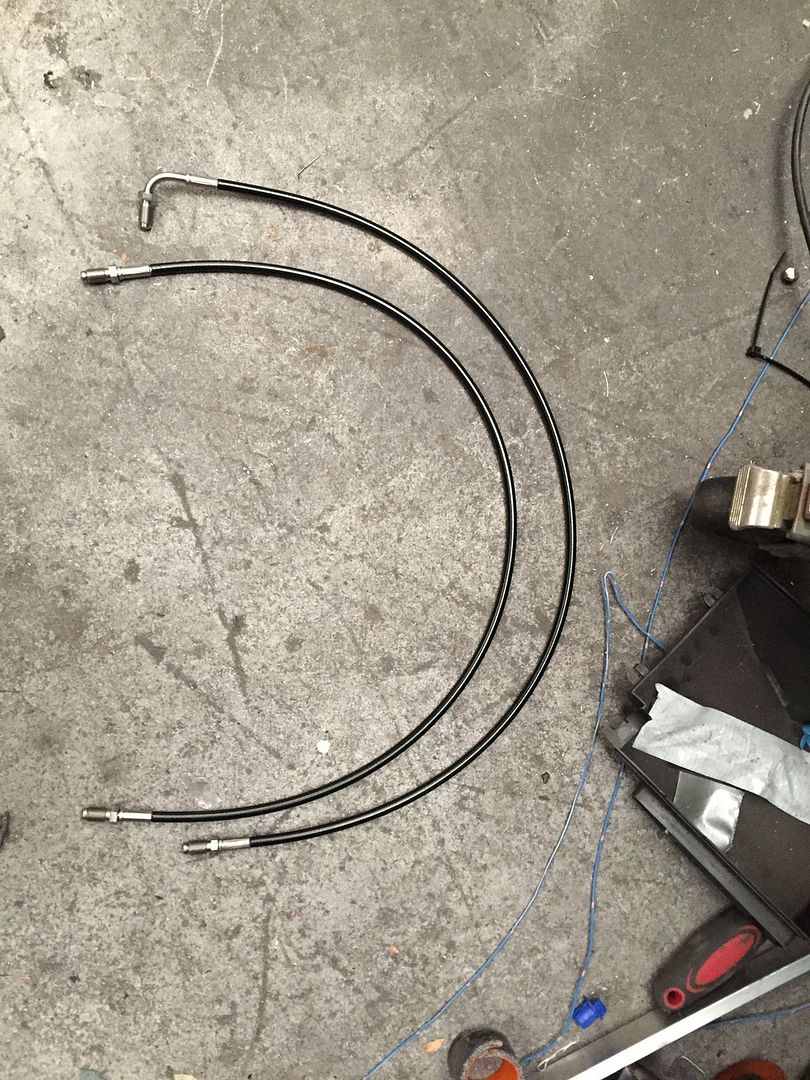
At this point, I received the adjusted brake line back, as well as a custom clutch line Proline Motorsport made up for me. Both of which fitted perfectly!
(Apologies for the terrible pictures, but light conditions are terrible under the car, who’d have thought that )
)
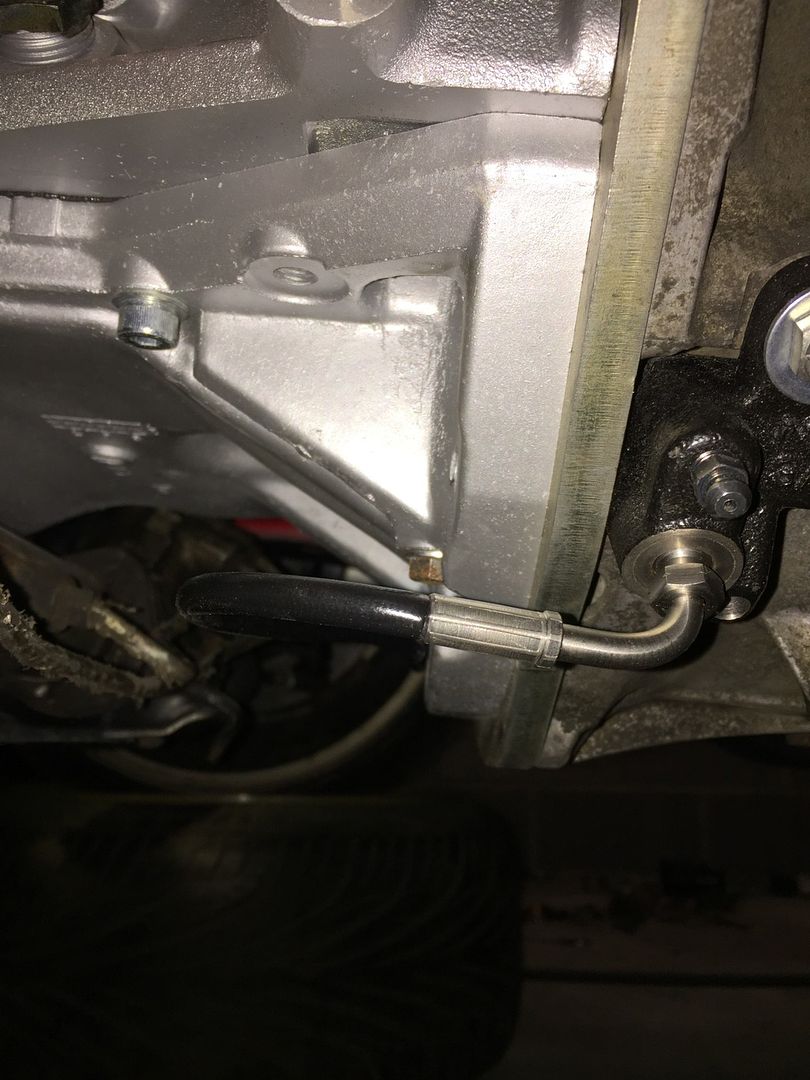
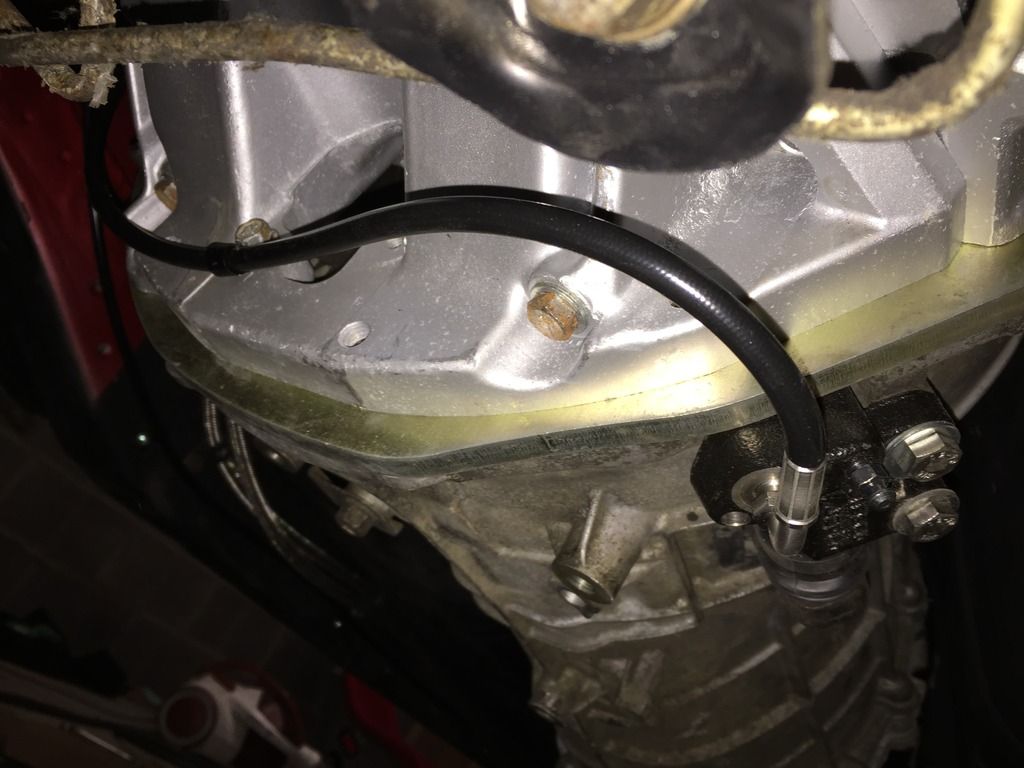
The issue with the Z33 box is that;
a) The slave sits on the opposite side, so a custom line is required
b) The gearbox sits fairly low, so I don’t exactly want the clutch line to be exposed should I run over a curb on track or something.
So here’s how it sat once installed;
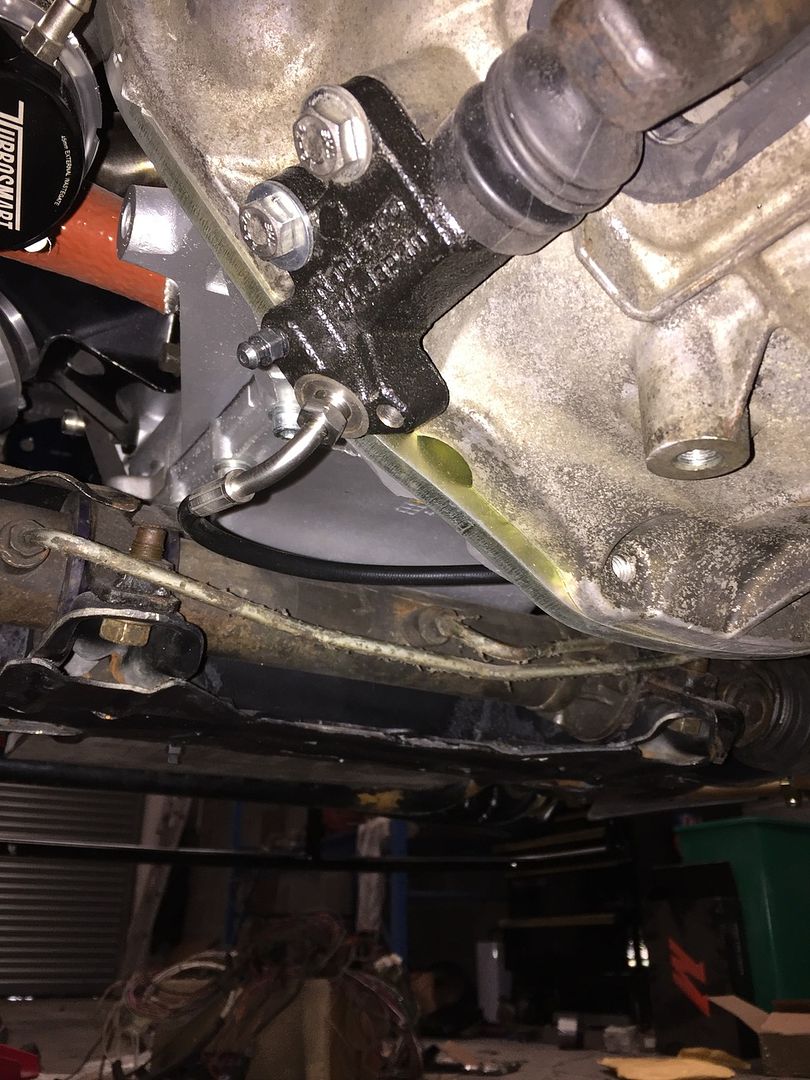
Thankfully, the 90* bend ensures the line doesn’t hang down which im stoked about. After speaking to 2 friends who run an SR/Z33 setup they both run their clutch lines different ways.
One of them runs the clutch line to the front subframe then around, whilst the other follows the gearbox around the top. Neither of which aren’t exactly what I had in mind, as I wanted to make sure the hose was tucked out of the way as soon as possible, whilst keeping it away from the turbo/manifold & downpipe area. With this in mind, I noticed there were 2x M6 threads on the rear of the sump, which meant that I could just a P-clip there, so essentially following the gearbox around the bottom and straight up to the master cylinder. The biggest issue here was that I didn’t want the bolt to foul on the flywheel, but nothing a lil’ bit of common sense could sort out.
Hopefully this will make things a tad clearer;
So that’s me kind of up to date at the moment, ive got a few little bits turning up but im hoping tomorrow the intercooler pipes will be welded up and fit without any drama’s (*touch wood*). I ordered up 2x pair of brake pads earlier, with one pair I spec’d to try and keep up with the track demands and kind of match the front pad (Ferado DS2500’s up front), with the other pair being chosen for their initial bite for the hydro pair of Z32’s.

The silicone sits flush around the pipe, with the coupler at the throttlebody using a tiny bit of flex in order to create a more natural bend. Nothing a decent clamp will secure.

After a bit of thinking, it needs to be extended around 1.5/2” to be on the safe side, nothing to complex. Once this was done I set about order 2x hose tail/barb fittings to get welded onto the hot side (pressure source for the boost solenoid) and one for the cold side (IACV source), as well as a 3/8NPT boss for the IAT Sensor.
The correct coupler turned up for the intake, as the snout on the compressor housing is 81mm, as opposed to the 76mm intake I have. Bit of an odd size, but its all sorted now.


That’s roughly how the intake will finally sit, but final positioning wont be confirmed until the hot side is all welded up and installed below it.
The next task I wanted to tackle was heat management surrounding the heater matrix hoses, purely because I didn’t have much faith the torn cardboard heat reflective material Nissan used, what with the downpipe sitting much closer than a stock turbo setup. So, first thing I did was to completely remove the Nissan stuff in order to re-protect the hoses;
(I trimmed the top hose for those that may notice. The aim here was to try and “pull” the hose up and away from the downpipe without trying to kink the hose.)

Unfortunately I forgot to take a picture of the heat sleeving I used, but I grabbed some heat reflective sleeving from Merlin Motorsport who are kinda local to me. You may just about notice it in the following pictures

Whilst I was at Melrin Motorsport, I grabbed some Nimbus GII Heat Shielding, which I’ve only heard good things about, even the chap at the counter was praising how effective the stuff is. I got this idea via 2 friends and kinda think it makes the how setup look more purposeful as well as more effective. Thanks to one of them, Diamondsink on here, I noticed he runs a fire extinguisher nozzle in the corner of the shielding, something I wouldn’t mind doing in the near future when I get round to installing a fire extinguisher setup.


The heat shielding is a god send to work with! I tried to get a nice fluent curve to make it look neat, whilst making sure it follows the areas its trying to protect. For example, you cannot see it in the pictures, but the bottom of the heat shielding near the firewall mimicks the downpipes shape to try and control where the heat is dispersed to

- - - Updated - - -

What with the turbo sitting fairly low to a conventional top mount setup, I was kind of worried about the brake line. So I made sure the heat shielding sat low enough to protect the brake line, as well as a bit of fire proof sleeve for good measure


At this point, I received the adjusted brake line back, as well as a custom clutch line Proline Motorsport made up for me. Both of which fitted perfectly!

(Apologies for the terrible pictures, but light conditions are terrible under the car, who’d have thought that
 )
)The issue with the Z33 box is that;
a) The slave sits on the opposite side, so a custom line is required
b) The gearbox sits fairly low, so I don’t exactly want the clutch line to be exposed should I run over a curb on track or something.
So here’s how it sat once installed;

Thankfully, the 90* bend ensures the line doesn’t hang down which im stoked about. After speaking to 2 friends who run an SR/Z33 setup they both run their clutch lines different ways.
One of them runs the clutch line to the front subframe then around, whilst the other follows the gearbox around the top. Neither of which aren’t exactly what I had in mind, as I wanted to make sure the hose was tucked out of the way as soon as possible, whilst keeping it away from the turbo/manifold & downpipe area. With this in mind, I noticed there were 2x M6 threads on the rear of the sump, which meant that I could just a P-clip there, so essentially following the gearbox around the bottom and straight up to the master cylinder. The biggest issue here was that I didn’t want the bolt to foul on the flywheel, but nothing a lil’ bit of common sense could sort out.
Hopefully this will make things a tad clearer;


So that’s me kind of up to date at the moment, ive got a few little bits turning up but im hoping tomorrow the intercooler pipes will be welded up and fit without any drama’s (*touch wood*). I ordered up 2x pair of brake pads earlier, with one pair I spec’d to try and keep up with the track demands and kind of match the front pad (Ferado DS2500’s up front), with the other pair being chosen for their initial bite for the hydro pair of Z32’s.
200sx_
PS13 x TD Power
So small update today! 
The mikalor clamps I purchased earlier were a tad too thick to sit properly on the throttlebody and the intercooler, so I decided to purchase my back up option, Murray's constant tension clamps, a.k.a fancy hose clips;
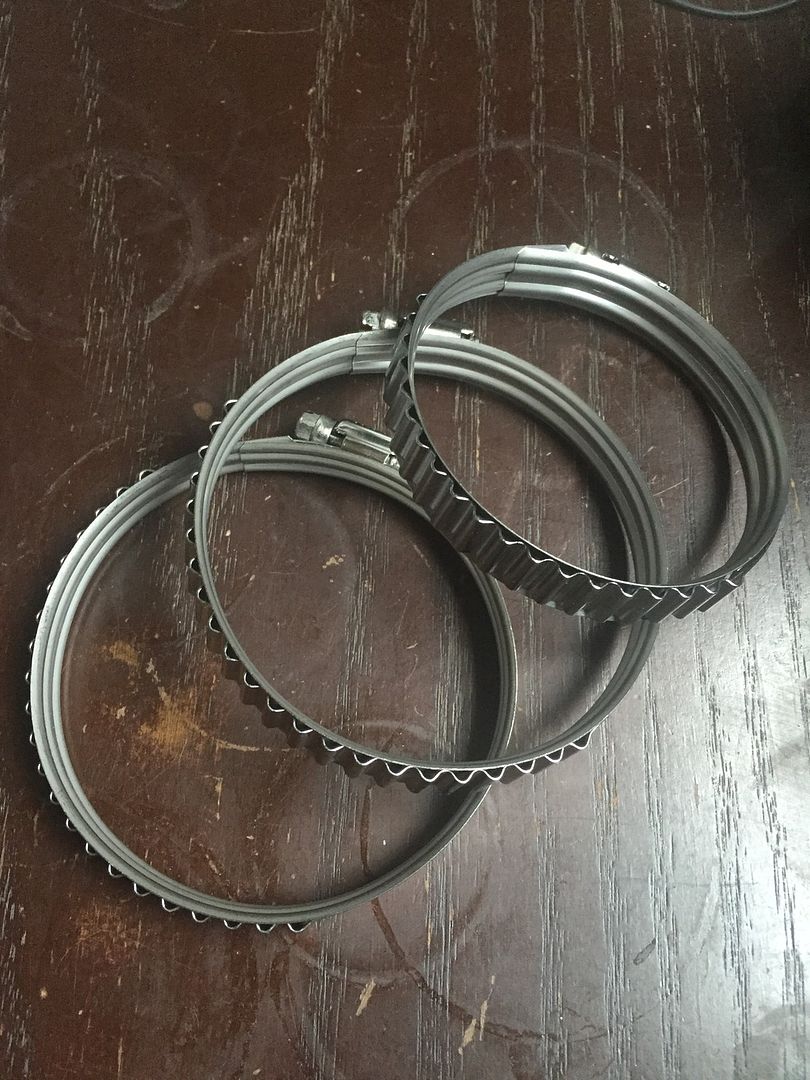
SO hopefully with usually correctly sized silicone joiners/bends and decent clamps all round, I'm hoping I wont have any boost issues.
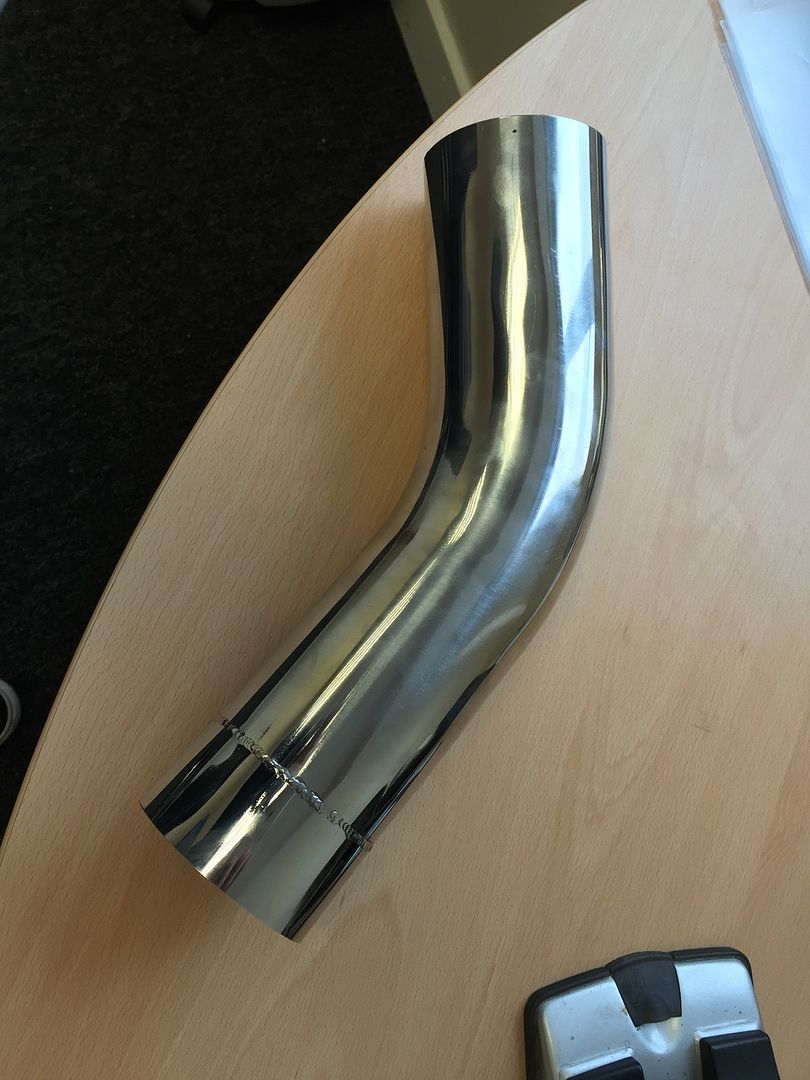
I picked up the intercooler pipes too, stoked with how they came out and so happy I chose stainless steel as the welding looks 100x neater!
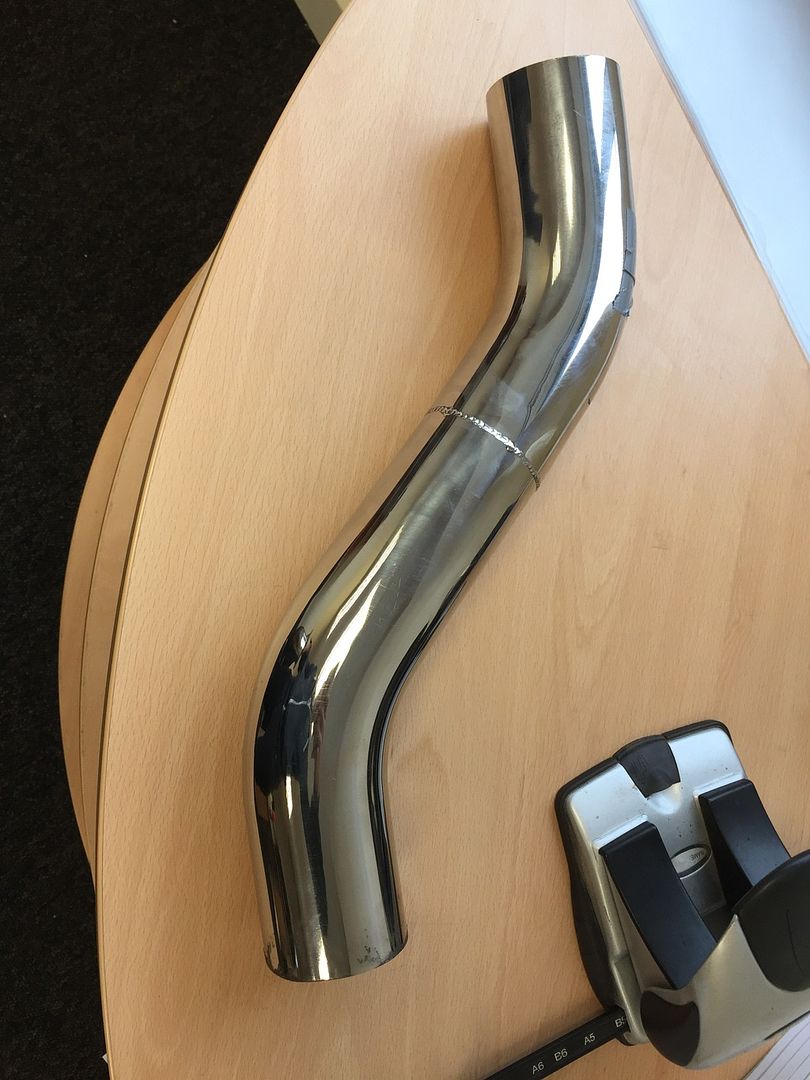
And the moment of truth as to whether they fit or not;
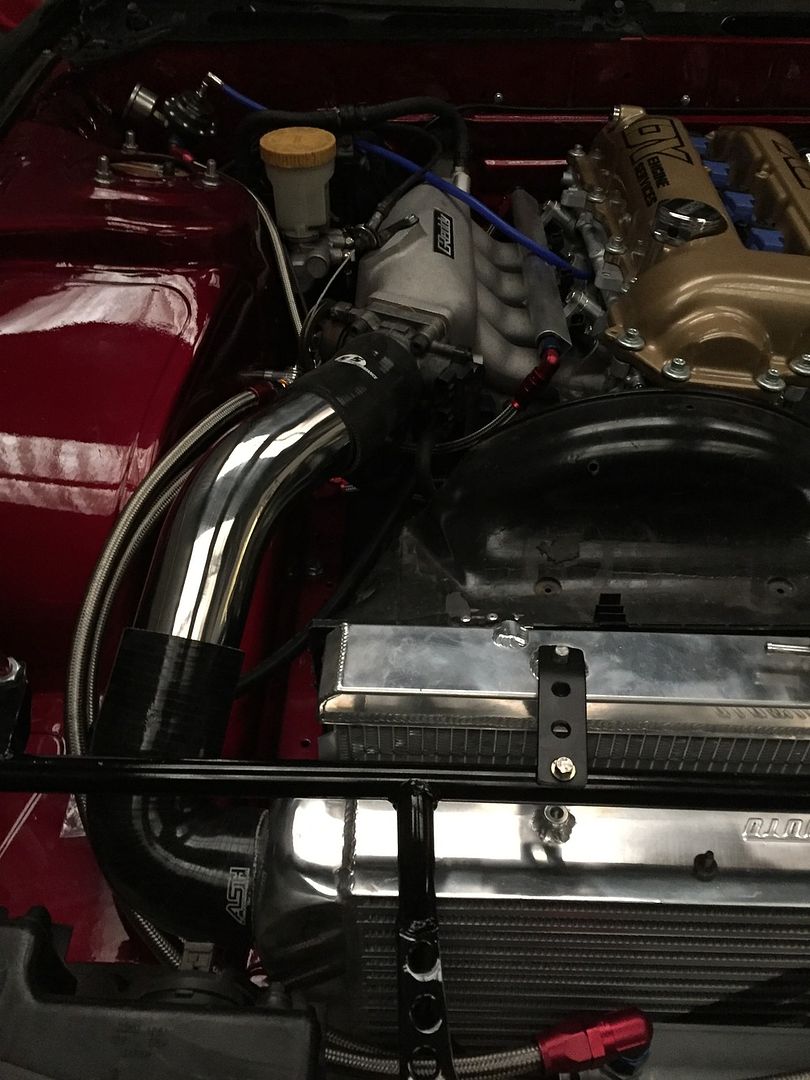
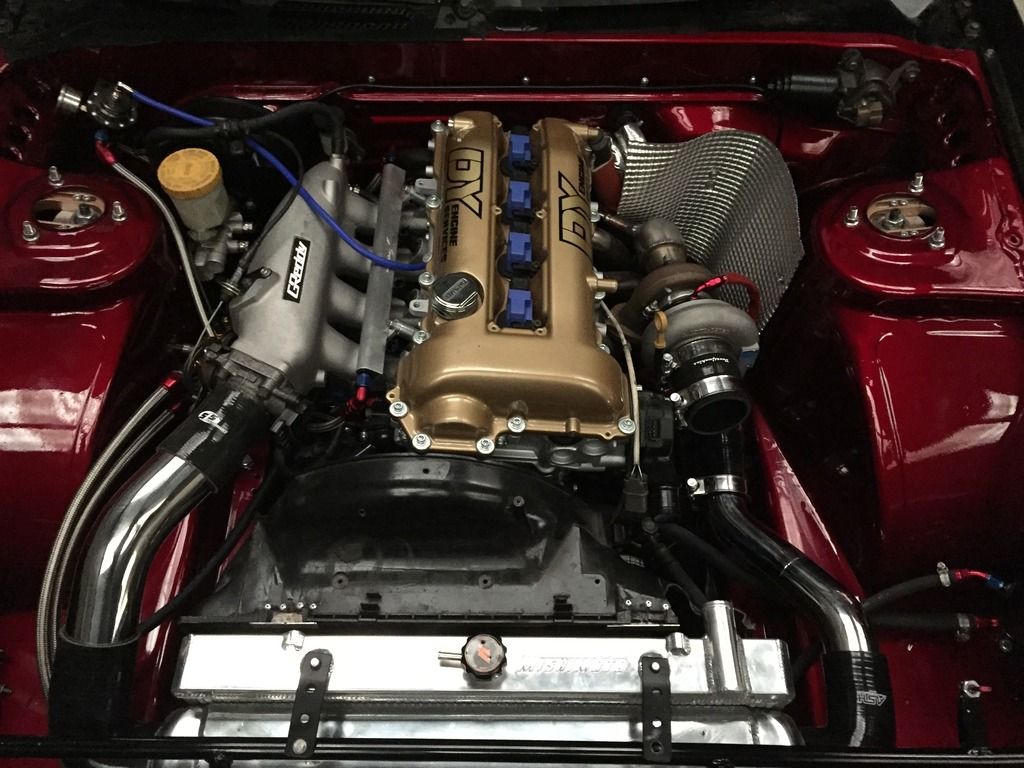
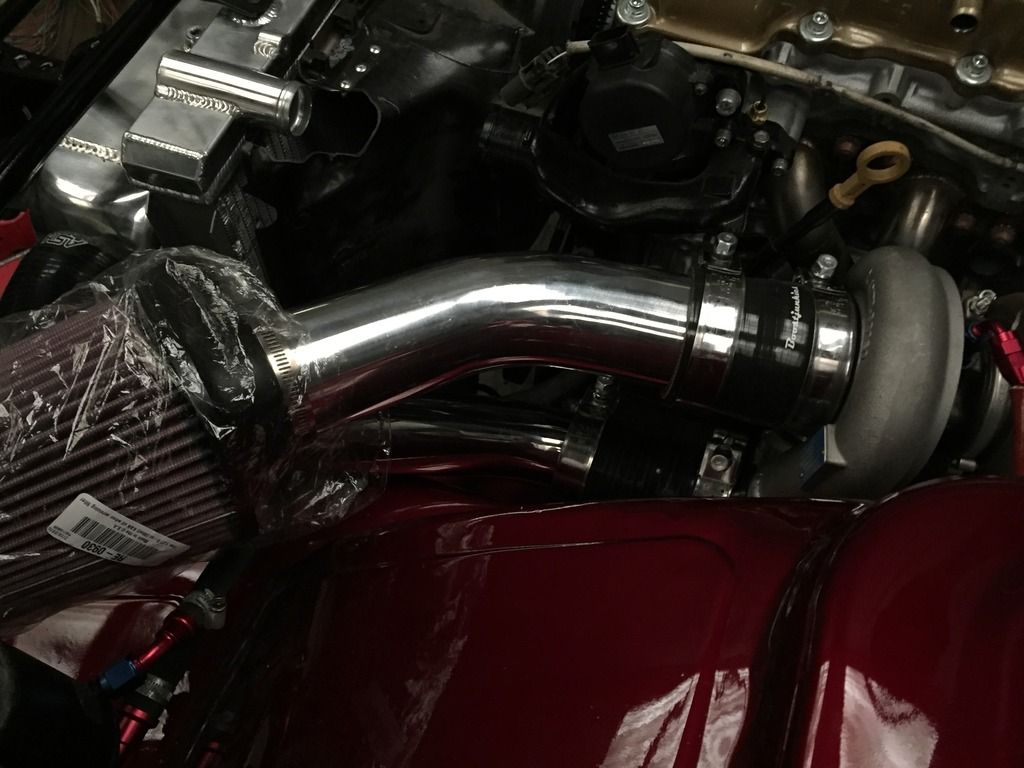
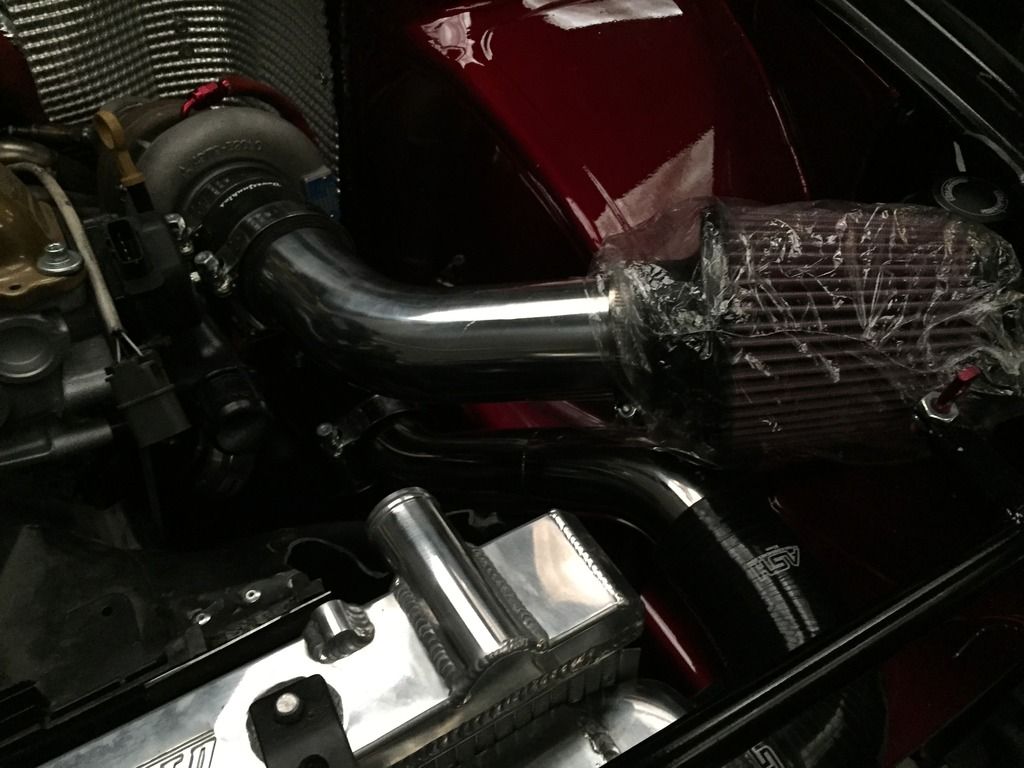
The cold side needs to be rotated to try and find that "sweet spot" where everything lines up perfectly, but even the worst case scenario is that it still fits real good!
Im off to go see Hux again tomorrow, although this time he's only bead rolling the end of the intercooler piping and welding on the various fittings I need, i.e. IAT sensor boss, IACV & wastegate nipples/barb fittings. So hopefully by Wednesday, it'll be time to mount the radiator and shroud for good, along with the intercooler pipes.

The mikalor clamps I purchased earlier were a tad too thick to sit properly on the throttlebody and the intercooler, so I decided to purchase my back up option, Murray's constant tension clamps, a.k.a fancy hose clips;

SO hopefully with usually correctly sized silicone joiners/bends and decent clamps all round, I'm hoping I wont have any boost issues.
I picked up the intercooler pipes too, stoked with how they came out and so happy I chose stainless steel as the welding looks 100x neater!


And the moment of truth as to whether they fit or not;


The cold side needs to be rotated to try and find that "sweet spot" where everything lines up perfectly, but even the worst case scenario is that it still fits real good!

Im off to go see Hux again tomorrow, although this time he's only bead rolling the end of the intercooler piping and welding on the various fittings I need, i.e. IAT sensor boss, IACV & wastegate nipples/barb fittings. So hopefully by Wednesday, it'll be time to mount the radiator and shroud for good, along with the intercooler pipes.